Groups setup
Overview
The Groups extension enables users to create and join communities centered around shared topics and interests, fostering increased engagement on your site. This guide covers installation, configuration, and management.
Documentation Index
2. Page, Menu & Role Management
1. Extension Configuration #
Once you activate the extension, you can access these settings via wp-admin > Ultimate Member > Settings > Extensions > Groups.

1.1 URL & Permalink Configuration #
| Setting | Description |
|---|---|
| Groups Slug | The base URL prefix for your groups (e.g. yoursite.com/um-groups/). |
| Groups Category Slug | The URL prefix for group categories. |
| Groups Tag Slug | The URL prefix for group tags. |
Note: After modifying any slug, navigate to wp-admin > Settings > Permalinks and click the Save Changes button to refresh site’s routing and prevent 404 errors.
1.2 Display & Interface #
| Setting | Description |
|---|---|
| Show group avatars | Toggle to enable/disable group-specific profile images. |
| Show people to Invite tab | Defines the scope of users available in the "Invite" list (Default: Everyone). |
| Highlight Color | Selects the brand accent color for group UI elements. |
1.3 Discussion Feed Settings #
| Setting | Description |
|---|---|
| Posts (Desktop/Mobile) | Determines the number of discussion posts displayed per page. |
| Initial Comments | Number of replies displayed per post before the "Load More" link appears. |
| "Load More" Count | Number of additional replies fetched when a user clicks "Load More." |
| Comments Order | Sort order: Newest first or Oldest first. |
| Post Truncation | Sets the word limit before a discussion post is automatically truncated. |
2. Page, Menu, Registration & Role Management #
2.1 Page Settings #
The Groups extension requires dedicated pages to handle community interactions, such as group discovery, membership management, and invitation workflows. These pages are automatically generated and configured upon activation. You can manage or update these page settings by navigating to wp-admin > Pages.

These pages is a part of the Groups extension; they are automatically configured when the extension is activated. If you need to manually create these pages or customize their layout, use the following shortcodes:
| Page | Shortcode | Purpose |
|---|---|---|
| Groups | [ultimatemember_groups] | The central directory where members can search, view group details, and join public or private communities. |
| Create Group | [ultimatemember_group_new] | Provides members with a front-end form to launch and configure their own new groups. |
| My Groups | [ultimatemember_my_groups] | Displays a personalized list of all groups that the current member has joined. |
| Invites | [ultimatemember_group_users_invite_list] | It displays the interface for members to invite others to their group. |
After creating custom pages and inserting these shortcodes, ensure the pages are correctly selected in the wp-admin > Ultimate Member > Settings > General > Pages screen to maintain proper site functionality.

2.2 Profile Menu Settings #
Navigate to the wp-admin > Ultimate Member > Settings > Appearance > Profile Menu screen to manage how the Groups tab is displayed on member profiles. This allows you to control who can view a user's group memberships, enhancing privacy and user experience.

Configuration options:
- Groups Tab - Toggle this setting to show or hide the Groups tab on user profile pages or profile menu.
- Who can see Groups Tab? - This setting restricts access to the tab based on the viewer’s relationship to the profile owner or their user role.

Access Level Definitions:
| Setting | Description |
|---|---|
| Anyone | The tab is visible to all visitors. |
| Guests only | The tab is visible only to users who are not logged in. |
| Members only | The tab is visible only to logged-in users. |
| Only the owner | Only the profile owner can see their own groups tab. |
| Only specific roles | Visibility is restricted to users with pre-selected WordPress roles (e.g., Admins or Moderators). |
| Owner and specific roles | The profile owner and users with pre-selected roles can view the tab. |
Pro-Tip: If you choose the "Only specific roles" option, the "Allowed Roles" box will appear, allowing you to pick exactly which user levels have permission to view the group information.

2.3 Registration & Role Permissions #
Beyond global extension settings, you can further refine how users interact with your community by managing group access during the registration process and enforcing role-based permissions. These controls allow you to automate user onboarding and restrict administrative capabilities to specific user levels.
- Auto-Join on Registration: You can automatically add new users to a specific Public group upon sign-up. To configure this, navigate to wp-admin > Ultimate Member > Forms > Edit. Select your registration form and locate the Groups settings section in the sidebar to choose the destination group.
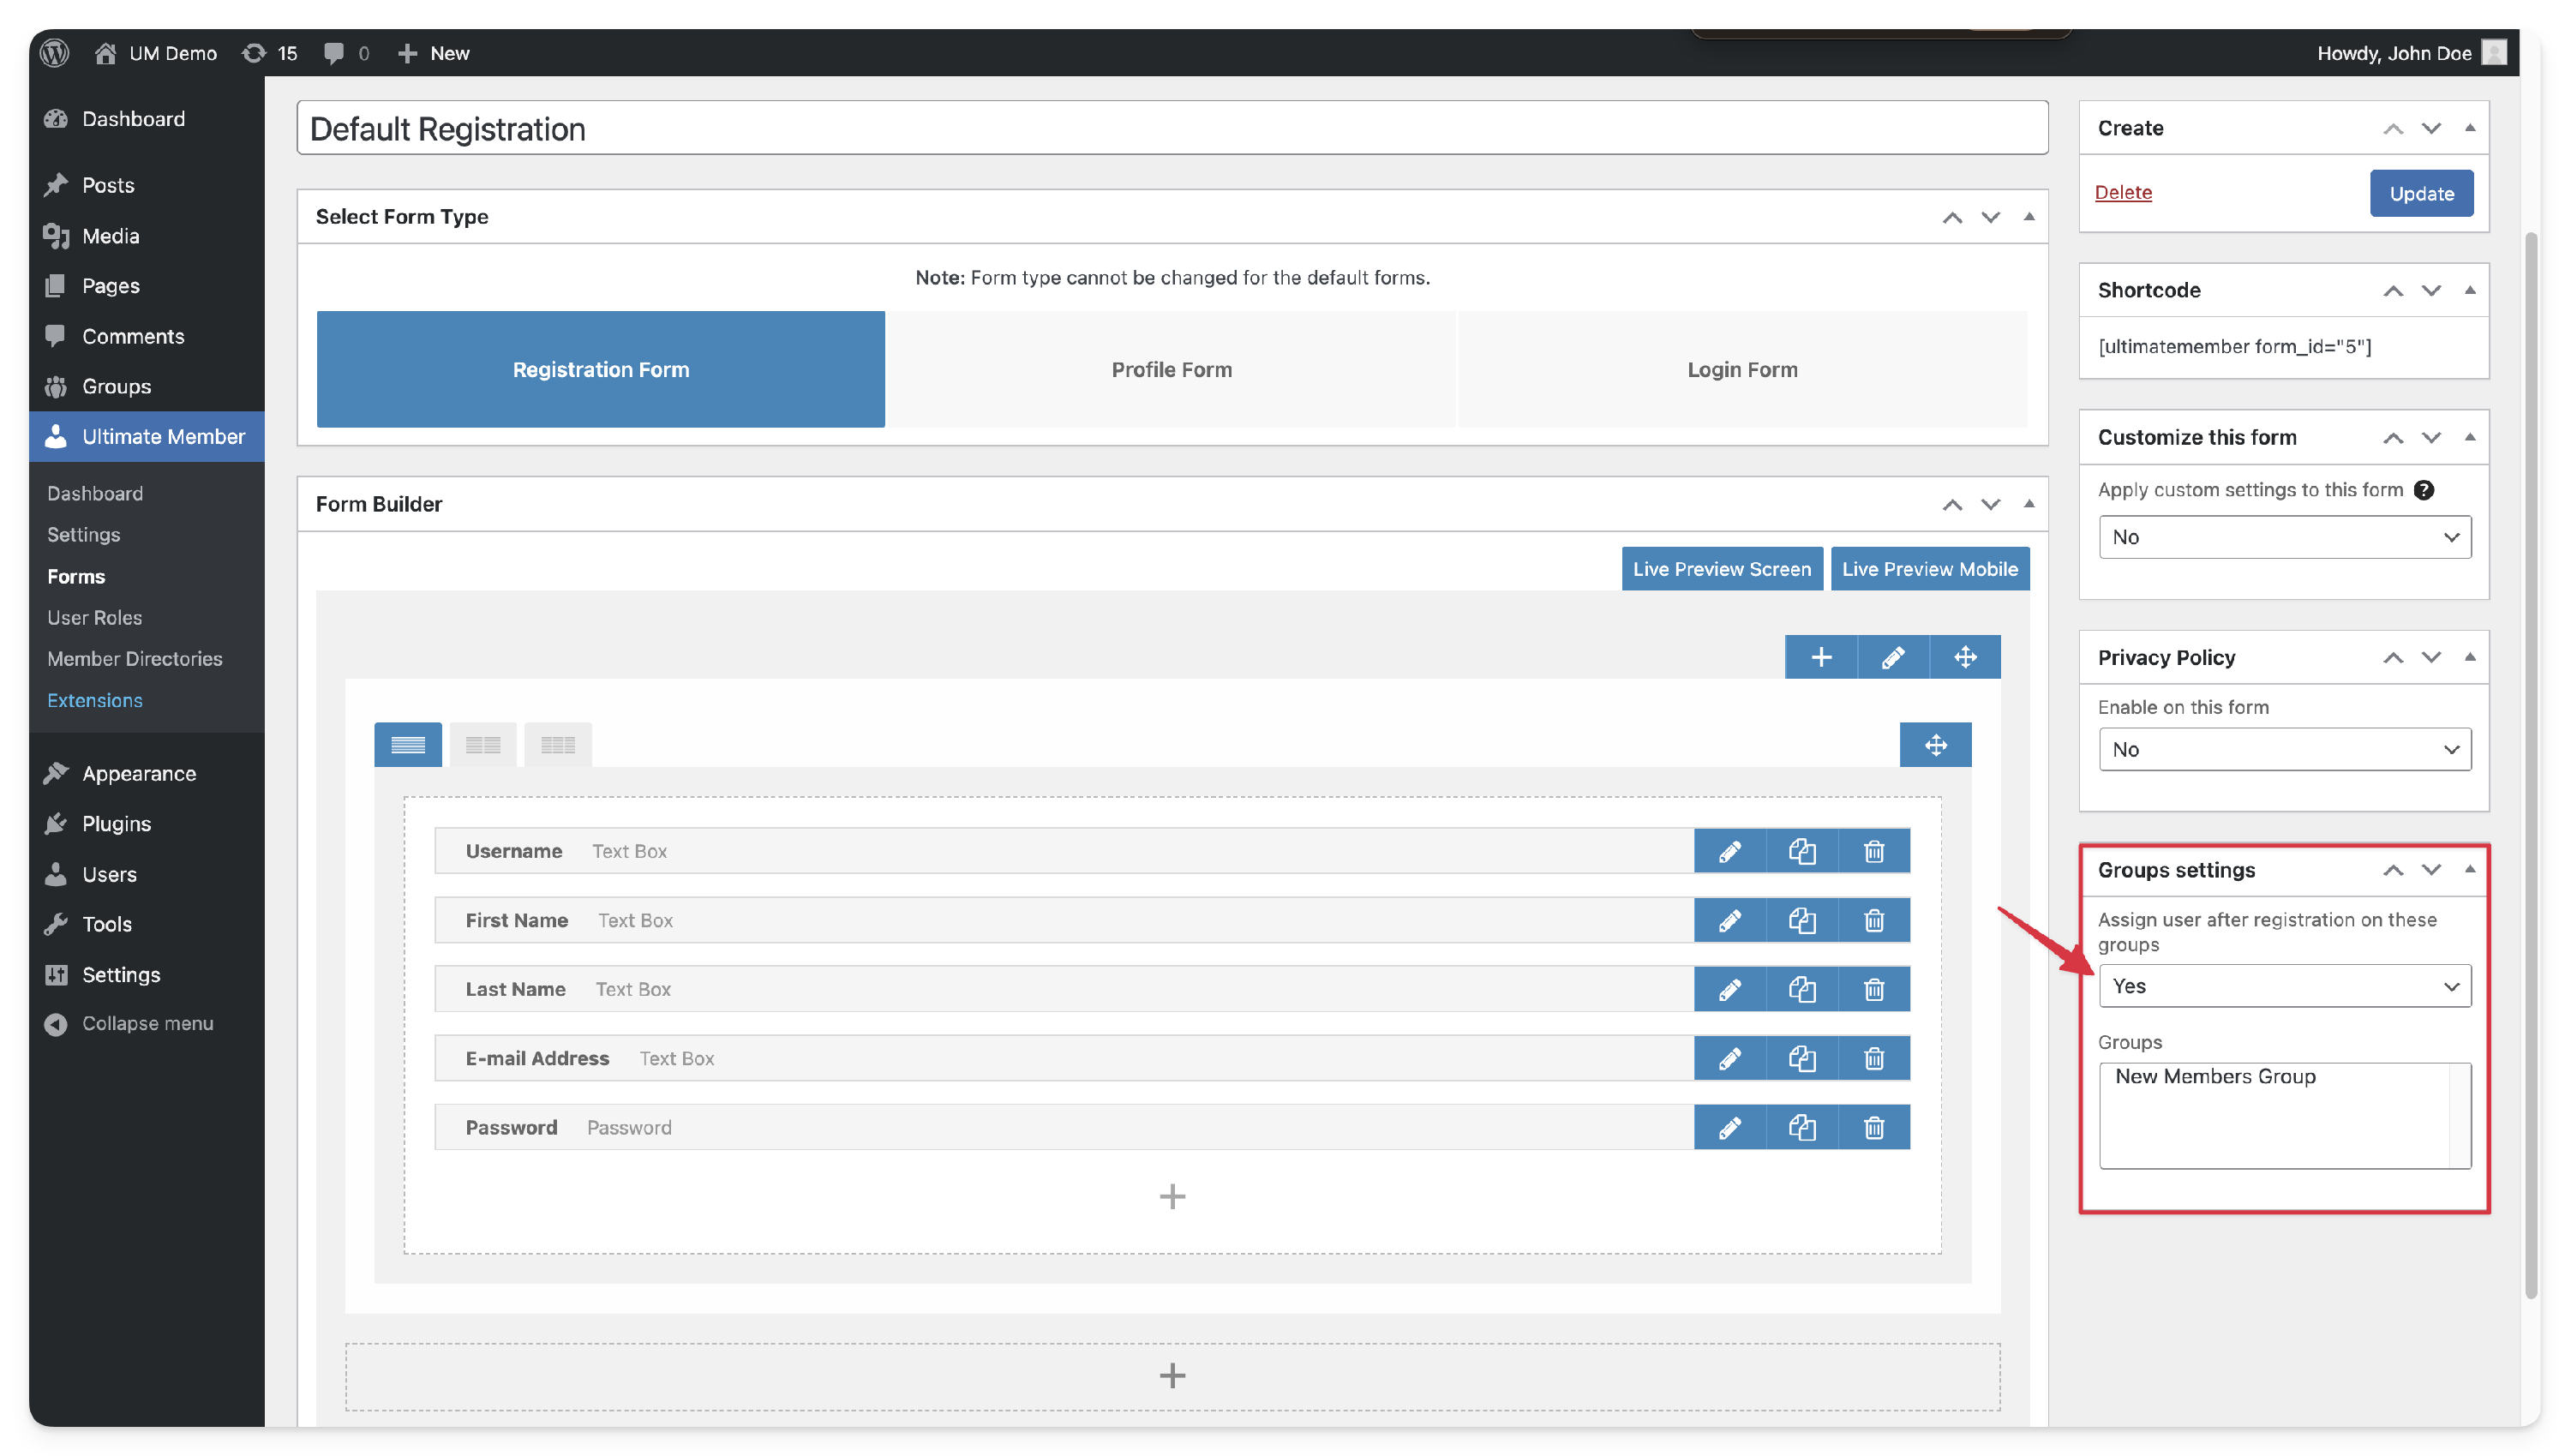
Note: Ensure your target group is created and configured as Public as only public groups will appear in the groups selection menu.
- Role-Based Creation Limits: You can manage who has the authority to launch new groups by navigating to wp-admin > Ultimate Member > User Roles. Select the specific user role you wish to modify; within the Groups settings section, toggle the Turn off creation group? option to restrict or grant group-creation privileges for that role.


3. Administering Groups #
Once the Groups extension is activated, you can manage individual group content, privacy, and member rosters directly from your WordPress dashboard. Navigate to the Groups menu in your WordPress admin sidebar to view or edit any existing community.
3.1 Group Management, Categories, & Tags #
Follow these steps to manage your community structure and organization:
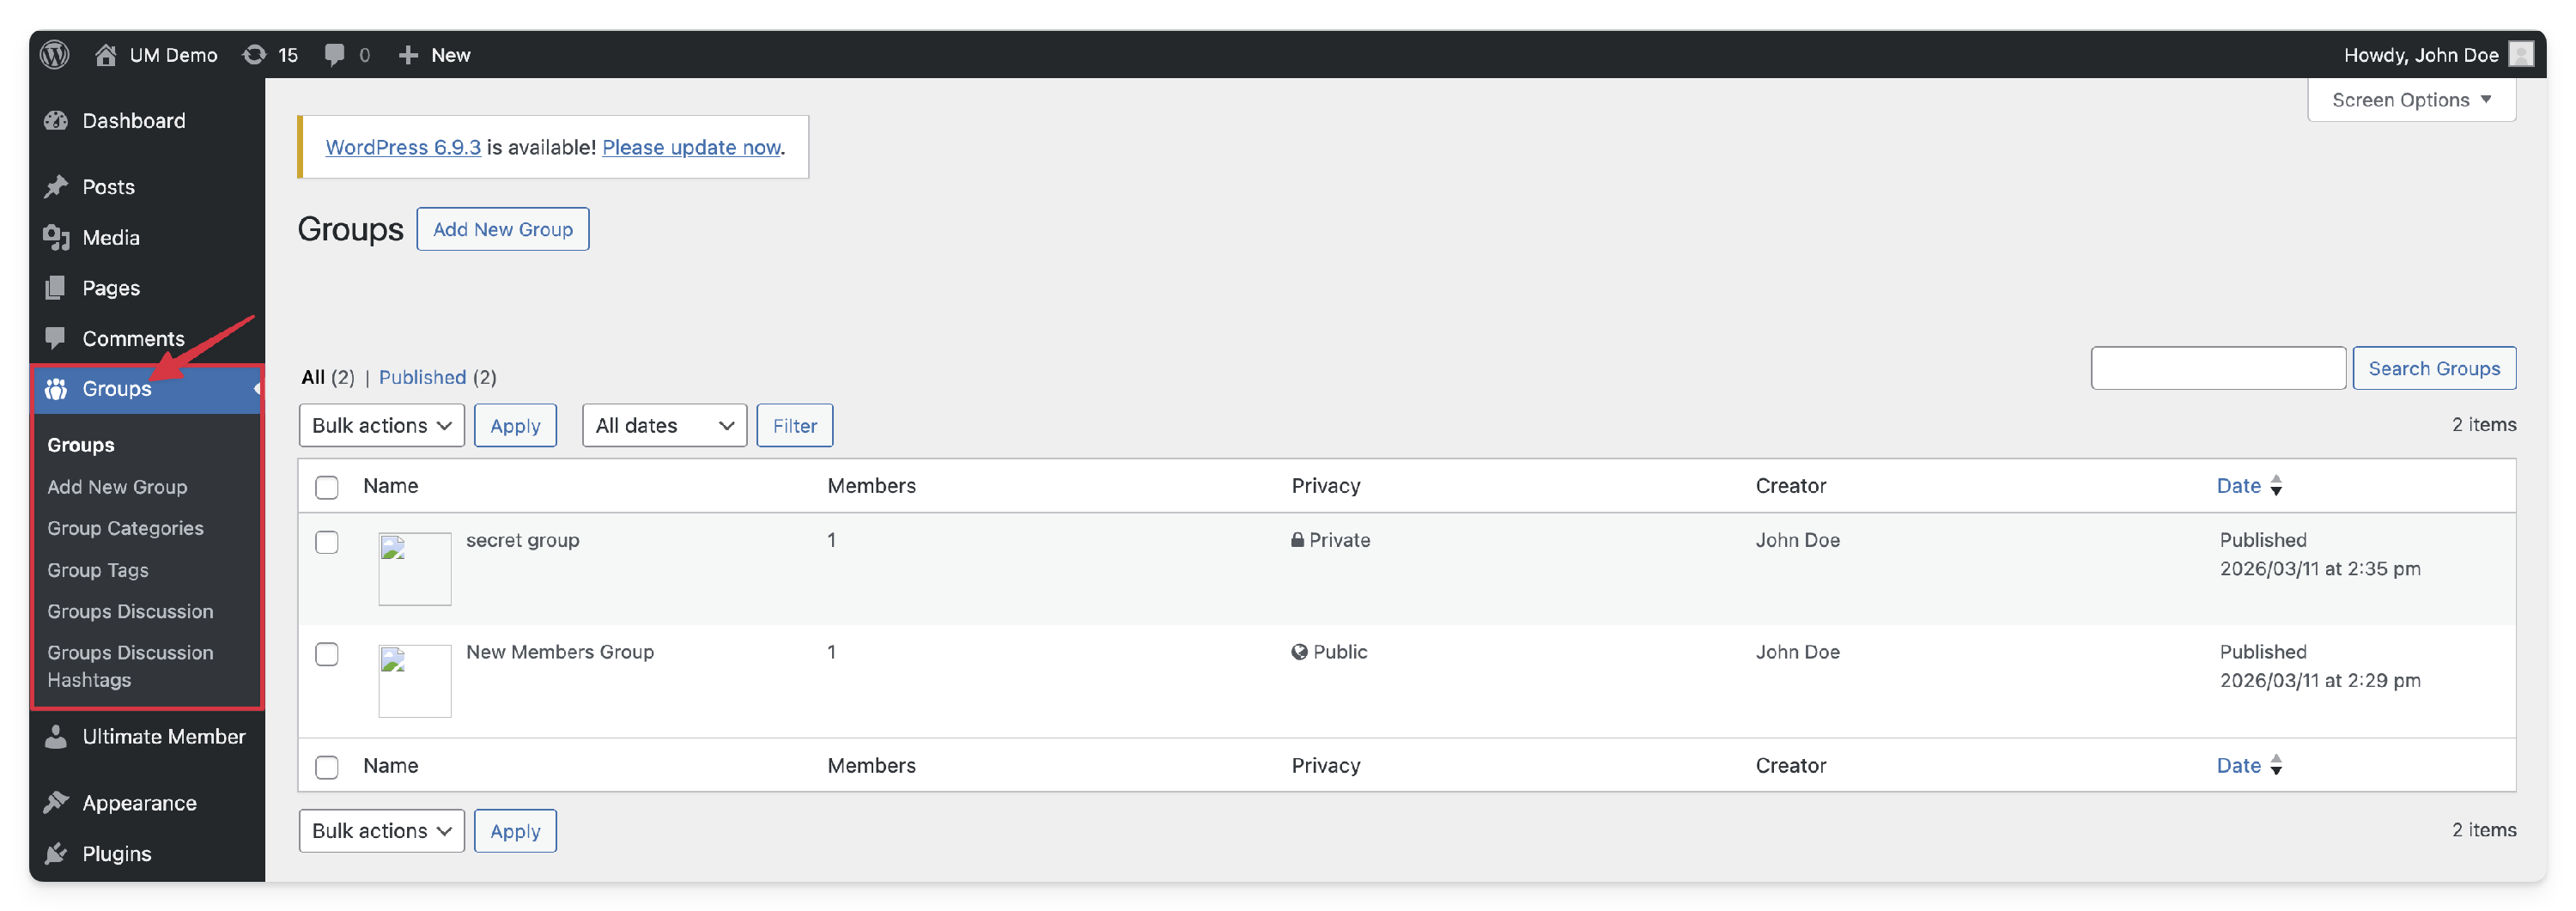
View All Groups
- Navigate to wp-admin > Groups to see a list of all existing groups, edit them, or create new ones.

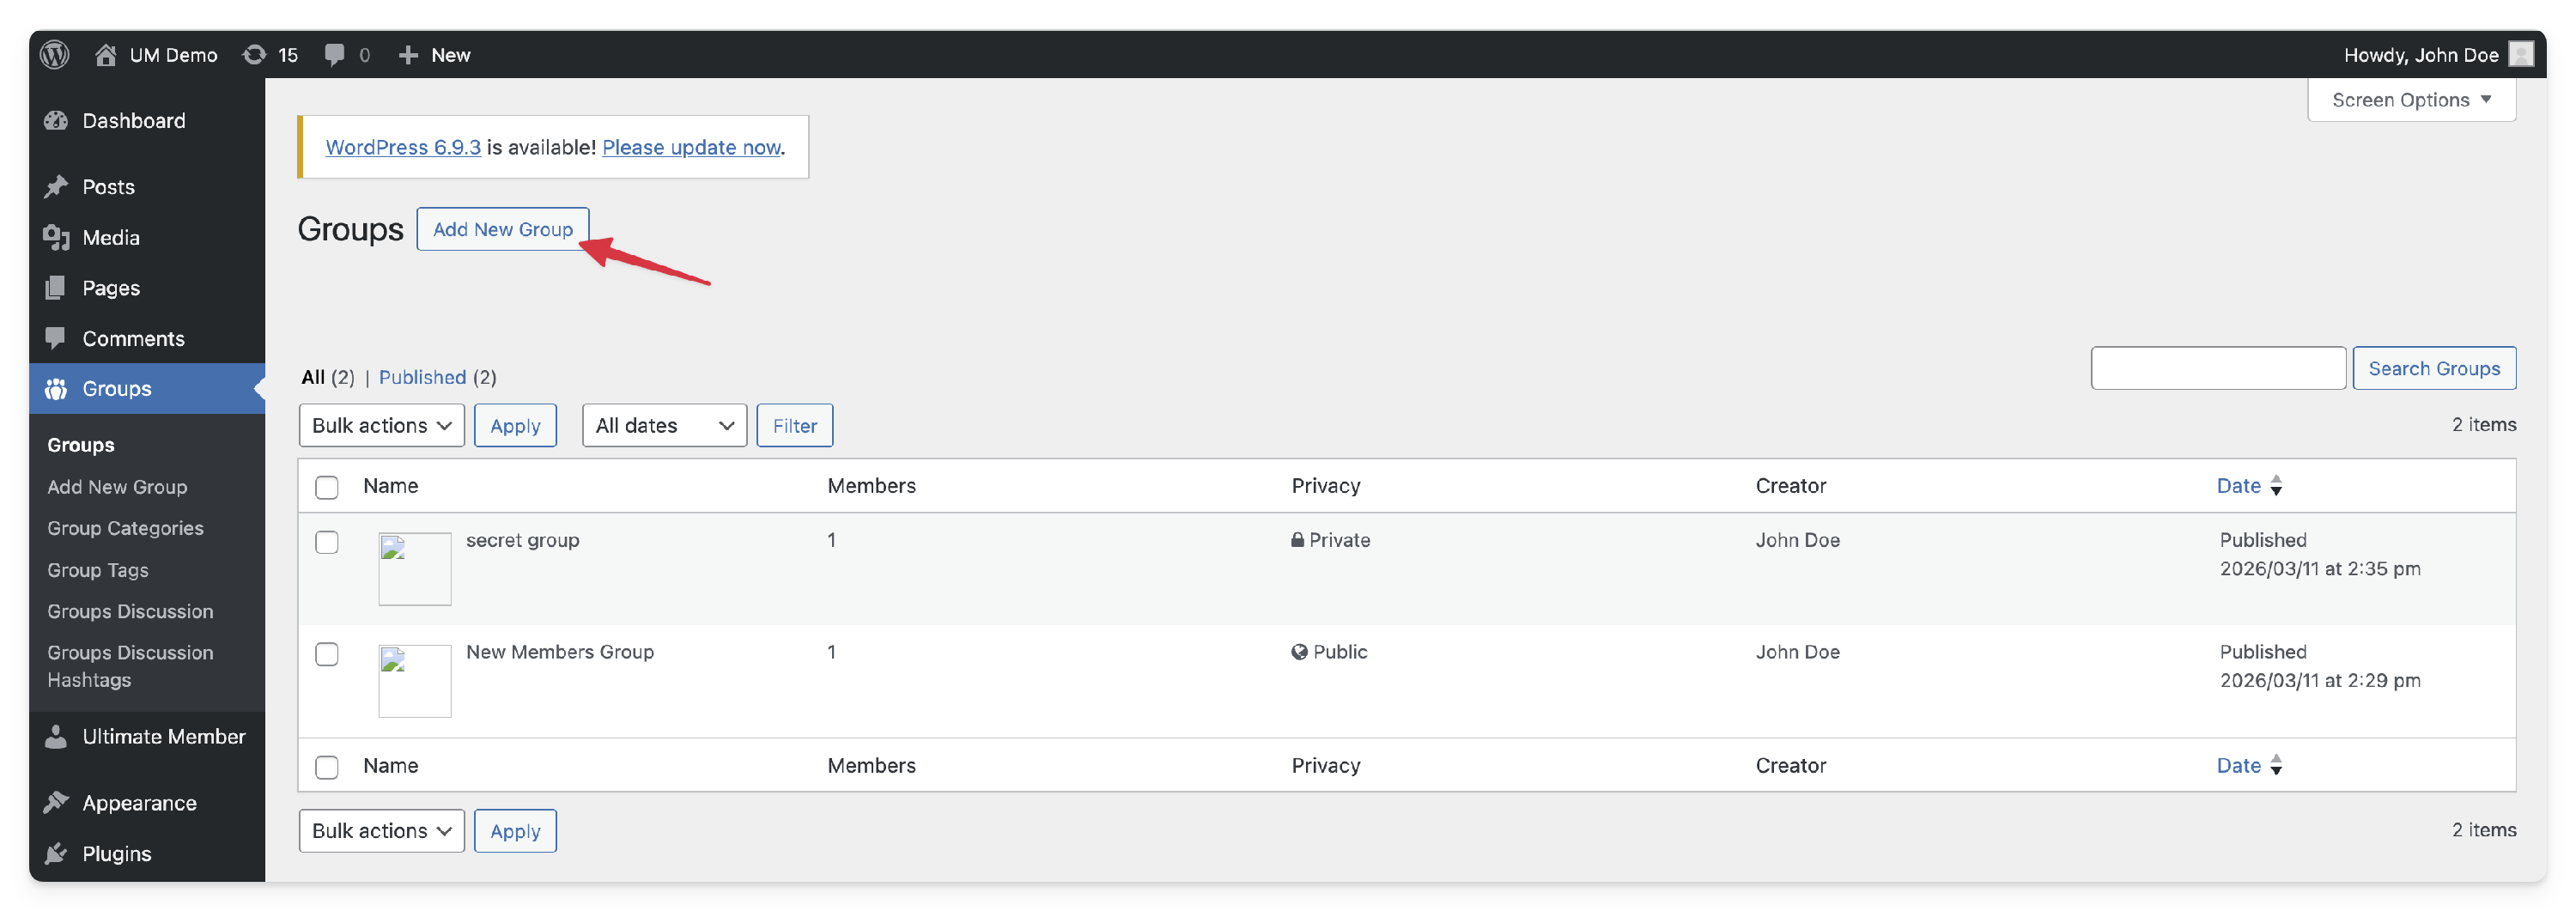
Add a New Group
- Navigate to wp-admin > Groups.
- Click the Add New Group button located above the Groups table.
- Configure your group settings by adding a group title, description, and using the available widgets (Settings, Invites, etc.) discussed below.
- Click the Add Group button to finalize and publish the group.

Manage Categories & Tags
Use these to organize your community and provide members with filtering tools on the frontend:
- Group Categories: Navigate to wp-admin > Groups > Group Categories to create broad topic buckets (e.g. "Hobbies", "Professional" or "Events").
- Group Tags: Navigate to wp-admin > Groups > Group Tags to create specific, granular labels (e.g. "Beginner", "Advanced" or "Local").
Note: These taxonomies will appear as filters on your frontend Groups directory, allowing members to search and sort groups by interest.
3.2 Configuring Group Settings & Privacy #
When creating or editing a group, settings are organized into four primary widgets: Settings, Invites settings, Add New Members and Manage Members.
![]()
Settings widget:

Privacy - Set access levels for your group:
| Privacy Level | Description | Visibility |
| Public | Any site member can join; content is visible to all. | Visible to all site members. |
|---|---|---|
| Public for Role | Members with specific role(s) can join this group. Group content and discussions are visible to members with specific role(s). | Visible to selected roles only. |
| Private | Only members who request membership and are accepted can join the group. Group content and discussions are visible to members of the group. | Visible to members only. |
| Hidden | Only members who are invited can join the group. Group content and discussions are visible to members of the group. This group is not listed in the groups' directory or search results. | Not listed in directories. |
Role List - Limit access by user role if "Public for Role" is chosen in the "Privacy" setting. Optional.
Post Moderation - Acts as a content filter for your group feed, ensuring that discussions align with your community guidelines. Choose the moderation level that best fits your group’s needs:
- Auto Published: Posts appear immediately on the group feed without intervention.
- Require Mod/Admin: All posts must be approved by a group administrator or moderator before appearing on the feed.
3.3 Invites & Member Control #
Use the Invites settings section to define your community's growth strategy and discovery tools.

- Enable Invites feature - Toggle this to activate or deactivate group invitations.
- Who can invite members? - Restrict invitation permissions based on group role:
- All Group Members - Open invitation system.
- Group Administrators & Moderators only - Moderate restriction.
- Group Administrators only - High restriction (only the group owners can invite).
- Enable Invites search - Toggle to enable/disable the member search tool.
- Enable Invites filters - Toggle to enable/disable the filtering tool for member discovery.
- Choose field(s) to enable in search - Select which profile fields (e.g. Age, Location, Gender, Role) are used to filter potential members during a search.
Tip: Click Add New Custom Field to include additional metadata from your user profiles in the search/filter criteria.
Management: Use the Remove button to delete an existing filter field if it is no longer required.
- Choose field(s) to enable in search - Select which profile fields (e.g. Age, Location, Gender, Role) are used to filter potential members during a search.
Frontend Preview
Below is how these settings appear to members on the live group page. When members visit, they will see the Send Invites link, search bar, and filters based on the permissions you configured in the settings widgets above.
Note on Visibility: Filters and search fields will only appear on the frontend if:
- There are registered users available to be found.
- The profile fields (e.g. Age, Country) have been created in the Form Builder.
- Users have filled in those profile fields on their accounts. If a field is empty for all users, the filter will not be displayed.
Depending on your configuration, members will see the tools necessary to grow the community. If you have enabled Invites search and Filters, they will see the specific fields selected to help them locate fellow members.
Interaction: Members can use the search bar to find users and click the designated action buttons to send invitations, provided they meet the role requirements defined in your Invites Settings.

Add New Members widget
You can add new members to the group by searching for registered users and clicking on the Add Member button.
- Use the search bar to locate a registered user by name or username.

- Click the Add member button to manually add them to the group.


Manage Members widget

This widget serves as your central command center for overseeing the group roster. Use these controls to maintain community standards by adjusting member access, vetting new joiners, and assigning administrative responsibilities.
- Change Status: Hover over a member’s current status to update their standing in the group. Select from: Pending Admin Review, Pending Member Review, Approved, Rejected or Blocked.
- Assign/Change Role: Hover over a member’s current group role to define their level of authority within the group. Select from: Administrator, Moderator, Member or Banned.
- Actions: Use the available action buttons to send direct invites or expel members from the group.
4. Frontend Features #
The Groups extension provides a seamless user experience, allowing members to discover, create, and manage communities directly from your site’s frontend.
4.1 Groups Directory page #
This page displays the master list of all available groups.
- Navigation Header: At the top, users can toggle between:
- All Groups: View every public group on the site.
- My Groups: Filter the list to display only the groups the current member has joined.
- Create a Group: Redirects the user to the group creation page.
- Search & Filters: A powerful search bar and filter system allows members to quickly locate communities based on specific categories or keywords.

4.2 Single Group page #
Once a user clicks on a specific group, the page is organized into three primary sections:
- Discussions Tab: The central feed for group-wide posts, updates, and interactions.
- Members Tab: A directory listing of all current group participants.
- Send Invites Tab: A dedicated interface for inviting other site members to join the community.

Administrative Controls: If you are a Group Administrator or Moderator, you will see a gear icon in the upper right corner of the group page. Clicking this icon opens the settings panel, allowing you to modify all group configurations (privacy, moderation, invites) directly from the frontend.

4.3 Create Group page #
This page presents the submission form for launching a new group or community. The user who creates the group automatically becomes its first member and is assigned the Group Administrator role.

5. Notifications #
The Groups extension supports automated email and real-time notifications to keep members engaged.
5.1 Email Notifications #
Administrators can manage these templates via wp-admin > Ultimate Member > Settings > Emails. Click the Manage button next to any template to enable/disable it or edit the content.

| Email Template | Description | Supported Email Placeholders |
|---|---|---|
| Approve Member | Sent if a user is approved for a group. | {group_name}, {group_url} |
| Join Request | Sent to notify the moderator of a join request. | {moderator_name}, {member_name}, {group_name}, {group_url}, {groups_request_tab_url}, {profile_link} |
| Invite Member | Sent if a user is invited to a group. | {group_name}, {group_url}, {group_invitation_guest_name}, {group_invitation_host_name} |
| New Post | Sent if someone posts on the group wall. | {group_name}, {group_url}, {group_url_postid}, {post_url}, {author_name}, {author_photo}, {member_name}, {content} |
| New Comment | Sent if someone comments on a group post. | {group_name}, {group_url}, {group_url_postid}, {group_url_commentid}, {post_url}, {comment_url}, {author_name}, {author_photo}, {member_name}, {content}, {comment} |
Member Preferences
Users can toggle email notifications for New Posts and New Comments via their Account Settings > Notifications page. These notifications are enabled by default.

5.2 Real-time Notifications #
This feature requires the Real-time Notifications extension. These notifications appear instantly within the site interface. Members manage these via Account Settings > Web Notifications.

For each group event, you can toggle the notification status and customize the notification template text in wp-admin > Ultimate Member > Extensions > Notifications.
| Real-Time Notifications | Trigger Event |
|---|---|
| Approve Member | User is approved for a group. |
| Join Request | A user has requested to join a group (Admin/Mod). |
| Invite Member | A user has been invited to join a group. |
| Change Group Role | A member’s group role has been updated. |
| New Post | A new post is added to the group wall. |
| New Comment | A comment is added to a group post. |
| New Mention | A member is @mentioned within a group. |
Performance Optimization: Enable only the notifications necessary for your community. Enabling every single toggle (especially on high-traffic sites) can increase server load.
Below is an example of how the Invite Member real-time notification appears to a user on the site interface:
