Zapier Setup for Triggers
Overview
Zapier Triggers are powerful tools for automating workflows in your Ultimate Member (UM) system. A Trigger is an event that starts a Zap, initiating a specific action based on conditions you define. Setting up Triggers allows you to automate tasks like sending notifications, updating profiles, or syncing data across platforms. This guide will walk you through the complete process of setting up Triggers for Ultimate Member using Zapier, enabling you to streamline your processes and save valuable time.
What are Zapier Triggers?
Zapier Triggers are events that start a Zap workflow as soon as a condition is met in the source application (e.g., a new row is added in Google Sheets). Triggers are essential to automation, as they pinpoint the exact moment when a task should be carried out, allowing you to efficiently manage repetitive processes.
Setup
Step 1: Create an Application Password
An application password is a specific type used to authenticate applications or services with your website or system without requiring you to use your main account password. In the Ultimate Member and Zapier integration context, the application password is used to securely connect Zapier to your Ultimate Member account. Follow these steps to create an application password:
- Navigate to WP Admin > Users > Edit a user.

- Scroll to the Application Passwords section and enter a name for the new application password.
- Click the Add New Application Password button to generate the password.

- Copy and save the generated password, as you’ll need it later.
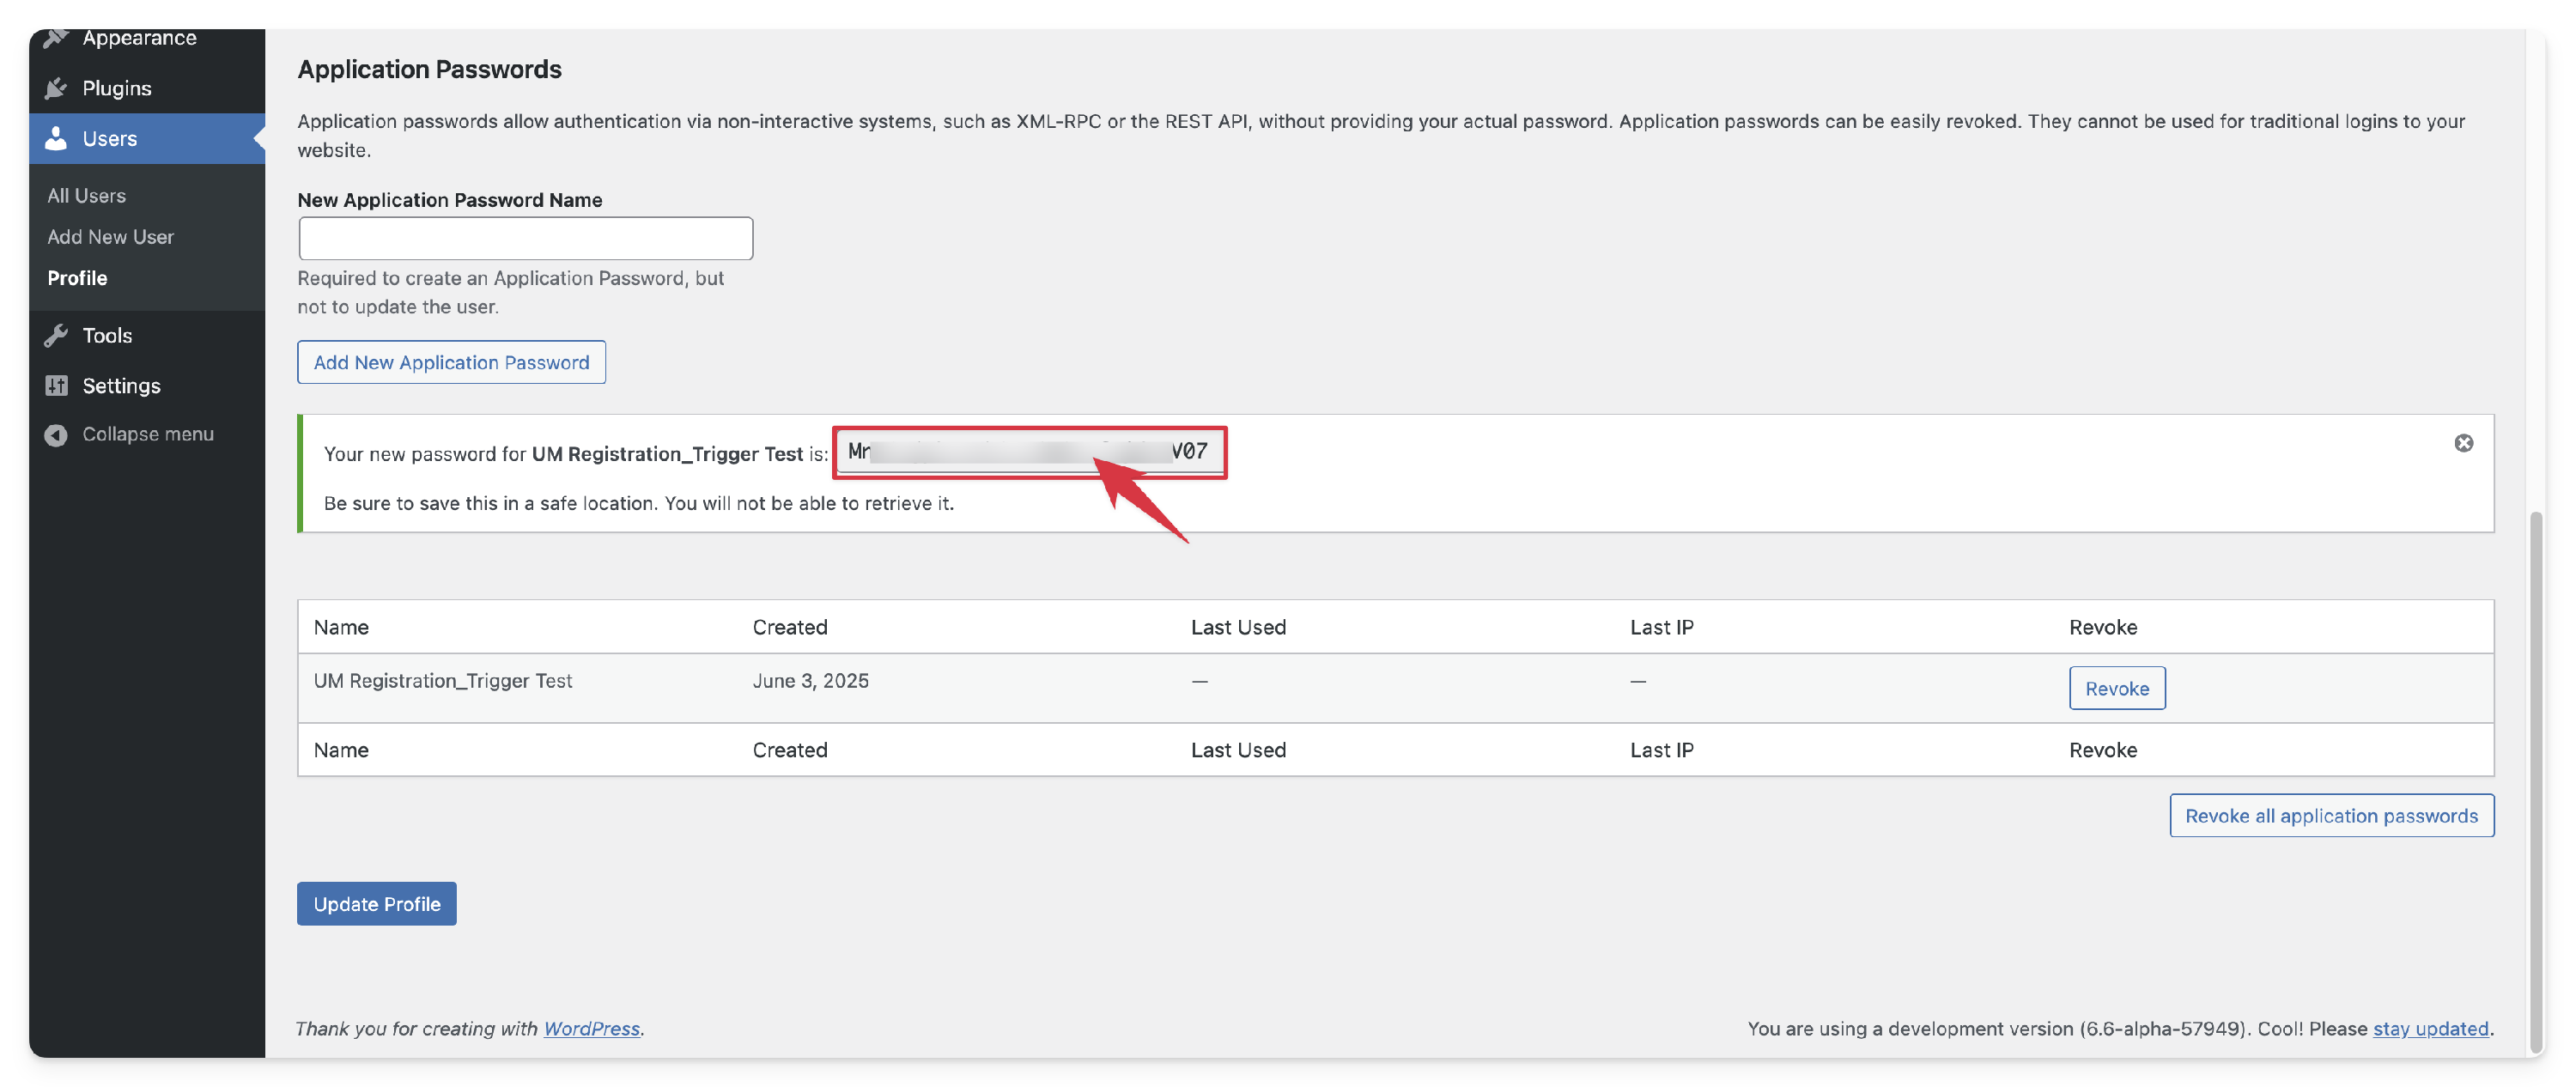
- Update the profile to save these changes.


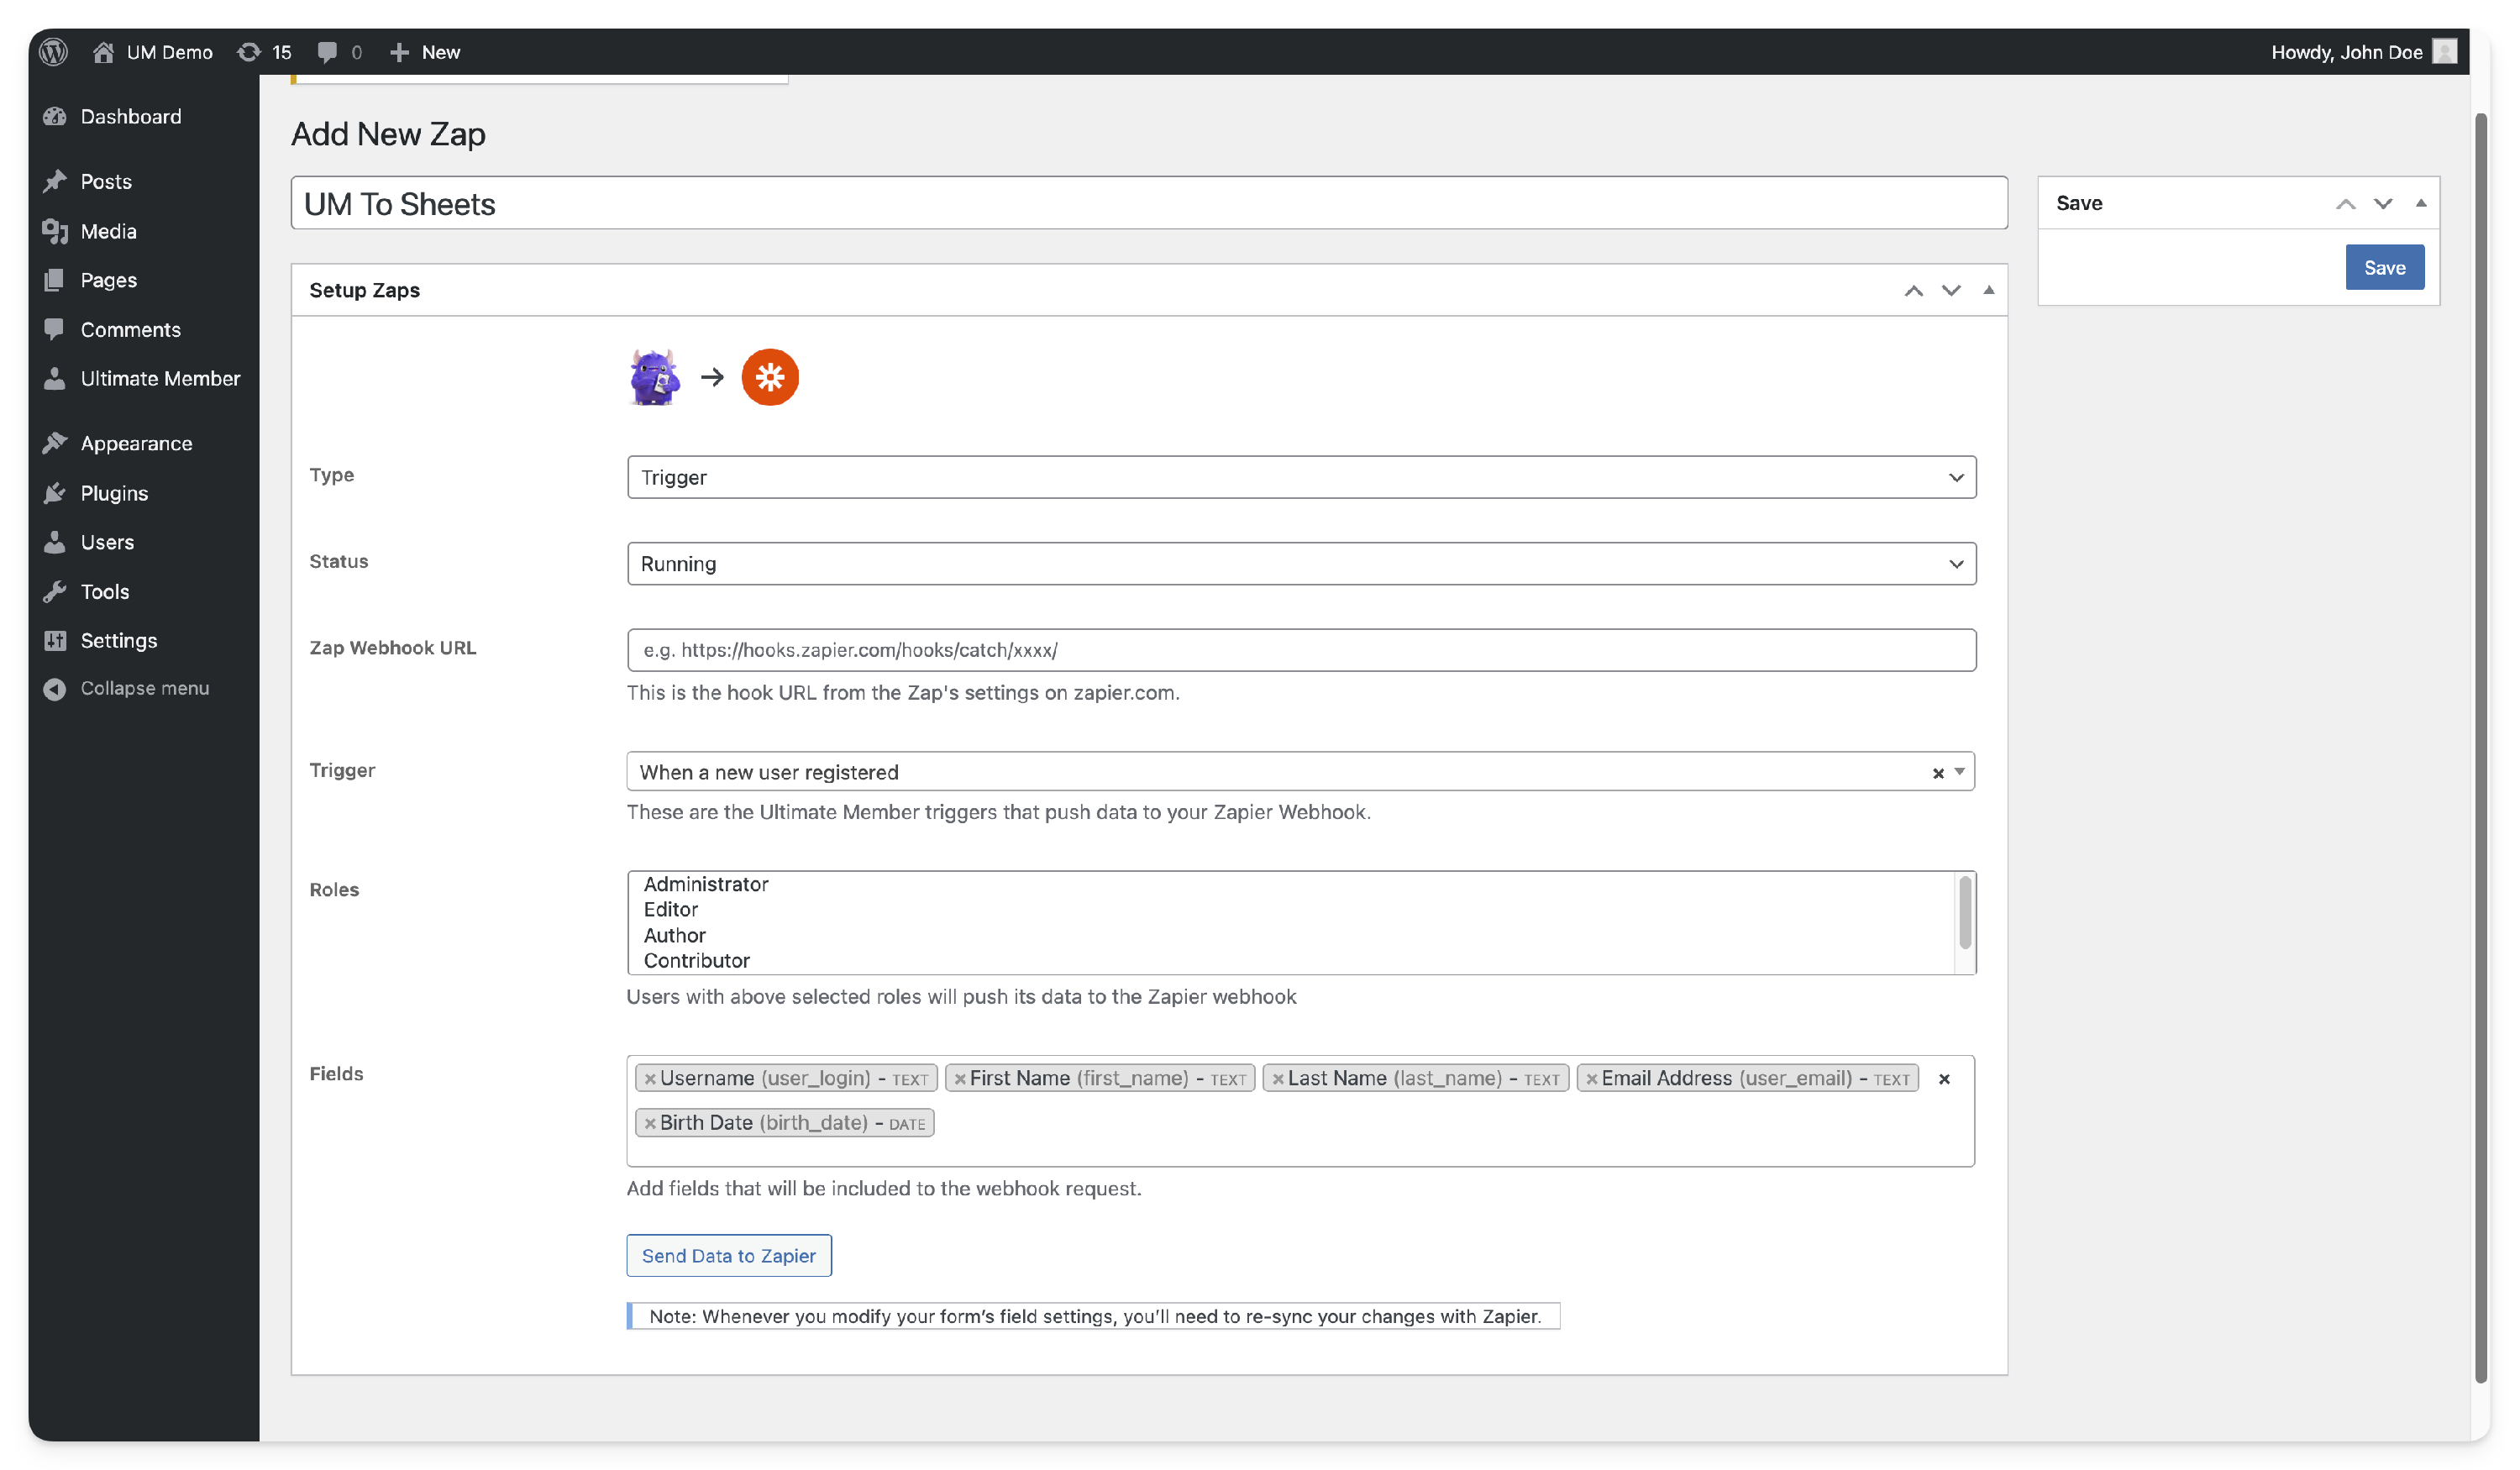
Step 2: Create a Trigger in WordPress Ultimate Member Zapier
The instructions below explain how to configure the Trigger within Ultimate Member for Zapier. For more information about each setting, please refer to this documentation.
- Go to your WordPress Dashboard: wp-admin > Ultimate Member > Zapier > Add New Zap.

- Enter a title for your Zap — for example:
UM To Sheets - In the Setup section:
- Set Type to
Trigger. This will push data to the Zapier Webhook when the event occurs. - Set Status to
Running - In Trigger, select the event — in this example:
When a new user registeredis selected. - Choose the User Roles you want this to apply to. Choose specific roles to control which users’ data will be sent to Zapier. If you leave it blank, data for all users, regardless of role, will be sent.
Note: You can select specific roles to filter which users’ registration data is sent to Zapier. If you choose one or more roles, only the registration data of users with those selected roles will be pushed to Zapier. If no roles are selected, the registration data of all users will be sent, regardless of their roles.
- In Fields, select which user fields should be included in the webhook request. Example:
first_name,last_name,birth_date
- Set Type to
- Click Save to create the Trigger Zap.


Step 3: Set Up Triggers in Zapier
To set up Triggers for Ultimate Member using Zapier, ensure you have a Zapier account. If you don’t yet have an account, sign up on the Zapier website. Once you’re logged in, follow the steps below to configure triggers with Ultimate Member.
- Log in to Zapier
- Visit the Zapier login page and enter your credentials to log in.
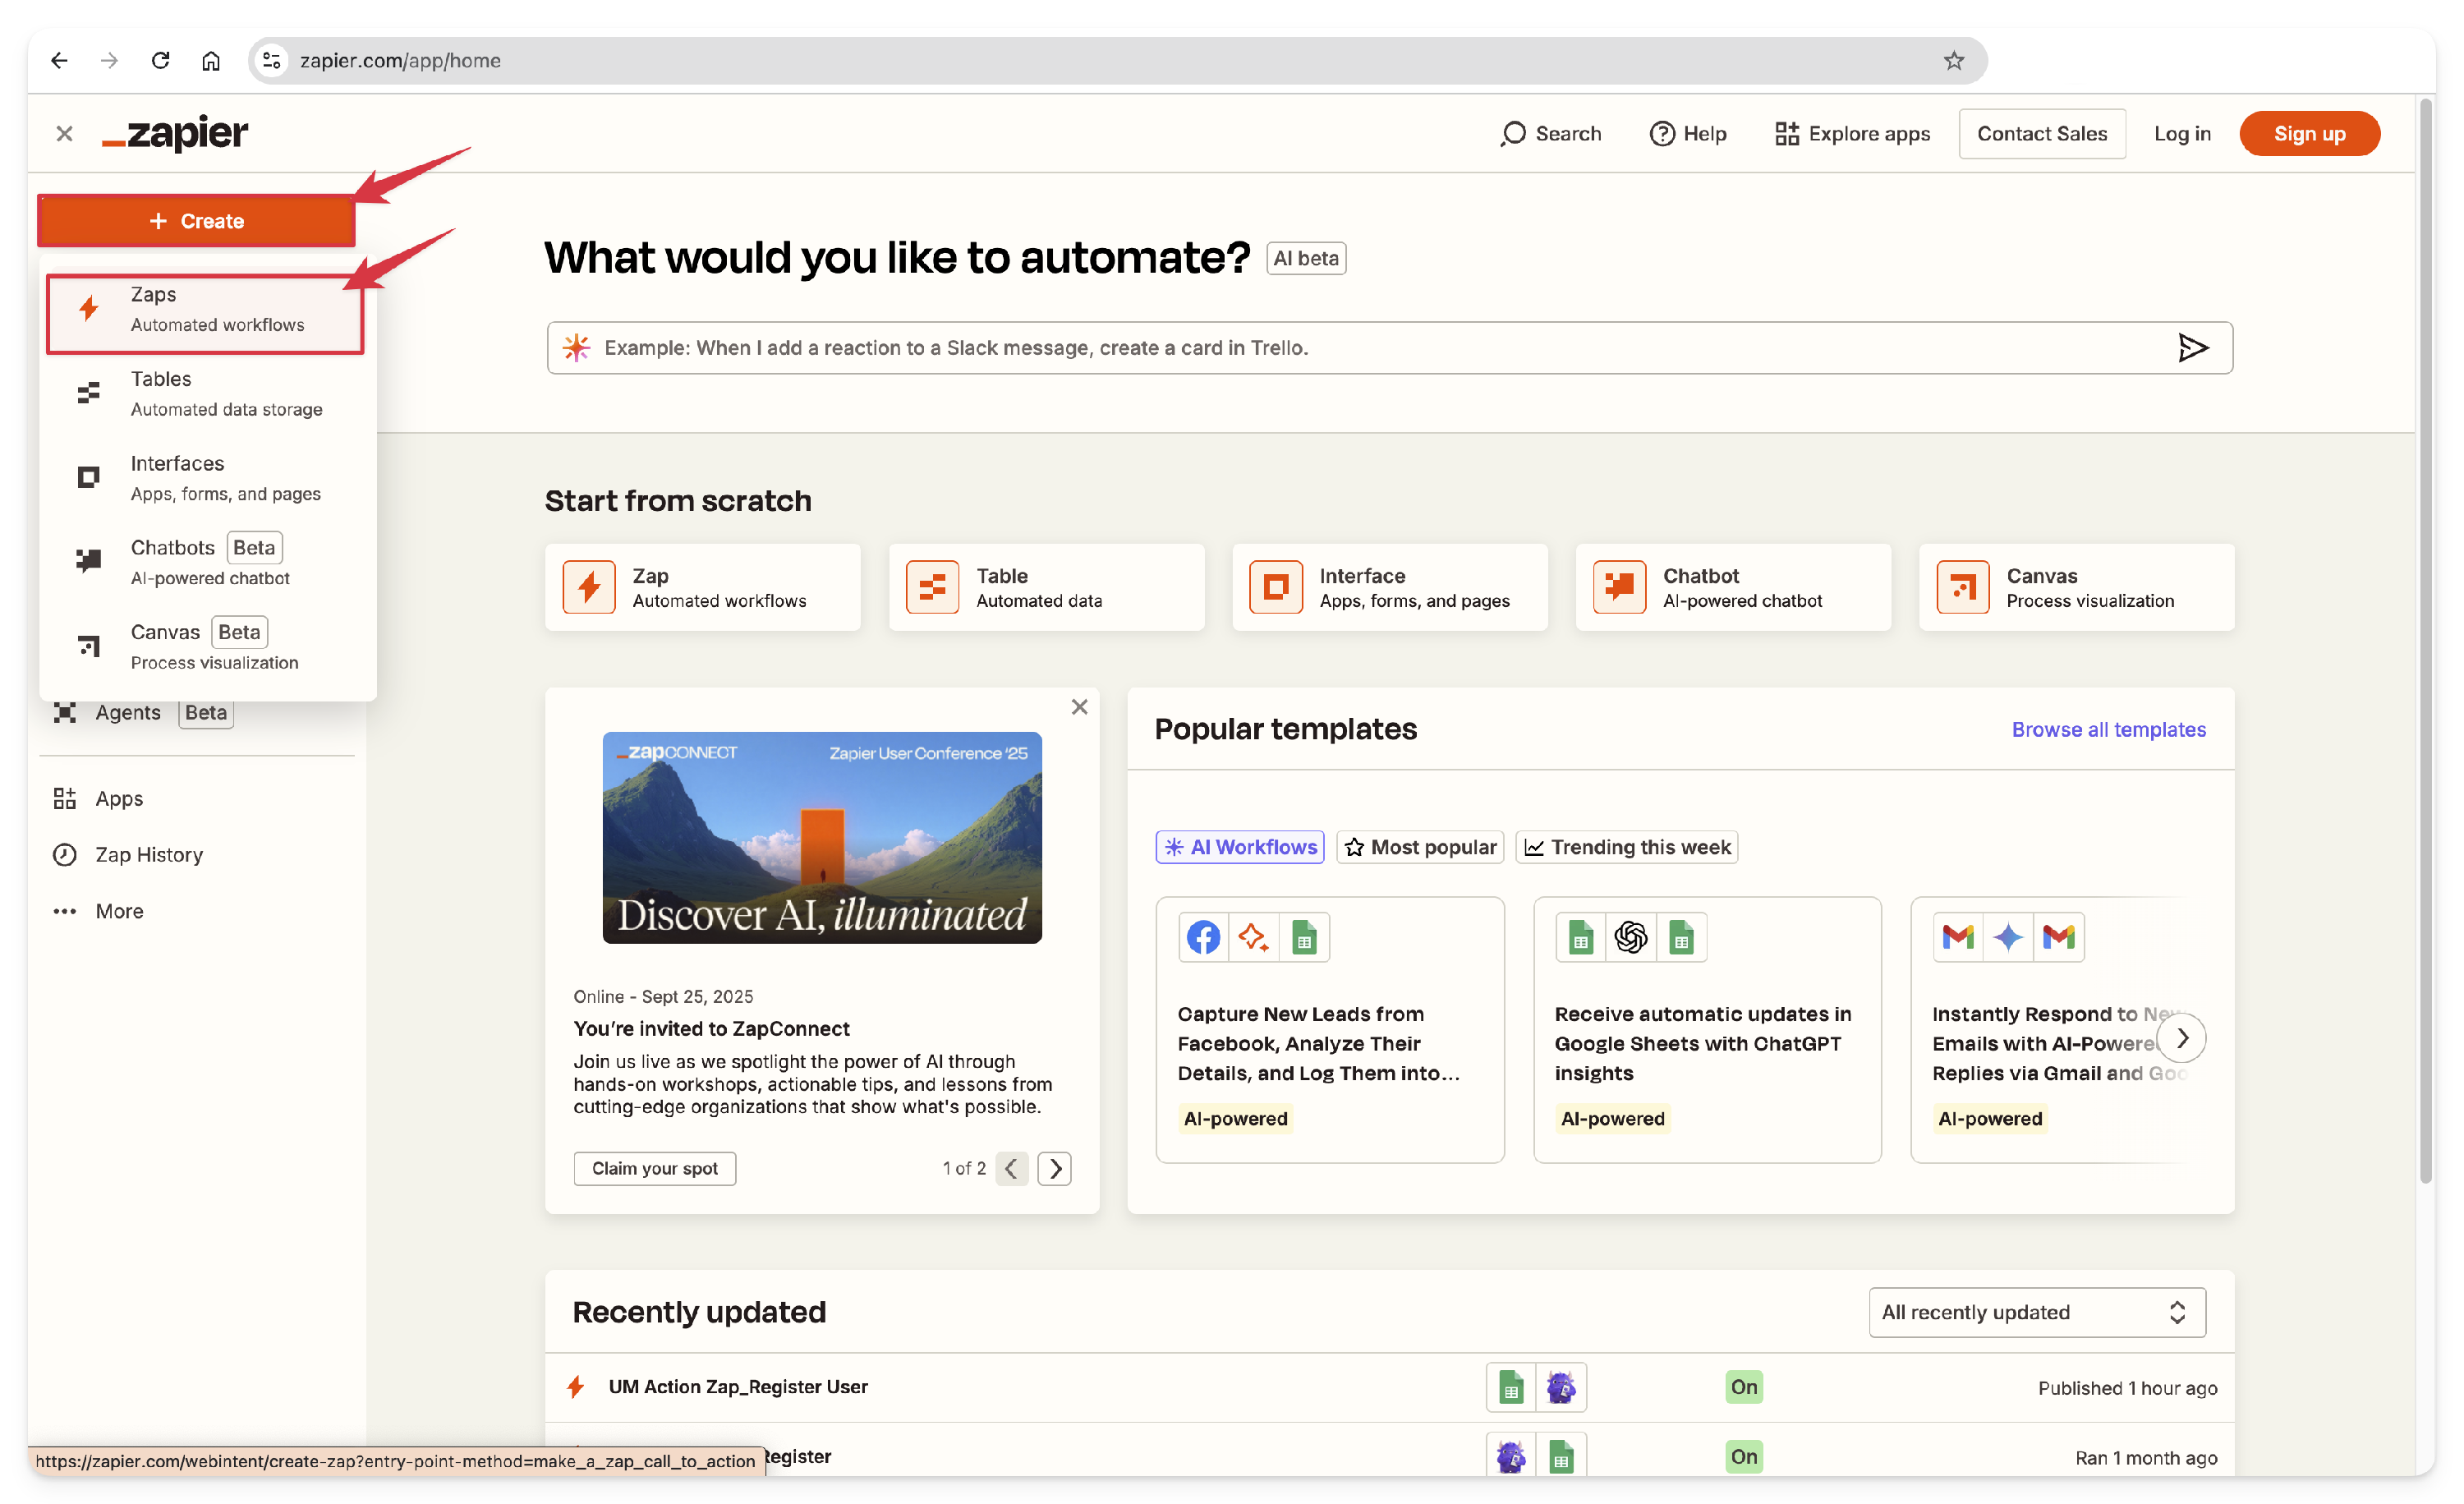
- Create a New Zap
- Once logged in, click on the + Create button on the Zapier dashboard and select Zaps to create a new Zap. Alternatively, you can click Zap from the home tab.
- Once logged in, click on the + Create button on the Zapier dashboard and select Zaps to create a new Zap. Alternatively, you can click Zap from the home tab.
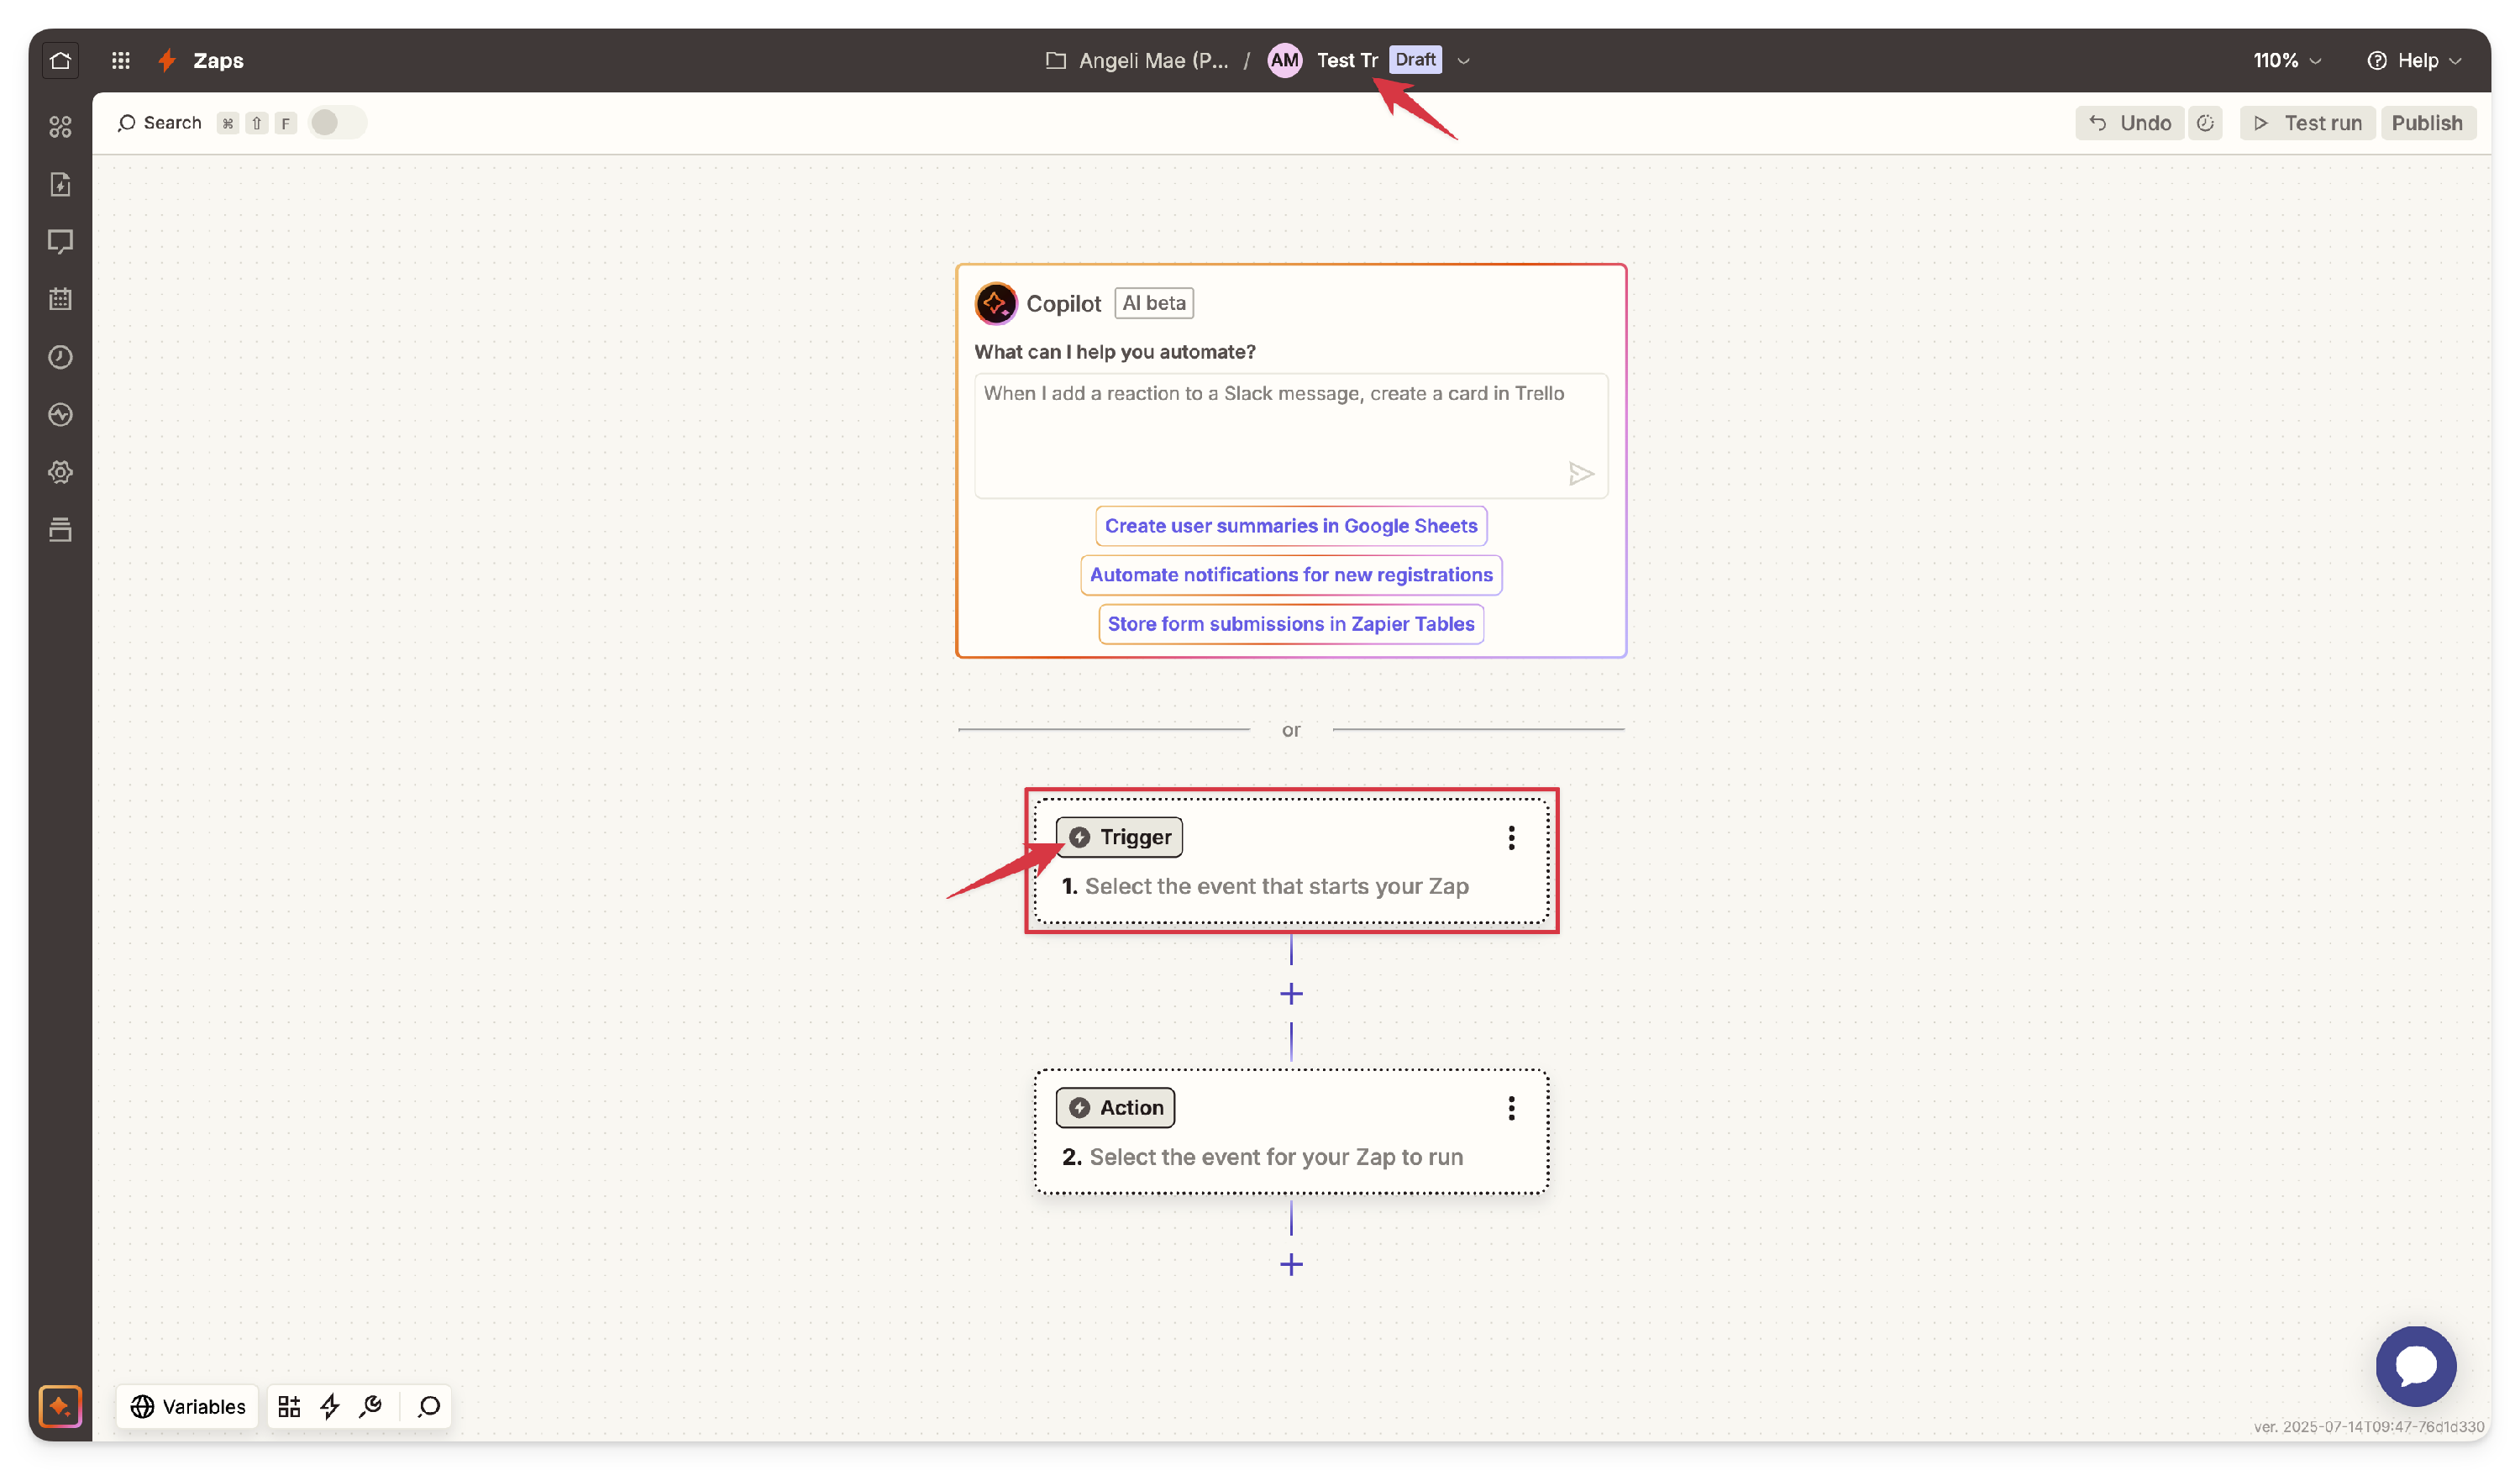
- Choose Ultimate Member as the Trigger App
- In the Zap Trigger Settings, name your Zap, then click on Trigger to select the event that will start your Zap.
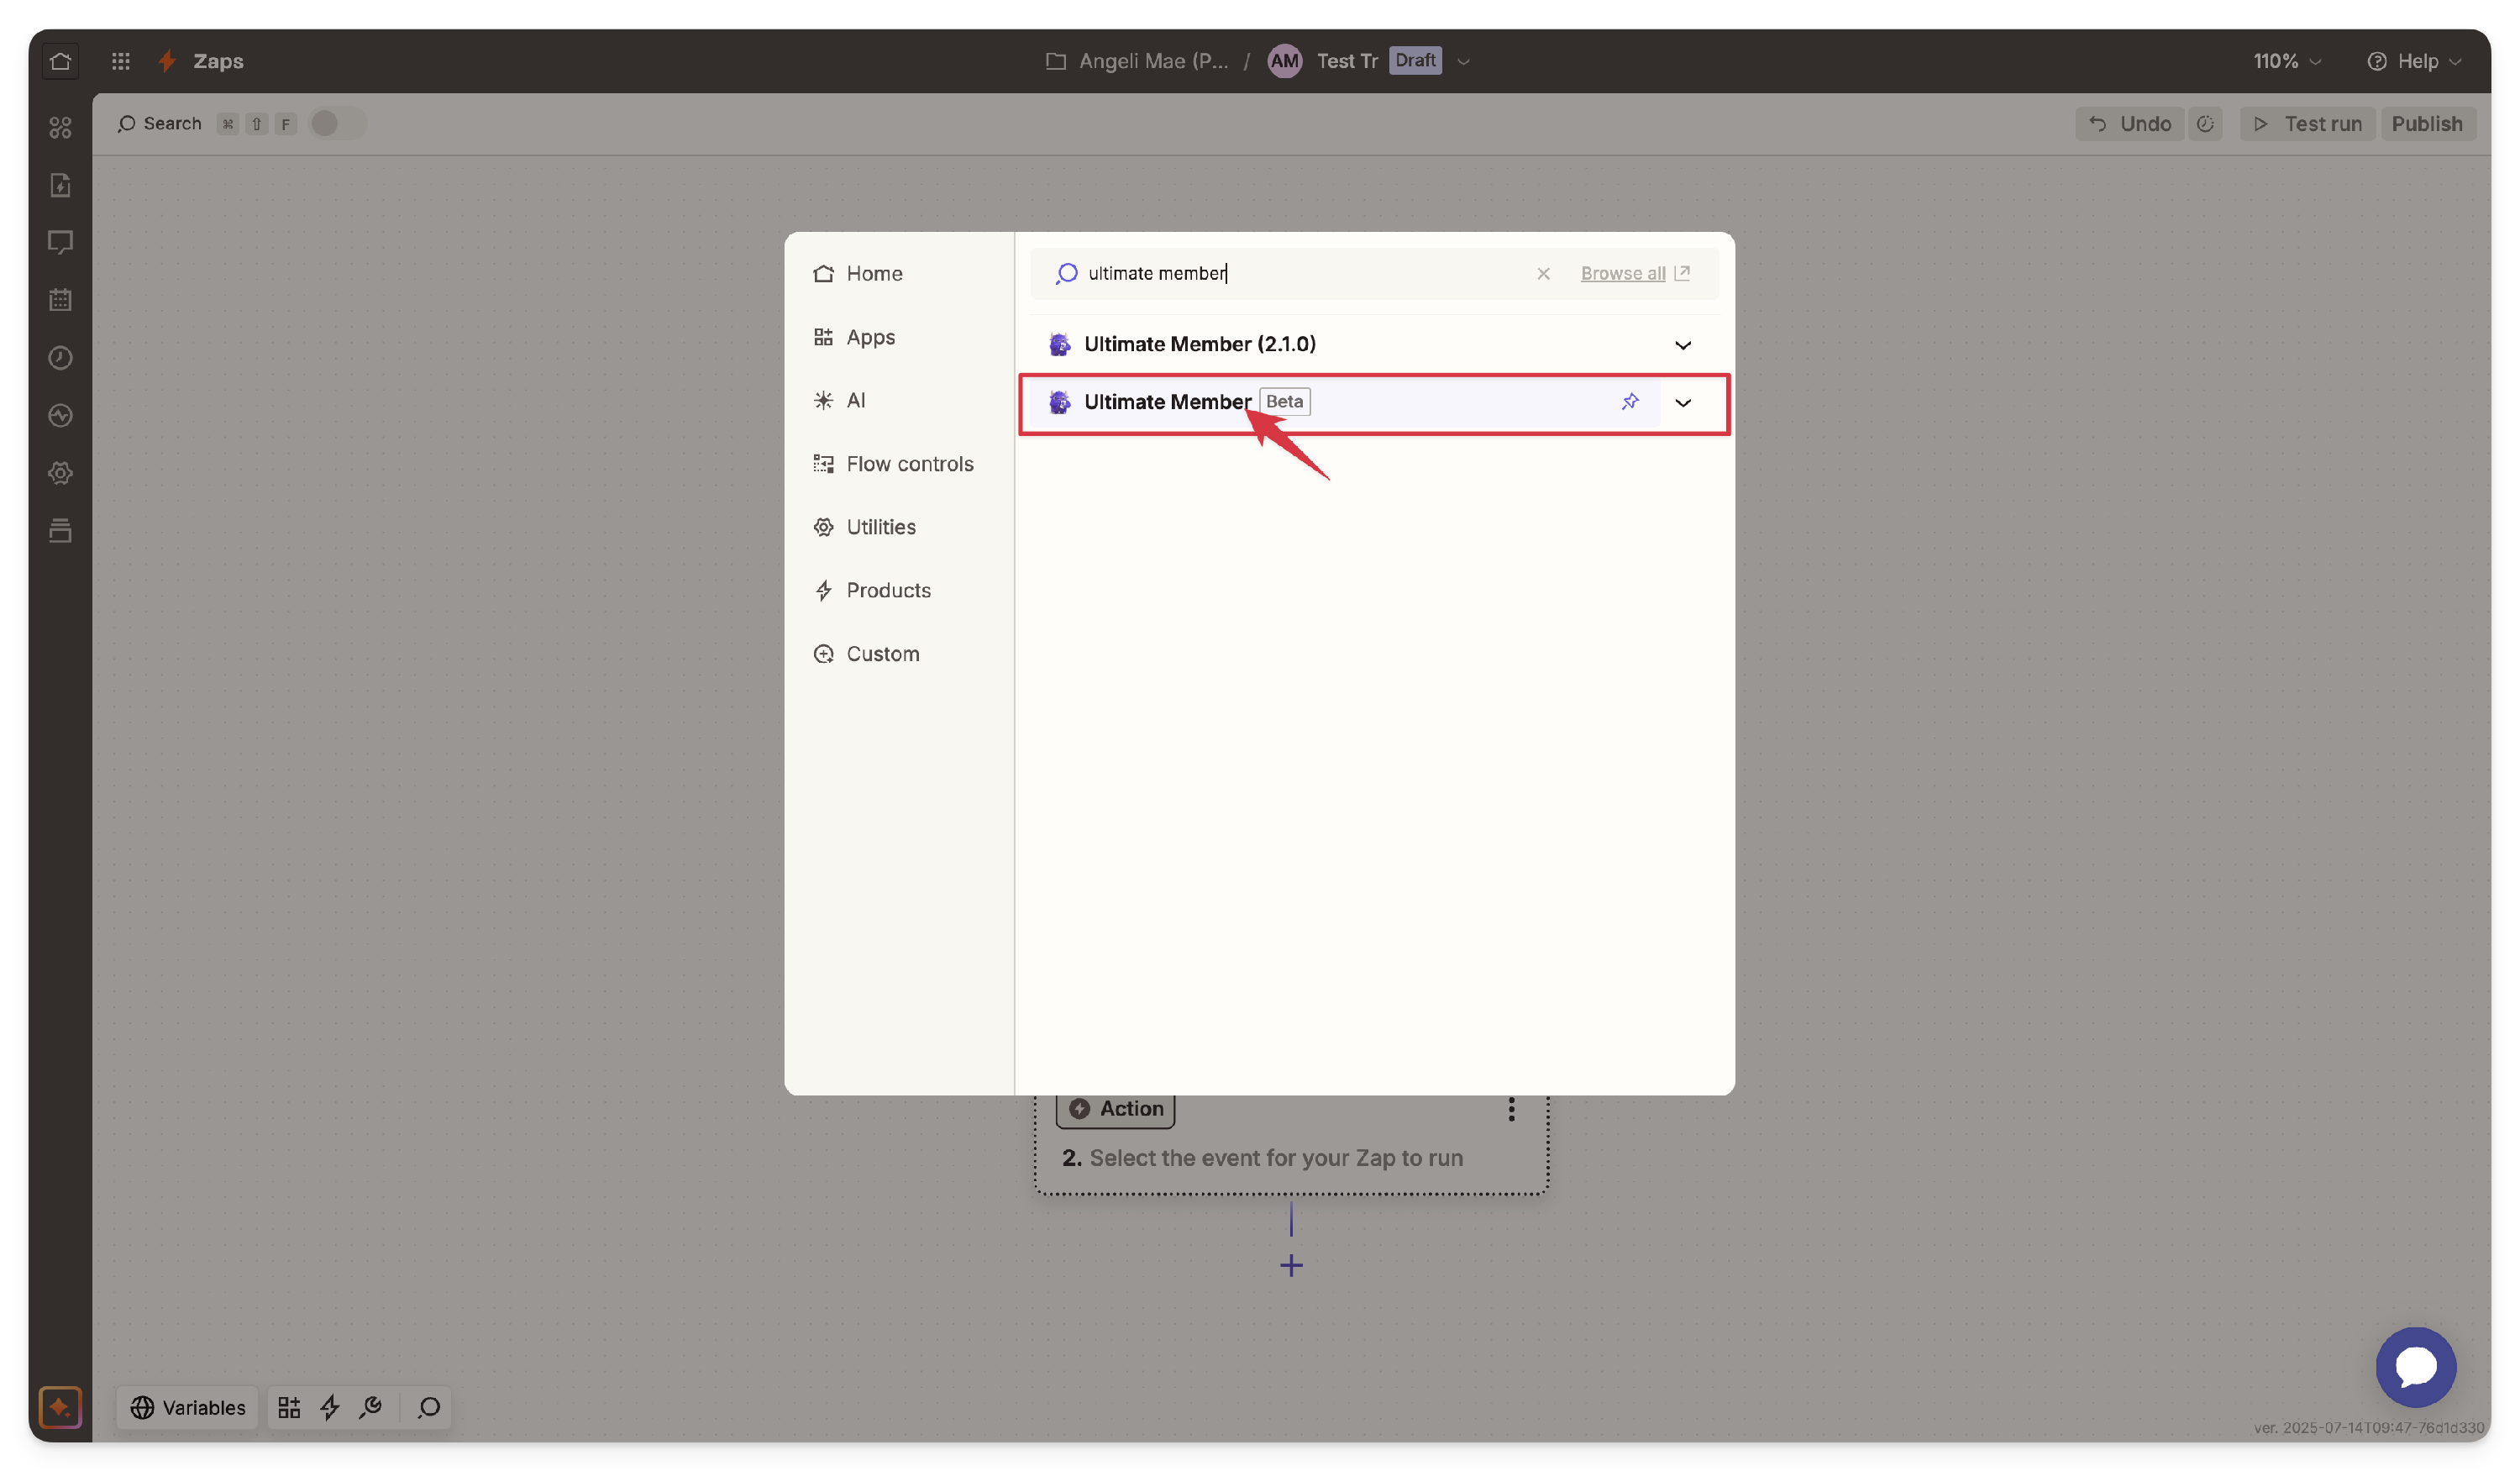
- Search for Ultimate Member in the app list and select Ultimate Member as your trigger app. When adding the app to your Zap, two options will appear:
- Ultimate Member
- Ultimate Member (2.1.0)
⚠️ Important: Select Ultimate Member (without a version number) to avoid compatibility issues. Do not choose Ultimate Member (2.1.0) — this is a legacy version no longer supported.
- Ultimate Member
 Connect Your Ultimate Member Account:
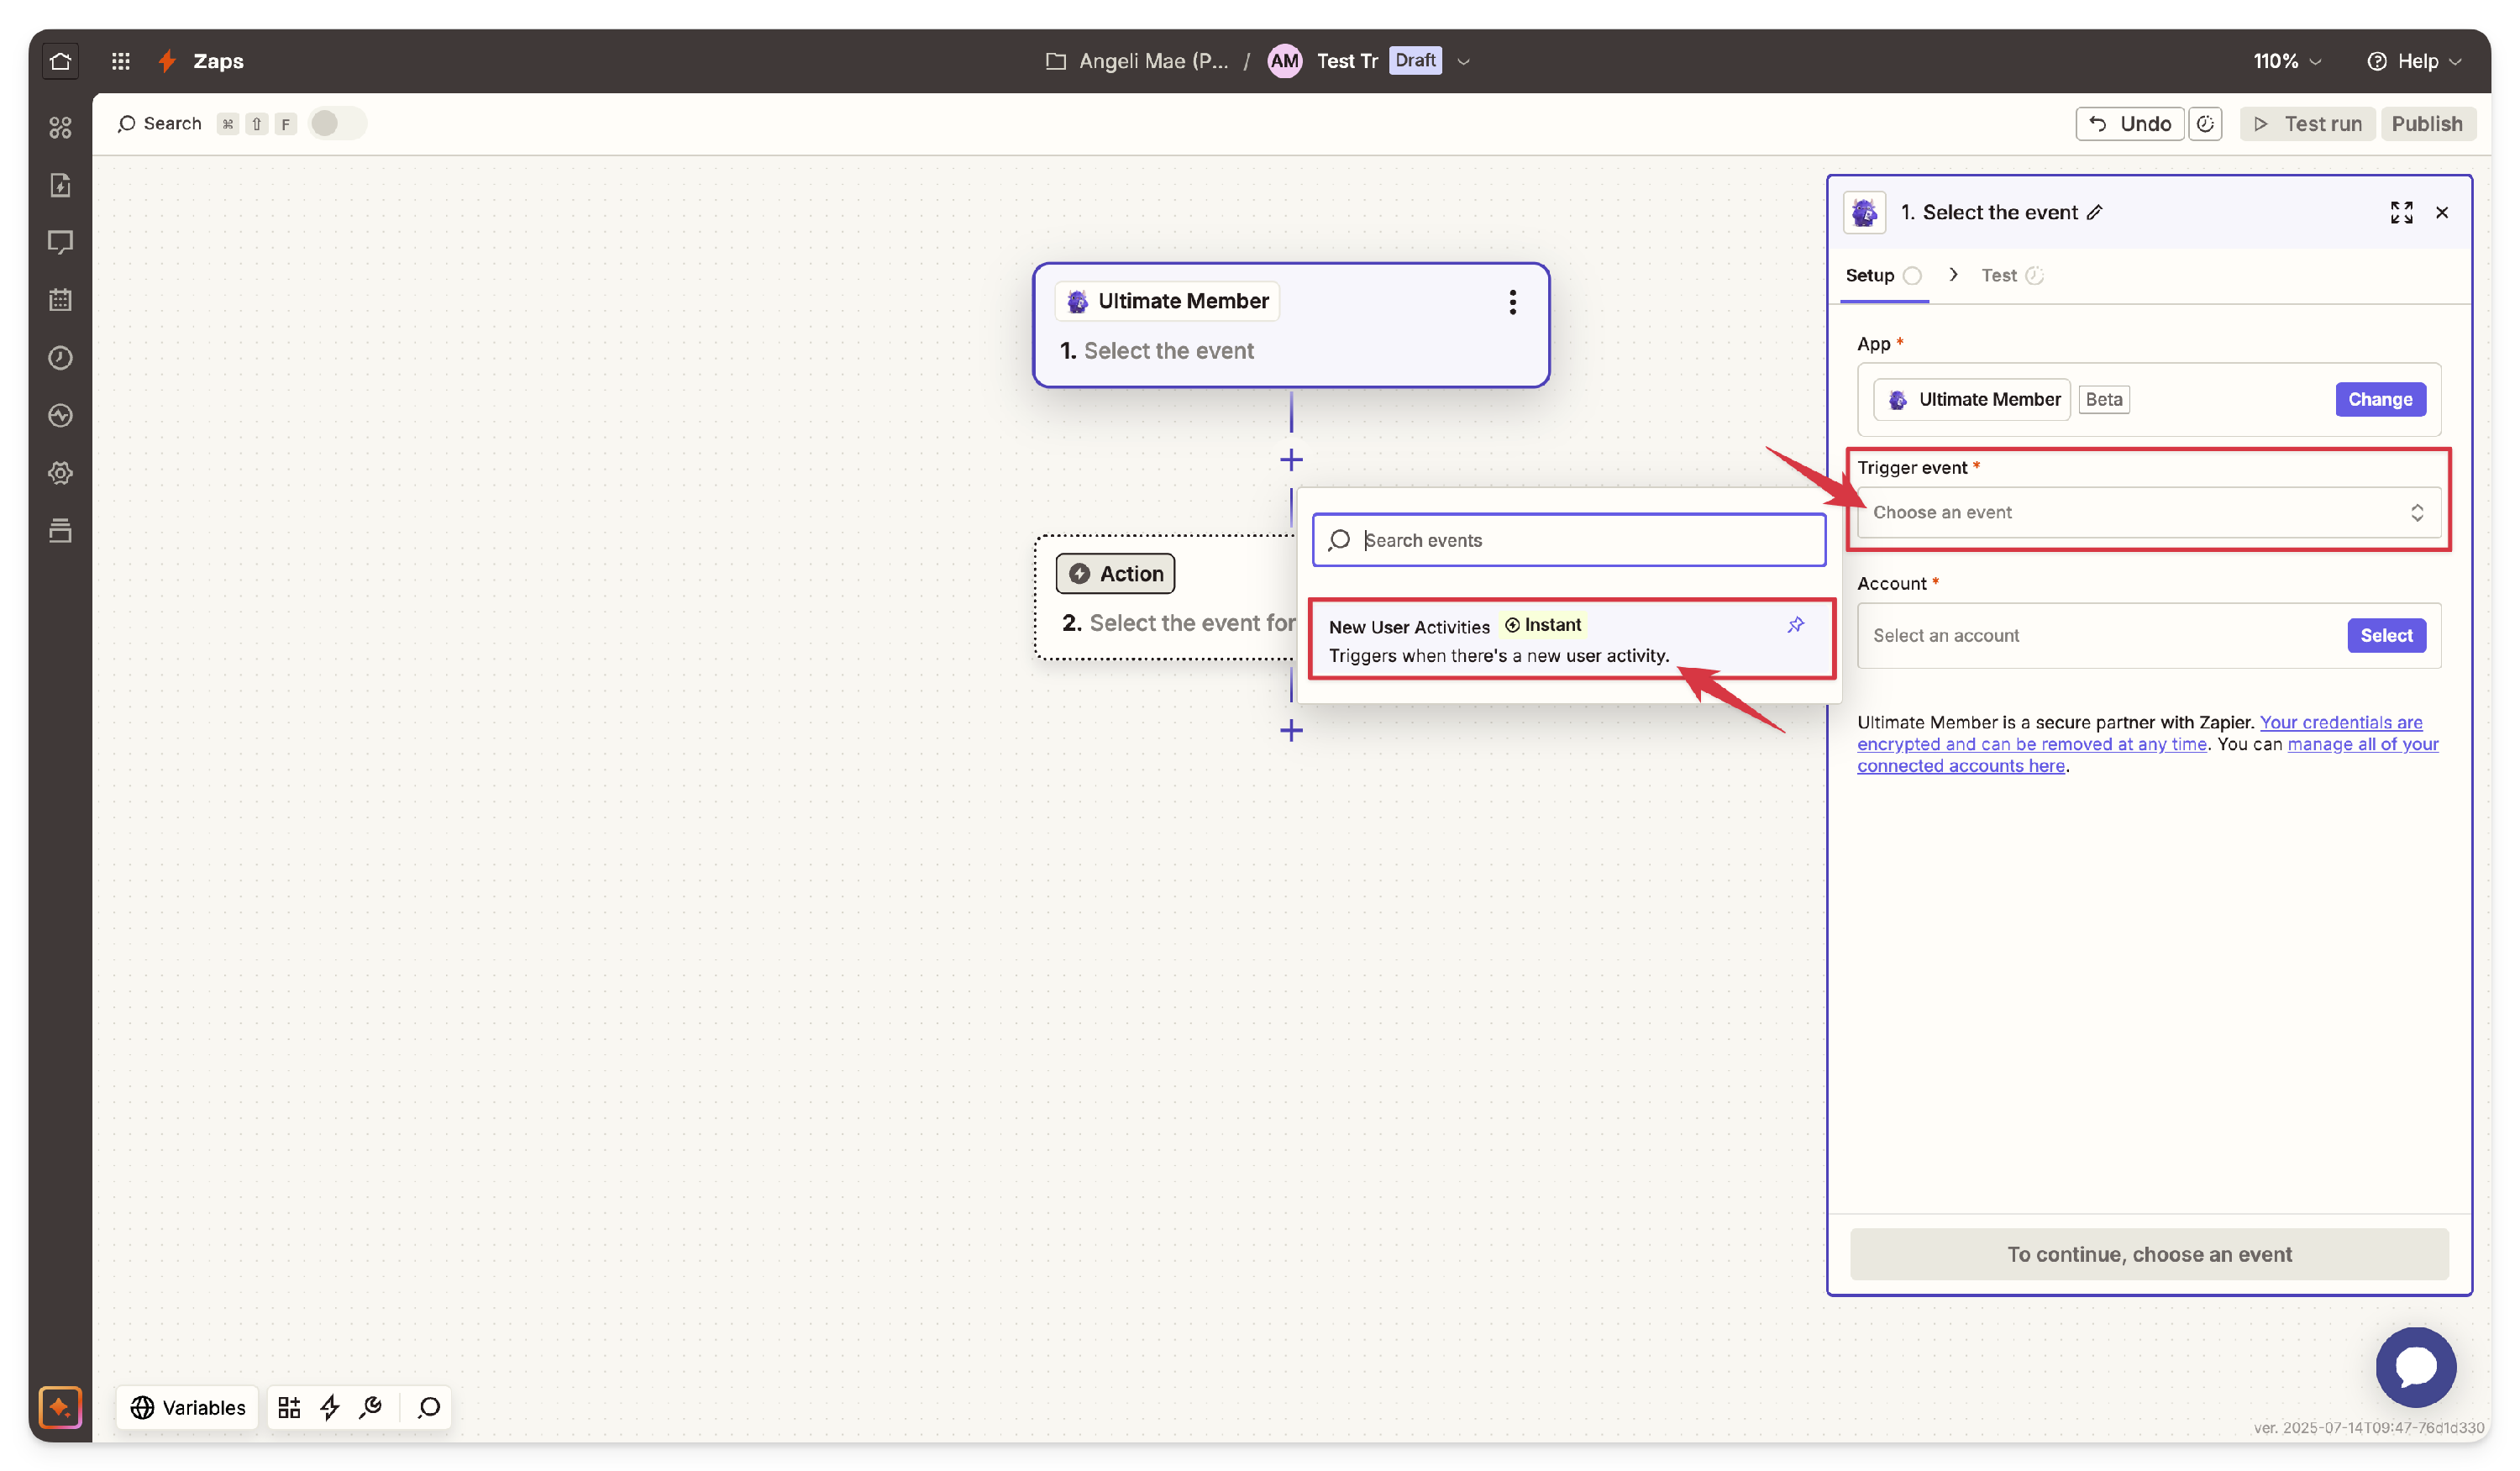
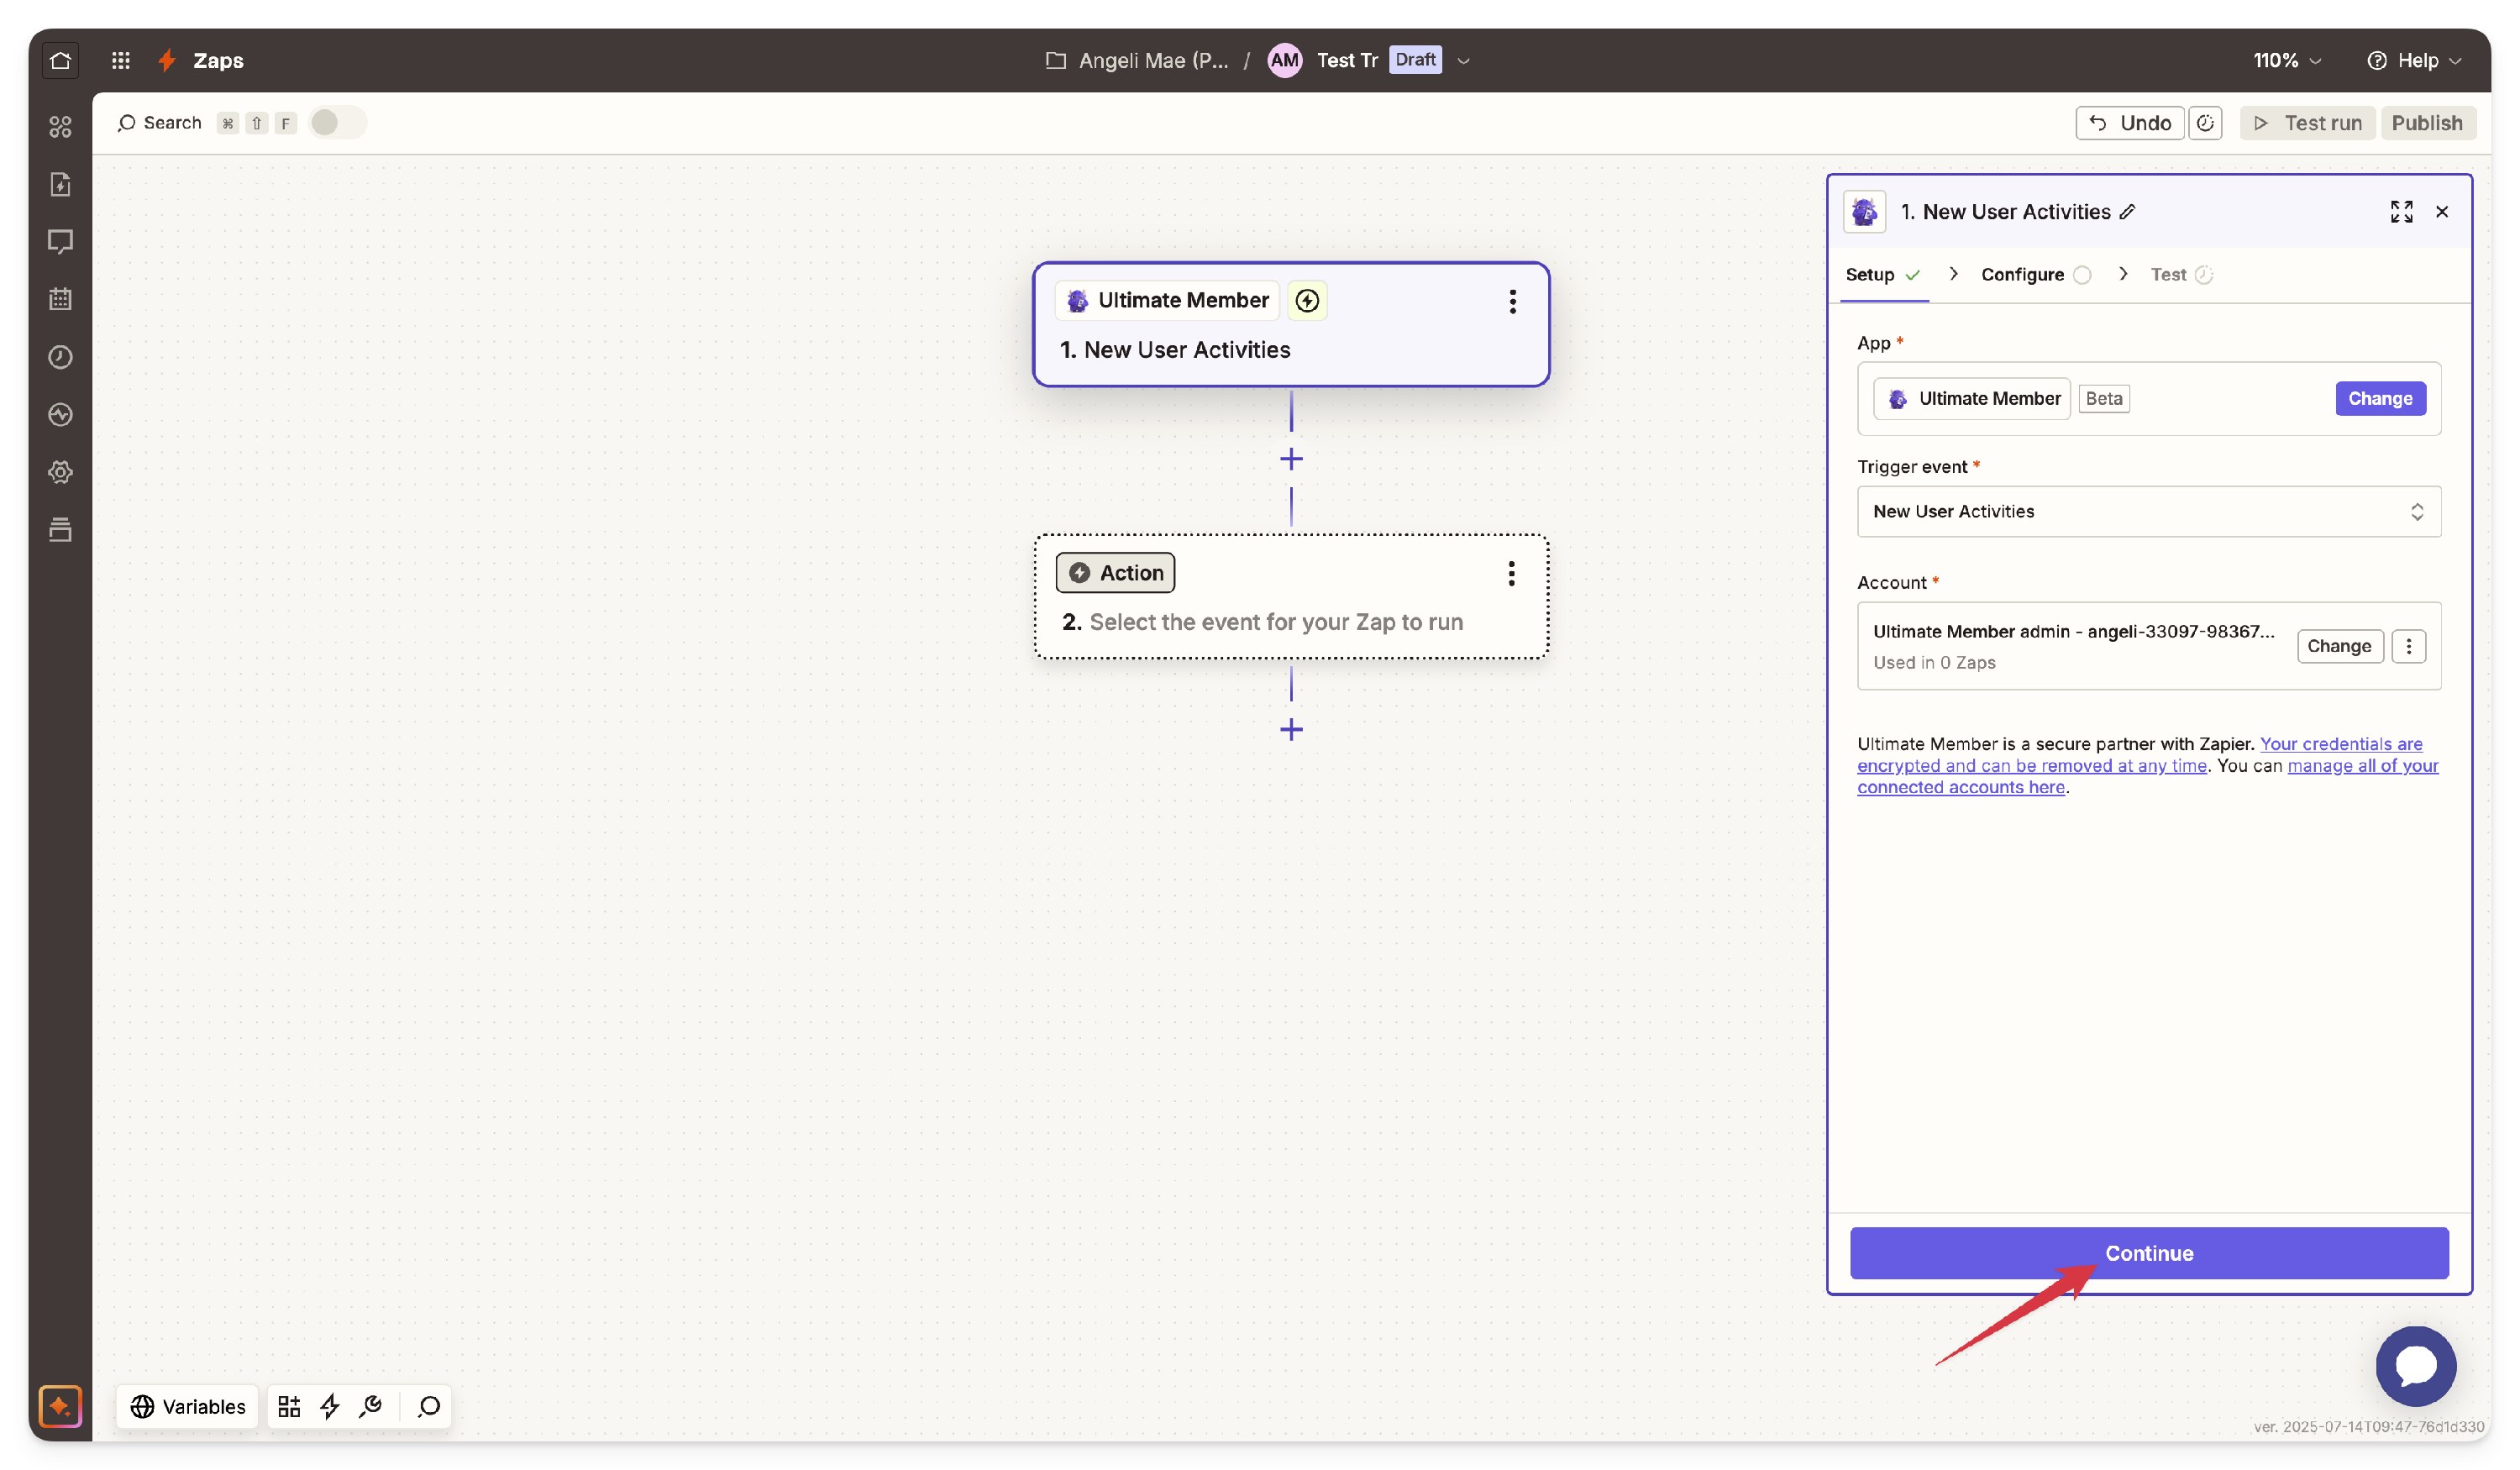
- In the Setup tab, located within the step details on the right-hand side, select New User Activity Instant as the Trigger Event.
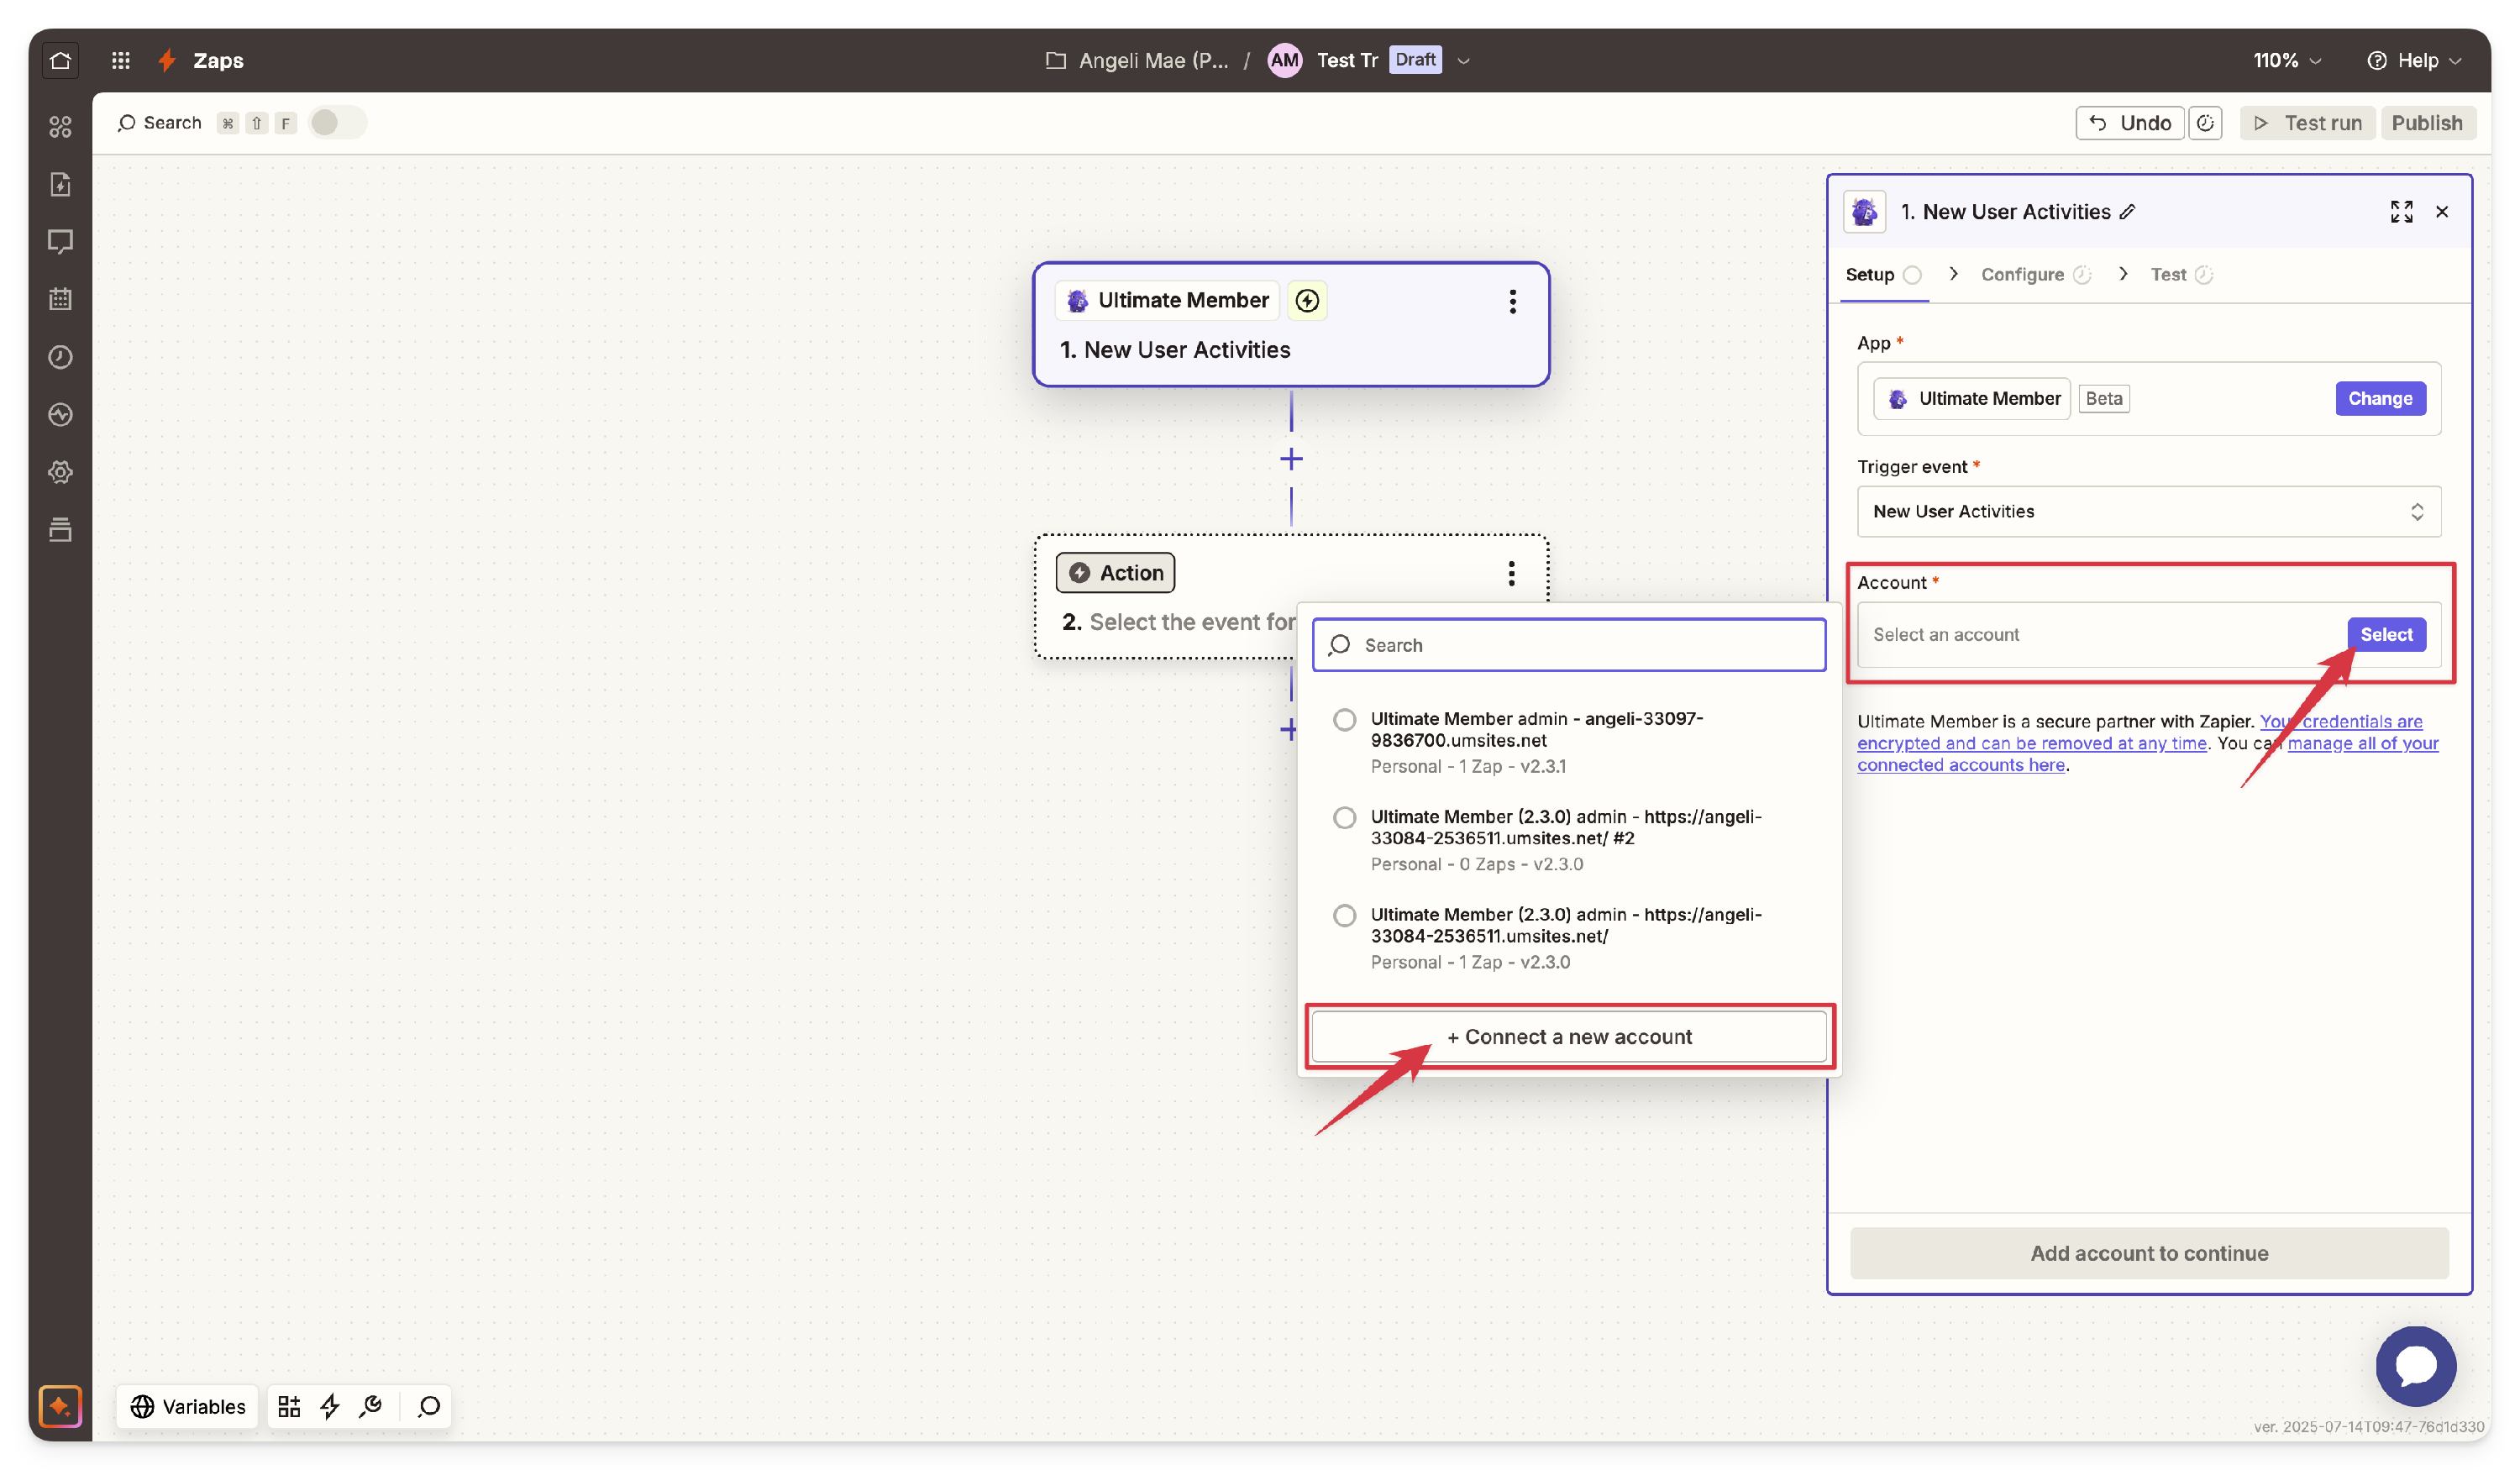
- In the Account option, click "Change" and choose an existing account, or click "Select", then click on the "+Connect a new account." This will open a new tab for the account connection or authentication prompt.
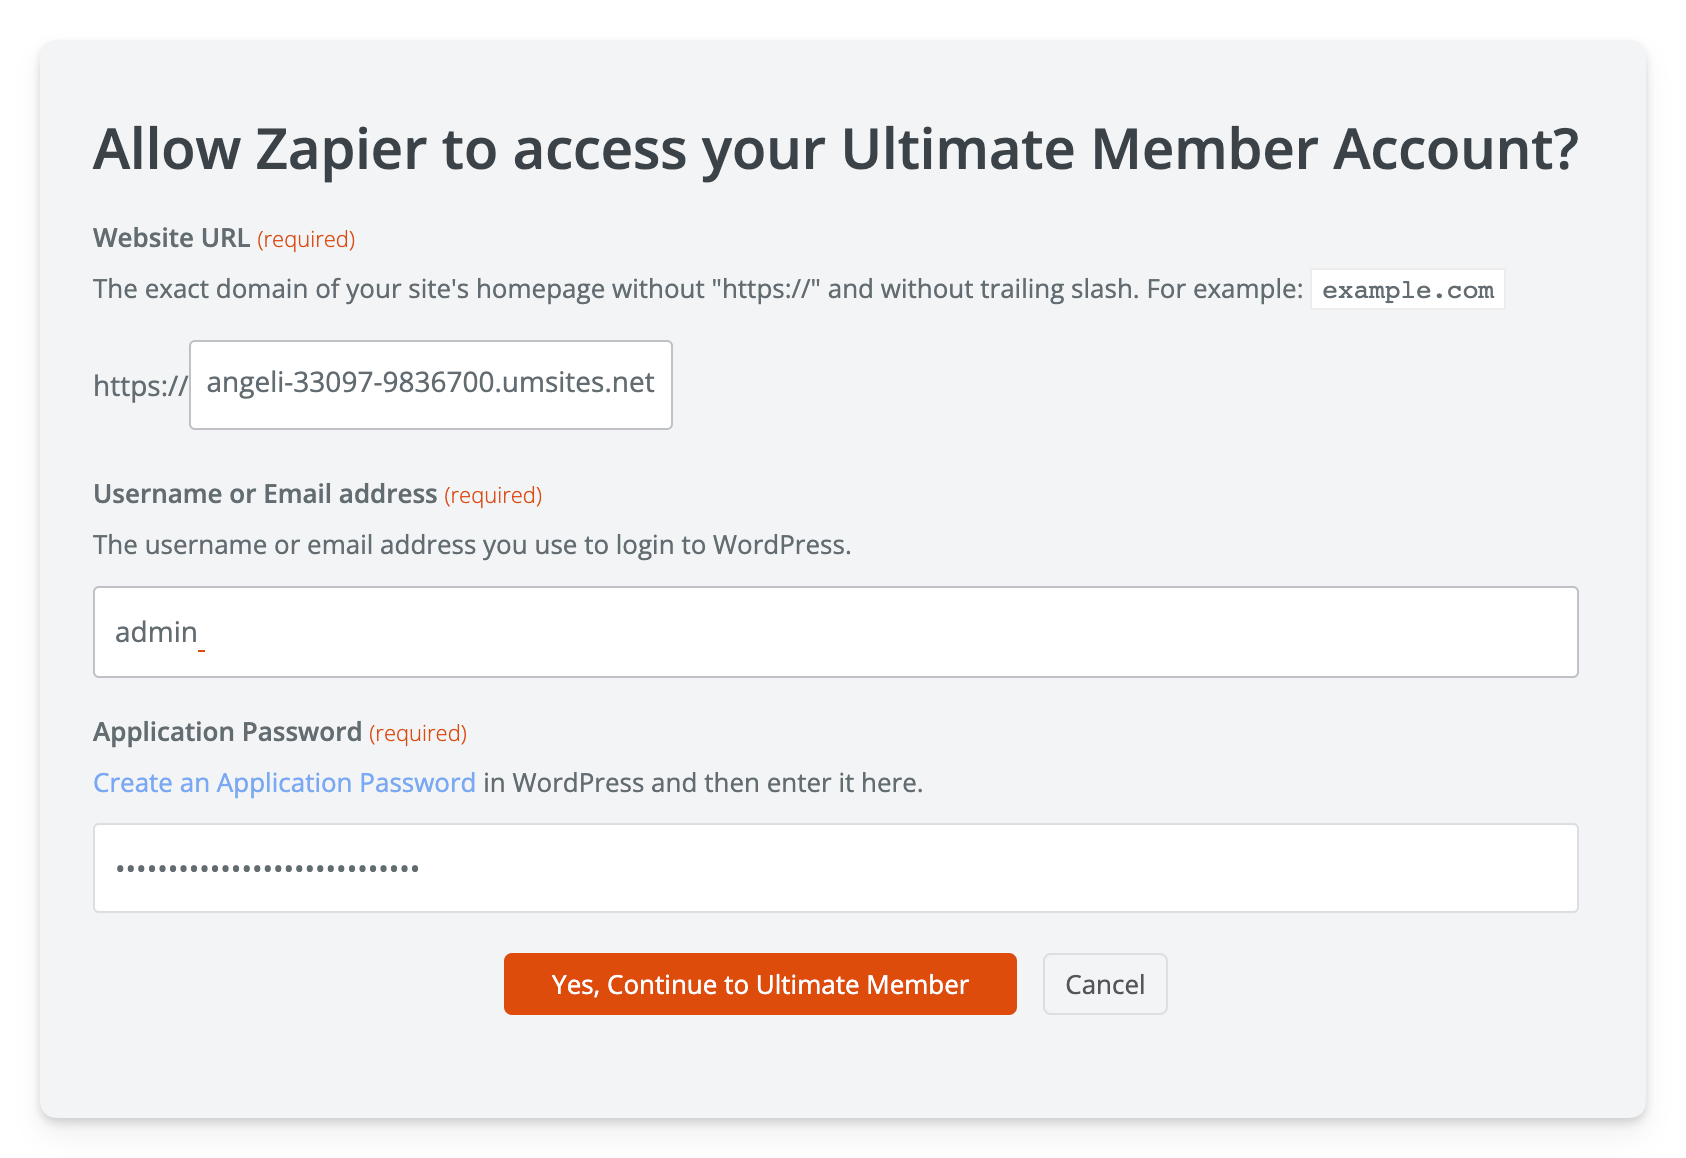
- Enter your website URL, username or email address, and the Application Password you created.
- Click the Yes, Continue to Ultimate Member button to authenticate.
- In the Setup tab, located within the step details on the right-hand side, select New User Activity Instant as the Trigger Event.
- After a successful connection, you’ll be redirected back to Zapier. Click the "Continue" button.
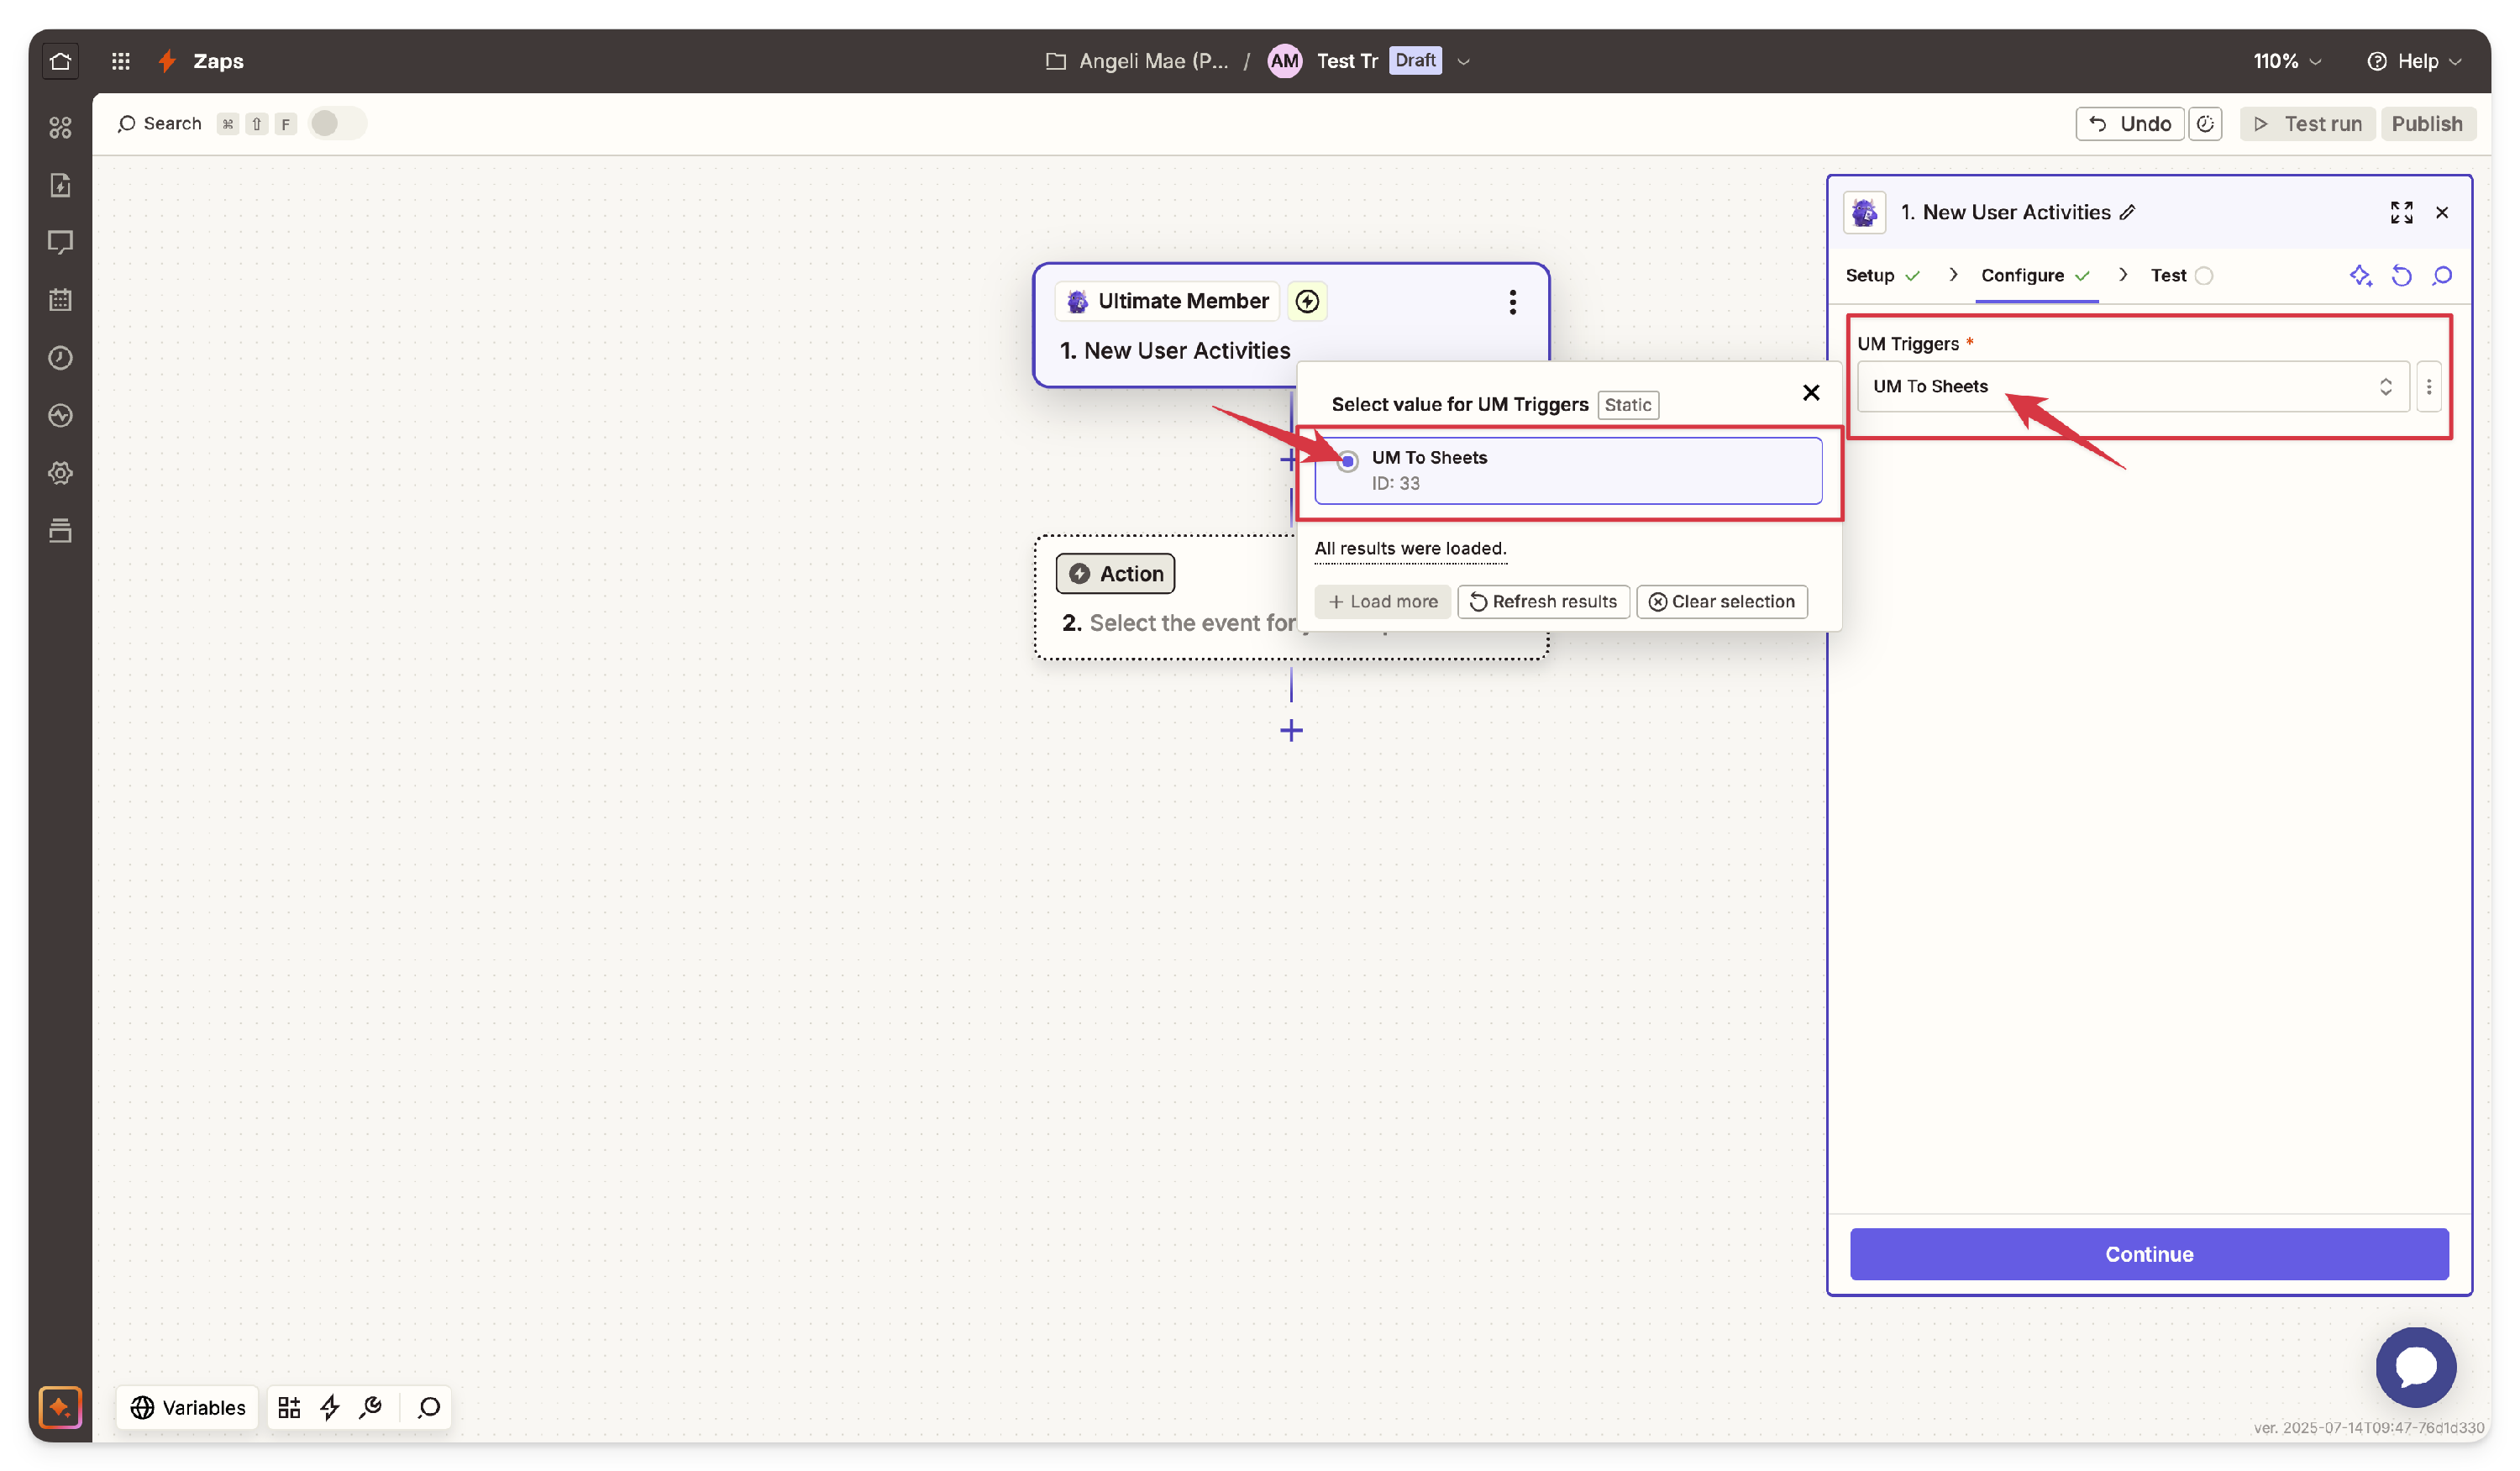
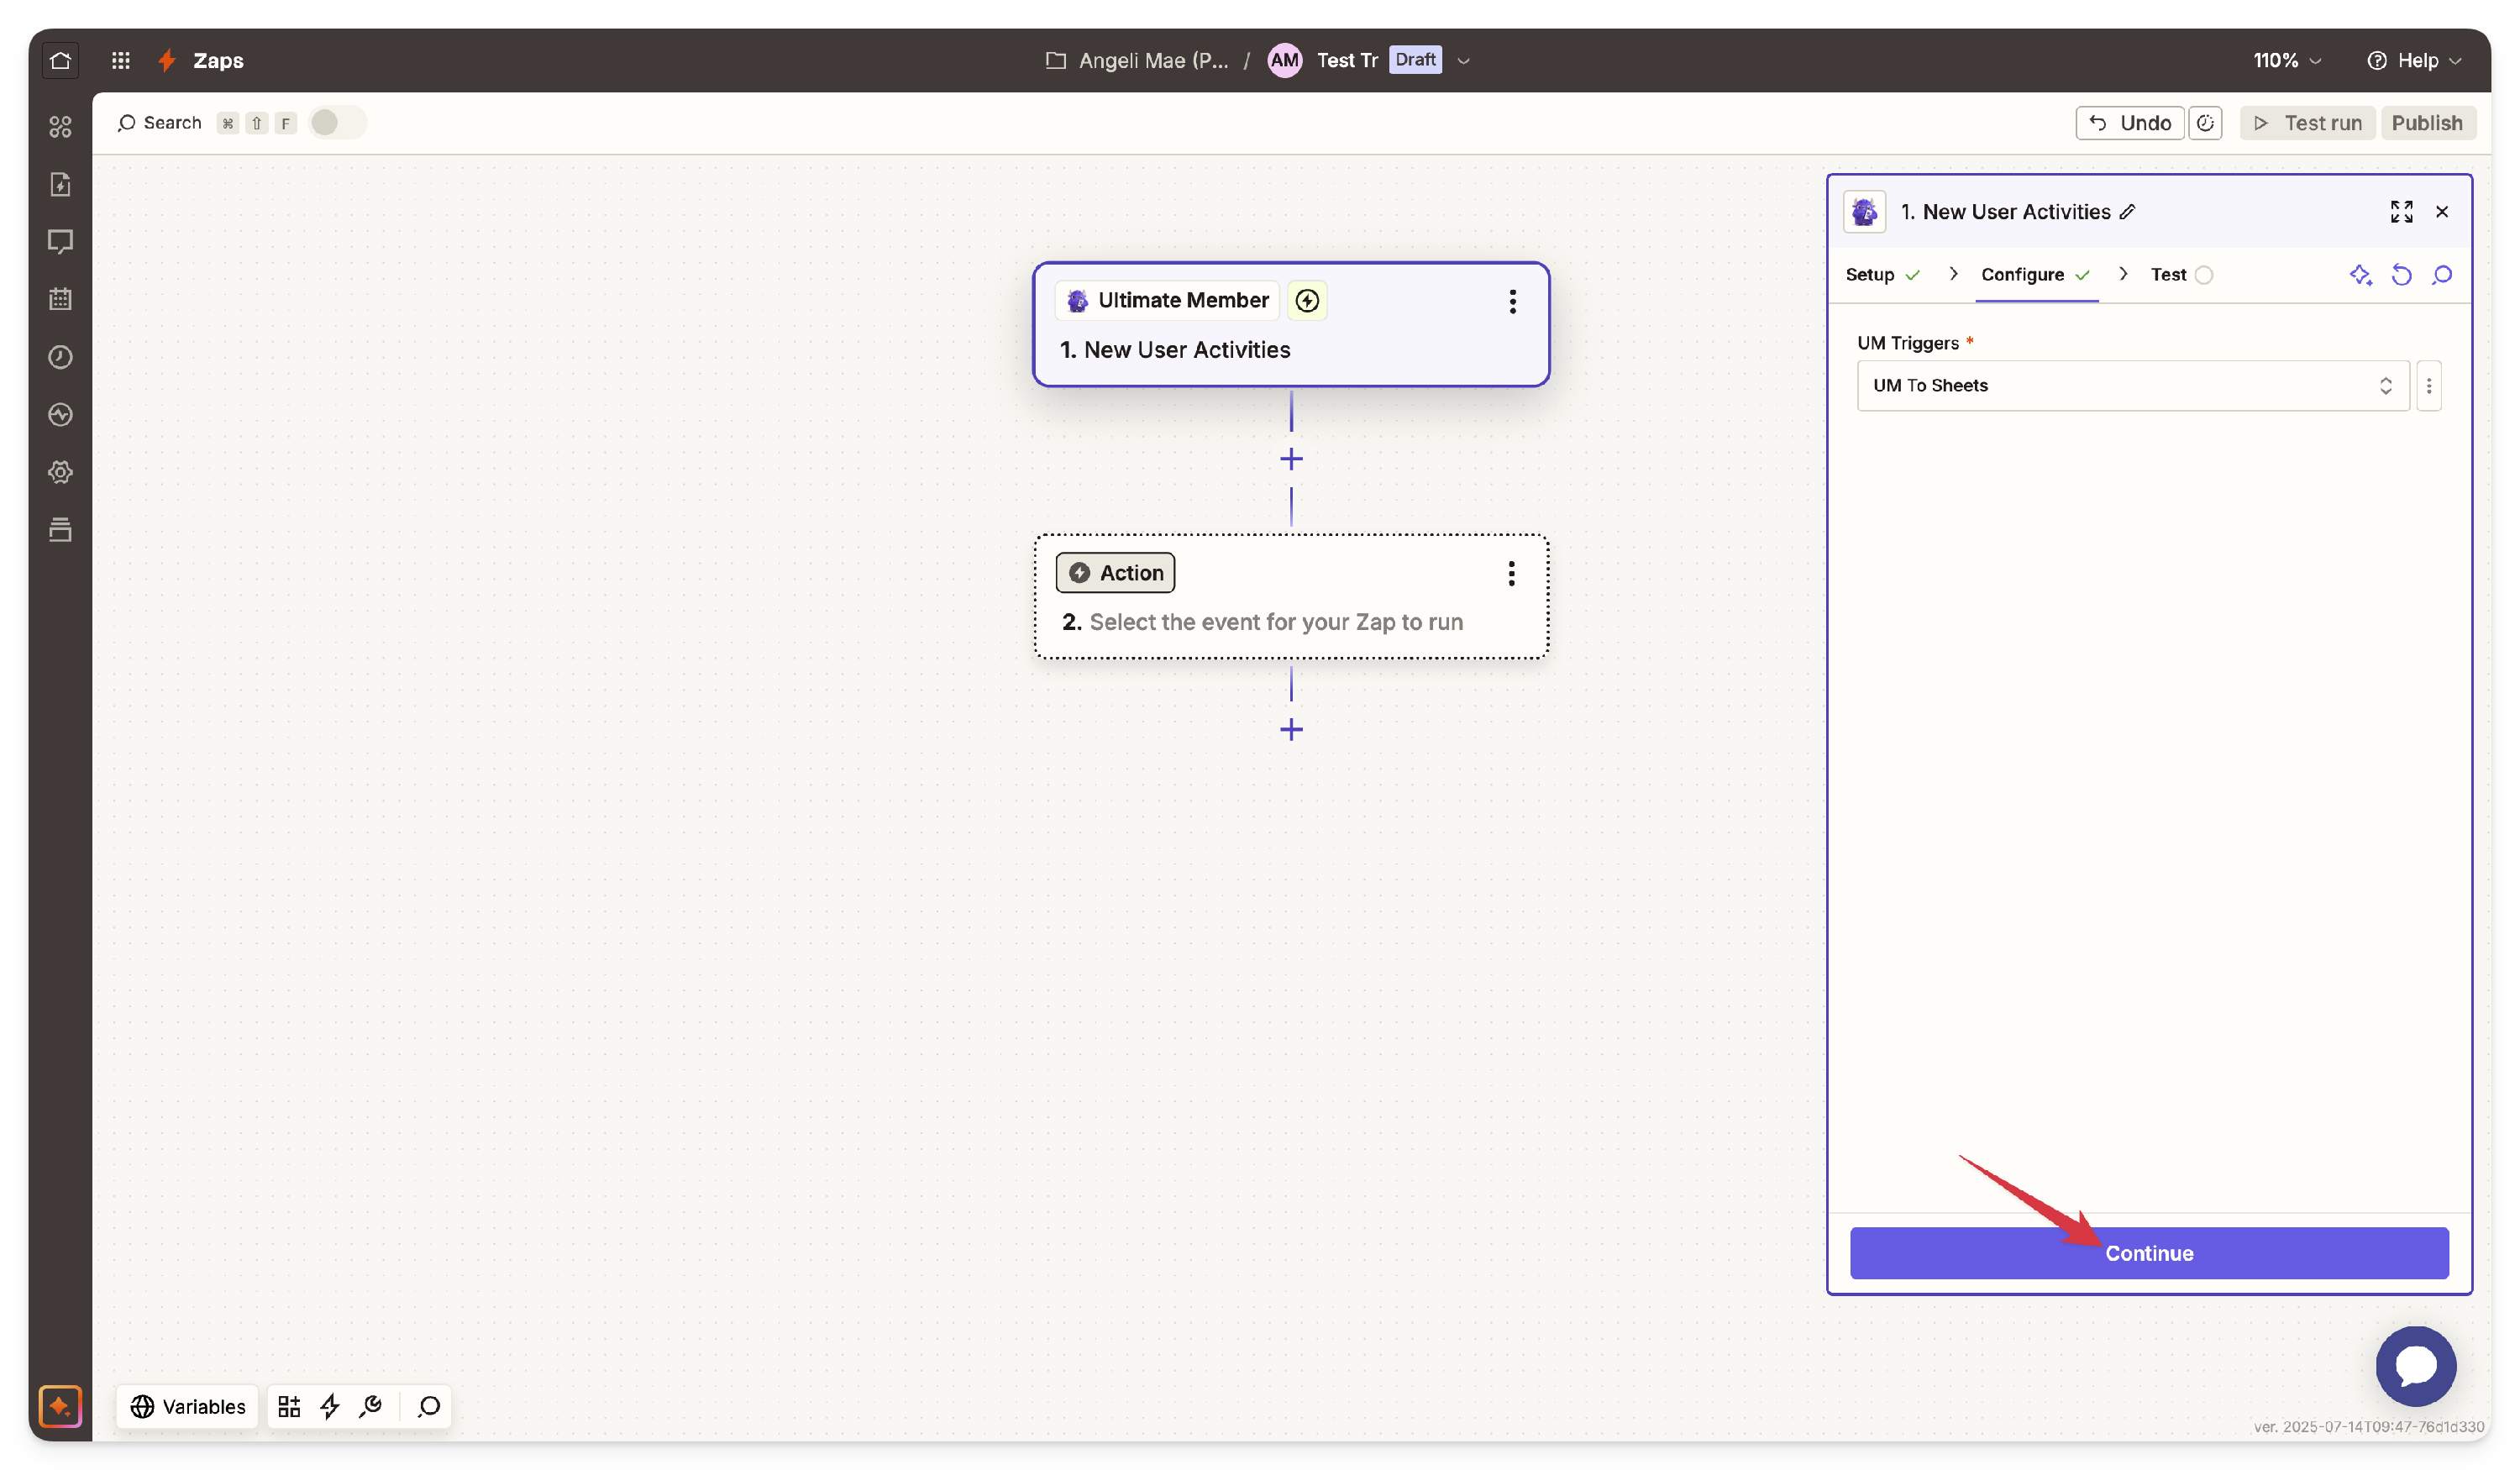
- In the Configure tab, select the UM Trigger you created in your WordPress dashboard, then click Continue.
-
In the Test tab, click the Test Trigger button to send a request to your site. Review the returned records. Click on a record to inspect the fields being sent.


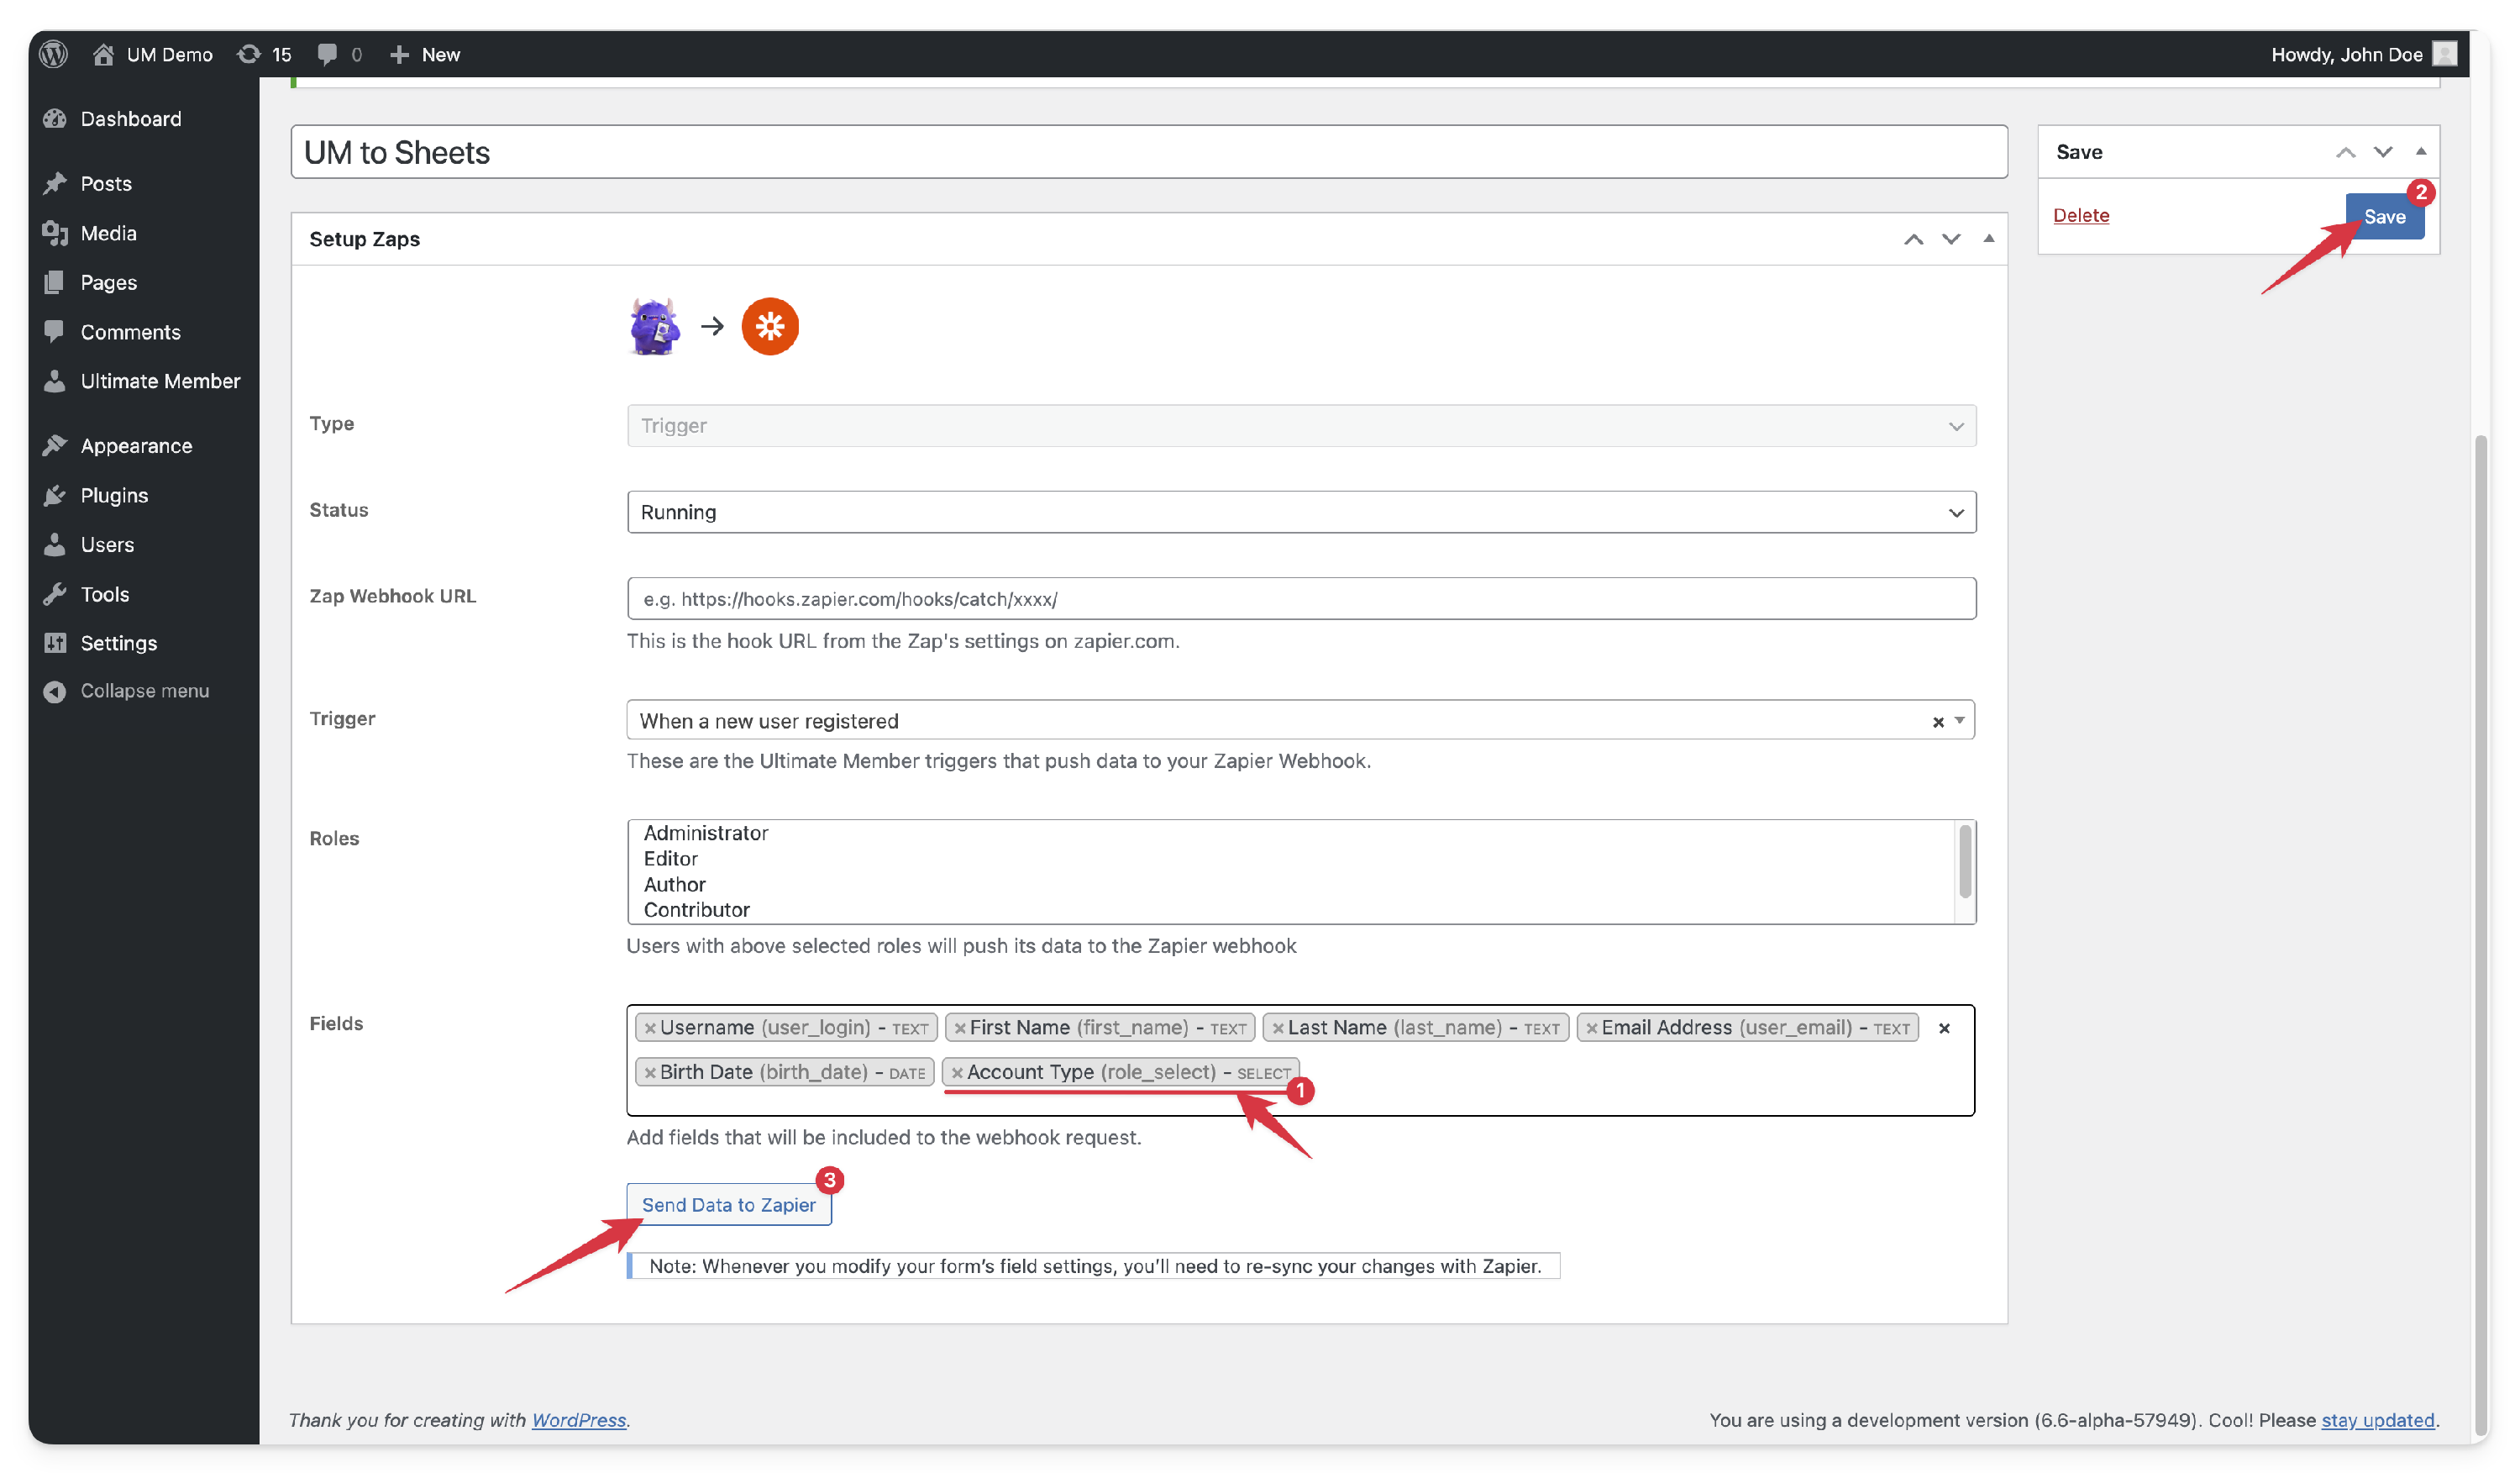
- To modify fields:
- Go to WP Admin → Ultimate Member → Zapier → Edit Trigger Zap.
- Add the fields that will be included in the webhook request. In this example, we added role_
- Click the Save button, then click the Send Data to Zapier button to update Zapier with the latest fields.
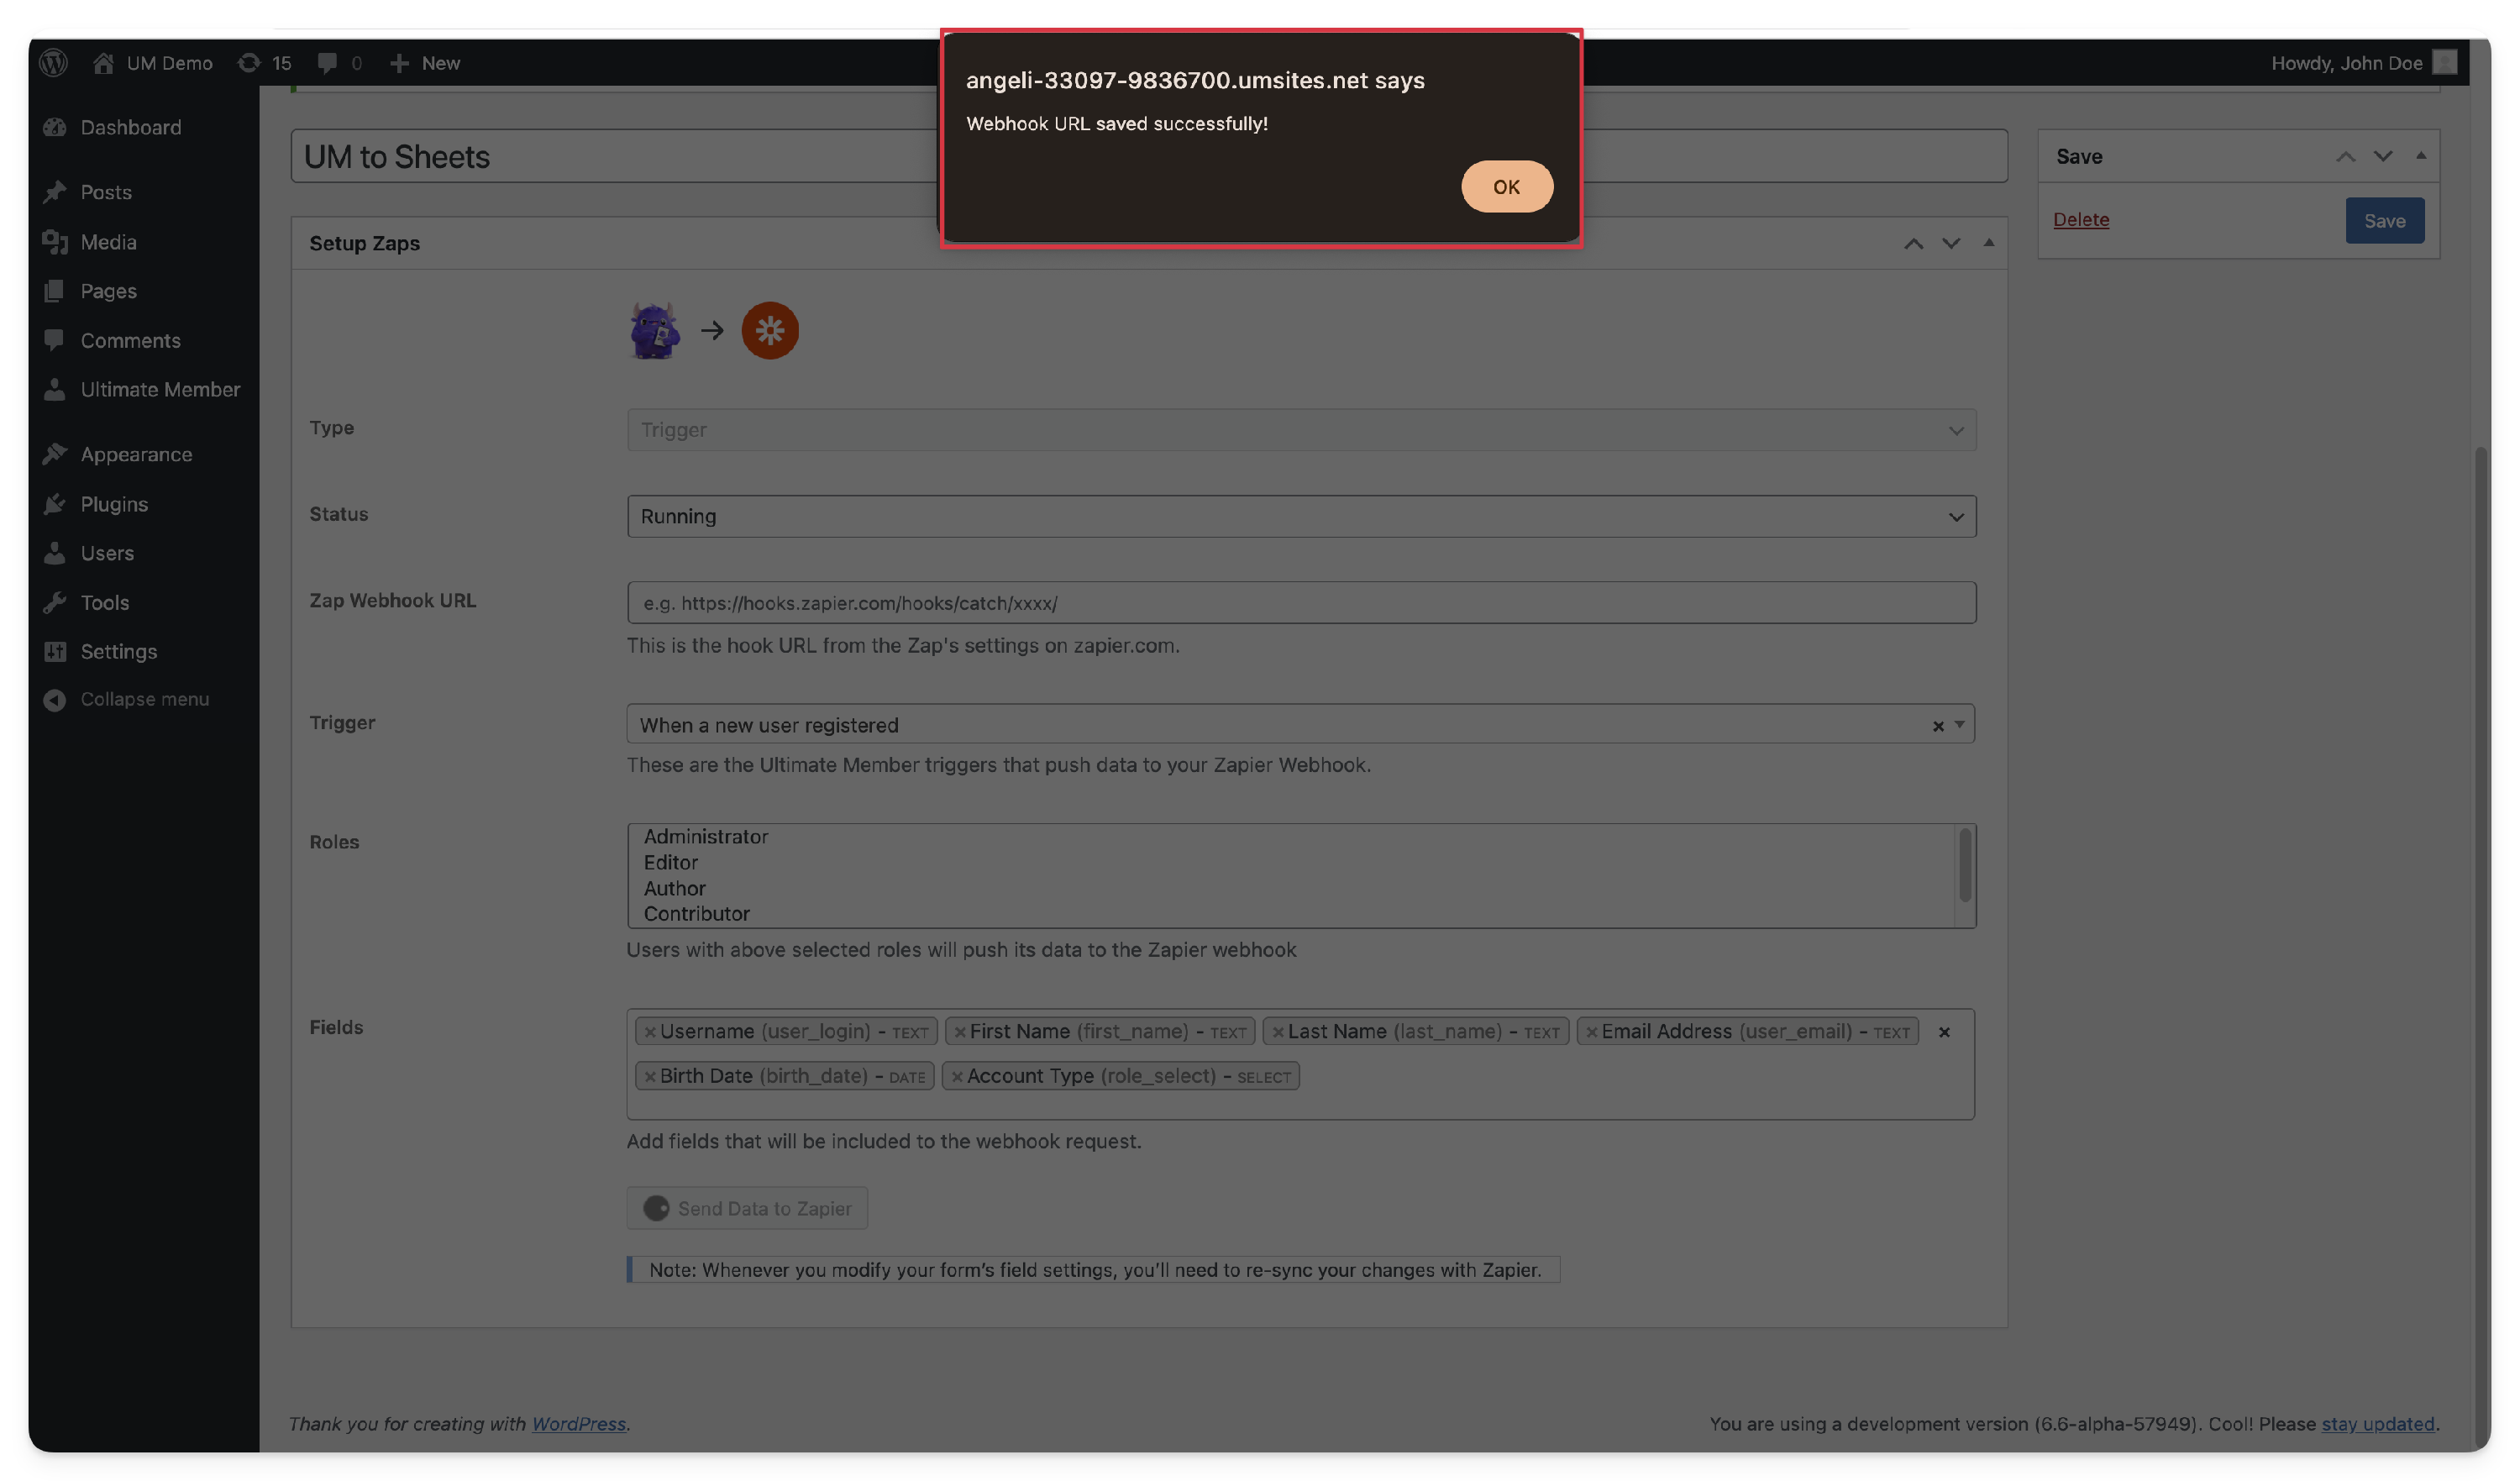
- This step is required for Zapier to receive new or updated data structures. When Zapier is actively listening (after clicking Send Data to Zapier), the webhook URL will automatically populate once the data is sent successfully.

- Go to WP Admin → Ultimate Member → Zapier → Edit Trigger Zap.
- After sending data:
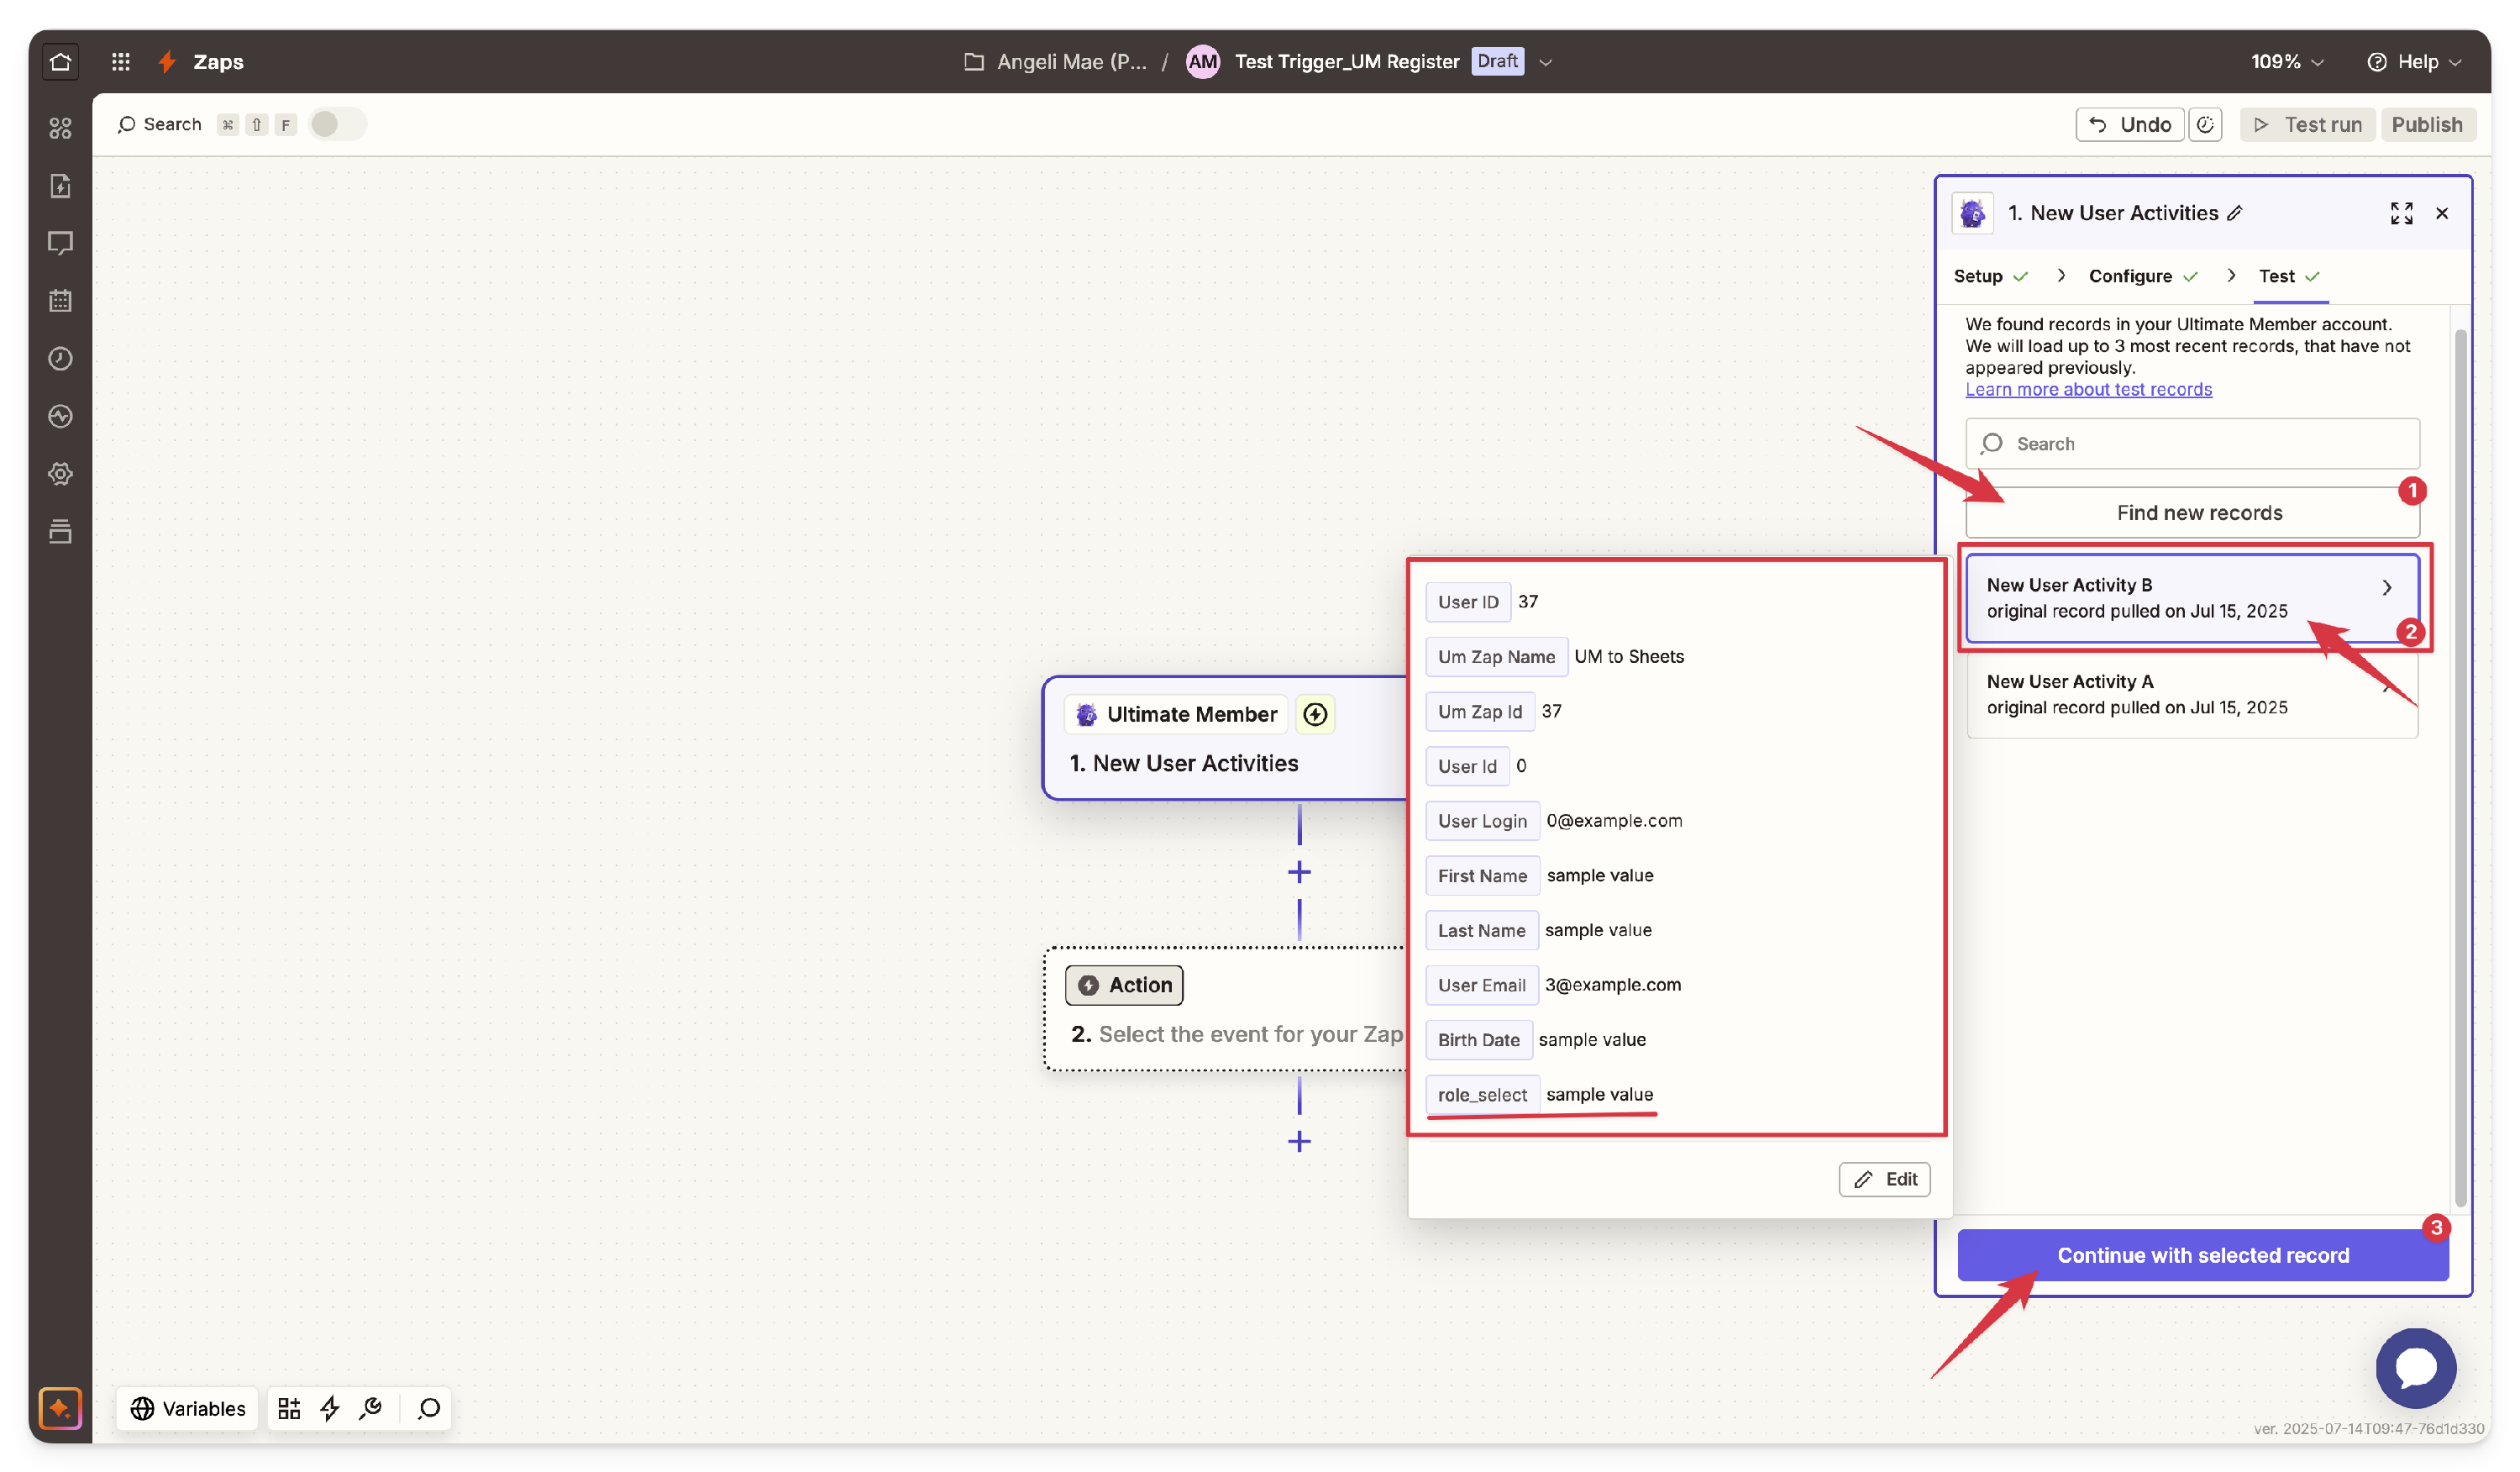
- Return to Zapier and click Find new records.
- You should see a new record with the sample data from the selected fields in UM Zapier.
- Select the latest record and click the Continue with Selected Record button to proceed.
- Imprtant Notes:
-
- If you send the same data again without any changes, Zapier won’t recognize it as a new activity.
- If you update any field data in WordPress and resend it using Send Data to Zapier, you’ll need to click Find New Records in Zapier to retrieve the updated data.
- In the Zap Trigger Settings, name your Zap, then click on Trigger to select the event that will start your Zap.


 Connect Your Ultimate Member Account:


Set Up the Action in Zapier
To set up an Action or event (the response to the Trigger), you’ll configure Google Sheets as the destination for the user registration data.
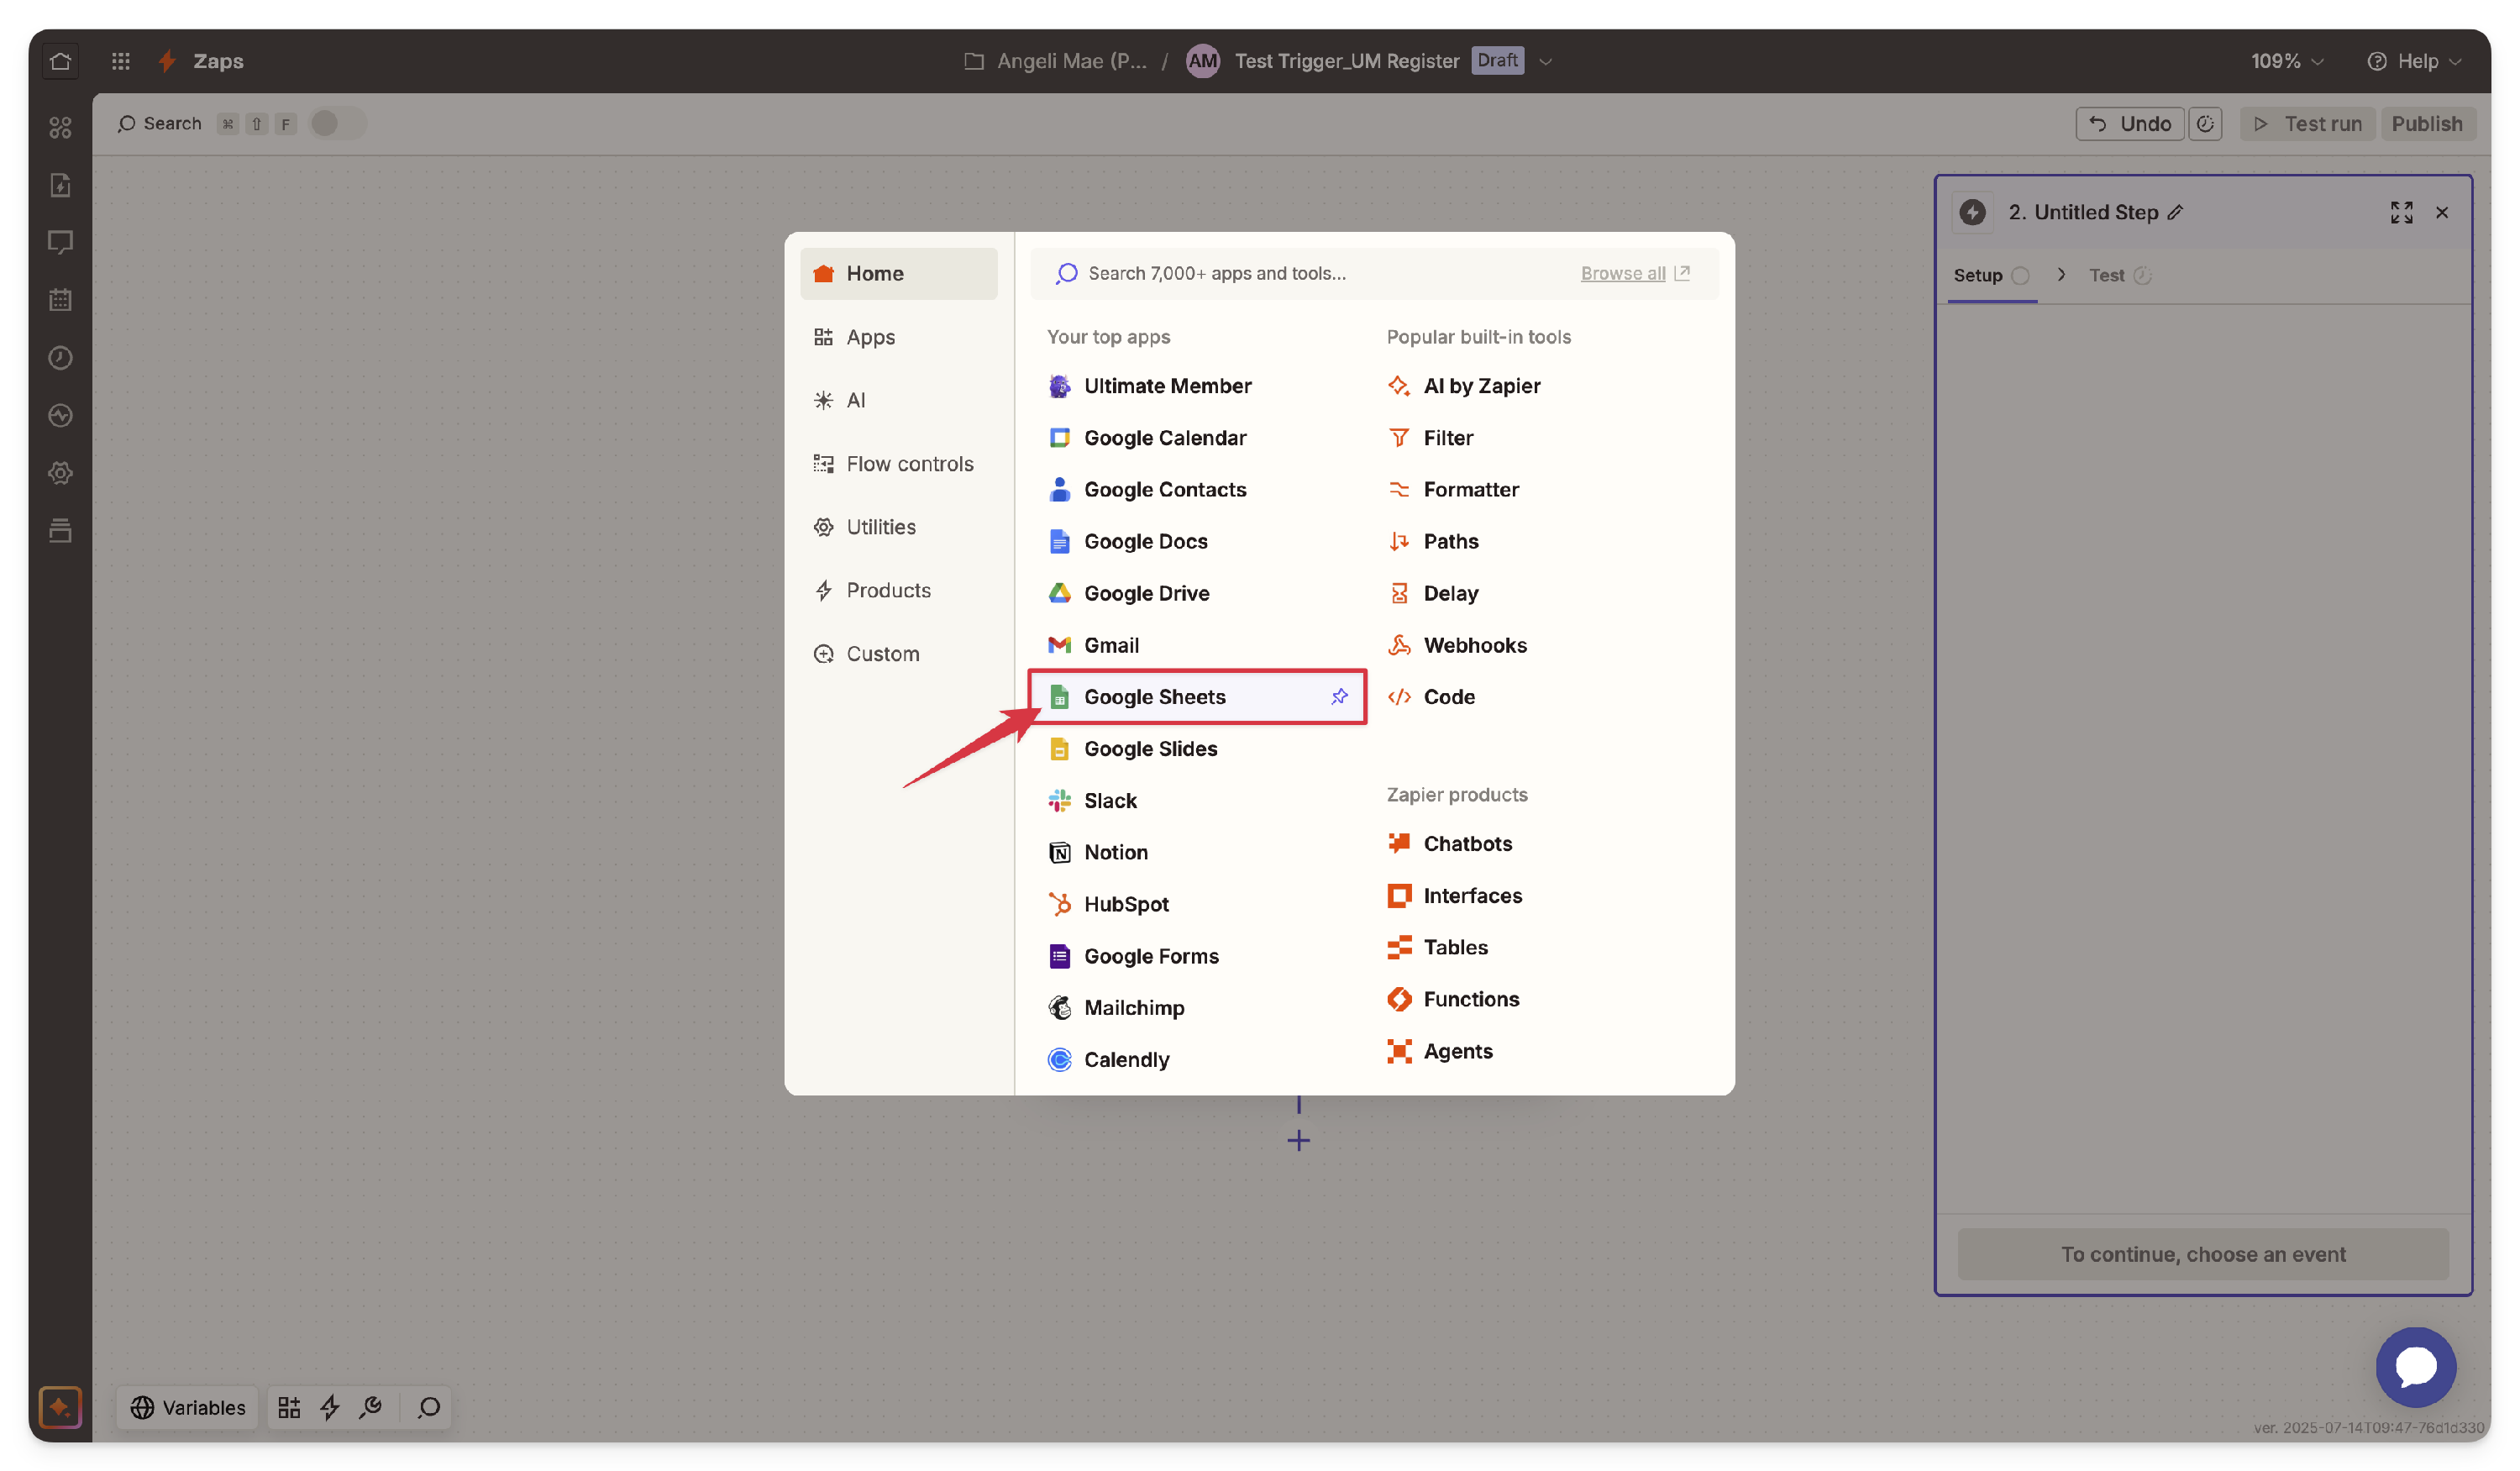
- Select Google Sheets as the Action App
- Search for Google Sheets in the application list and select it.
- Search for Google Sheets in the application list and select it.
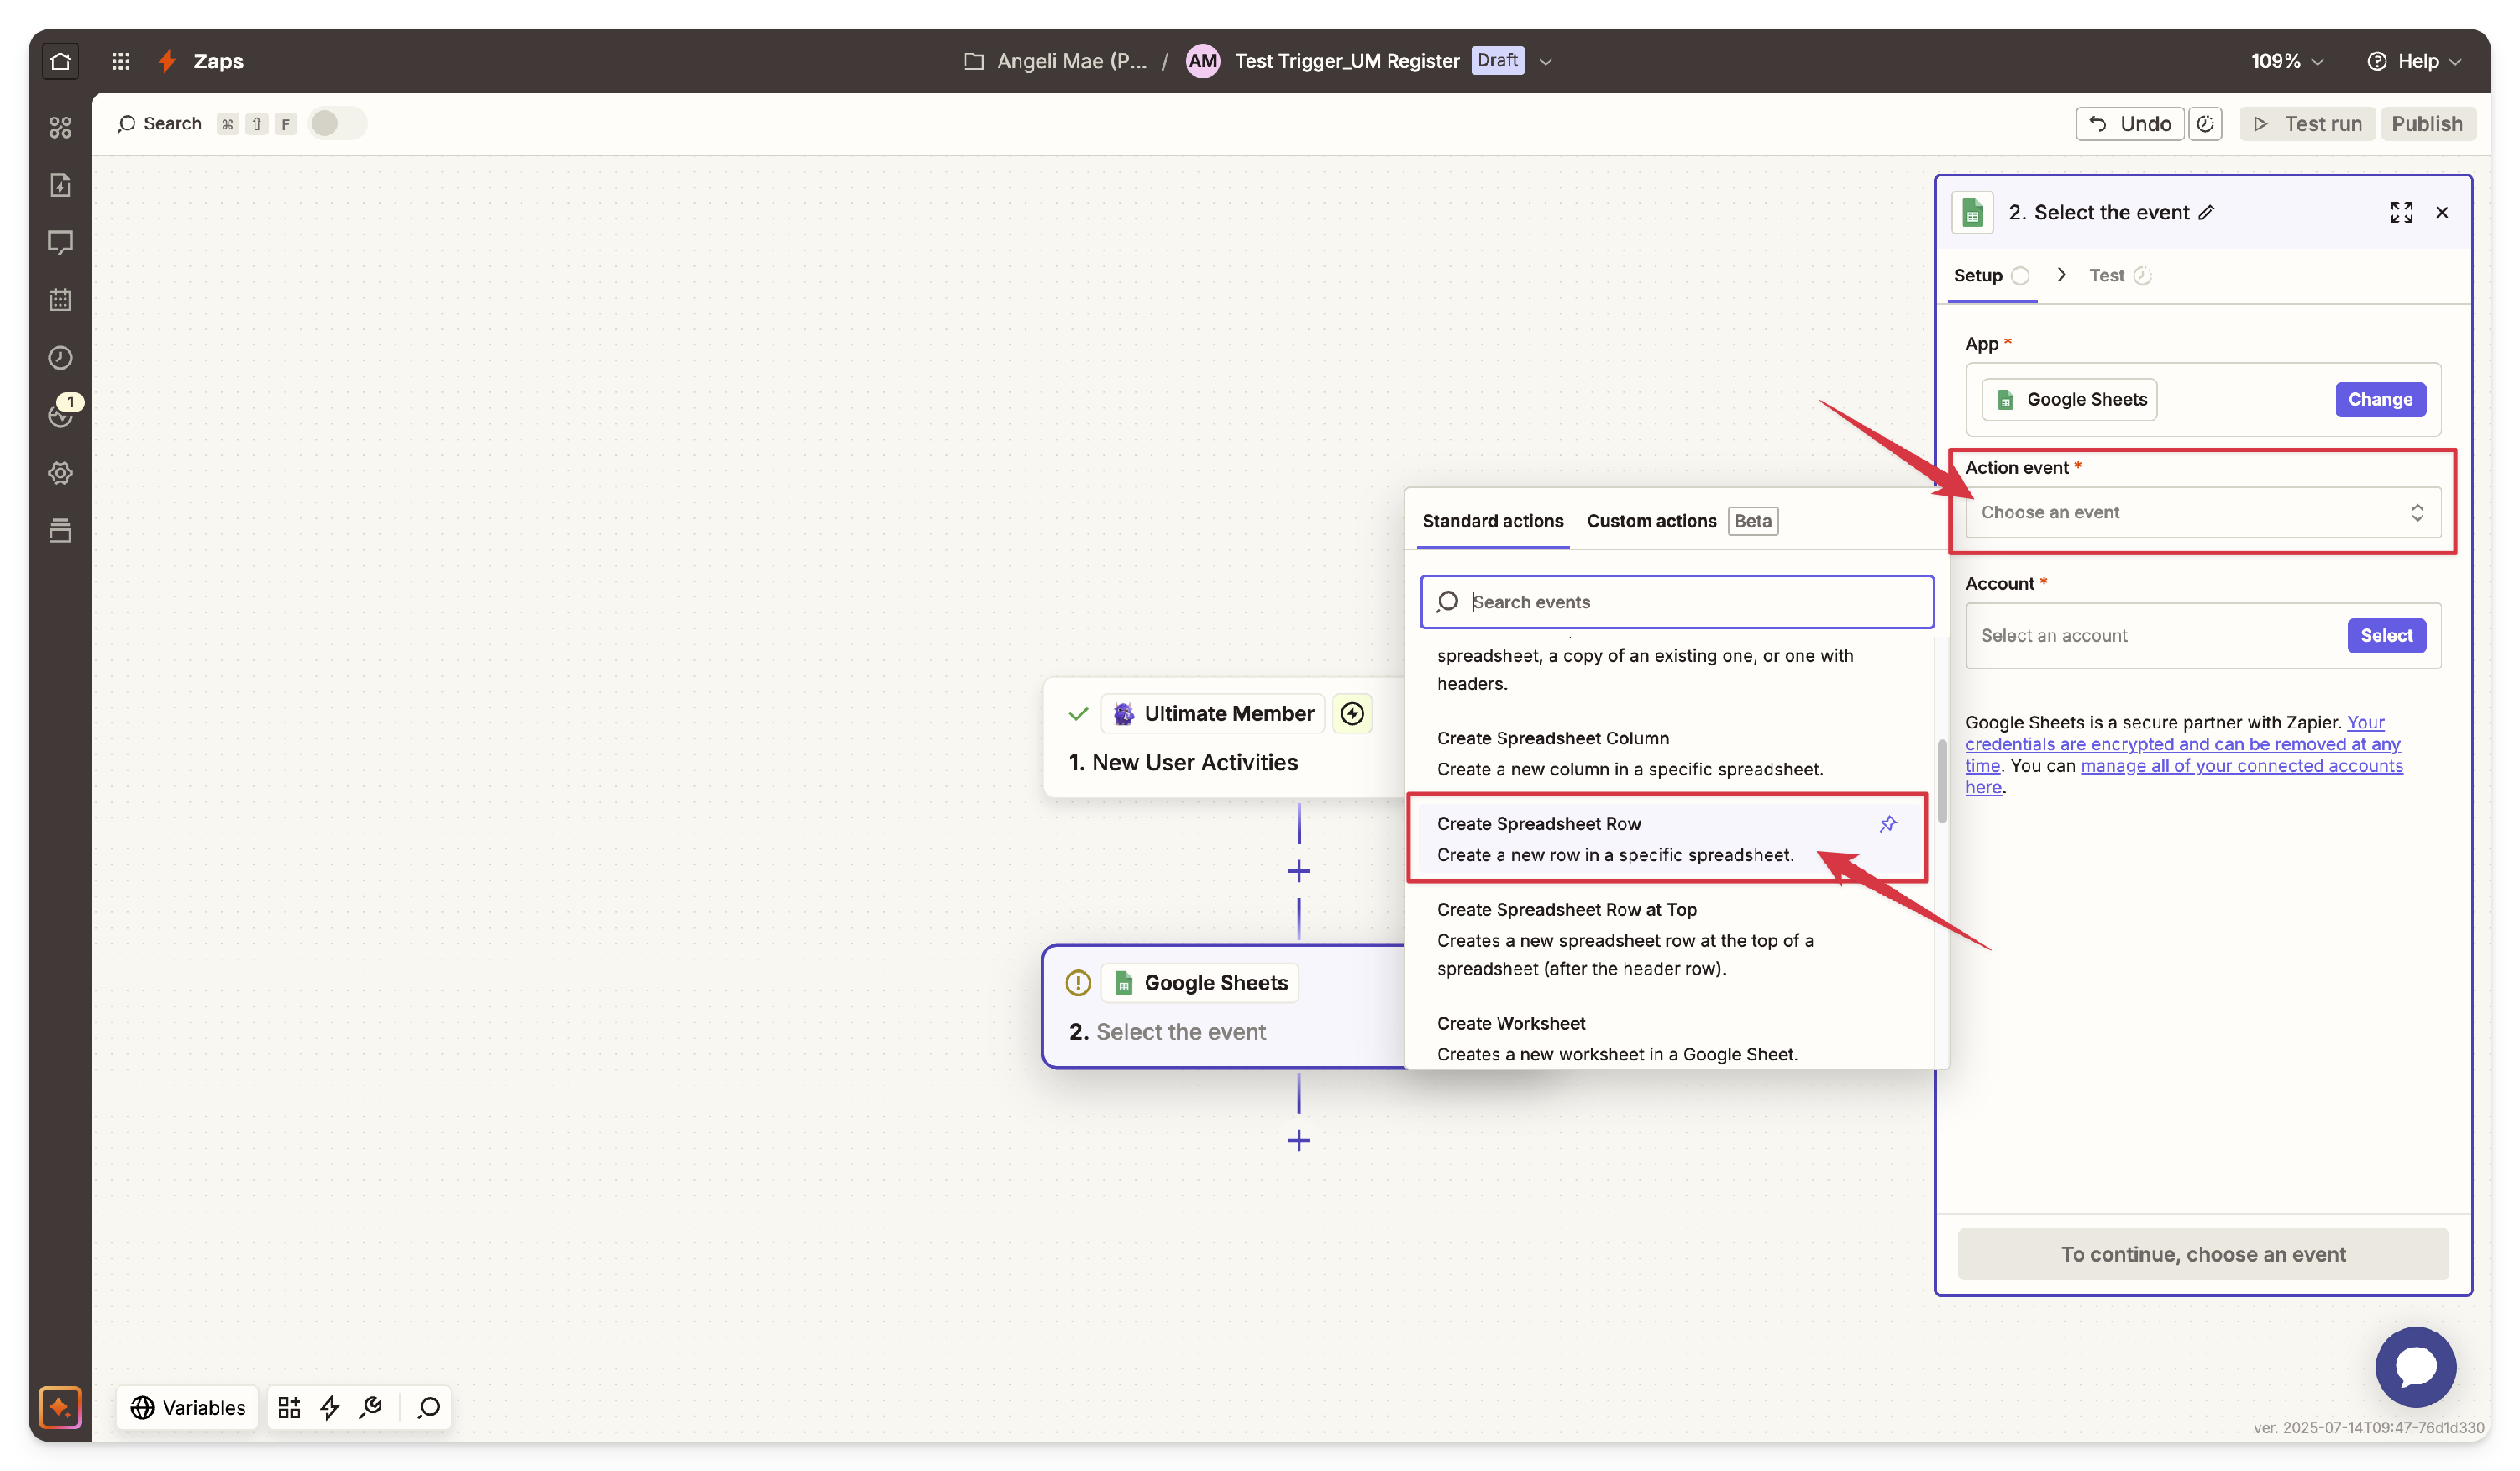
- Choose an Event
- In the Setup tab, within the step details on the right-hand side, go to the Action Event and select an event (e.g., Create Spreadsheet Row) to define the action that will be executed when the Zap runs.
- In the Setup tab, within the step details on the right-hand side, go to the Action Event and select an event (e.g., Create Spreadsheet Row) to define the action that will be executed when the Zap runs.
- Connect Your Google Sheets Account
- In the Account option, choose the account you want to connect, or connect a new account.
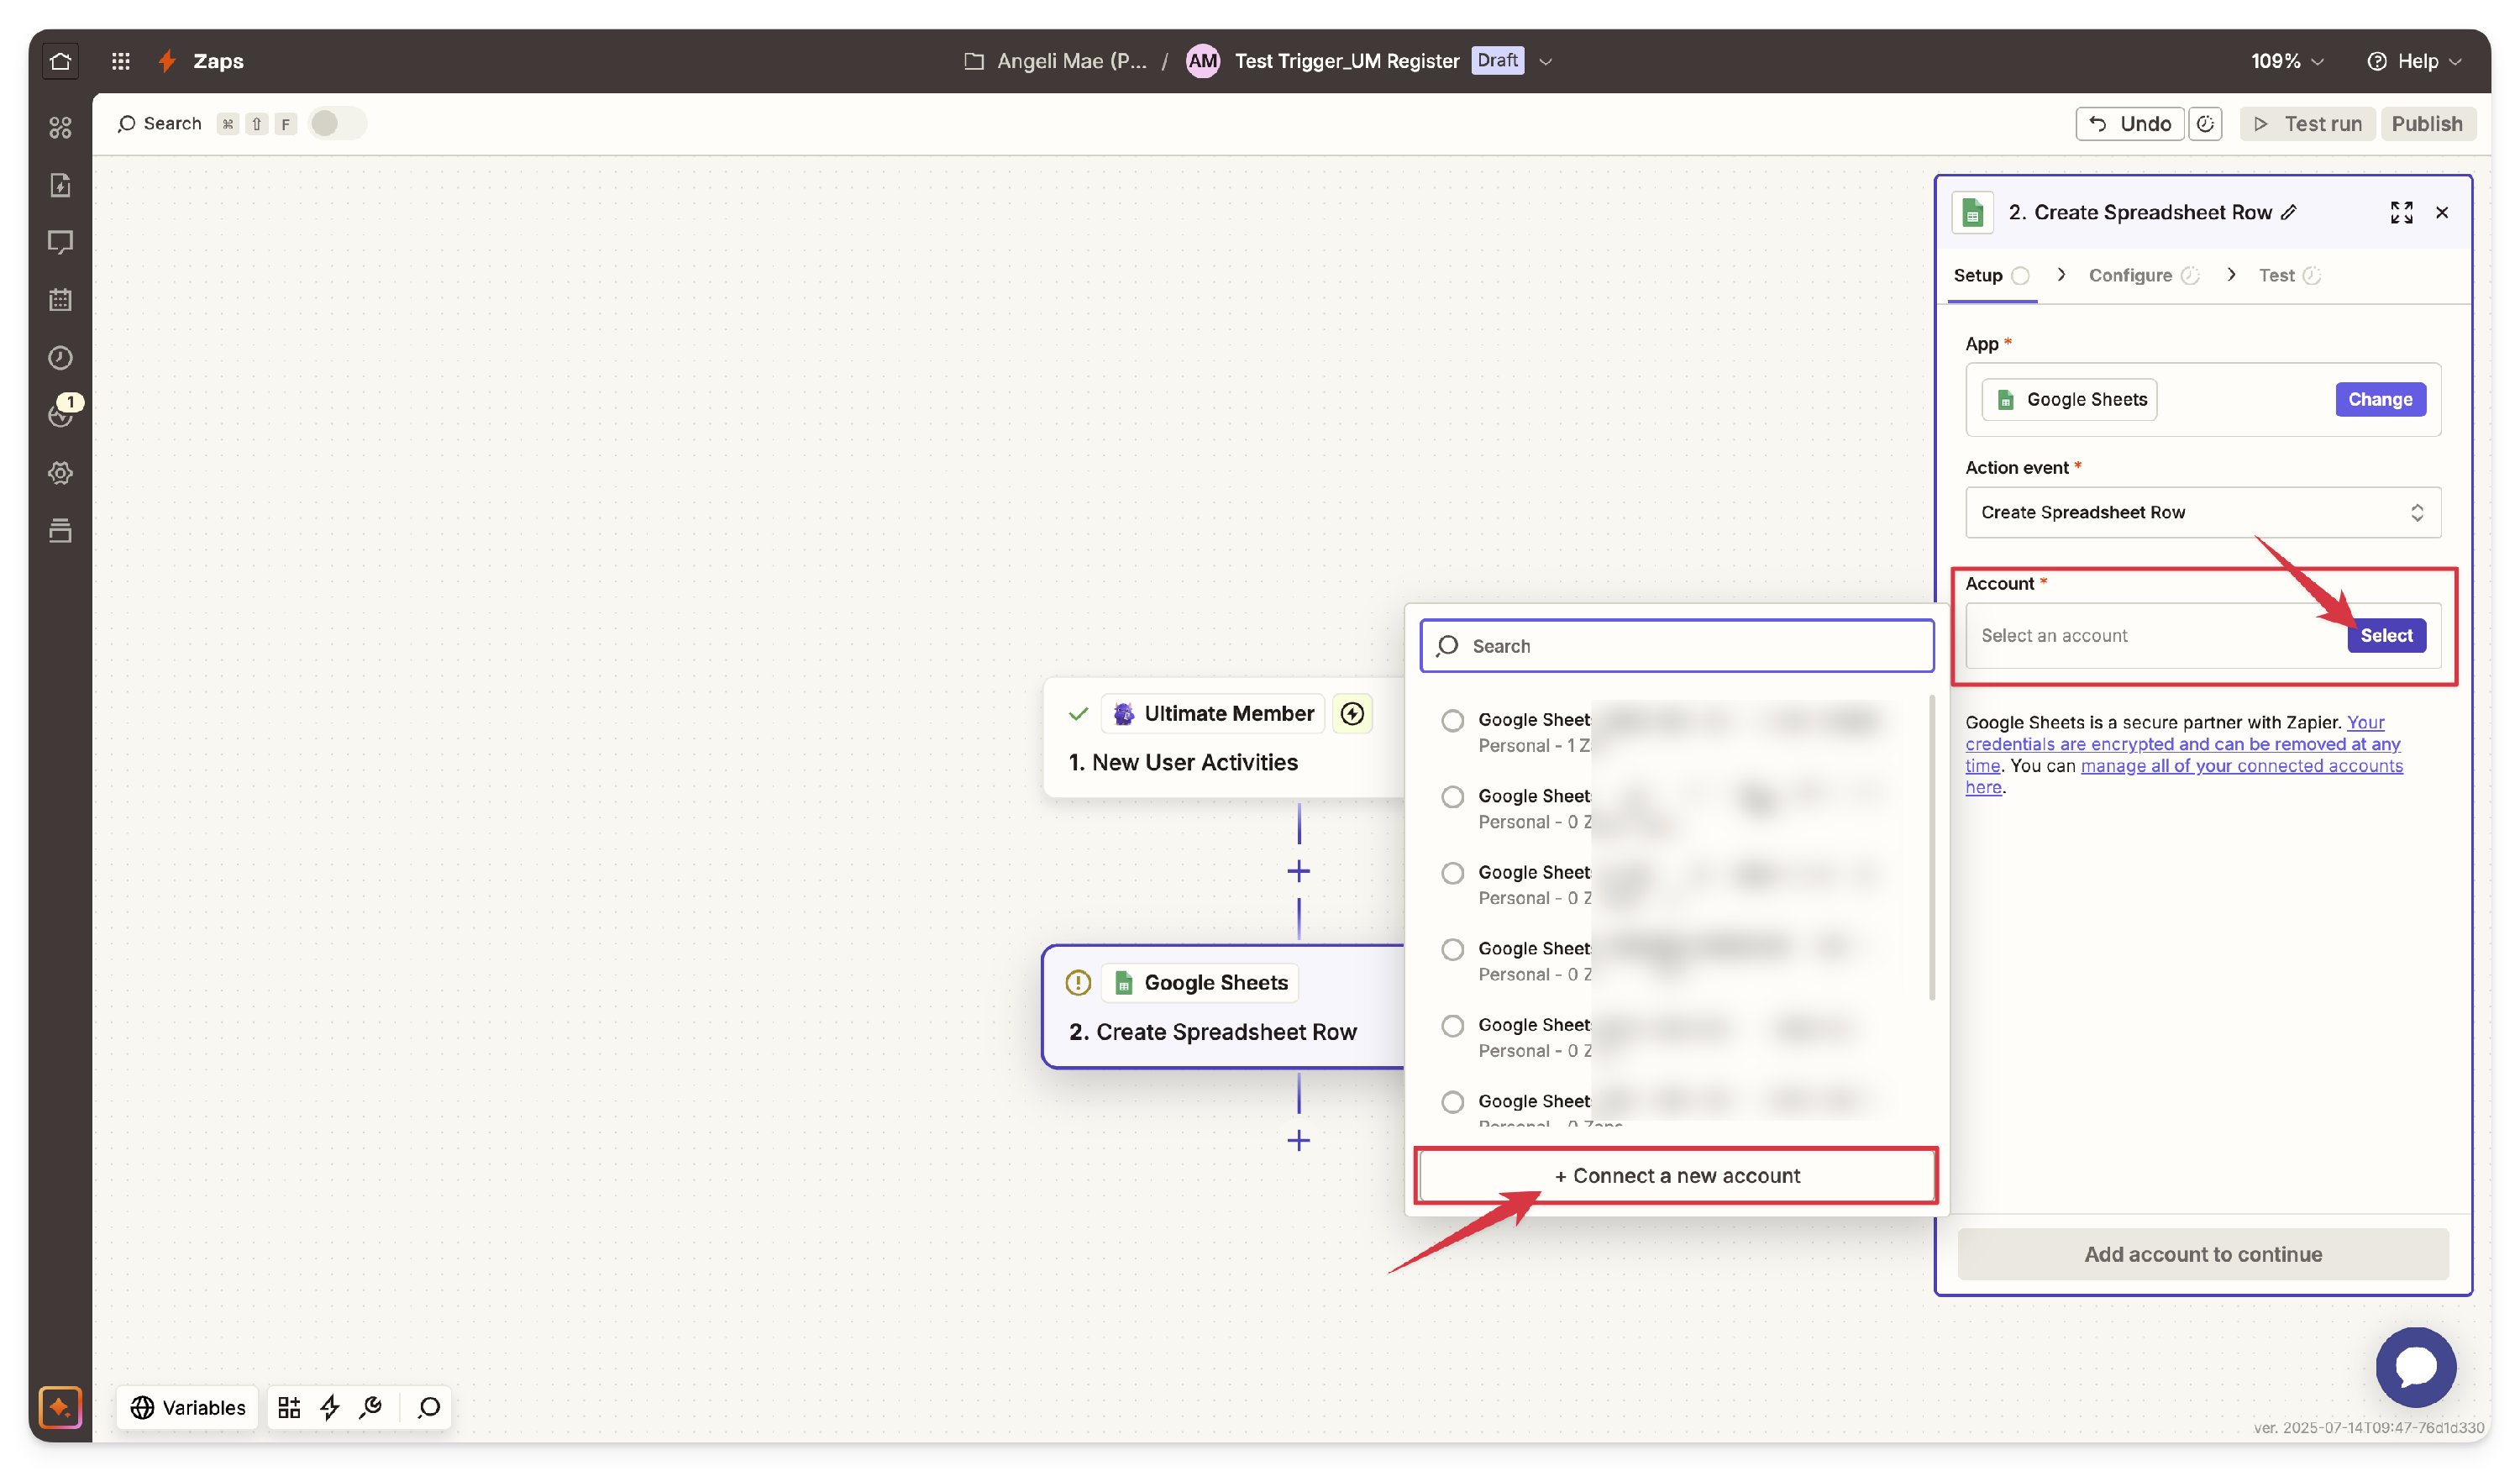
- Then click the "Continue" button once connected to your account.
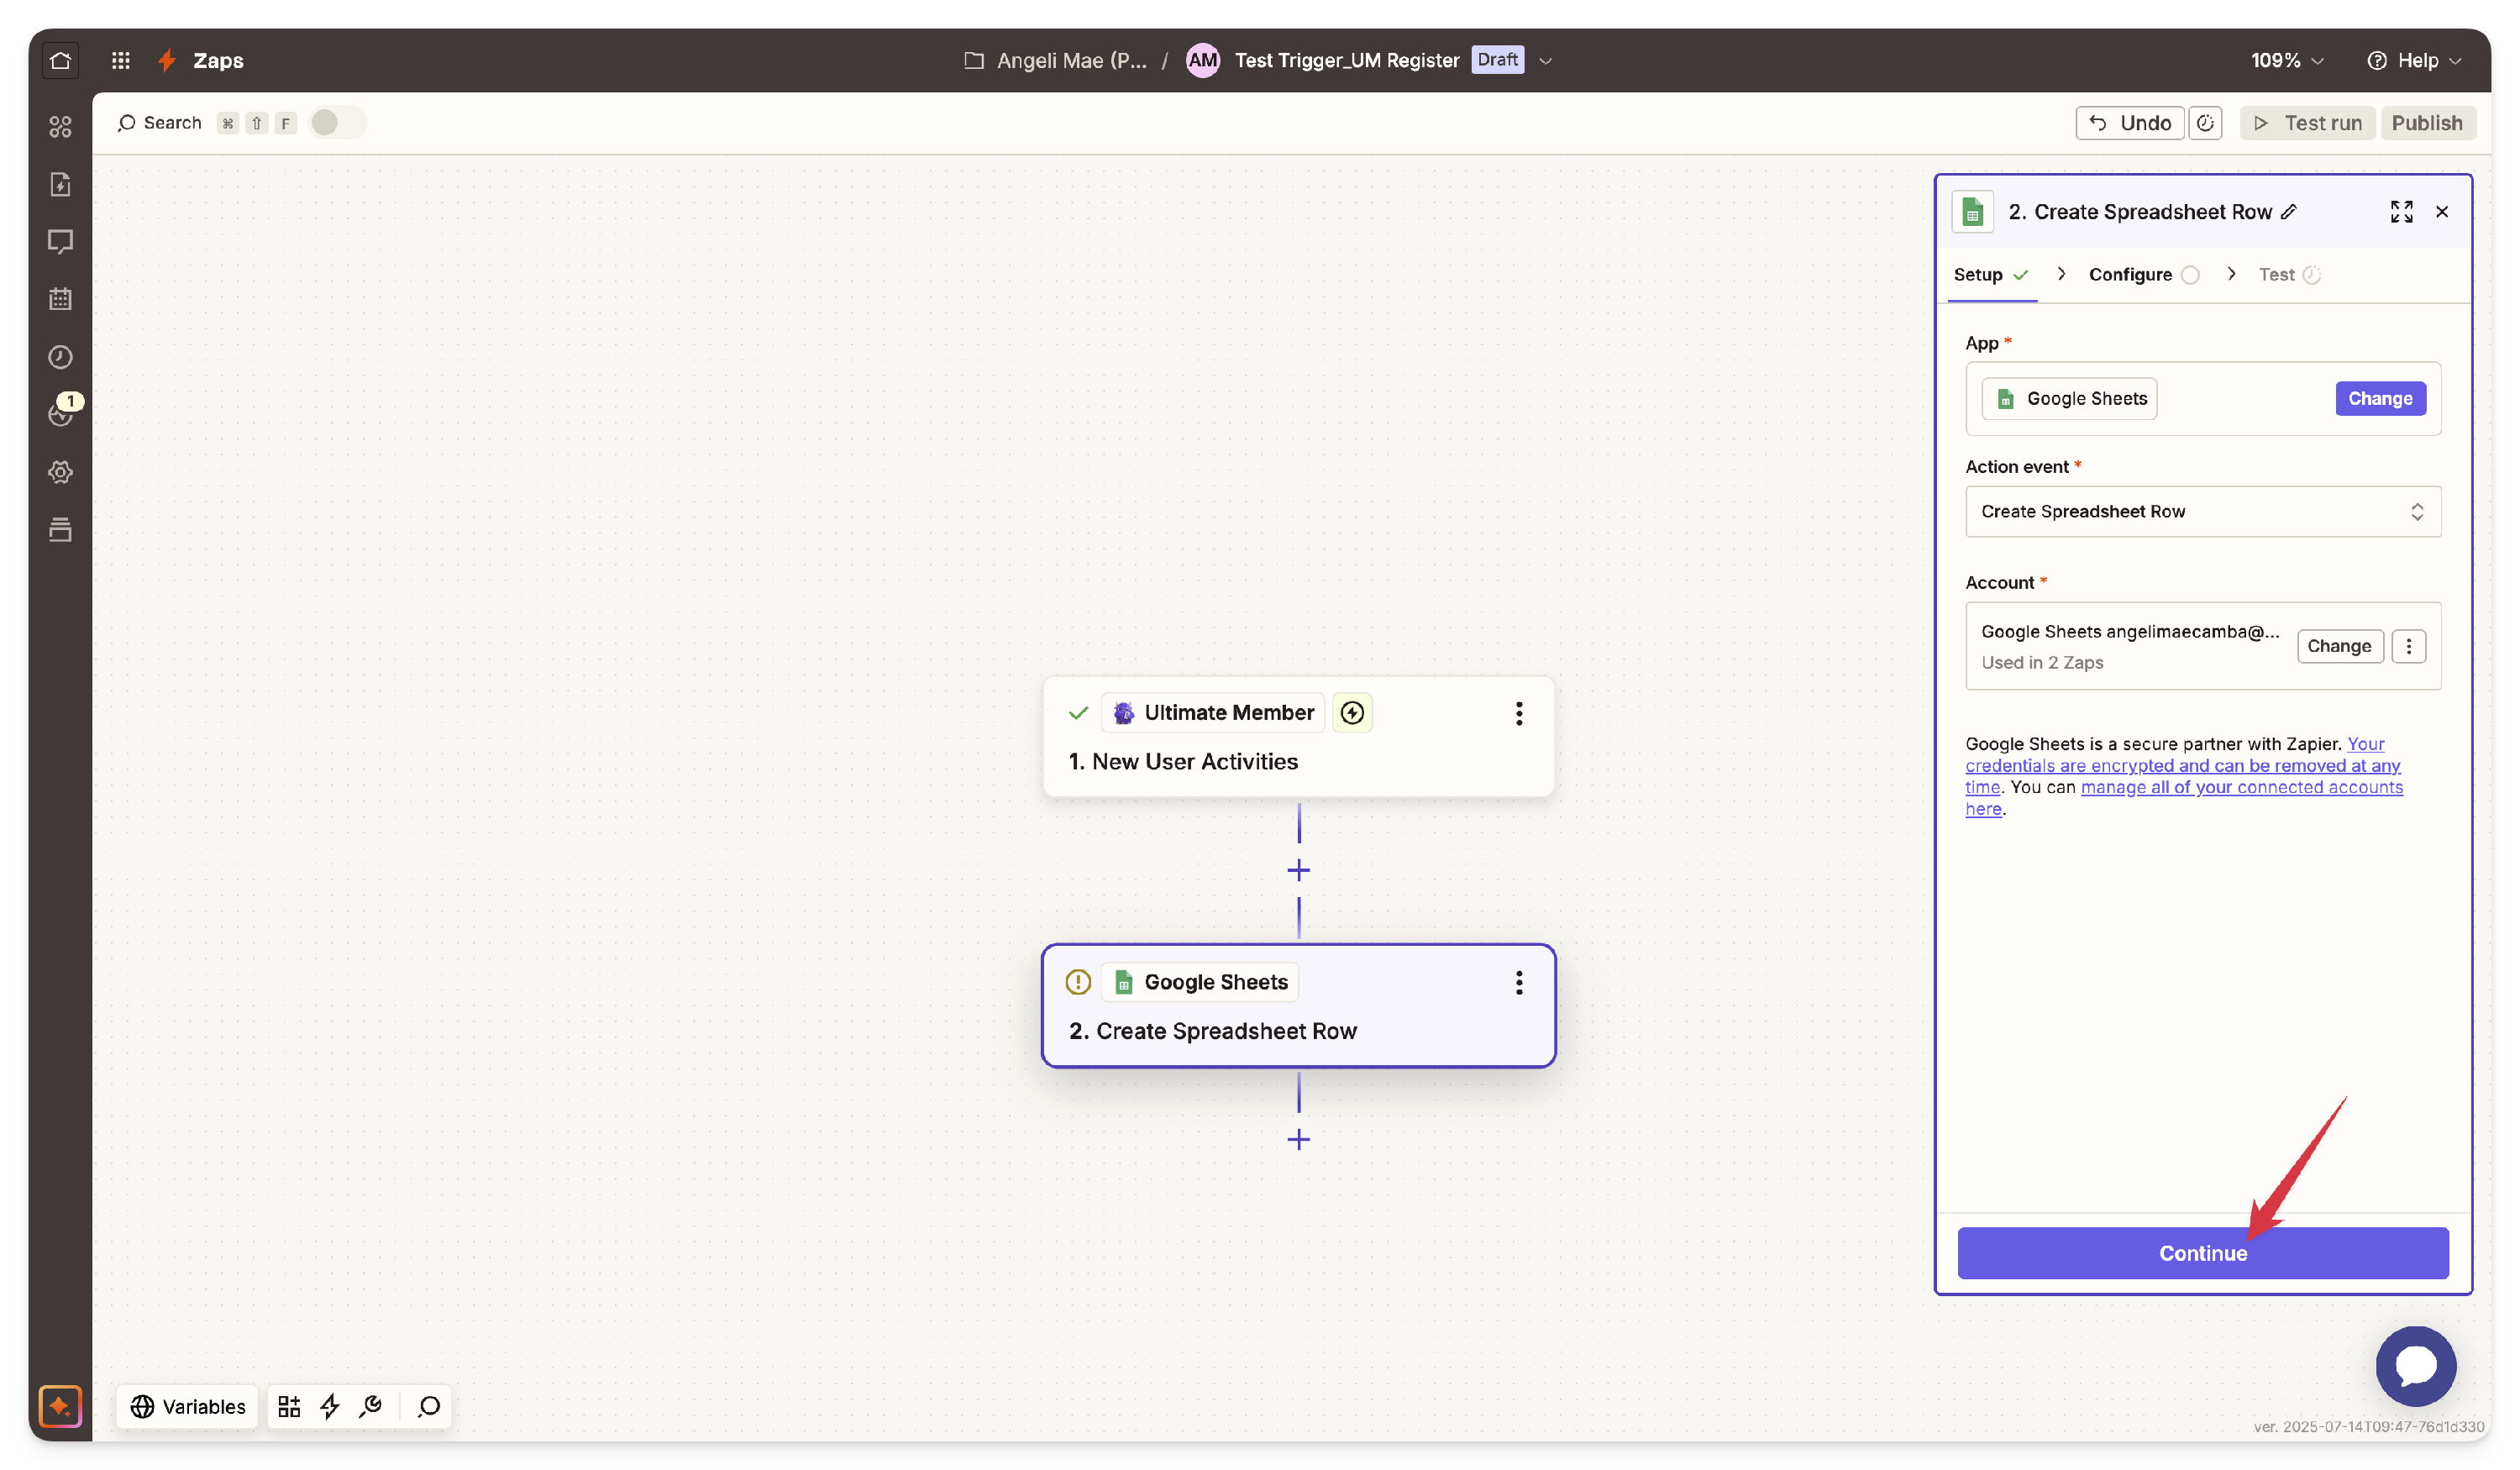
- In the Account option, choose the account you want to connect, or connect a new account.
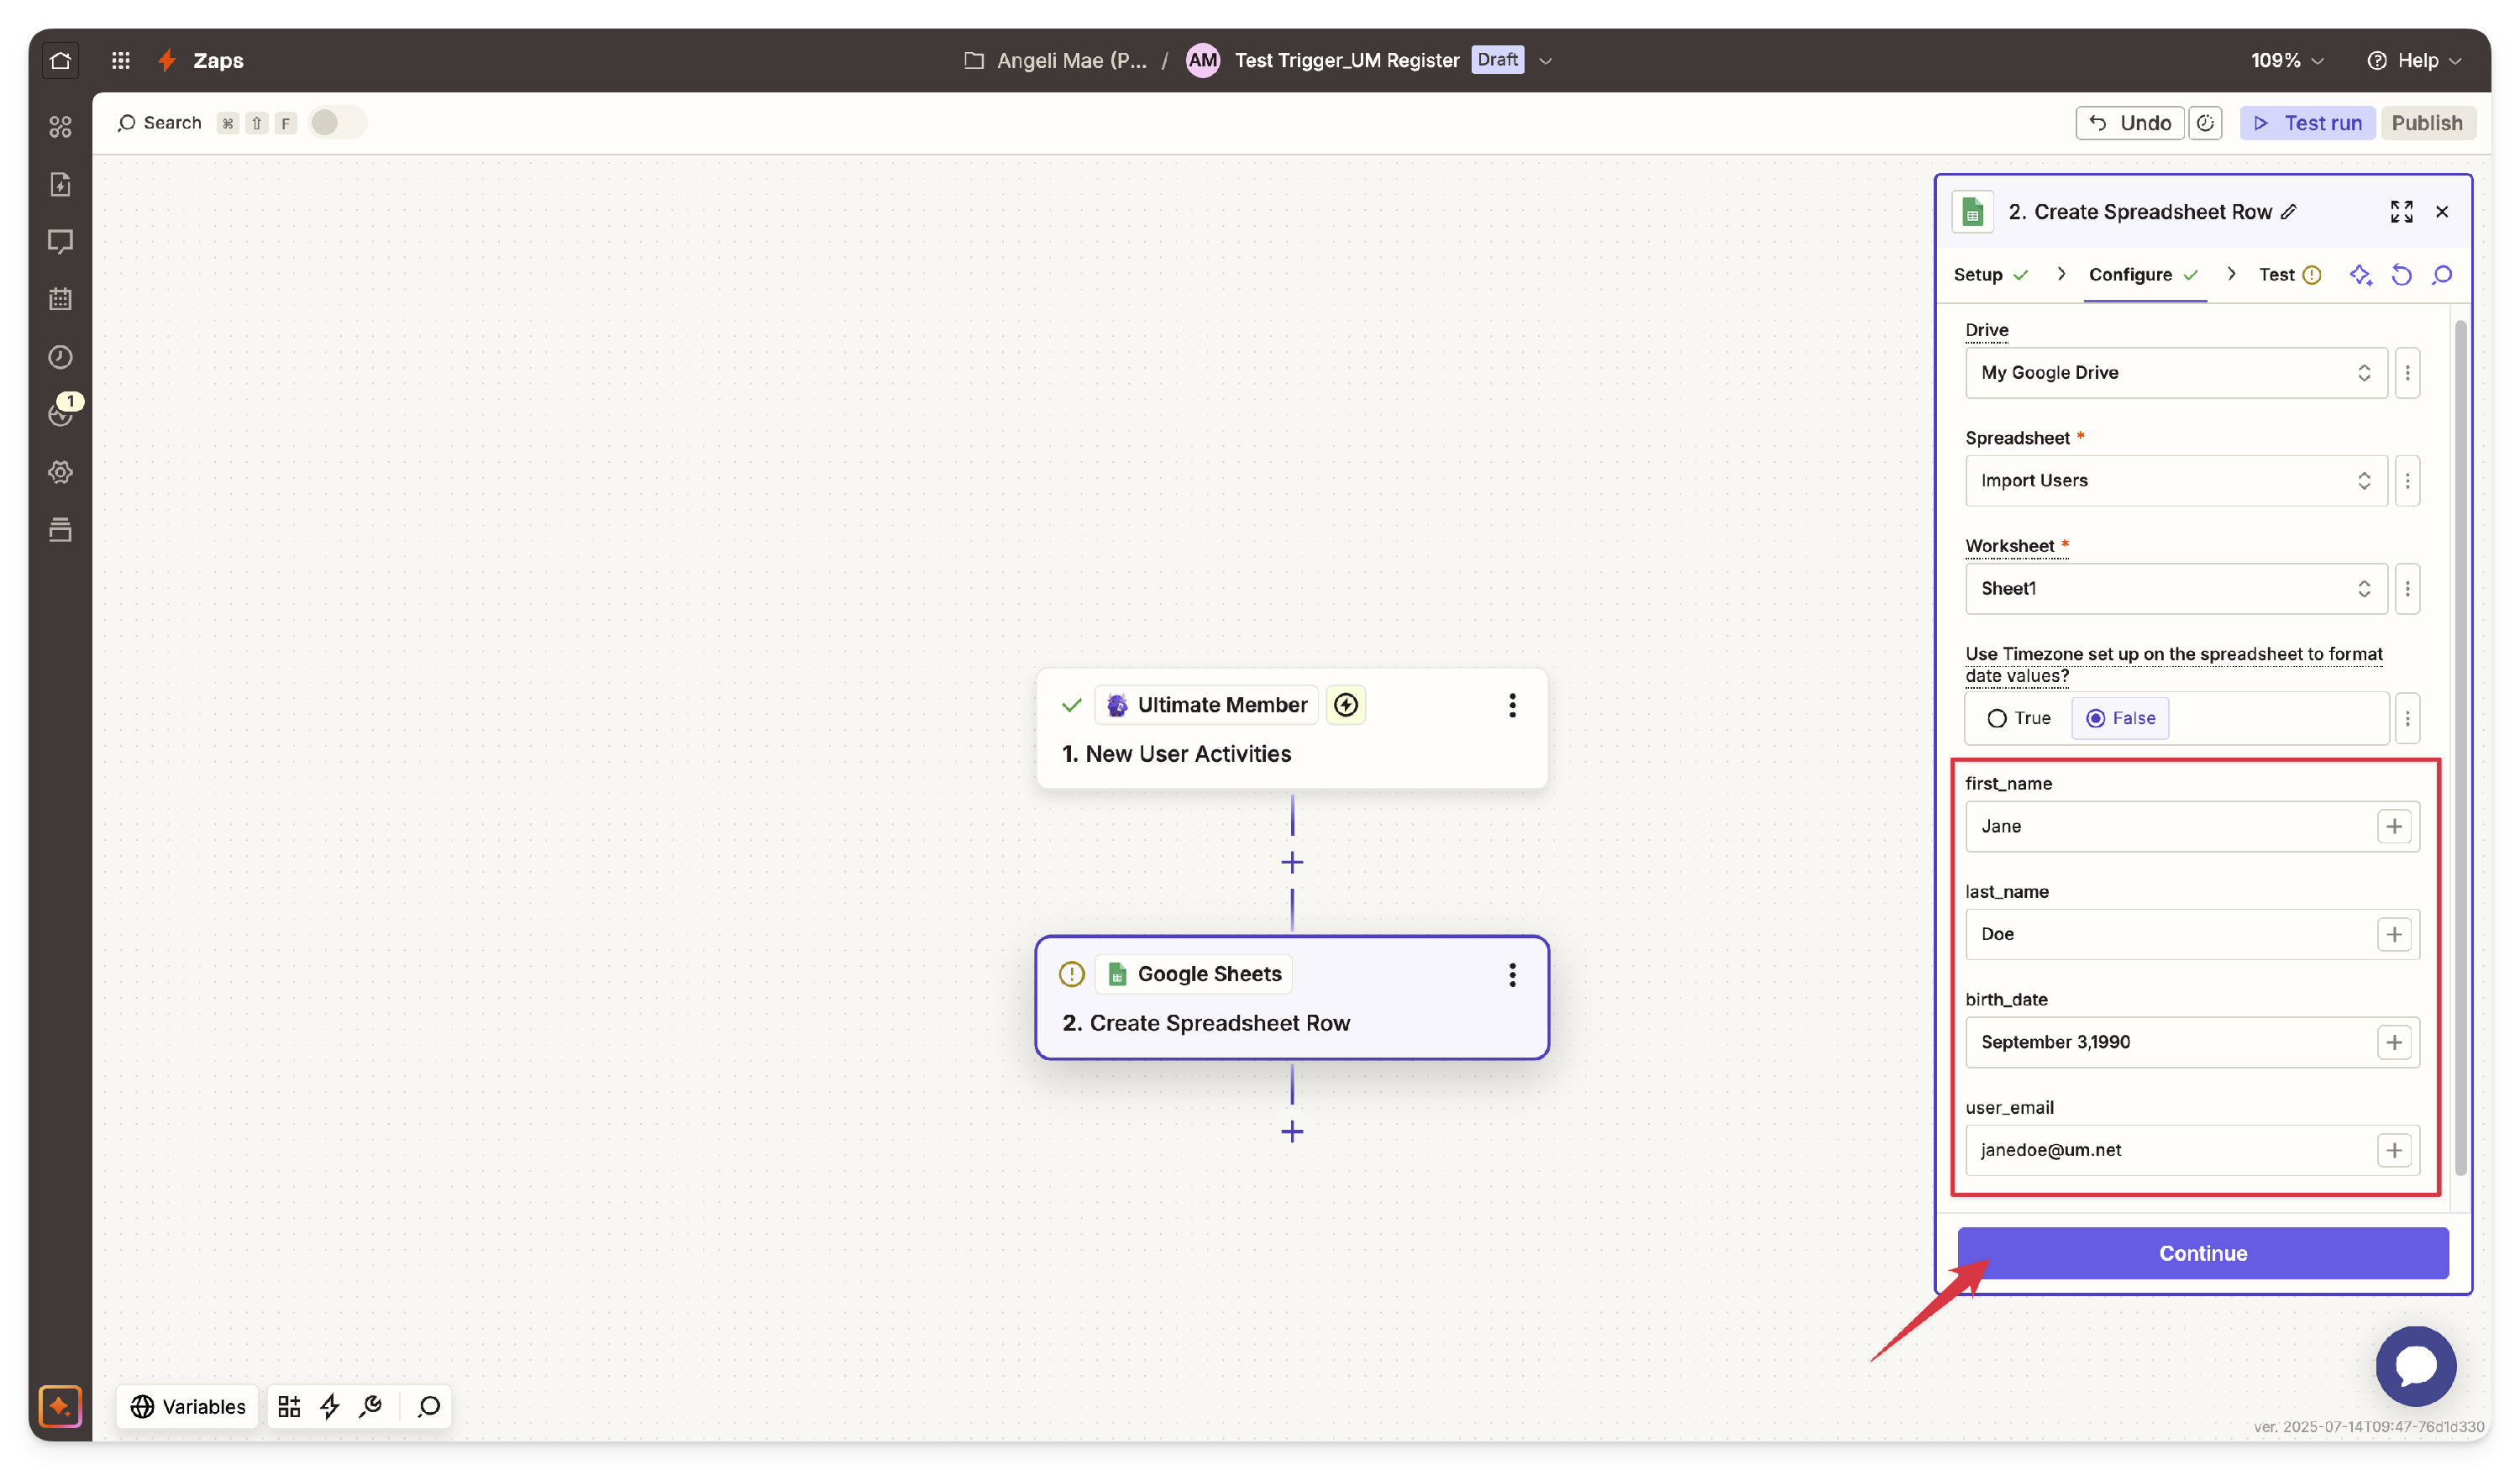
- Configure Action Settings
- In the Configure tab:
- Select the Drive, Spreadsheet, and Worksheet you want to use.
- Enter the data into the fields that you have configured in the Ultimate Member Trigger. These fields determine where the registration data will be stored in Google Sheets. Once the fields are mapped.
- Click the Continue button to proceed with testing and confirm that the data will be transferred correctly.
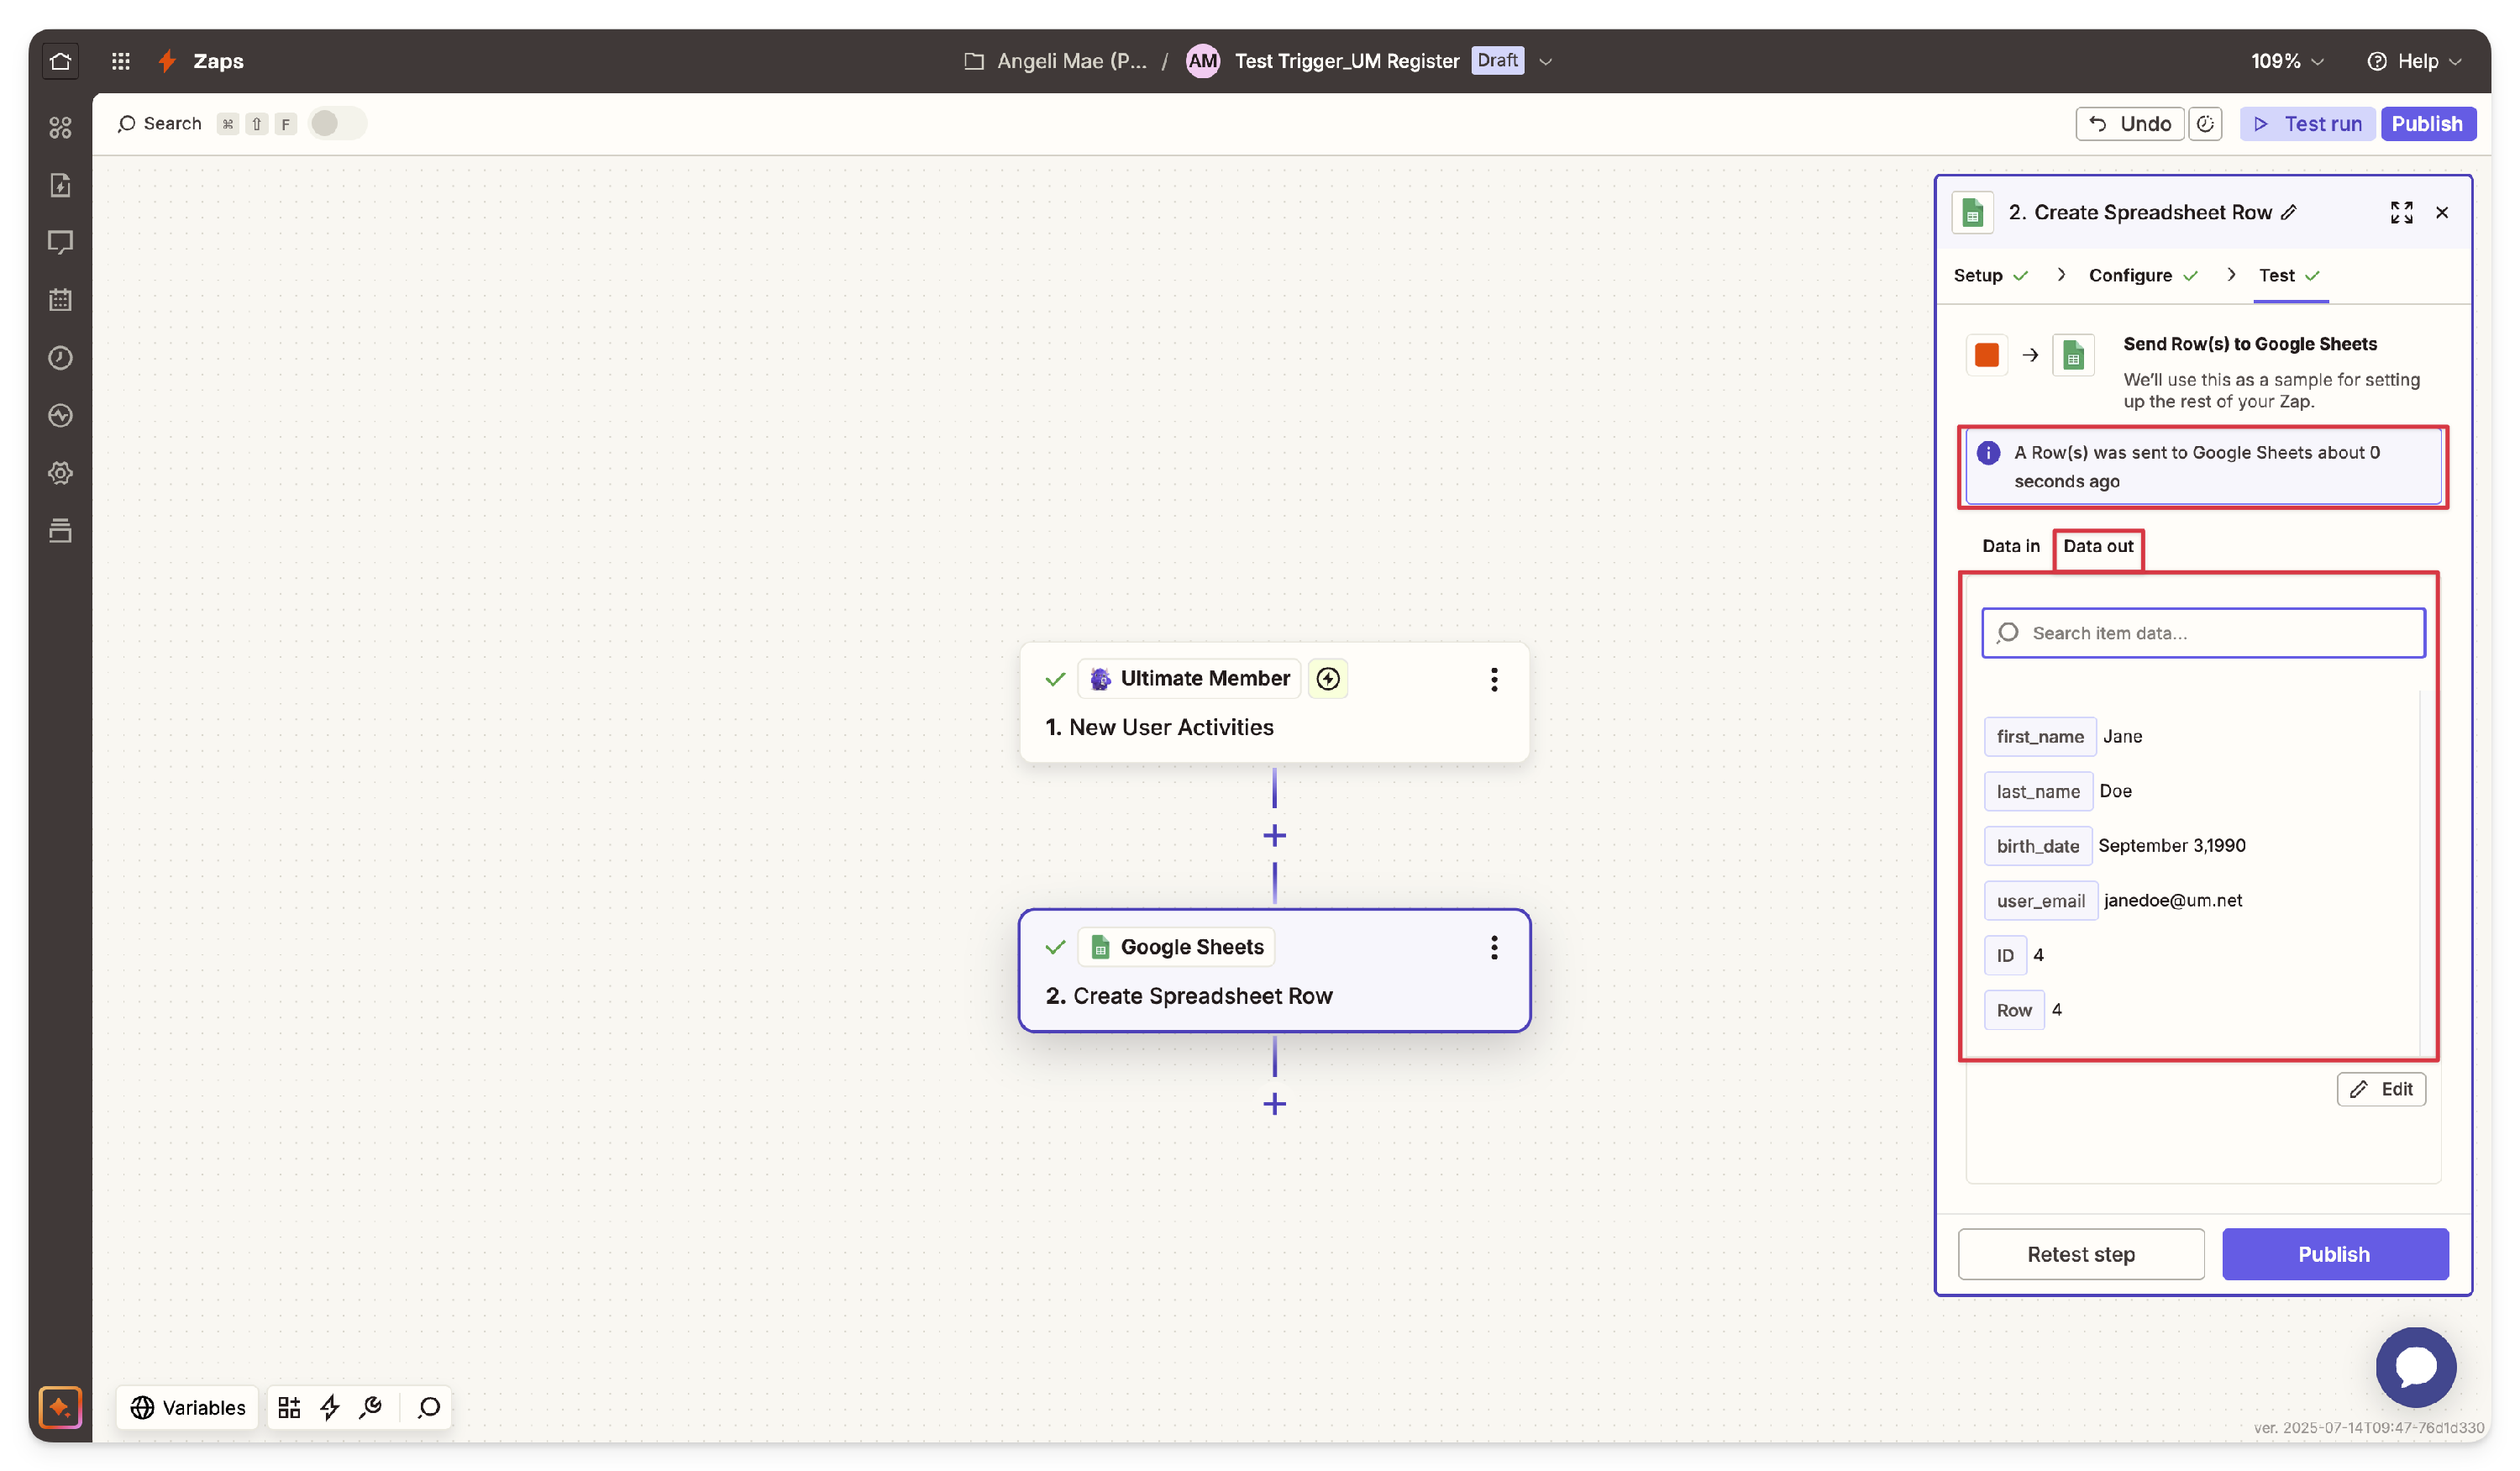
- You can check in the Data In subtab the data you have mapped, it is a test sample data that you would've input into your site. Then click the Test step button.
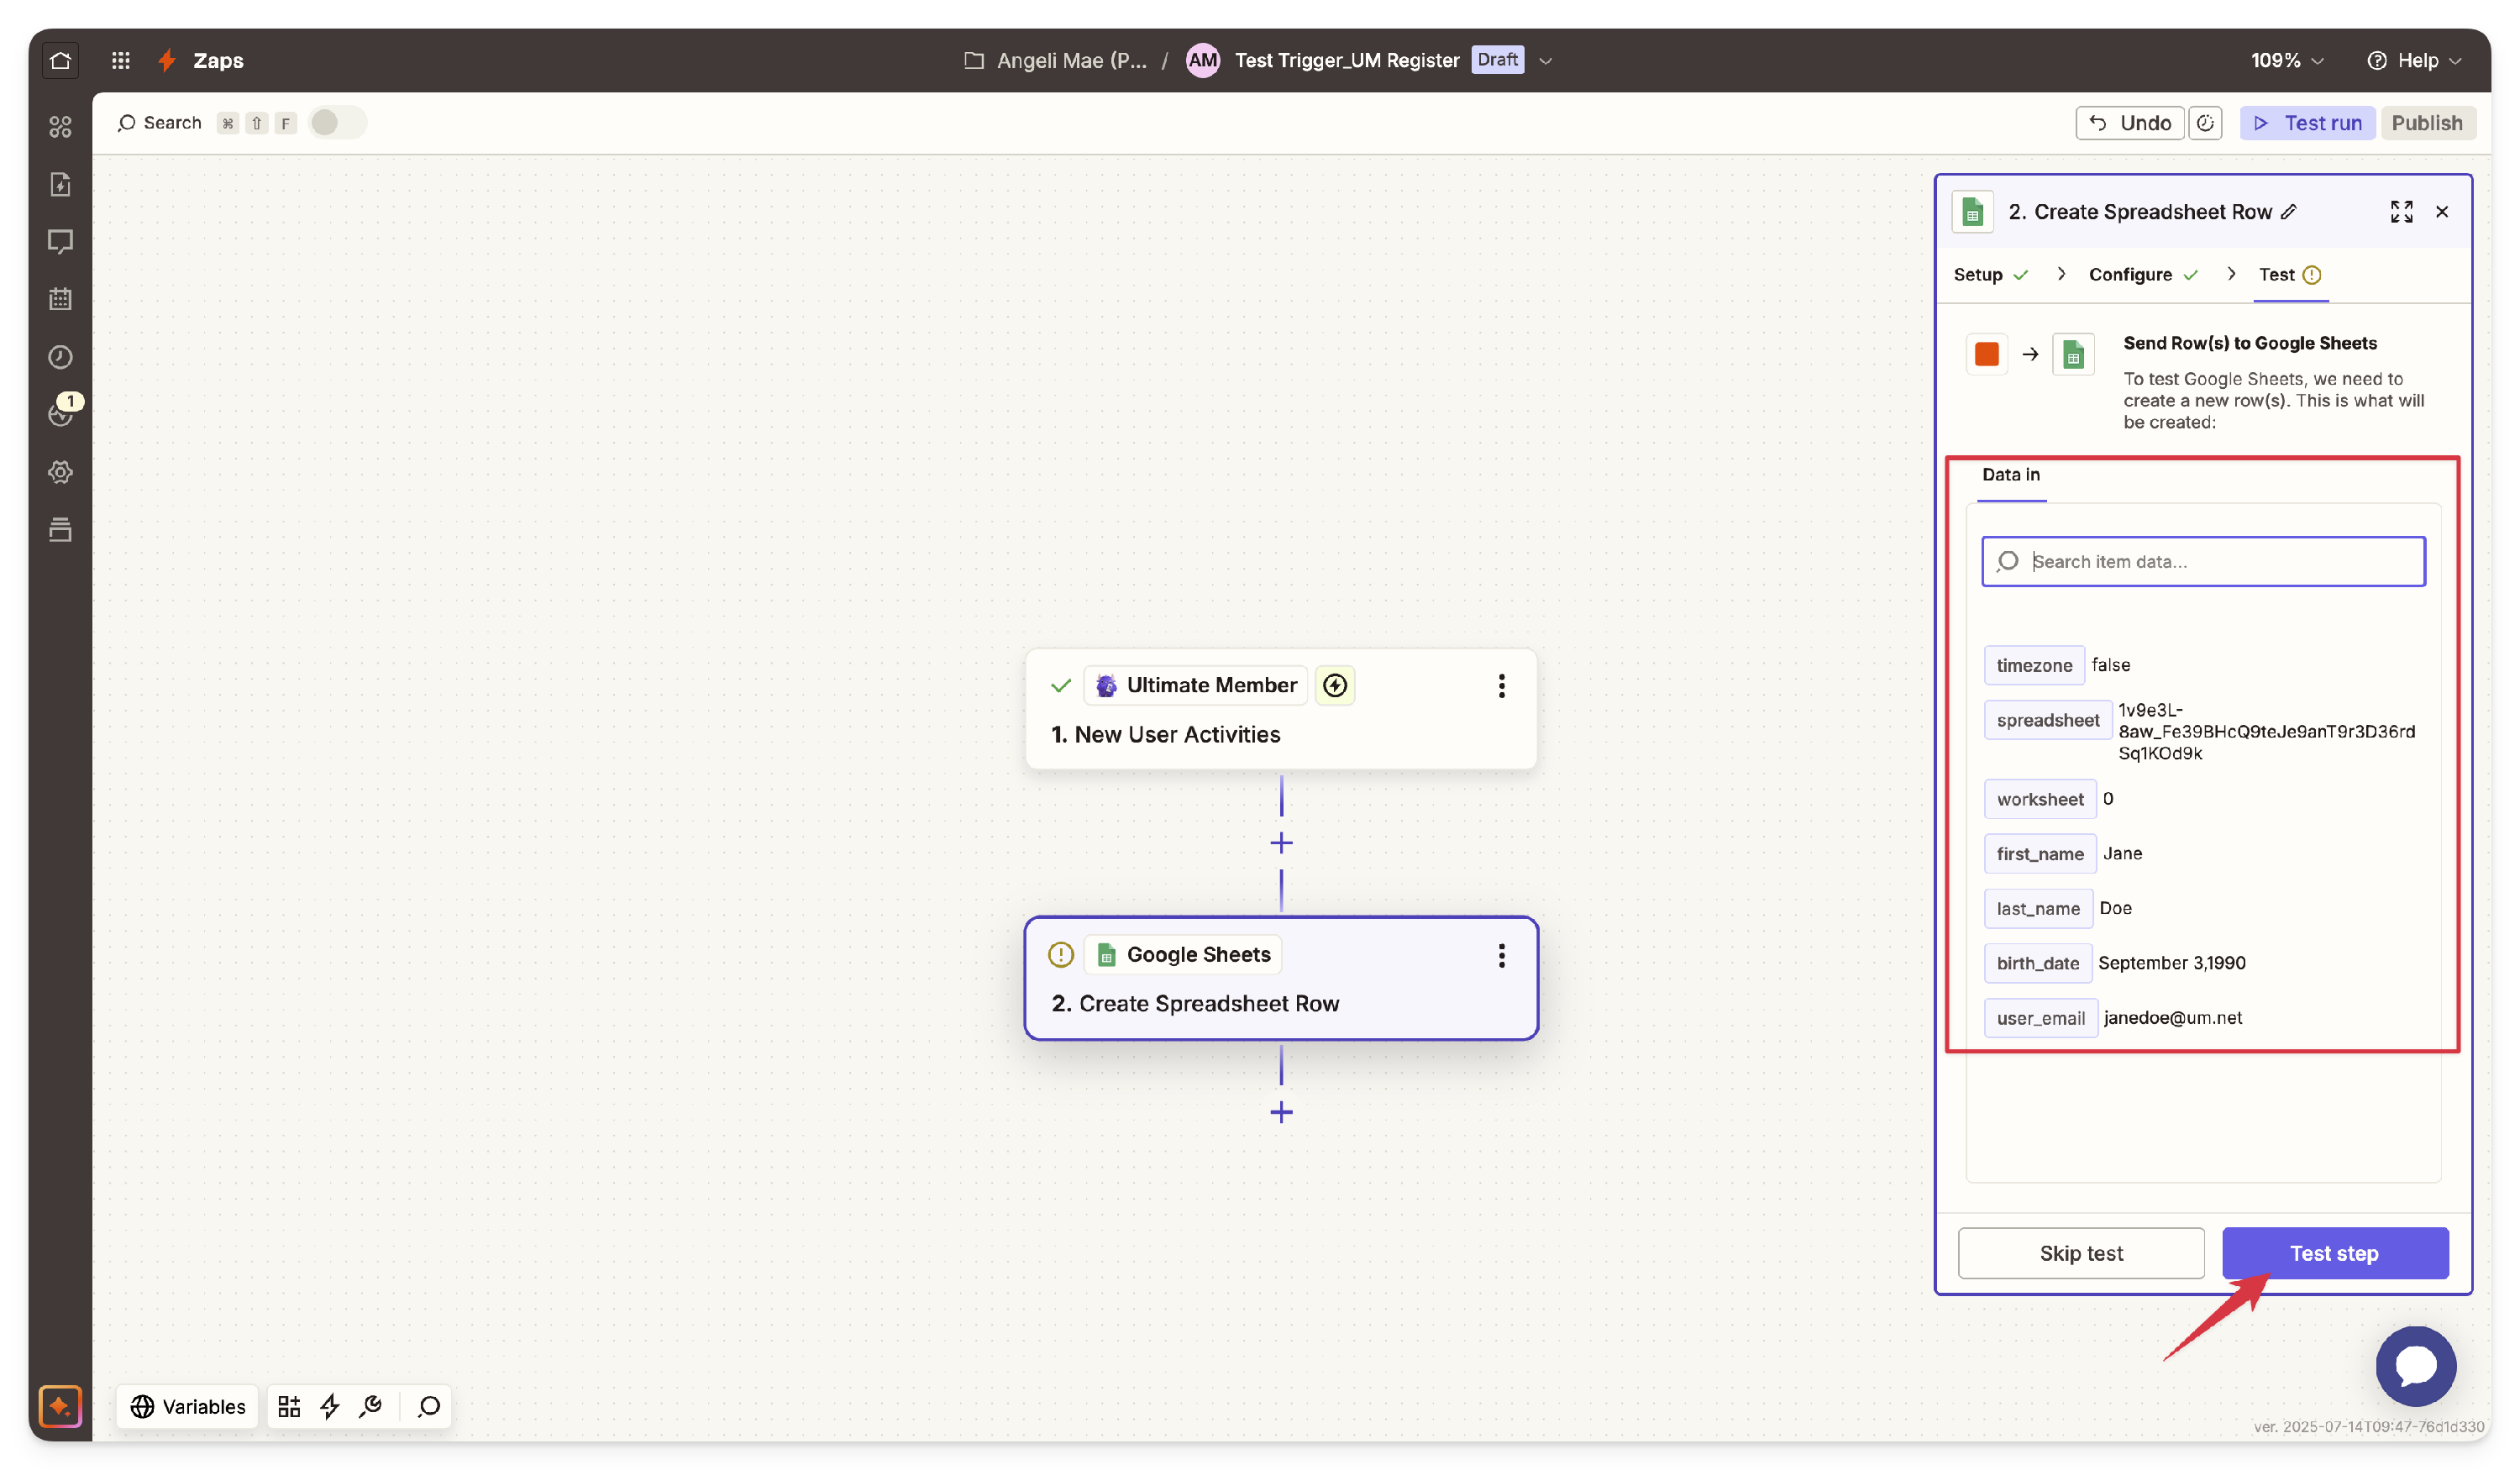
- After the test, you'll see here a notice that the row(s) were sent to the Google sheet. The Data out subtab shows the data that was sent to your Google sheet.
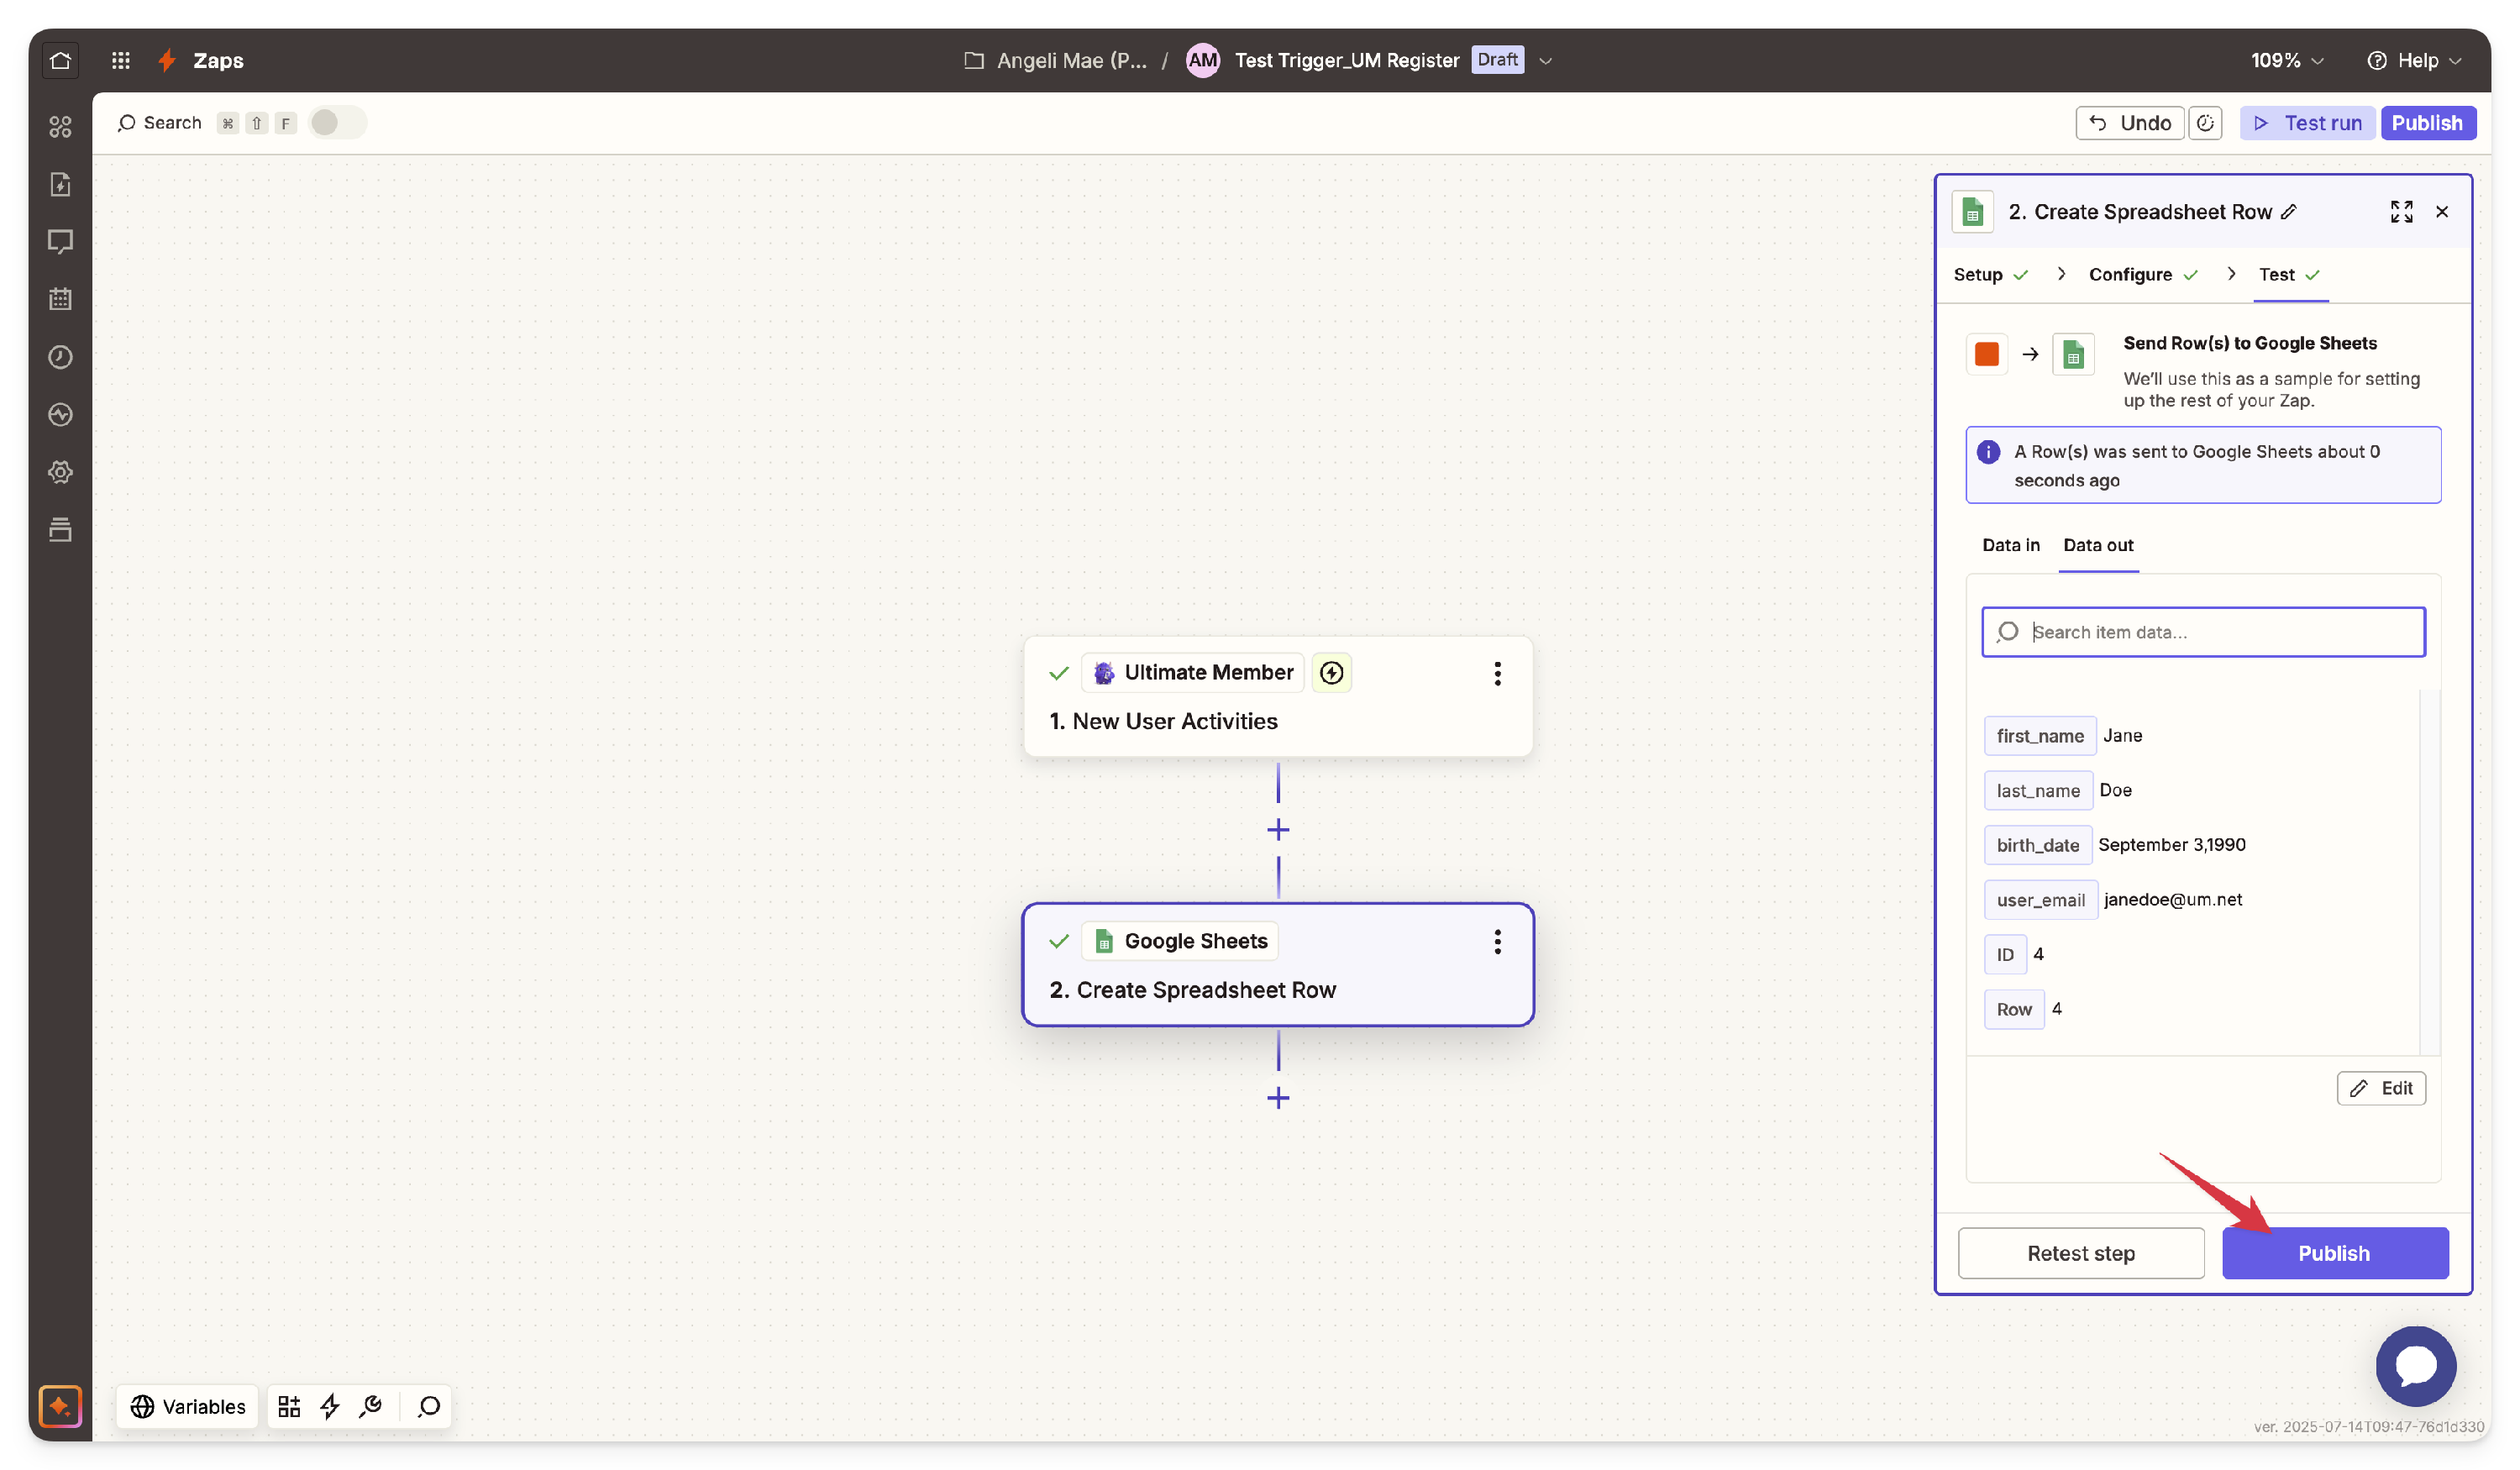
- Go to your Google sheet and check if the data was sent successfully. Click the Publish button on Zapier if successful.


Publish Your Zap
- Click Publish to save and activate your Zap. This step ensures synchronization between Ultimate Member and Google Sheets for every new registration on your site.
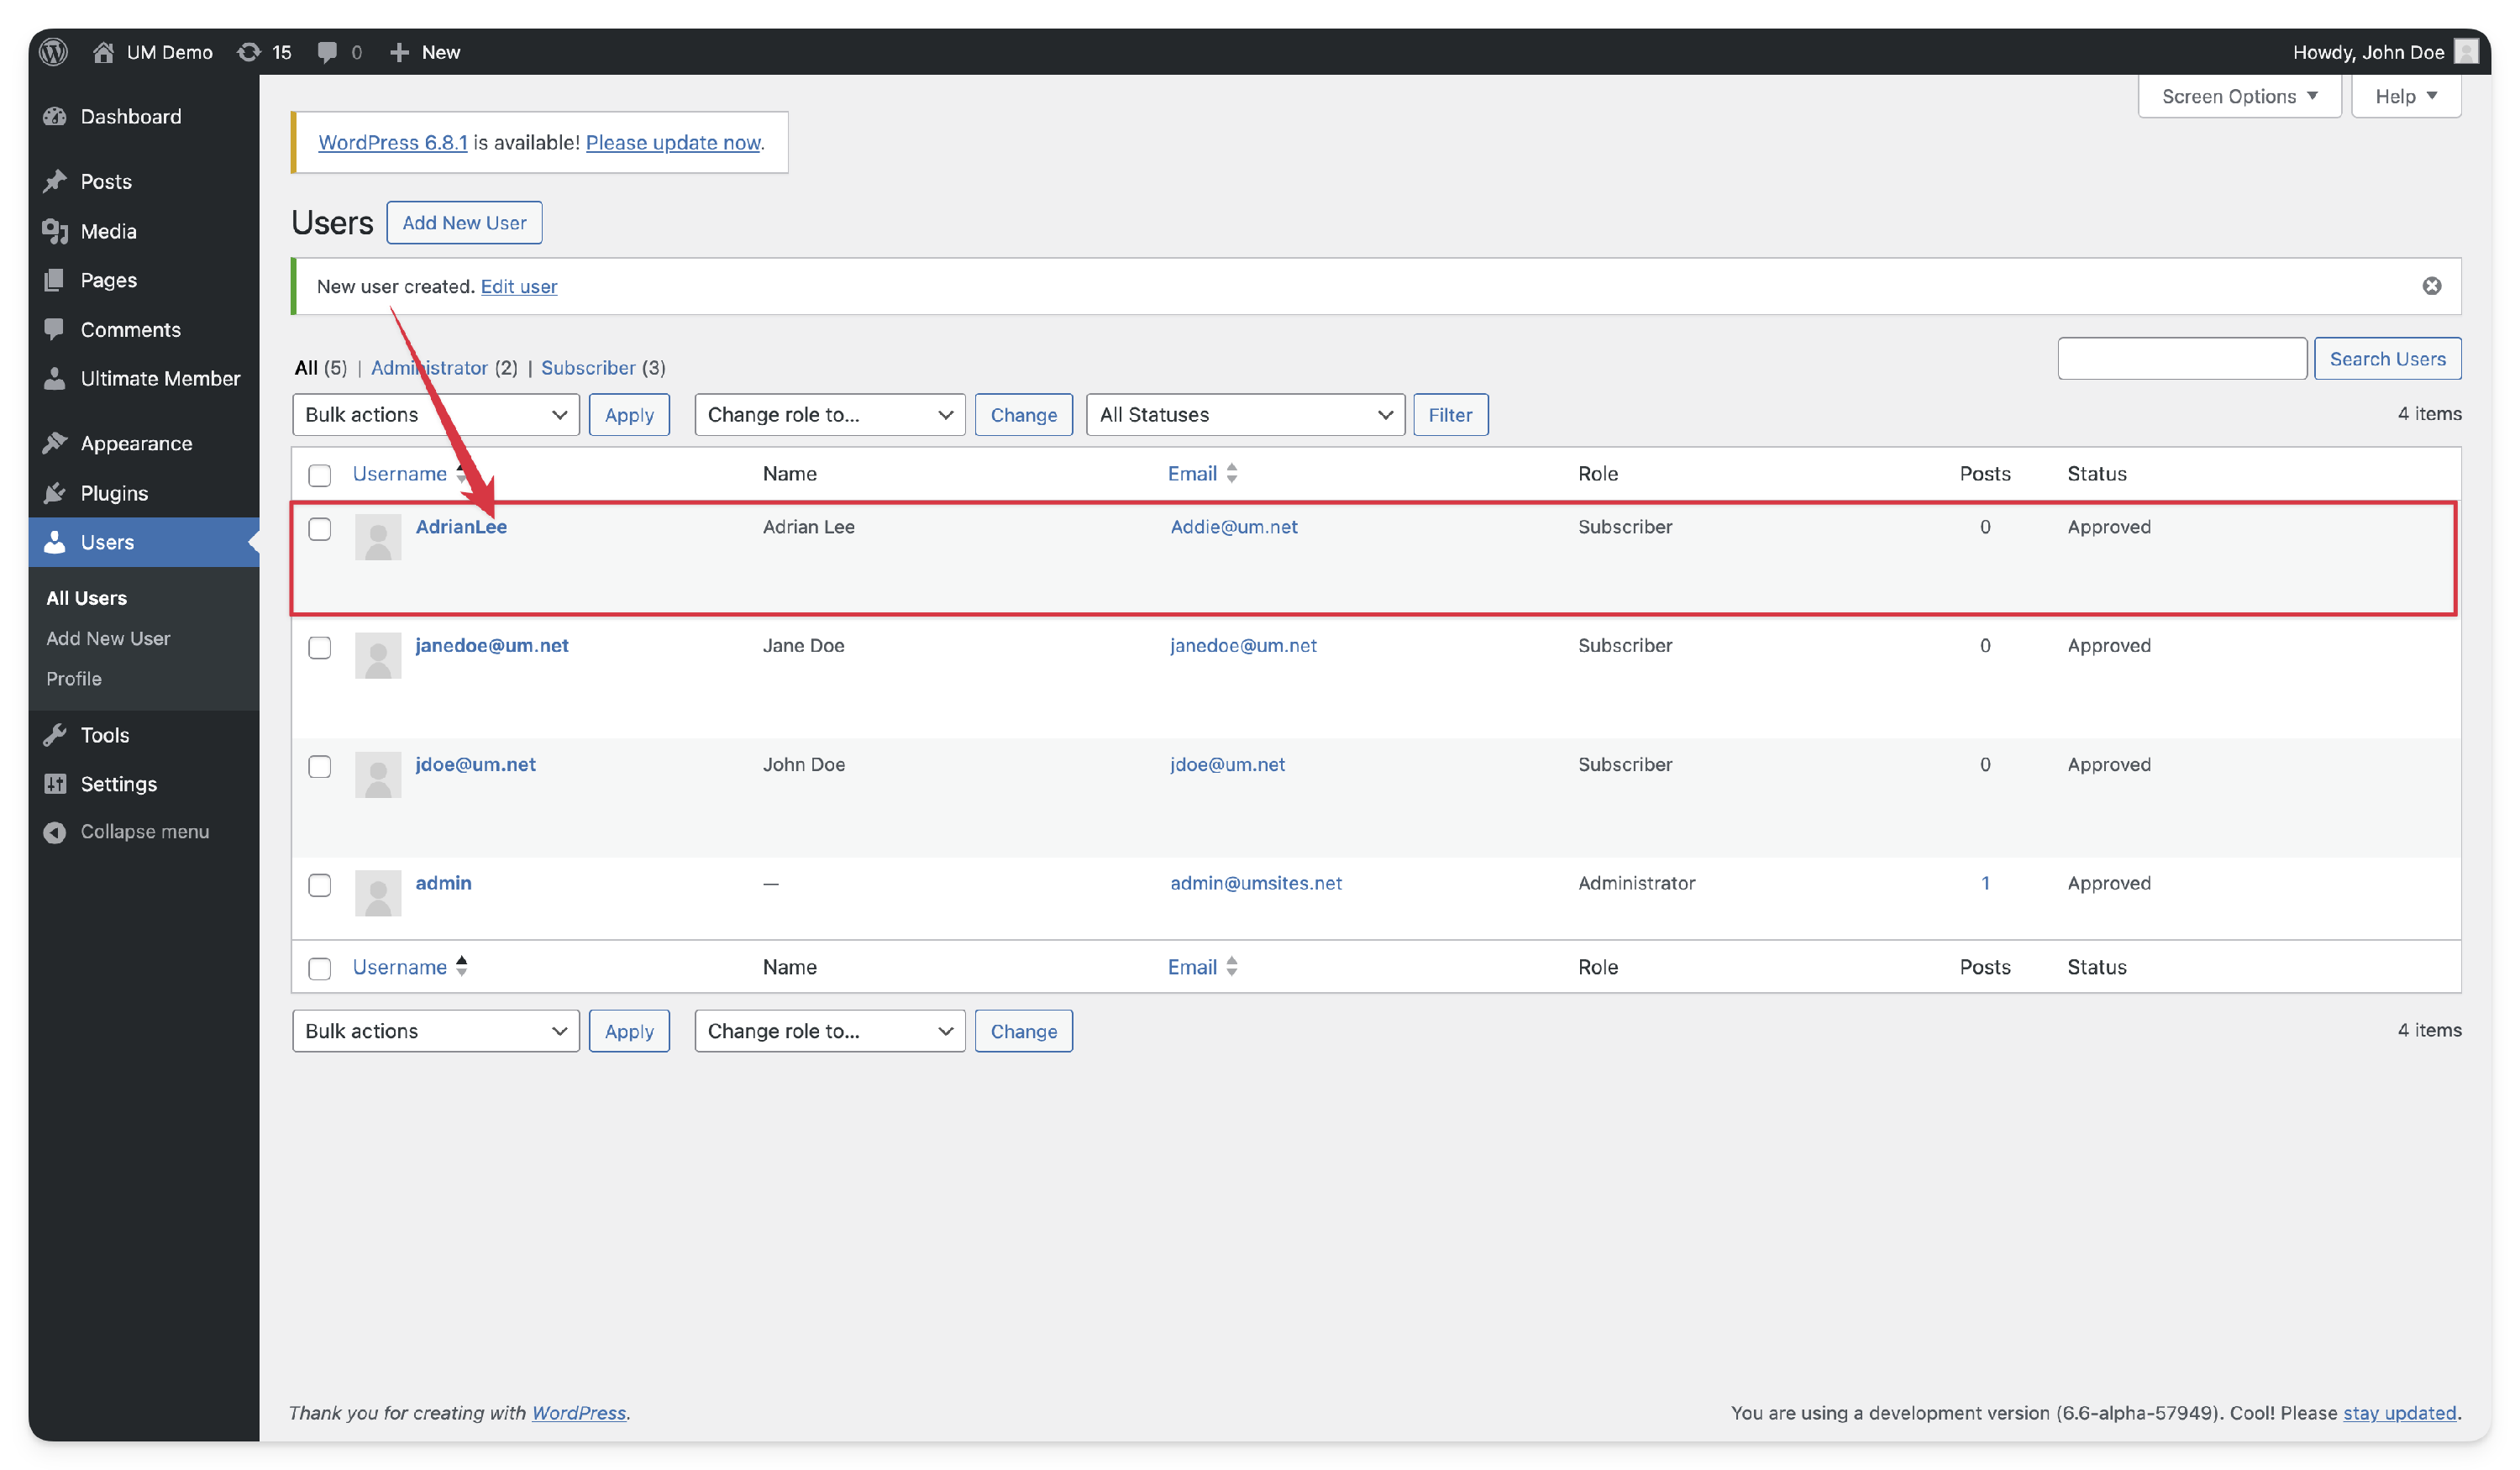
- Once your Zap is published, navigate to WP Admin > Users > Add New User. Create a new user; whenever a new user is created or registers on your Ultimate Member site, their data is automatically sent to Google Sheets.


By following these detailed steps, you’ll have a fully automated workflow set up in Zapier to handle new registrations on your Ultimate Member site, sending data directly to Google Sheets or another application of your choice.