Ultimate Member Zapier Settings Guide
Overview
The Ultimate Member (UM) Zapier extension offers powerful automation capabilities, allowing you to streamline processes and enhance the functionality of your membership site. By integrating UM with Zapier, you can create Zaps that trigger actions based on events within UM or Zapier, saving you time and effort.
Zaps Page
After installing and activating the Ultimate Member (UM) Zapier extension, a new "Zapier" menu will appear in the Ultimate Member sidebar. From this menu, you’ll be taken to the Zaps page, where you can create, edit, delete, and manage your list of Zaps.
Zap's Table Overview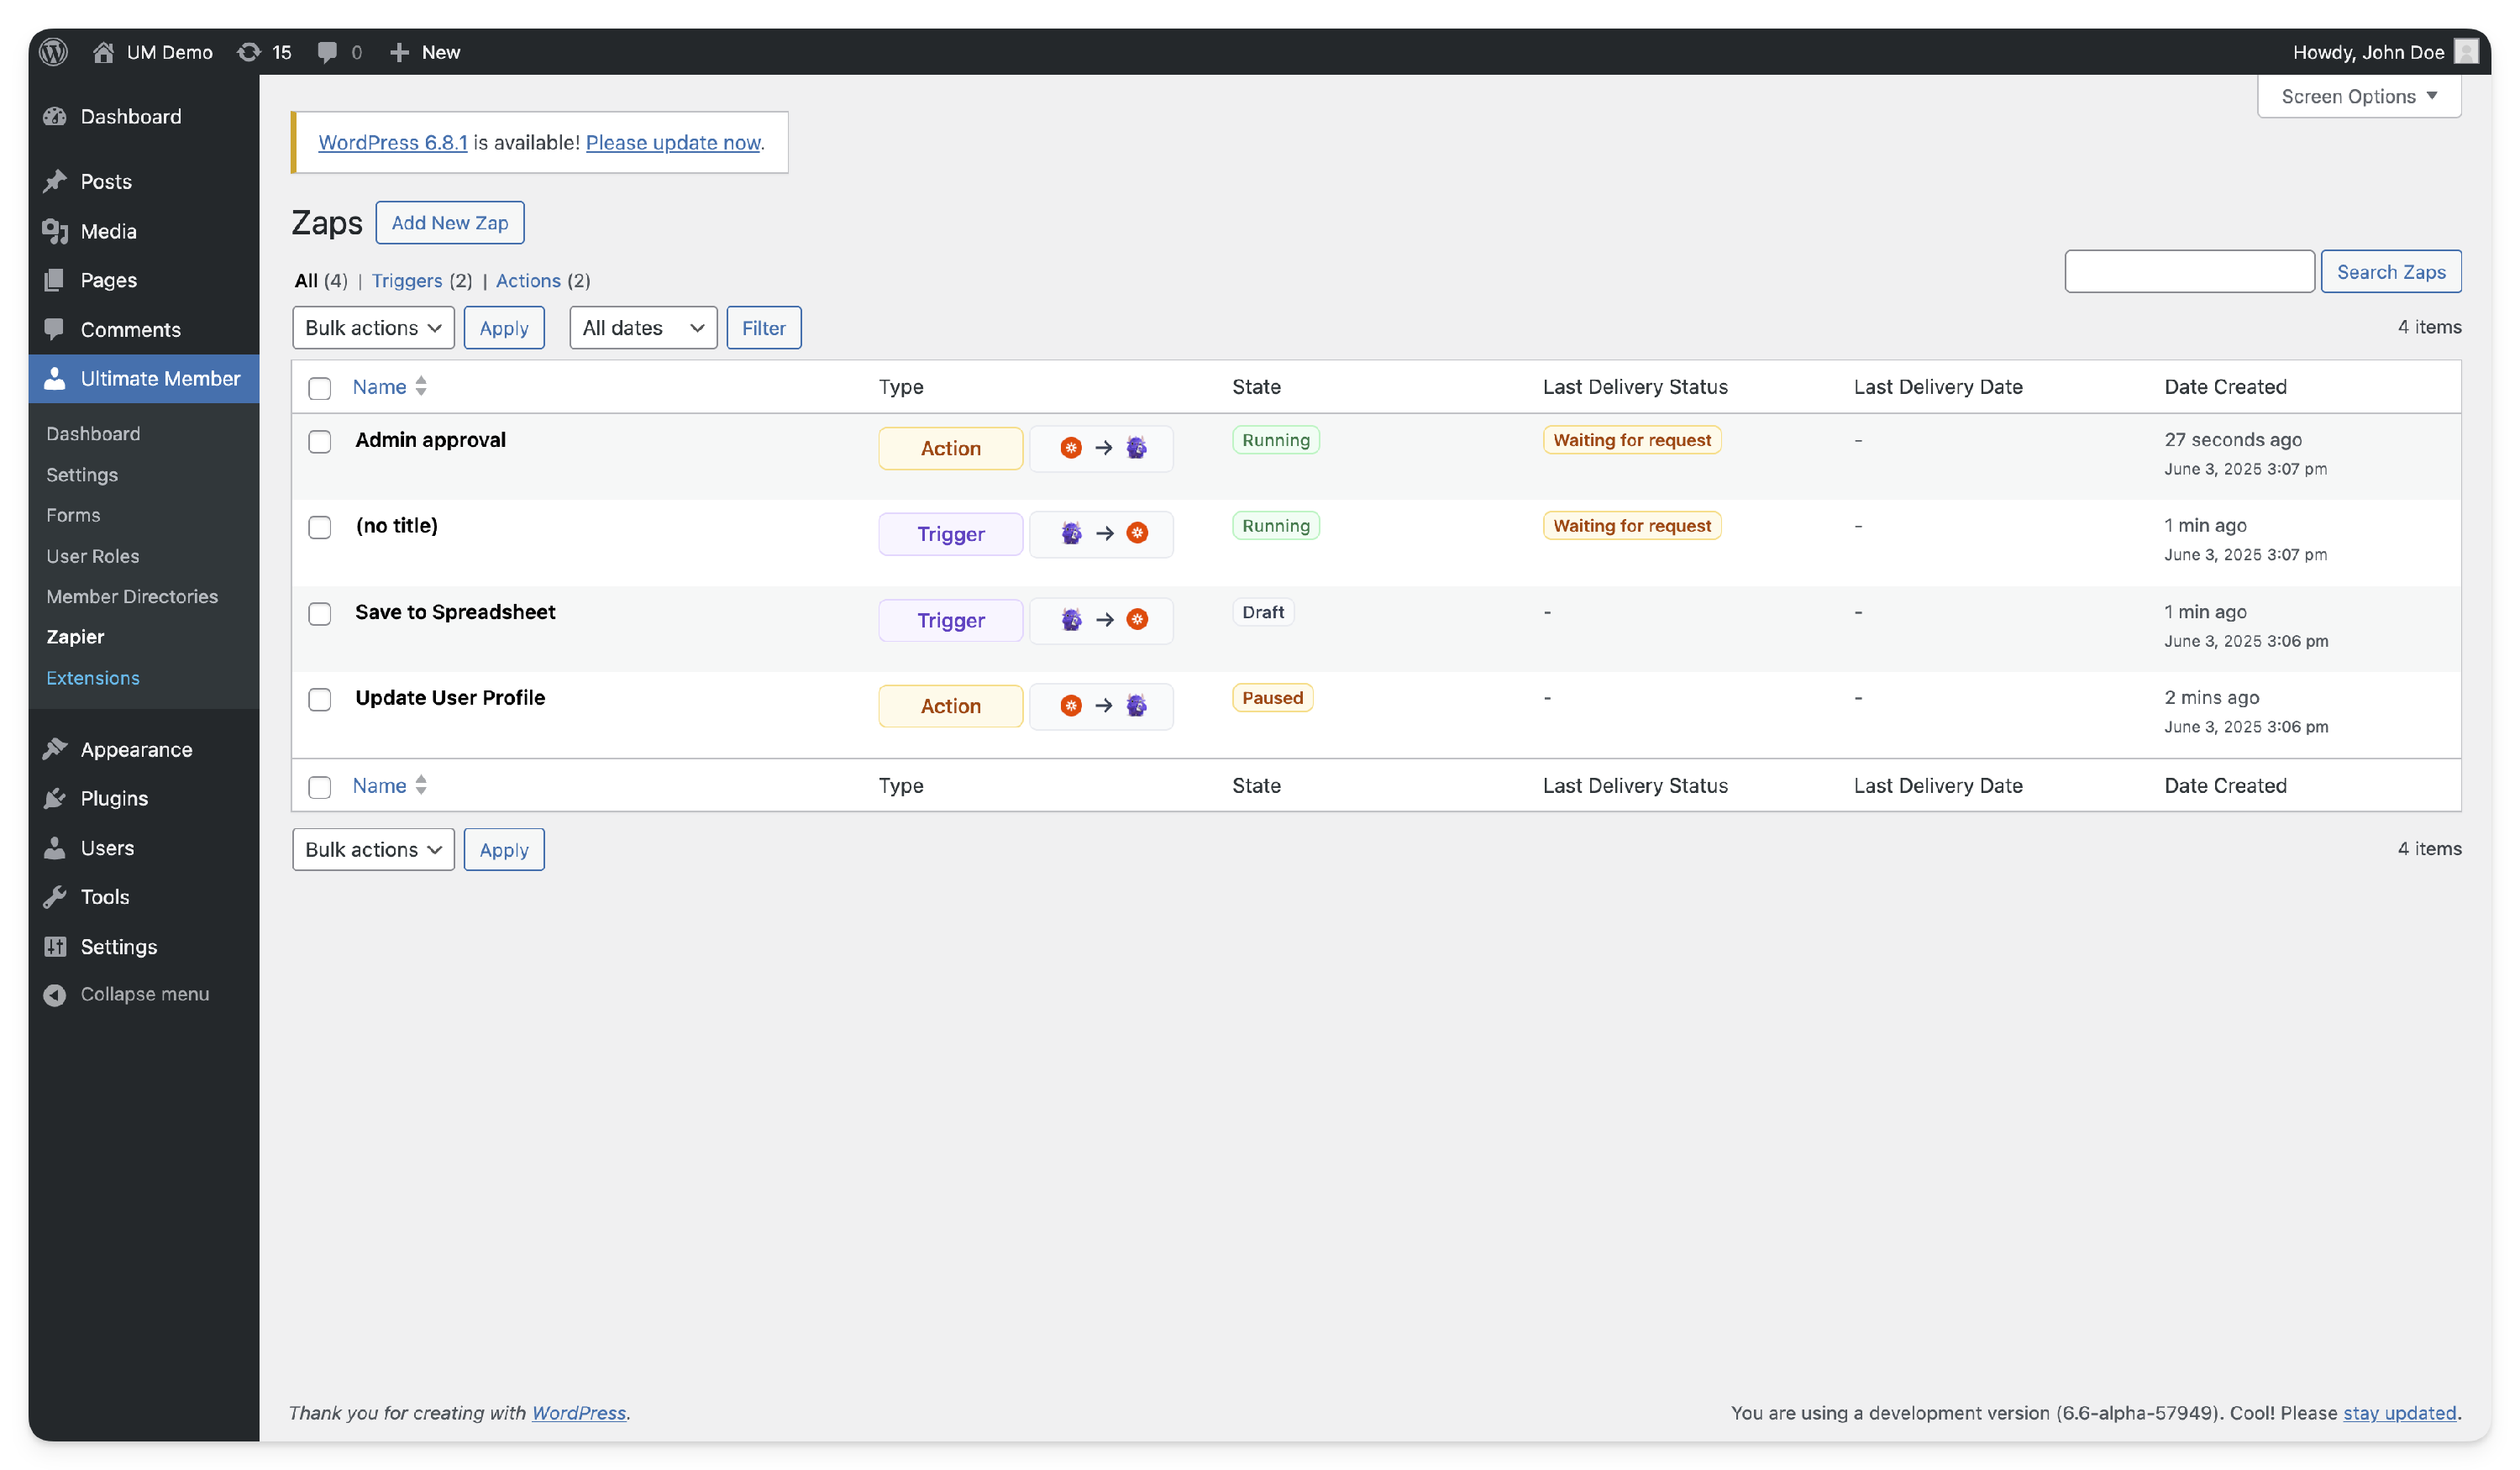

You'll find a table listing for all your configured Zaps on the Zaps page. Here is a description of the elements you can find in this table:
- Header Section:
- Add New Zap: A button to create a new Zap.
- Filters:
- All (n): Displays all Zaps regardless of their status or type. For example, If there are 4 Zaps in total, clicking on this filter will show all 4 Zaps.
- Trigger (n): Displays only the Zaps that are configured as Triggers. For example: If there are 2 Zap that are set up to trigger actions, clicking on this filter will show that specific Trigger Zap.
- Action (n): Displays only the Zaps that are configured as Actions. For example: If there are 2 Zap that perform actions based on triggers, clicking on this filter will show that specific Action Zap.
- Search Zaps: A search bar to find specific Zaps.
- Select bulk action: Dropdown to perform bulk actions on selected Zaps. You can choose to delete, stop, run, or draft selected items.
- List Table:
- Checkbox: This provides options to select all or multiple Zaps on the list.
- Name: The name of the Zap, with options to sort ascending or descending.Identifies the specific Zap. For example, "New User Registered" indicates this Zap is triggered when a new user registers.
- Type: Indicates whether the Zap is a Trigger (initiates an action) or an Action (performs a task).
- Status: The current status of the Zap (e.g., Running, Paused, Stopped, Draft).
- Last Delivery Status: The status of the last delivery attempt.The result of the most recent attempt to execute the Zap (e.g., Success, Failed, Waiting for Request).
- Last Delivery Date: The date and time of the last delivery attempt.
- Date Created: The date and time when the Zap was created.
This table provides a comprehensive overview of all your Zaps, their statuses, and relevant timestamps, helping you manage and troubleshoot your automation workflows efficiently.
Adding a Zap
To create or add a new Zap, Follow these steps:
- Navigate to wp-admin > Ultimate Member > Zapier.
- On the Zaps page, locate and click the "Add New Zap" button.

- Once clicked, you'll be able to configure the settings below. The available options may vary based on the type selected (Trigger or Action.)

Configuring Settings
These settings allow you to customize the behaviour of your Zap and specify how data is transferred between Ultimate Member and Zapier, enabling you to automate workflows and streamline processes. Here's a breakdown of the settings:
| Settings | Descriptions |
| Title | This allows you to give your Zap a descriptive title for easy identification. This title is for your reference and won't affect the Zap's functionality. Choose a clear and descriptive title that helps you remember the purpose or function of the Zap. |
| Type | This setting determines the nature of the Zap, dictating how it responds to events:
|
| Status | This setting allows you to control the current state of your Zap. You can choose from the following options:
|
| Zap Webhook URL | This option is only available for the "Trigger Type" Zap, where the Zap is initiated based on events within Ultimate Member. This field is where you need to enter the webhook URL from Zap's settings on zapier.com.
A webhook is a way for one application to send real-time data to another application. In this context, the webhook URL is unique and provided by Zapier for your Zap, which allows Ultimate Member to send data to Zapier when a specified event occurs. |
| Trigger | This option is only available when the " Trigger type" is selected. It specifies the specific event in UM that triggers the Zap.These are the Ultimate Member triggers that push data to your Zapier Webhook:
|
| UM Zapier Trigger | These triggers originate from Zapier and are only available when the "Action type" is selected in your Zap. They allow actions in Zapier to update data on your Ultimate Member website. Currently, Ultimate Member app in Zapier provides three triggers:
|
| Roles | This option is only available for "Trigger Type" Zap. This setting allows you to specify which user roles should trigger an action when registering. This setting ensures that only users with the selected roles will have their registration data pushed to Zapier. By default, all roles are deselected. Unless you choose specific roles, the action will trigger for any user role upon registration, pushing their data to Zapier. If no roles are selected, the system will push data for any newly registered user to Zapier. However, if specific roles are selected, only users with those roles will have their data pushed to Zapier upon registration.
To select multiple roles, press ctrl or cmd and click the roles you want to select. |
| Fields | This setting allows you to define or select the data fields from Ultimate Member that will be sent to Zapier. The available fields depend on whether you are configuring a "Trigger Type" or "Action Type" Zap.
Note: Whenever you modify your form’s field settings in Ultimate Member, such as adding or removing fields, you’ll need to re-sync your changes with Zapier to ensure that the correct fields are being sent.
Note: Whenever you modify your form’s field settings in Ultimate Member, you’ll need to re-sync your changes with Zapier. To do this, go to Zapier.com, edit the Ultimate Member Zap's action, navigate to "Setup Action," and click "Refresh fields" to ensure that the correct fields are available for mapping in your Zap.
|
| Send Data to Zapier button | This button is specifically designed for Trigger Type Zaps and appears when this type is selected. Its function is to update the connection between your Ultimate Member form and Zapier, ensuring that any changes made to your field settings are reflected in the data sent to Zapier.
When you make modifications to the field settings in your Ultimate Member form, such as adding or removing fields, it's essential to use the "Send Data to Zapier" button to synchronize these changes with your Zap. This action ensures that the correct fields are available for mapping in your Zap, enabling seamless data transfer between Ultimate Member and Zapier. By clicking this button, you maintain the integrity of your data flow, ensuring that the information sent from Ultimate Member to Zapier is accurate and up-to-date based on your form's current configuration. |
Settings for Trigger Type Zap:
Settings for Action Type Zap:
