Zapier Setup for Actions
Overview
Ultimate Member's Zapier integration automates user creation and data updates across applications. Using Zapier Actions, workflows can be configured to execute tasks automatically when certain events are triggered. This guide walks through integrating Google Sheets with Ultimate Member, enabling streamlined user data management.
What are Zapier Actions?
Zapier Actions are automated tasks triggered by specific events, using API calls to push or retrieve data from customizable fields. For example, an action could register a new user or update existing user data in Ultimate Member based on details from Google Sheets.
The setup described transfers data from an external app (e.g., Google Sheets) to Ultimate Member on your WordPress site, enabling data from the external app to create or update user profiles in Ultimate Member.
Setting Up Google Sheets
- Create a New Sheet
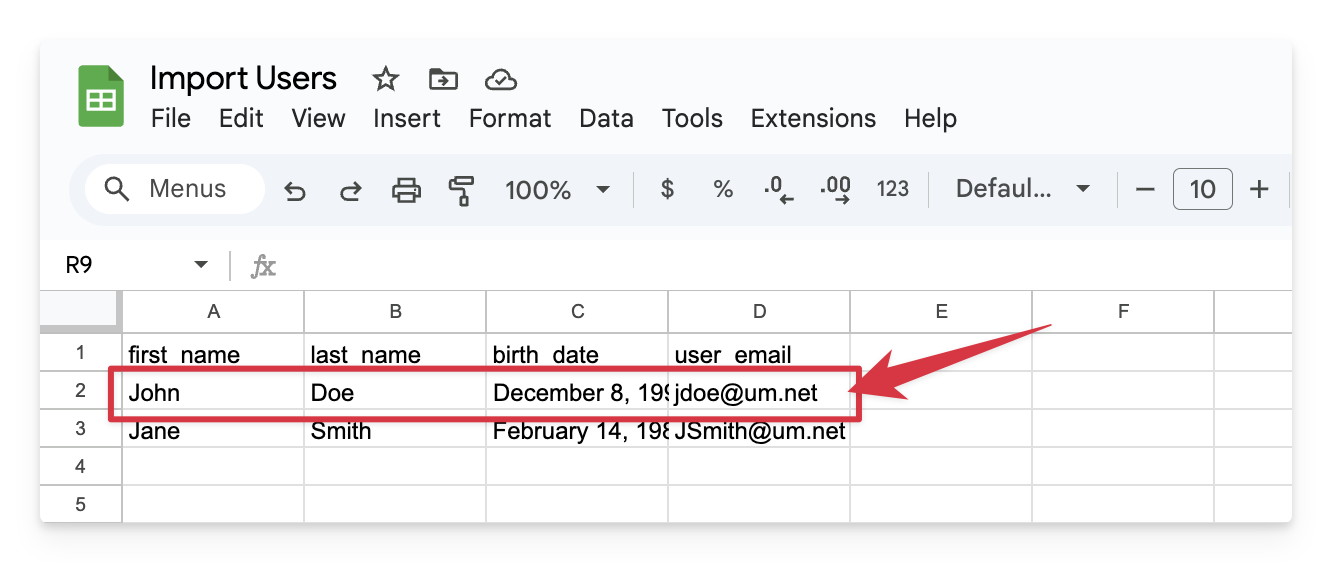
Go to Google Sheets, and create a blank sheet named "Import Users." - Define Headers and Sample Data
- Add headers in the first row:
first_name,last_name,birth_date,user_email - Enter sample data in the following rows: e.g.,
John,Doe,December 8, 1996,jdoe@um.net

- Add headers in the first row:
- Save and proceed to your WordPress Site.

Configuring Actions in Ultimate Member
To integrate Ultimate Member with Zapier, you'll need to configure specific actions that will automate the process of creating or updating user profiles. For more in-depth information on setting up Zaps, please refer to this article.
What Are Field Groups in Ultimate Member?
Field Groups are collections of custom fields used to store and manage user information, such as first_name, last_name, or birth_date. These fields facilitate mapping data during integrations between Ultimate Member and external applications like Zapier. For more details about Zap settings, refer to this article.
- Create a Field Group in Ultimate Member
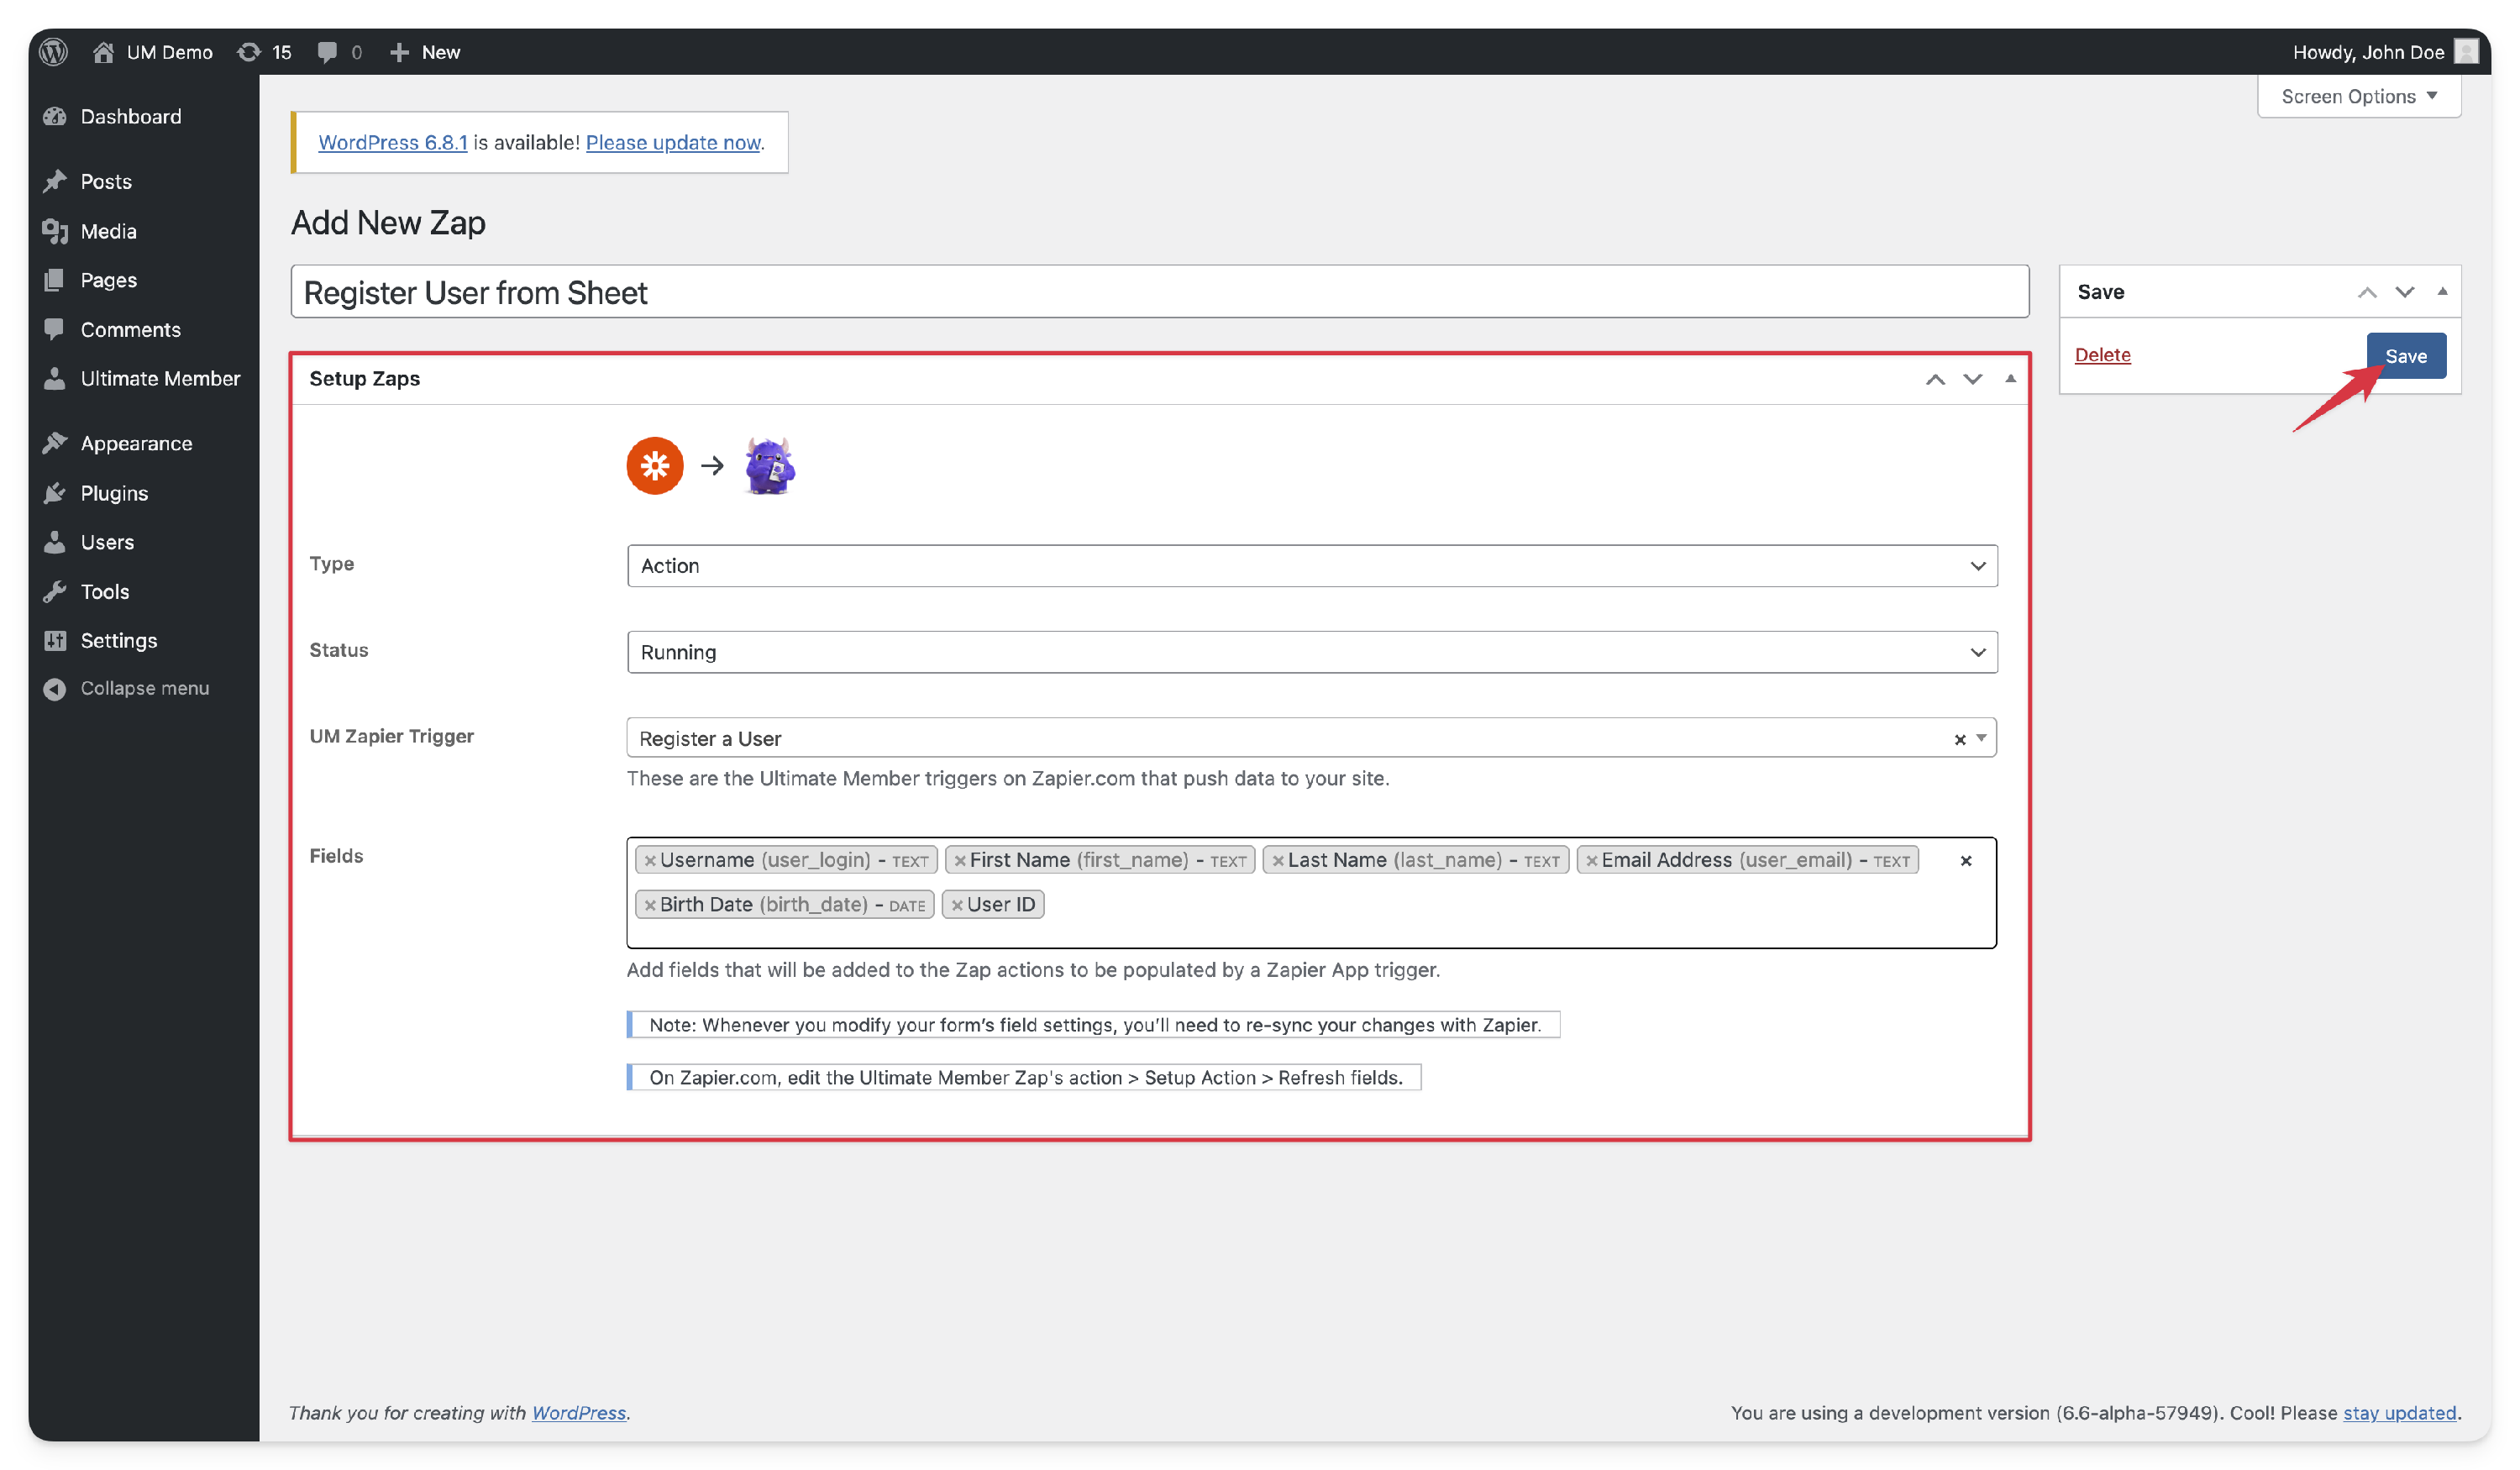
- Go to WP Admin > Ultimate Member > Zaps.
- Click “Add New Zap” and name it, e.g., “Register User from Sheet”

- Select "Action" as your type, then set the status to “Running.”
- Choose "Register a user" as your UM Zapier trigger and add the fields to be populated by the trigger, such as
first_name,last_name - Click the “Save” button to save the Action Zap.


Setting Up Triggers and Actions in Zapier
Step 1: Create a Trigger in Zapier
- Log in and Create a New Zap
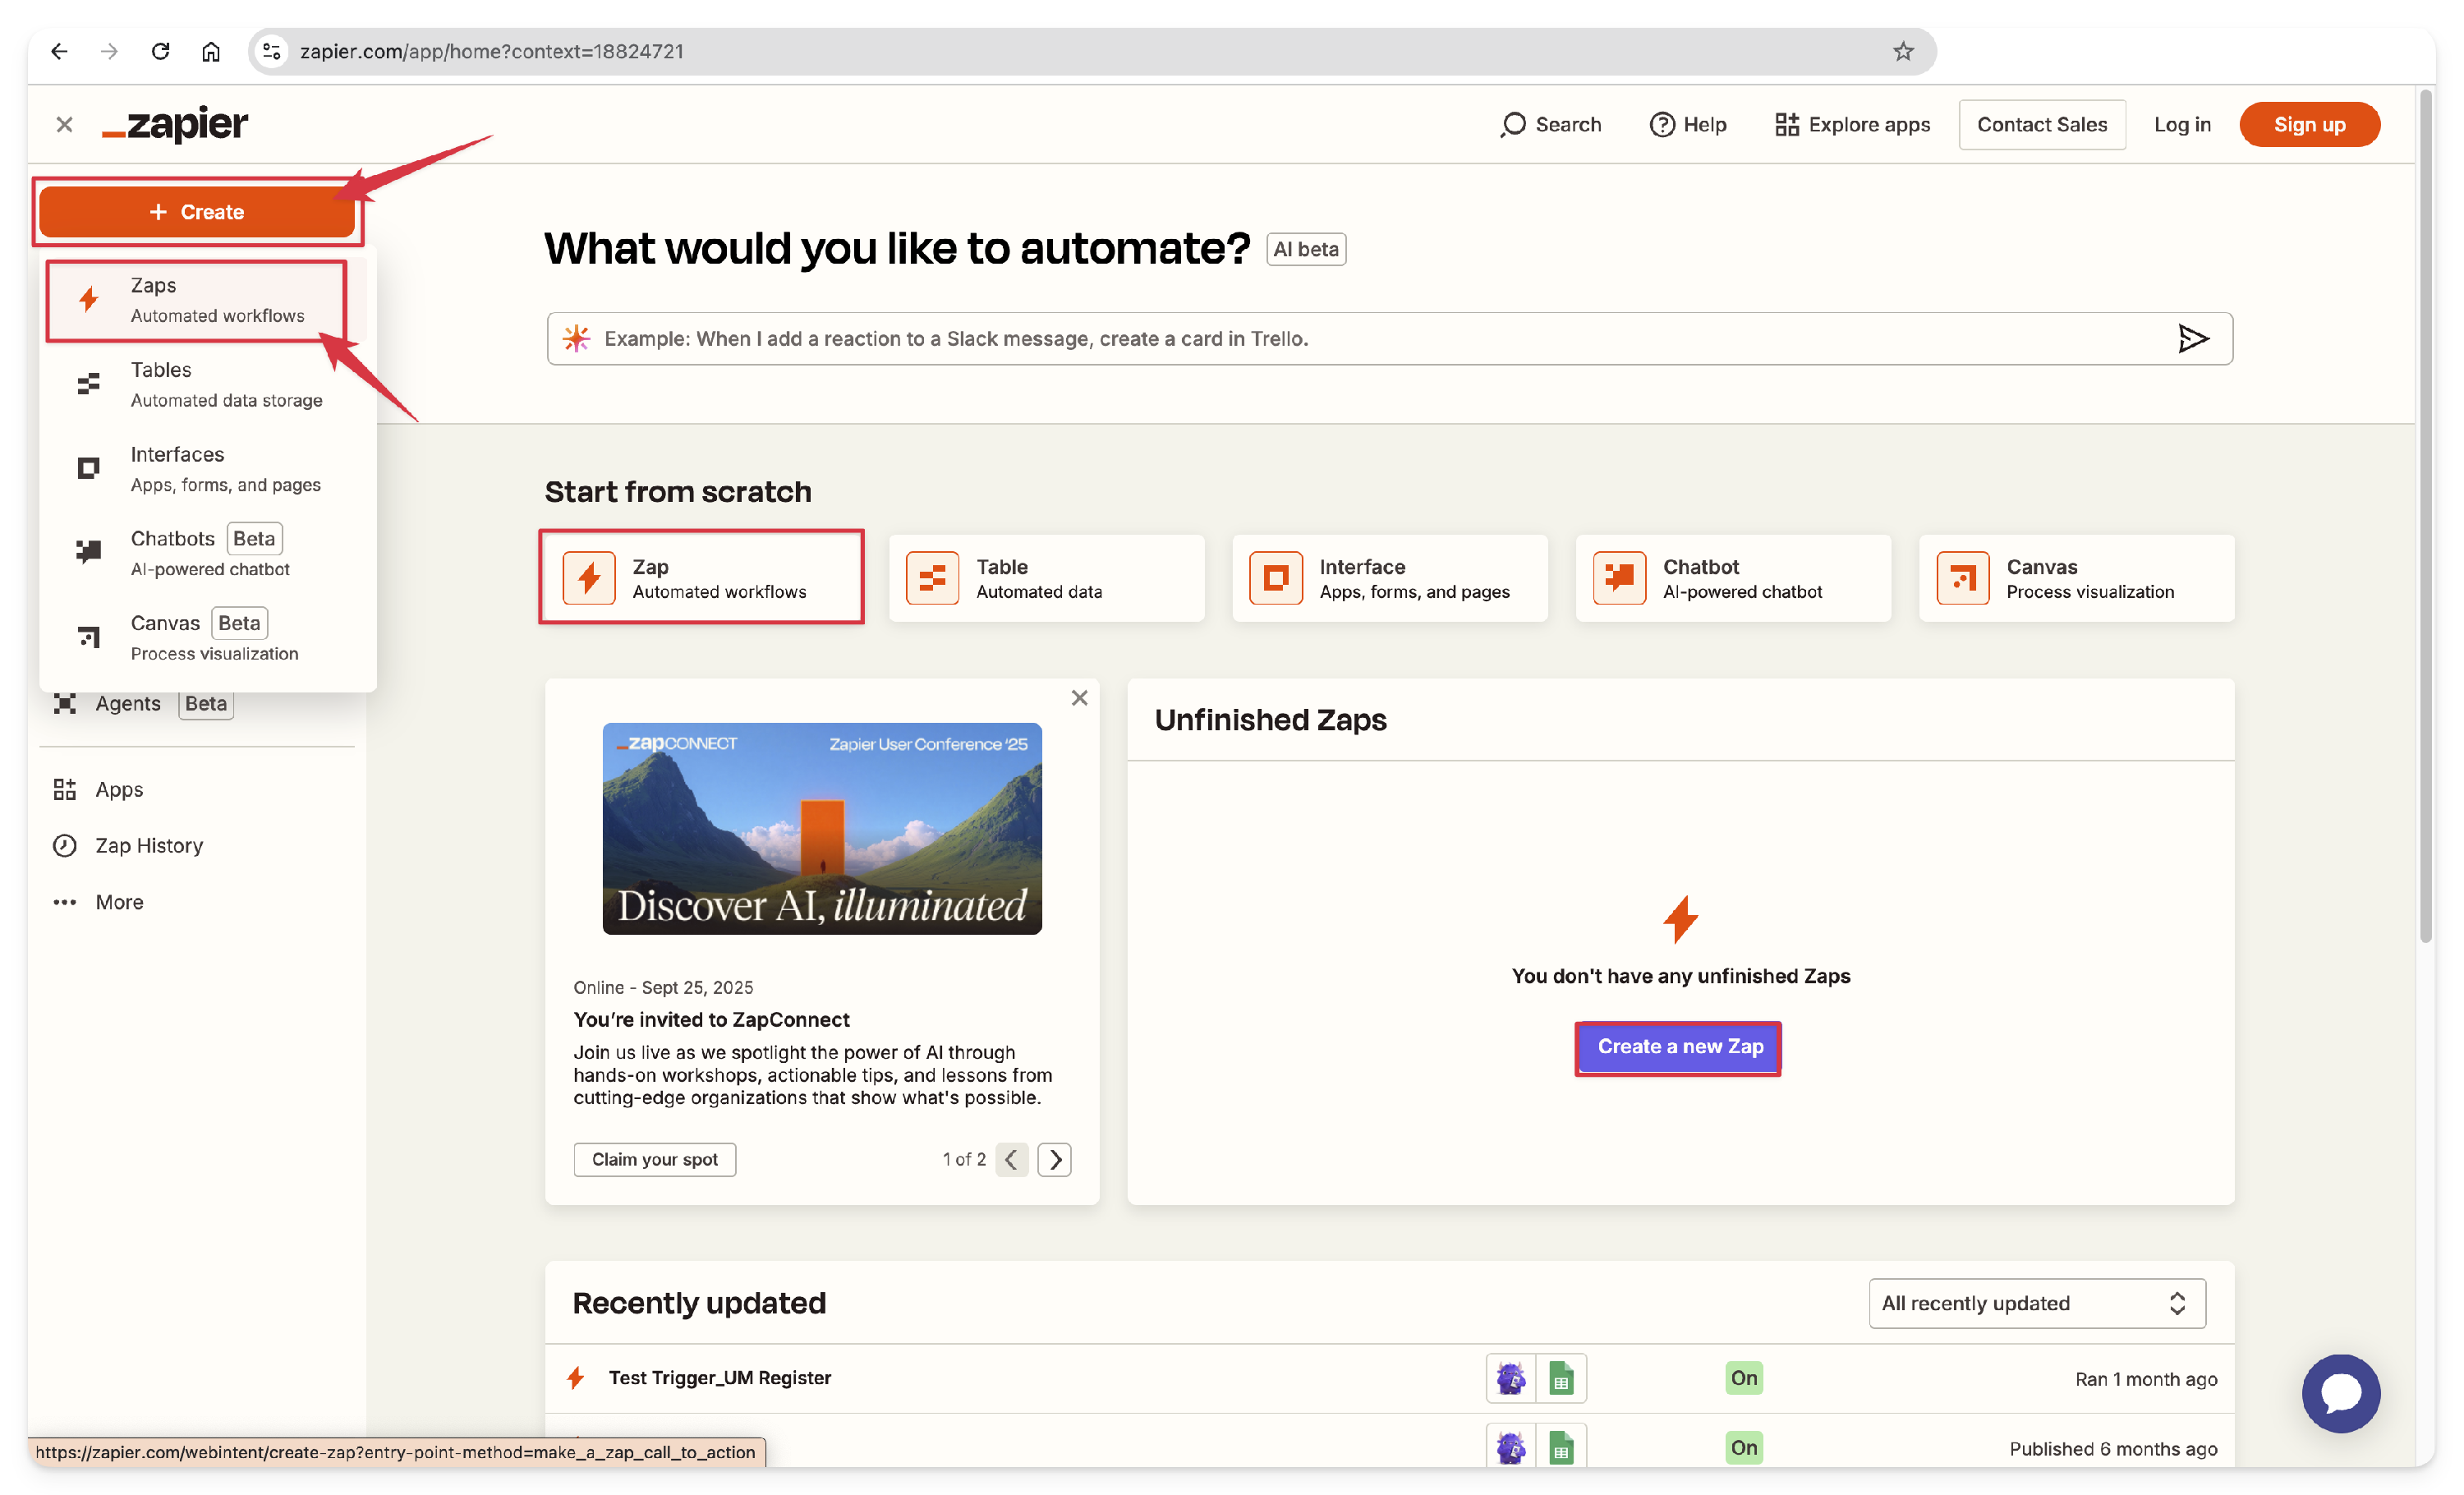
- Log in to Zapier.On the dashboard, click “+ Create” and select “Zaps.” Then click on the "+Create Zap" button.
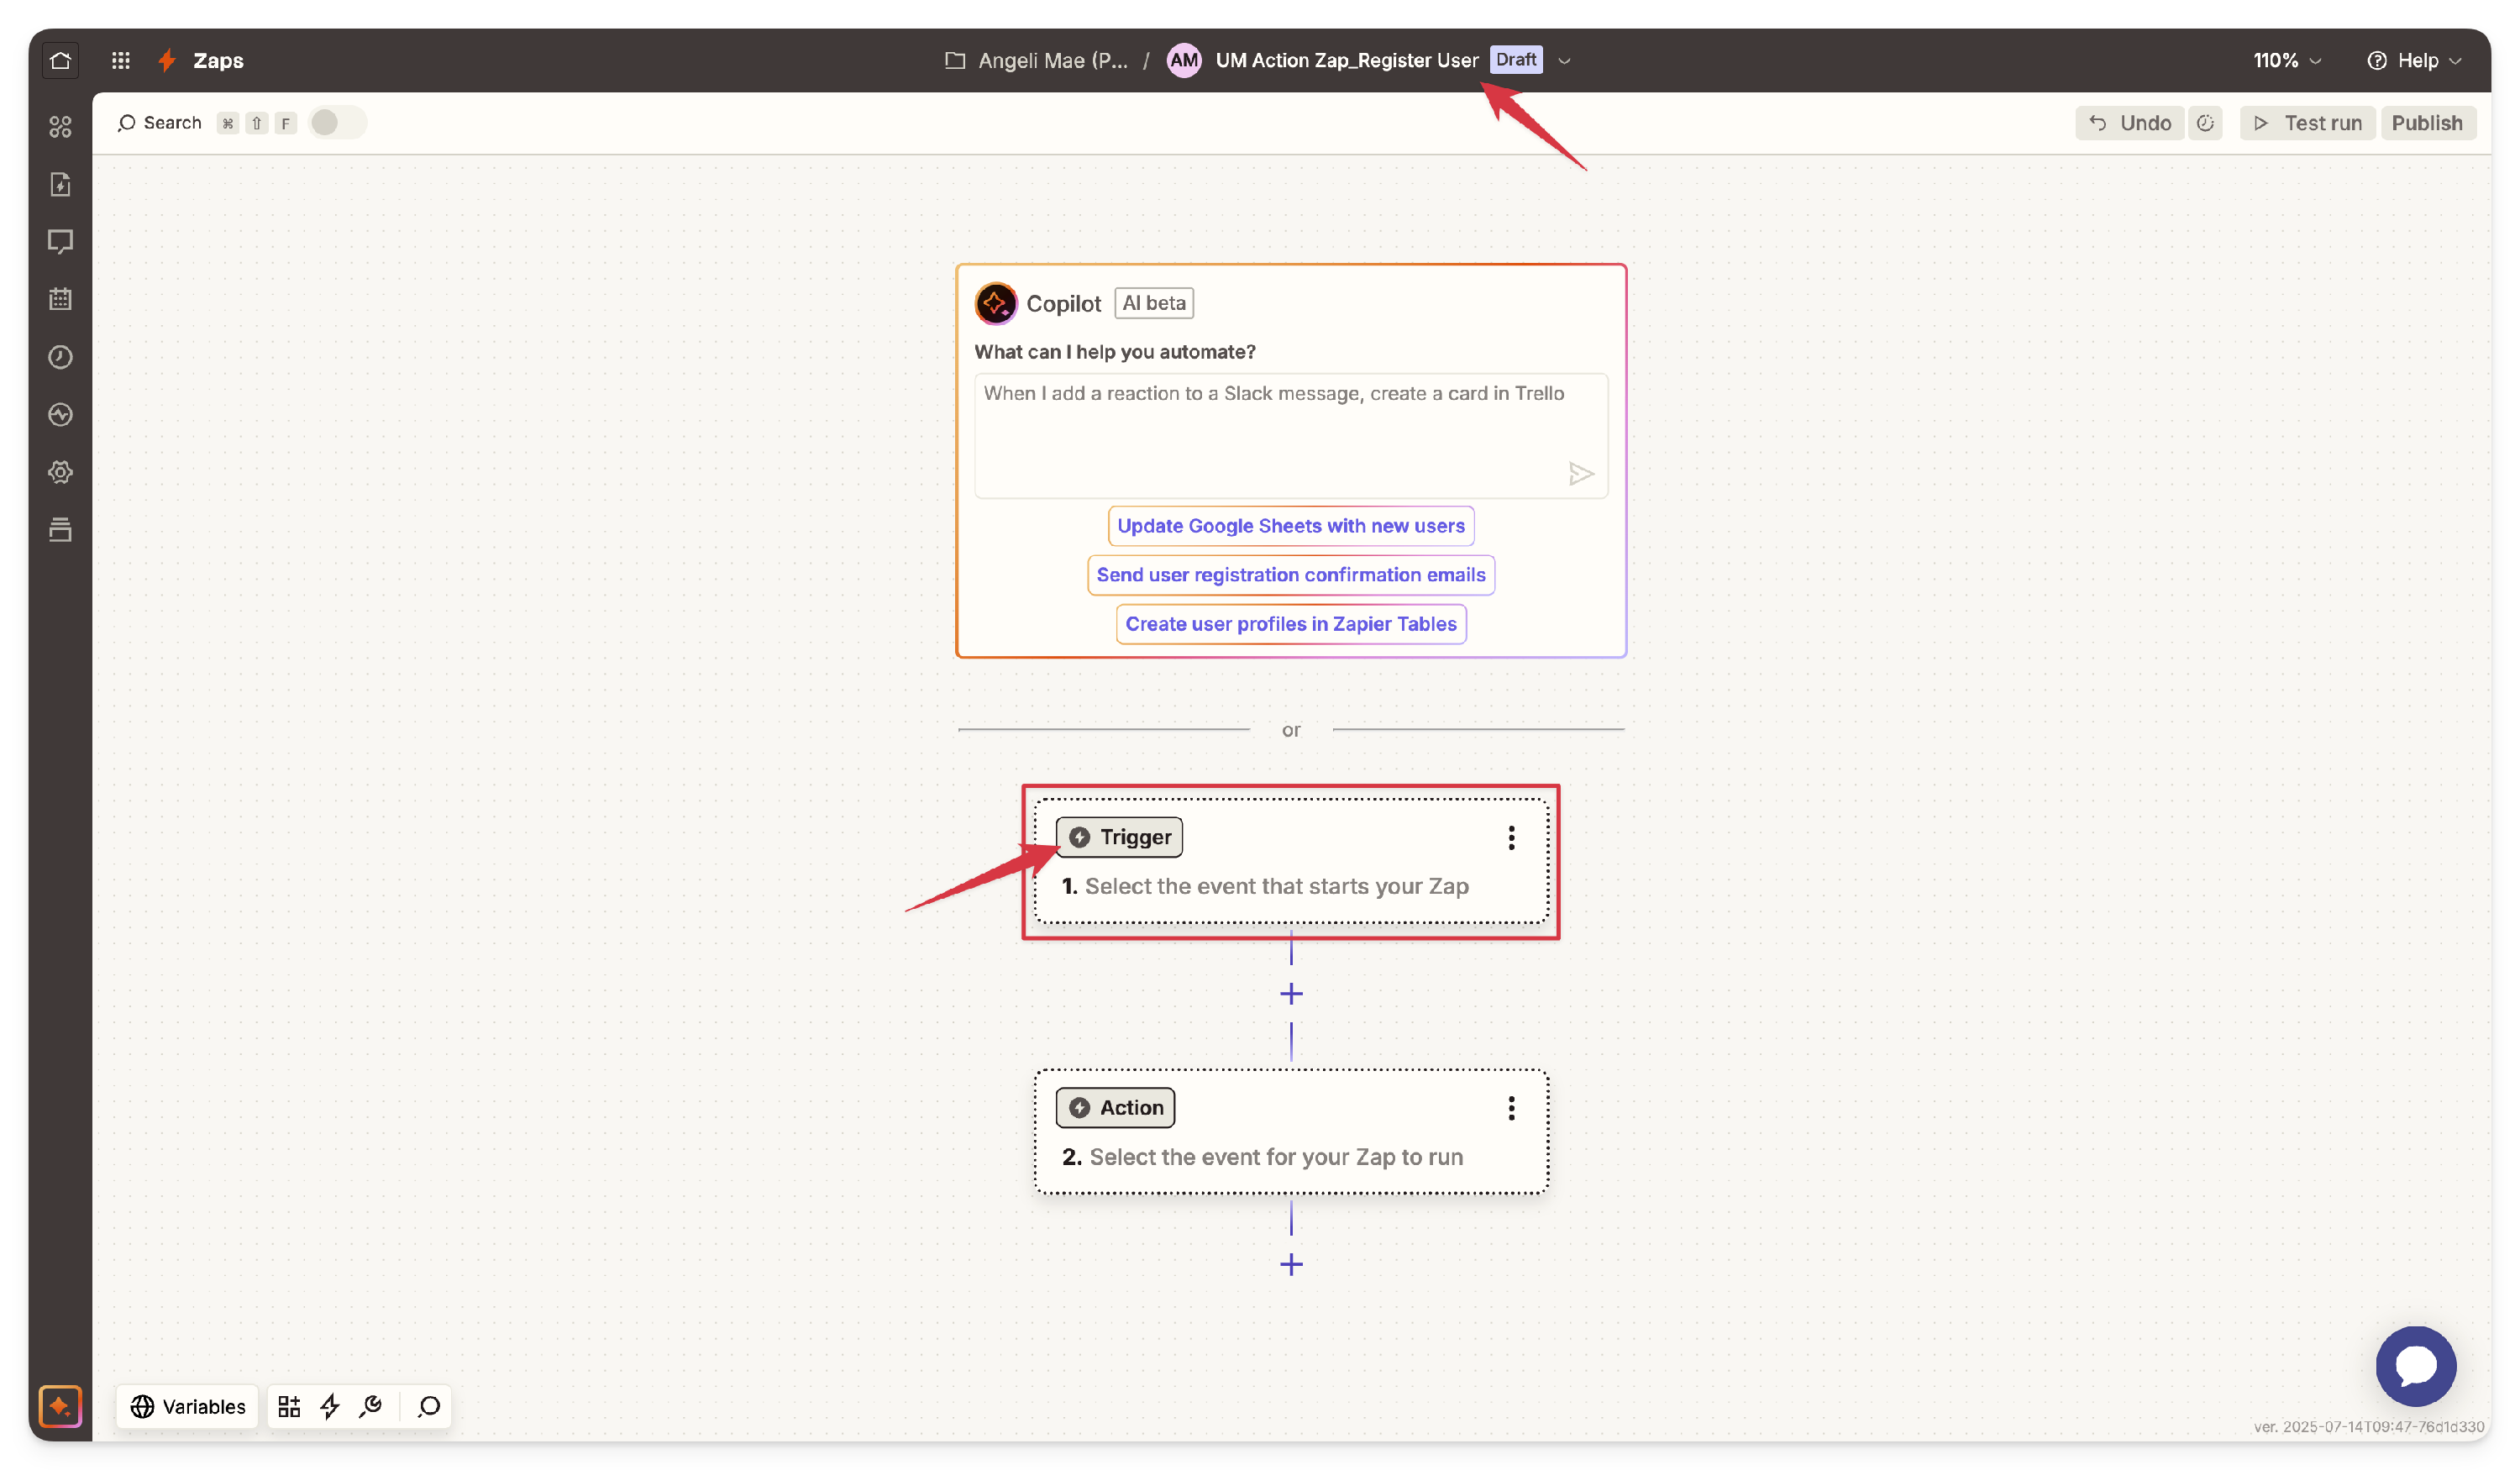
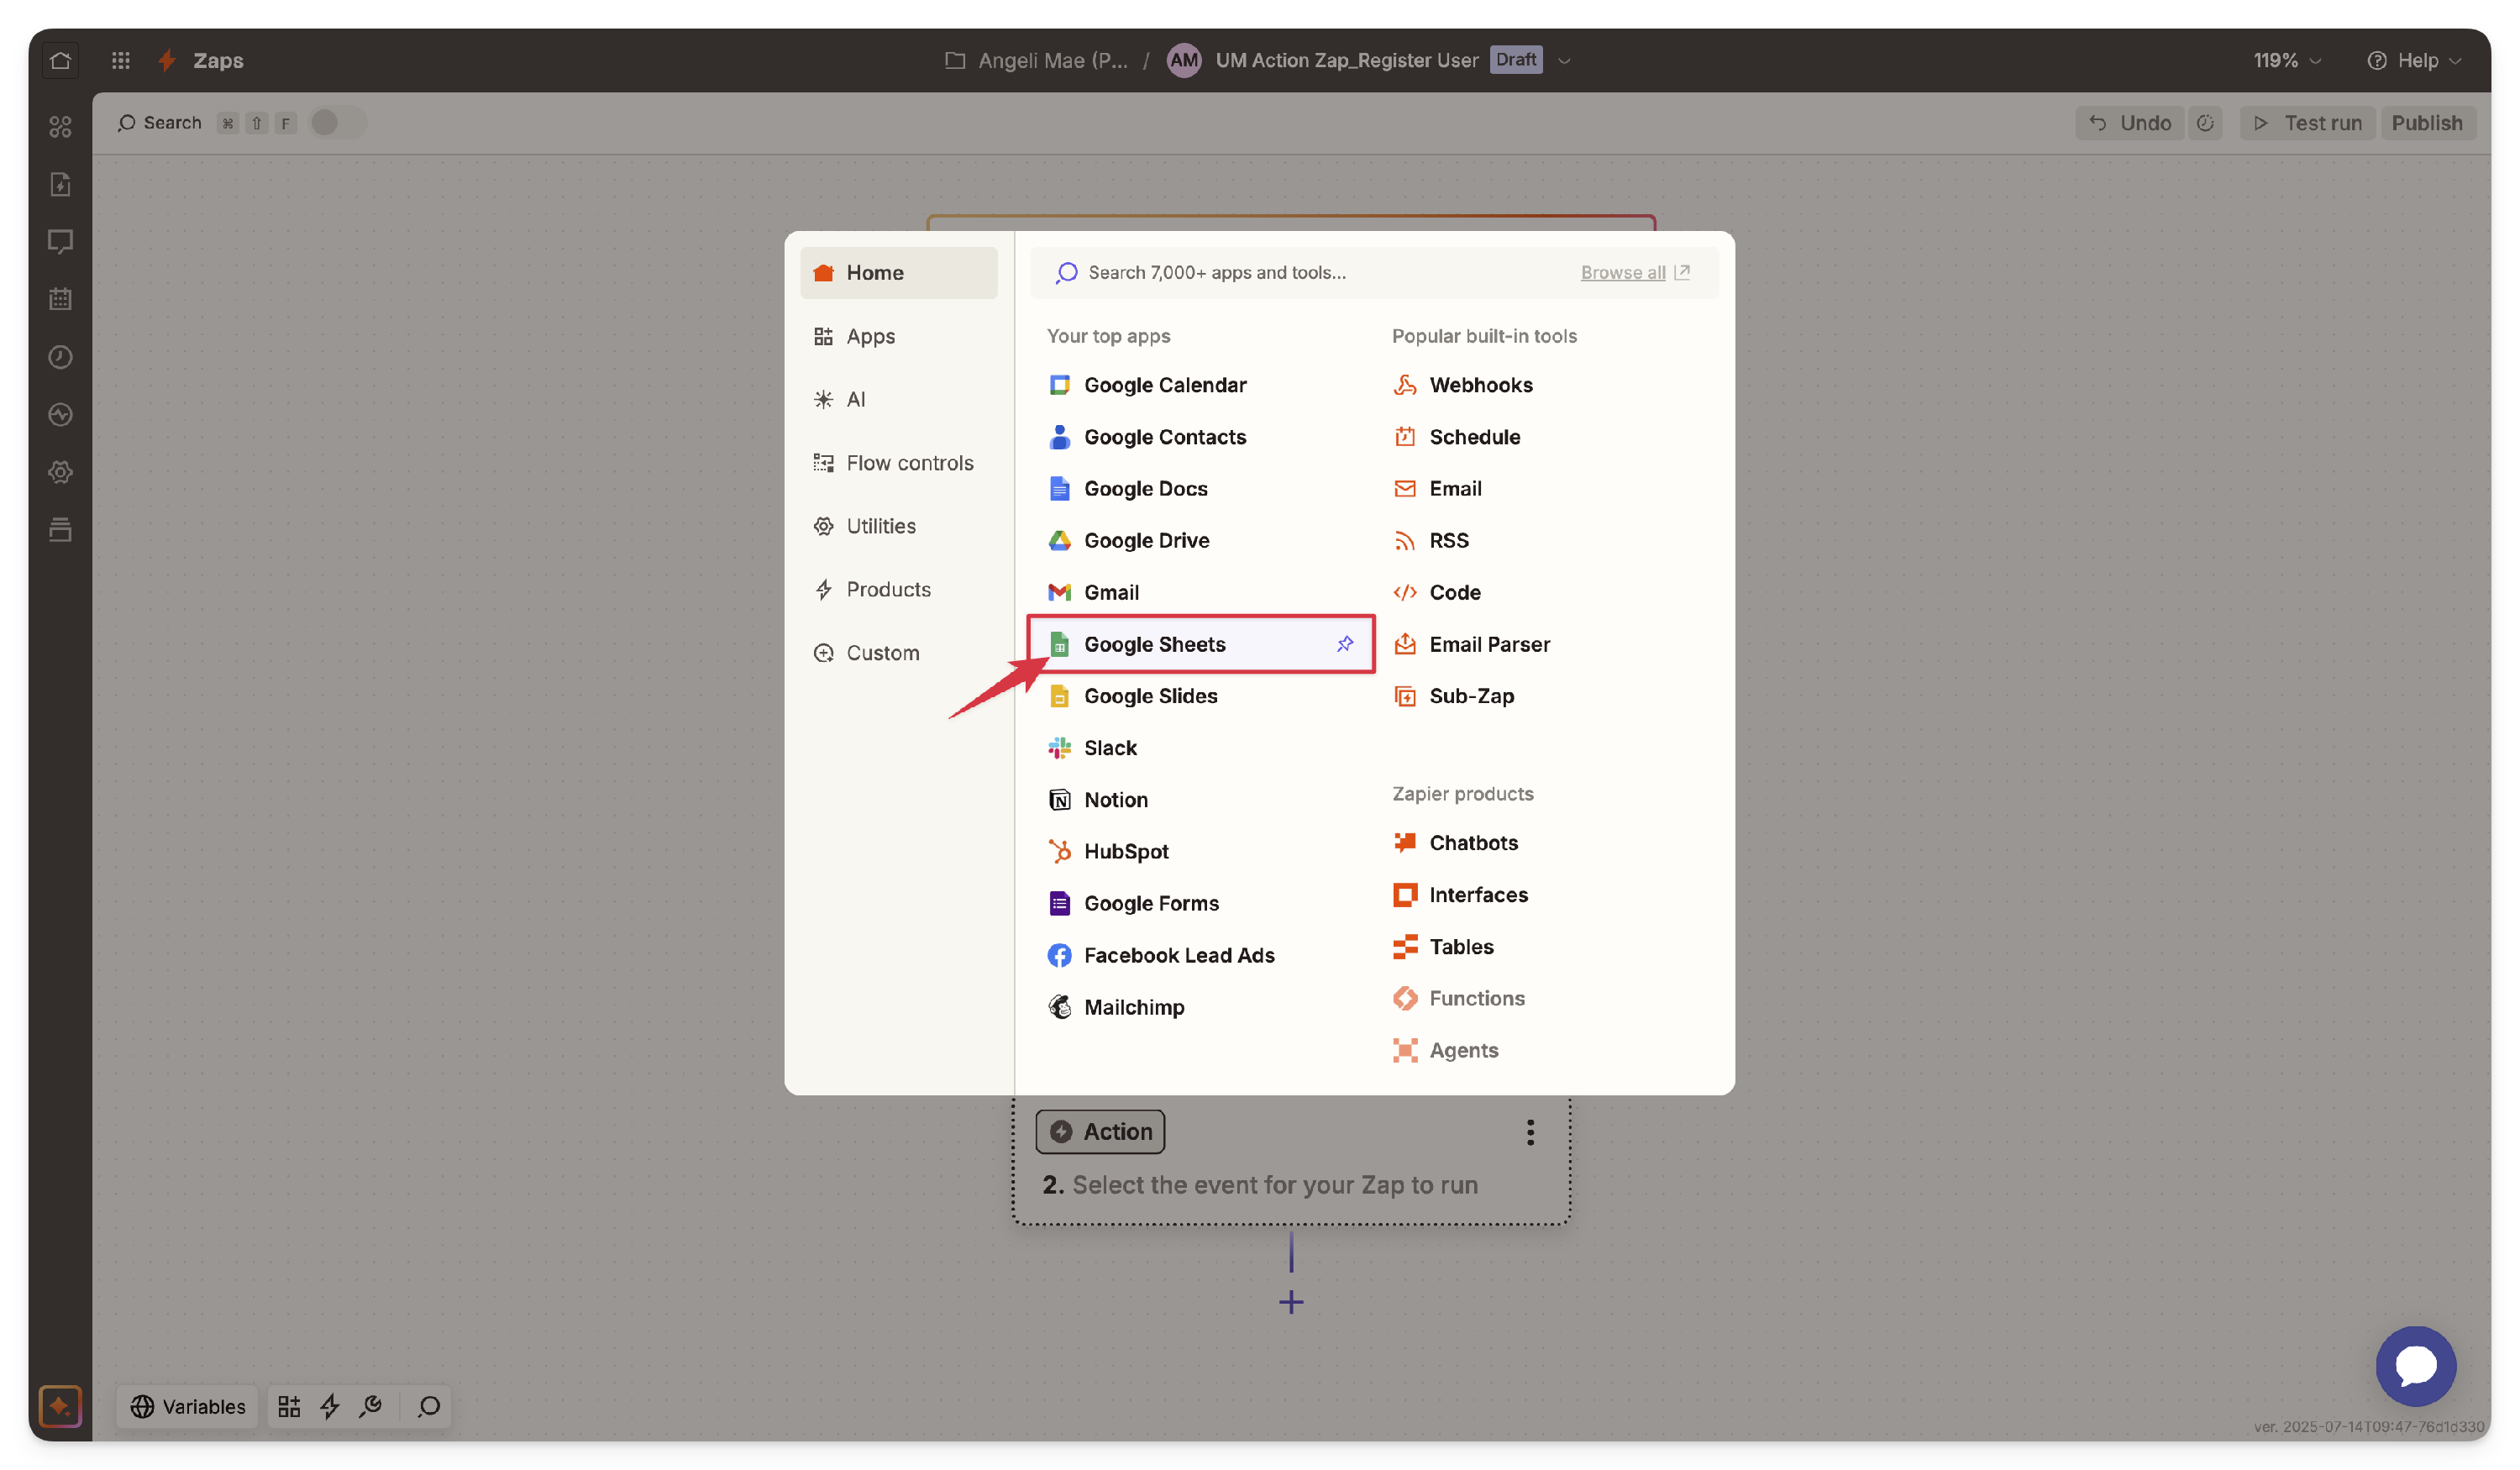
- Name the Zap and click on “Trigger”, then select “Google Sheets” as your event app.
- Log in to Zapier.On the dashboard, click “+ Create” and select “Zaps.” Then click on the "+Create Zap" button.
- Set up the Trigger Event
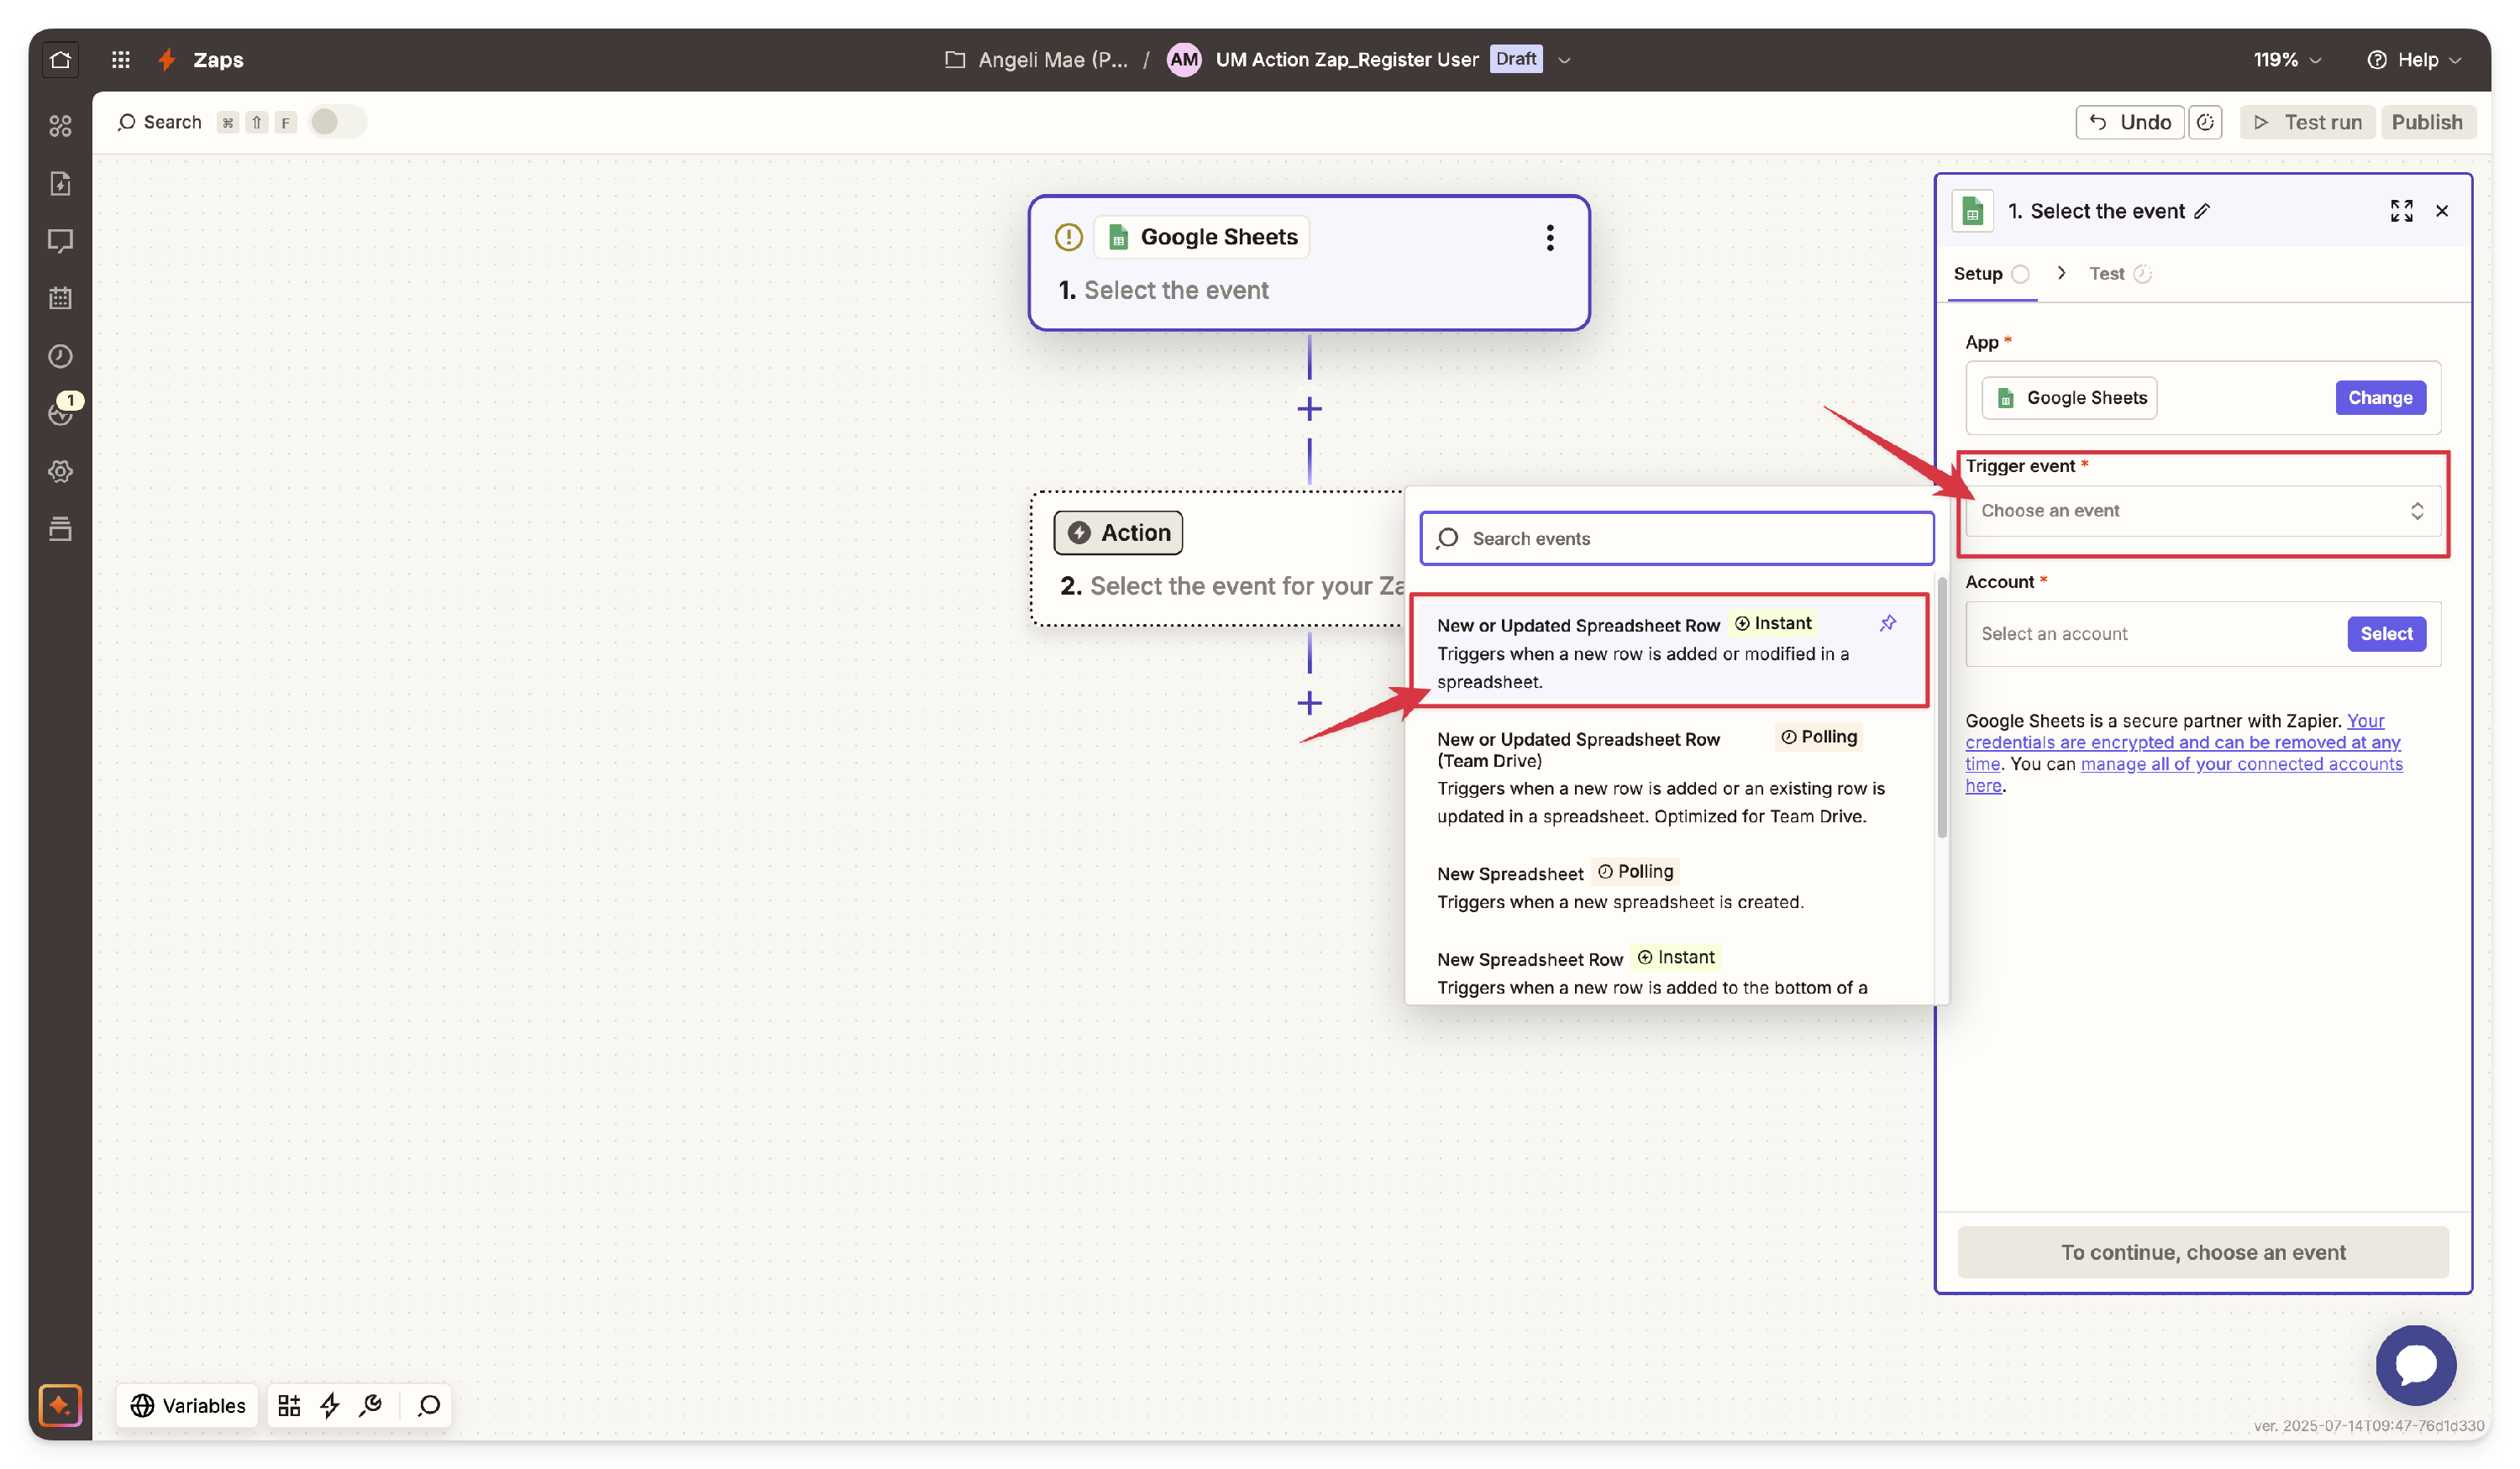
Once you've selected Google Sheets as your event app, set the details from the Setup tab within the step details panel on the right side.- In the Trigger event field, choose the event “New or Updated Spreadsheet Row.” This will initiate the Zap whenever a new or updated row appears in your Google Sheet.
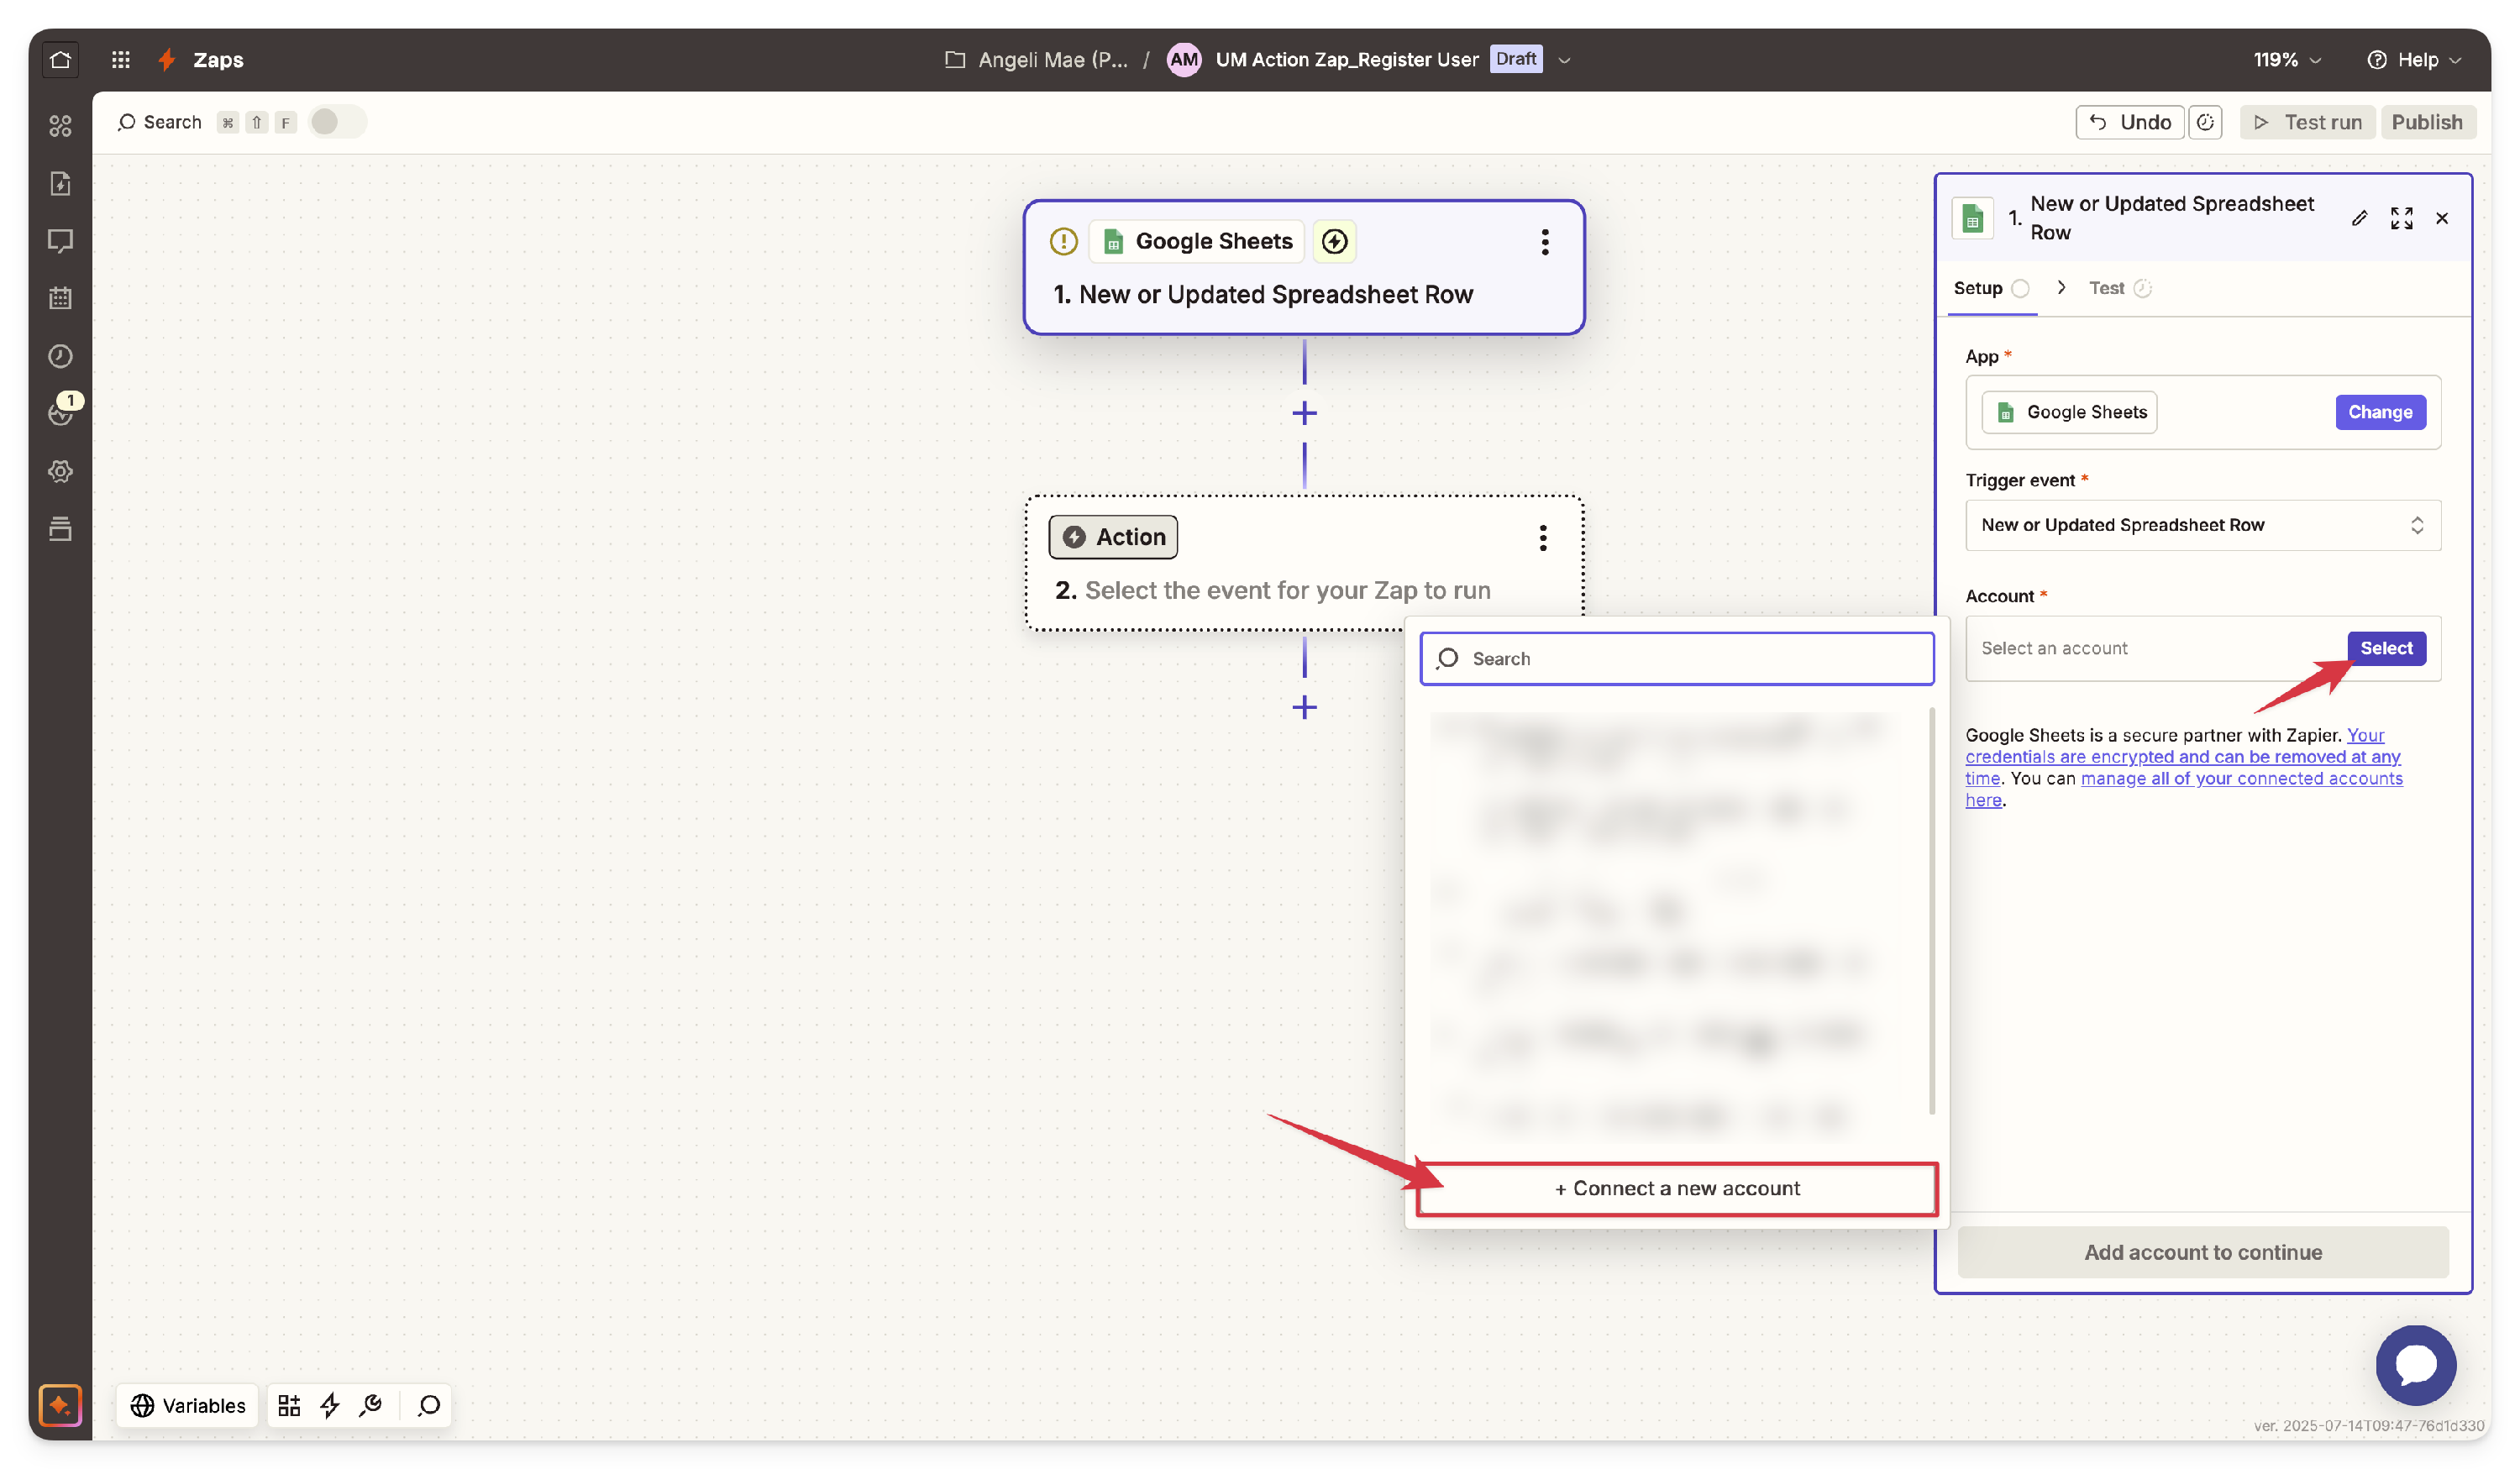
- In the Account option, sign in to your Google account and allow Zapier access to your Sheets. Connect your account to Google Sheets by clicking the "Select" and "+Create new account" buttons.
 It will redirect you to the authentication page where you must sign in to your Google account and authenticate the app.
- The "Allow" button process allows Zapier to access your Google Account securely. Zapier must use your Google services, like Drive and Sheets, for automation. It ensures secure authentication without revealing your password and gives you control over access.

- Once connected, click on the Continue button to proceed Configure tab.
- In the Trigger event field, choose the event “New or Updated Spreadsheet Row.” This will initiate the Zap whenever a new or updated row appears in your Google Sheet.
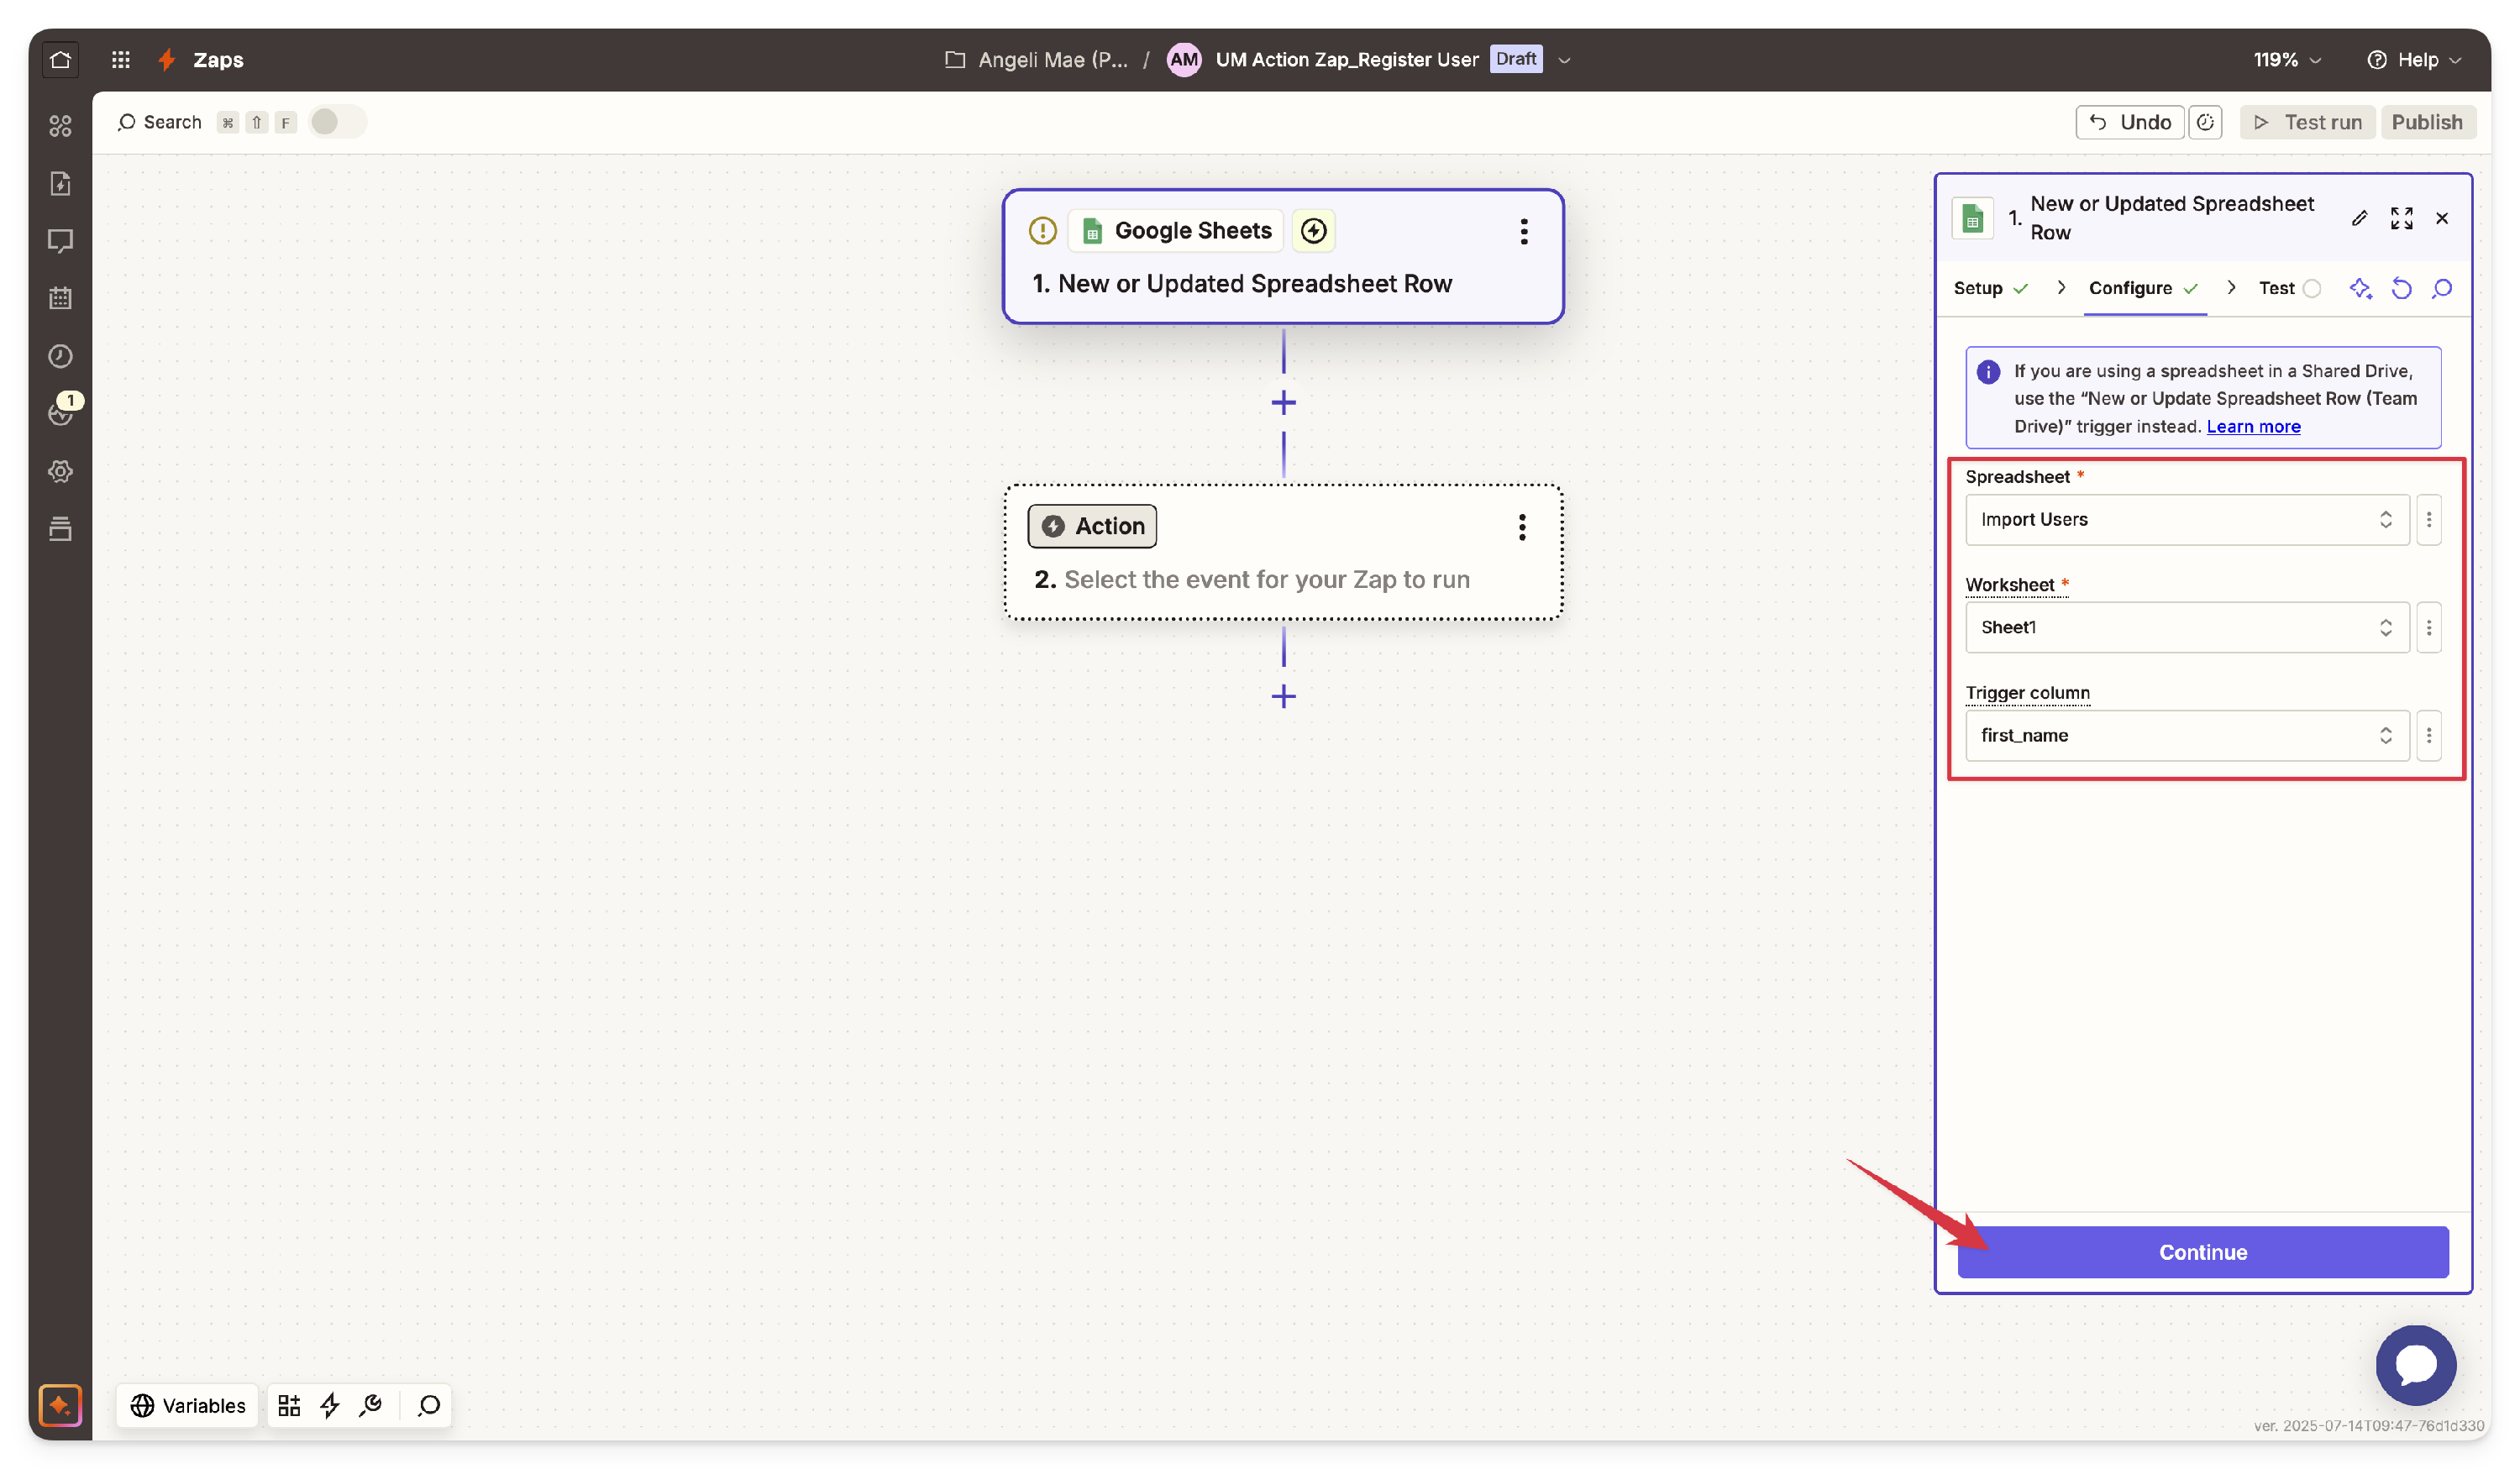
- Configure Spreadsheet, Worksheet & Trigger Column
- Choose the specific Google Spreadsheet (e.g., Import Users) and the worksheet you’ll use for the trigger.
- You can select a specific column as the trigger, so the Zap only activates when there’s a change in that particular column. In this example, we have selected 'first_name'.
- Test
- After configuring the settings, click Continue to move to the Test tab. Here, you can test your trigger by clicking the Test Trigger button. This will display data from your spreadsheet, allowing Zapier to map the data accurately.
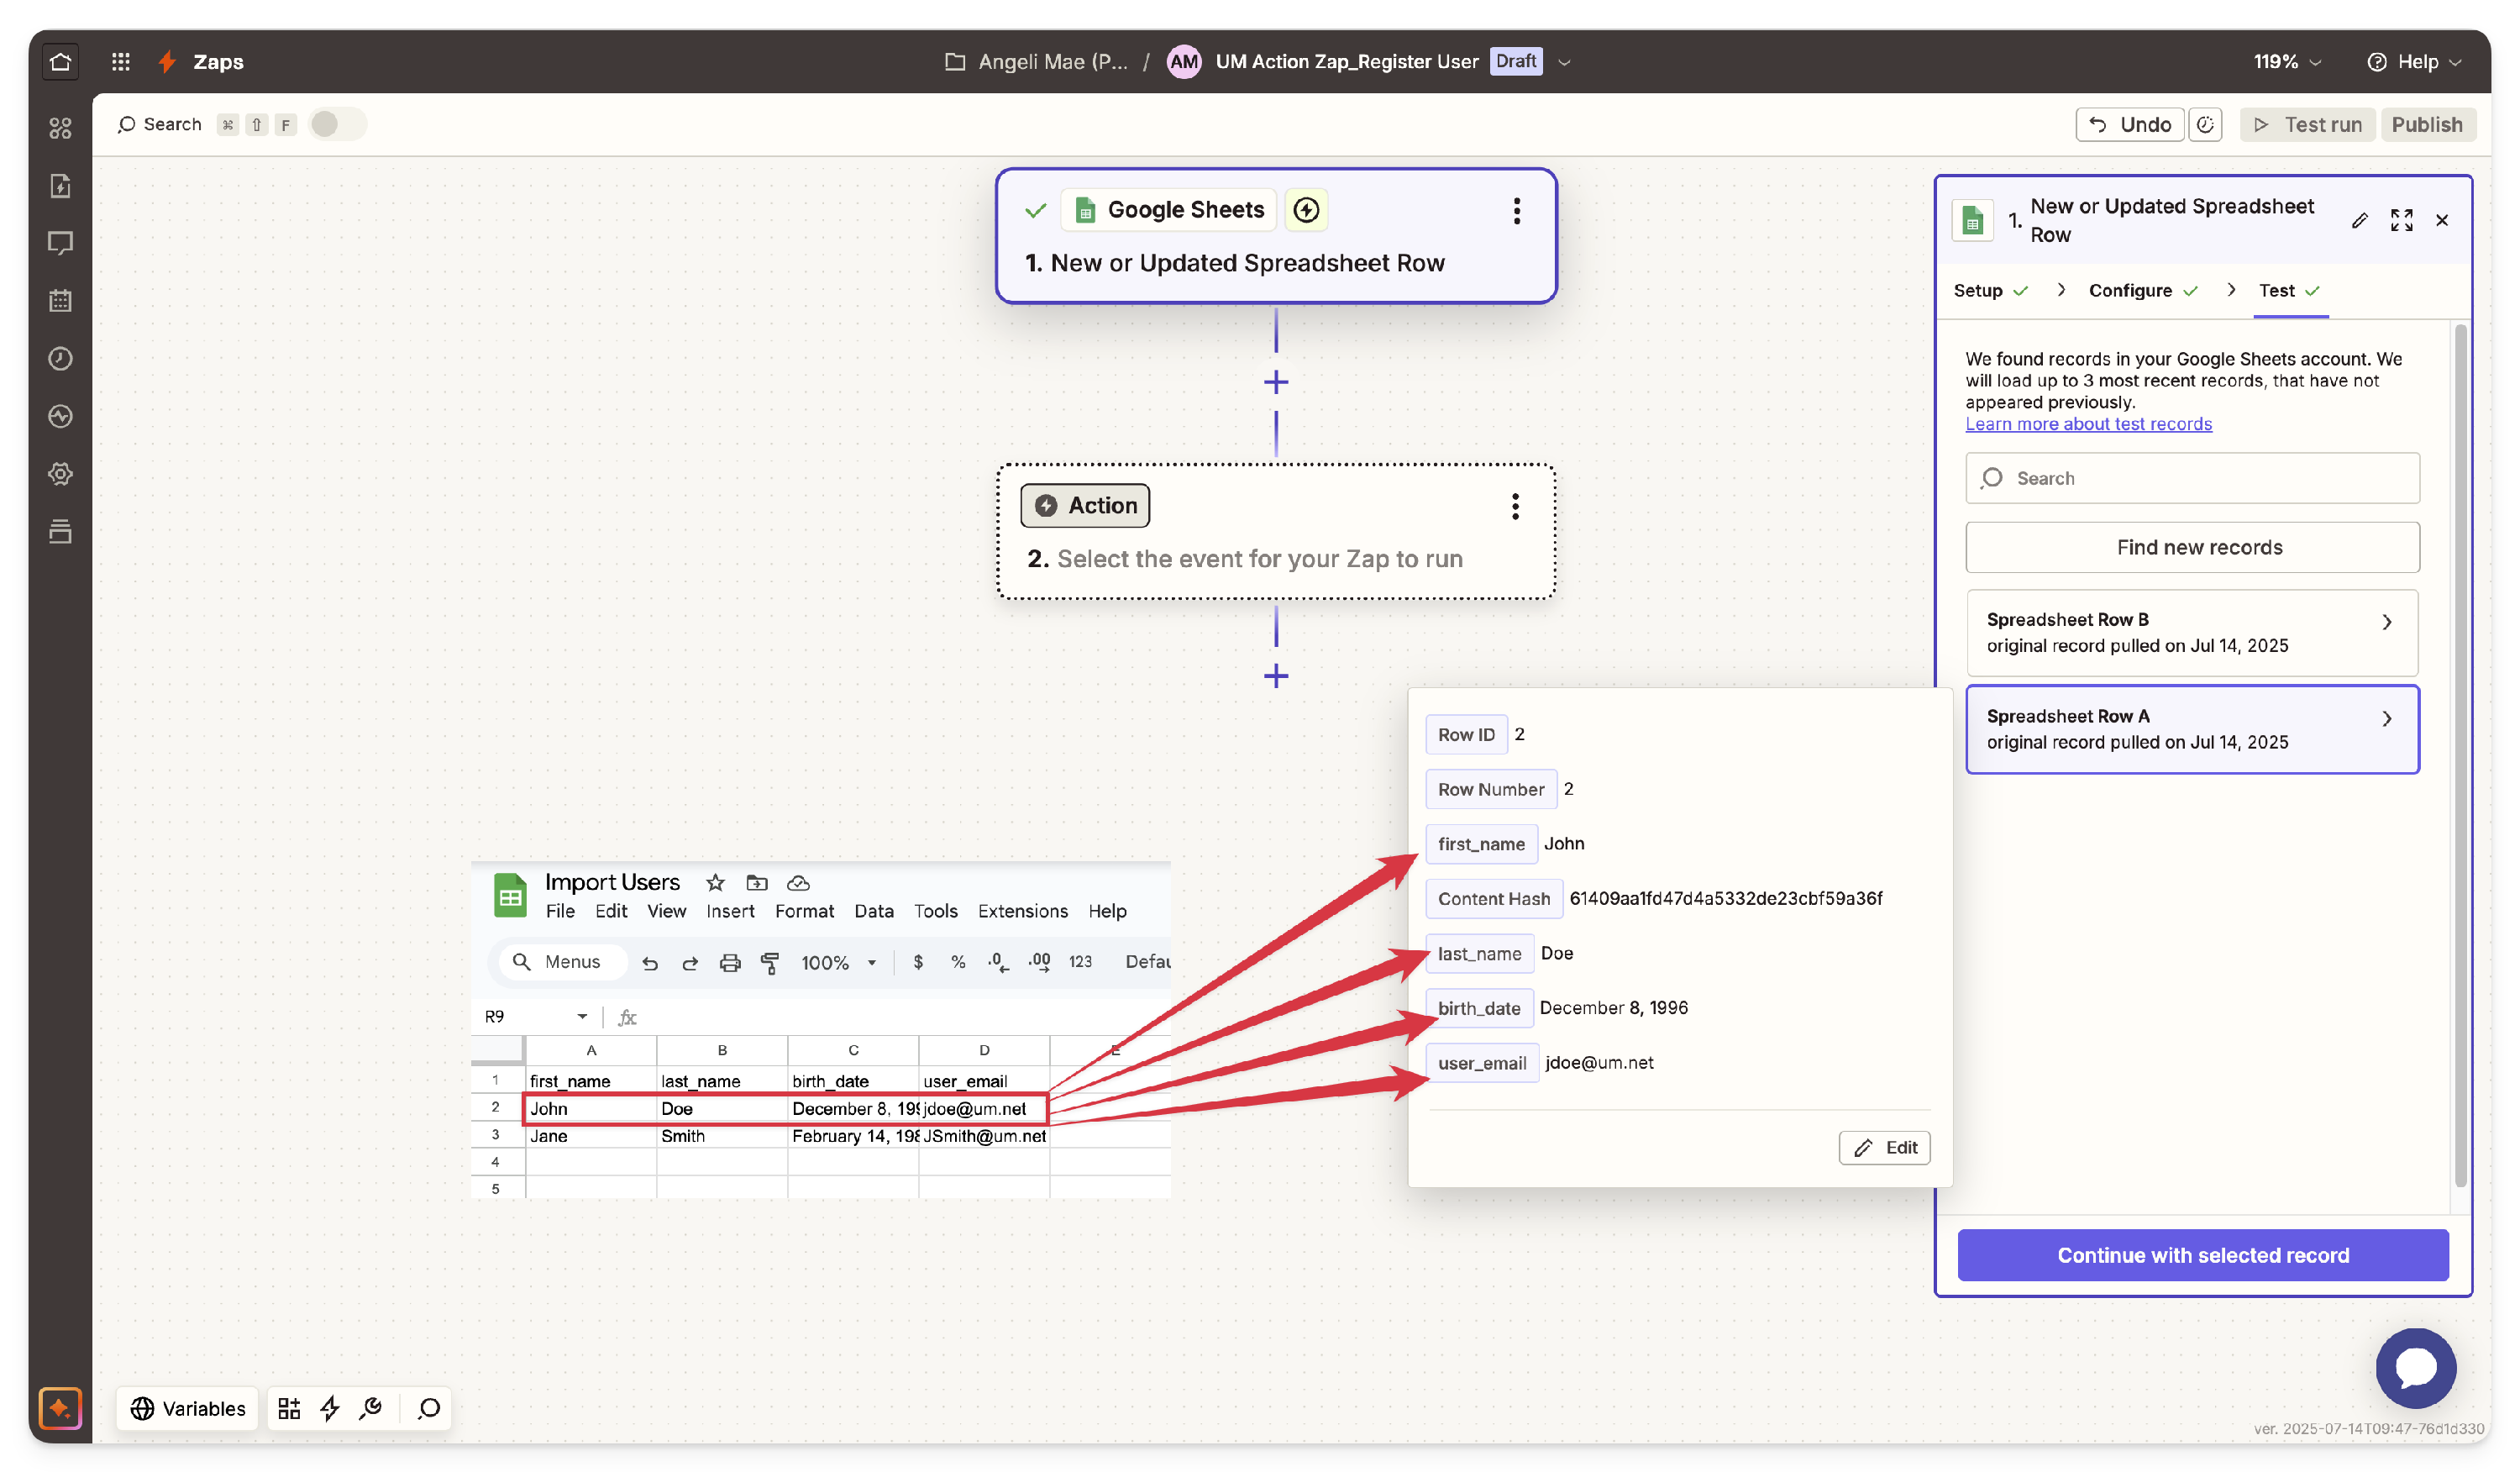
- If the trigger test is successful, you’re ready to proceed to the action setup by clicking the "Continue with selected record" button.
- After configuring the settings, click Continue to move to the Test tab. Here, you can test your trigger by clicking the Test Trigger button. This will display data from your spreadsheet, allowing Zapier to map the data accurately.


 It will redirect you to the authentication page where you must sign in to your Google account and authenticate the app.


Step 2: Configure the Action in Ultimate Member
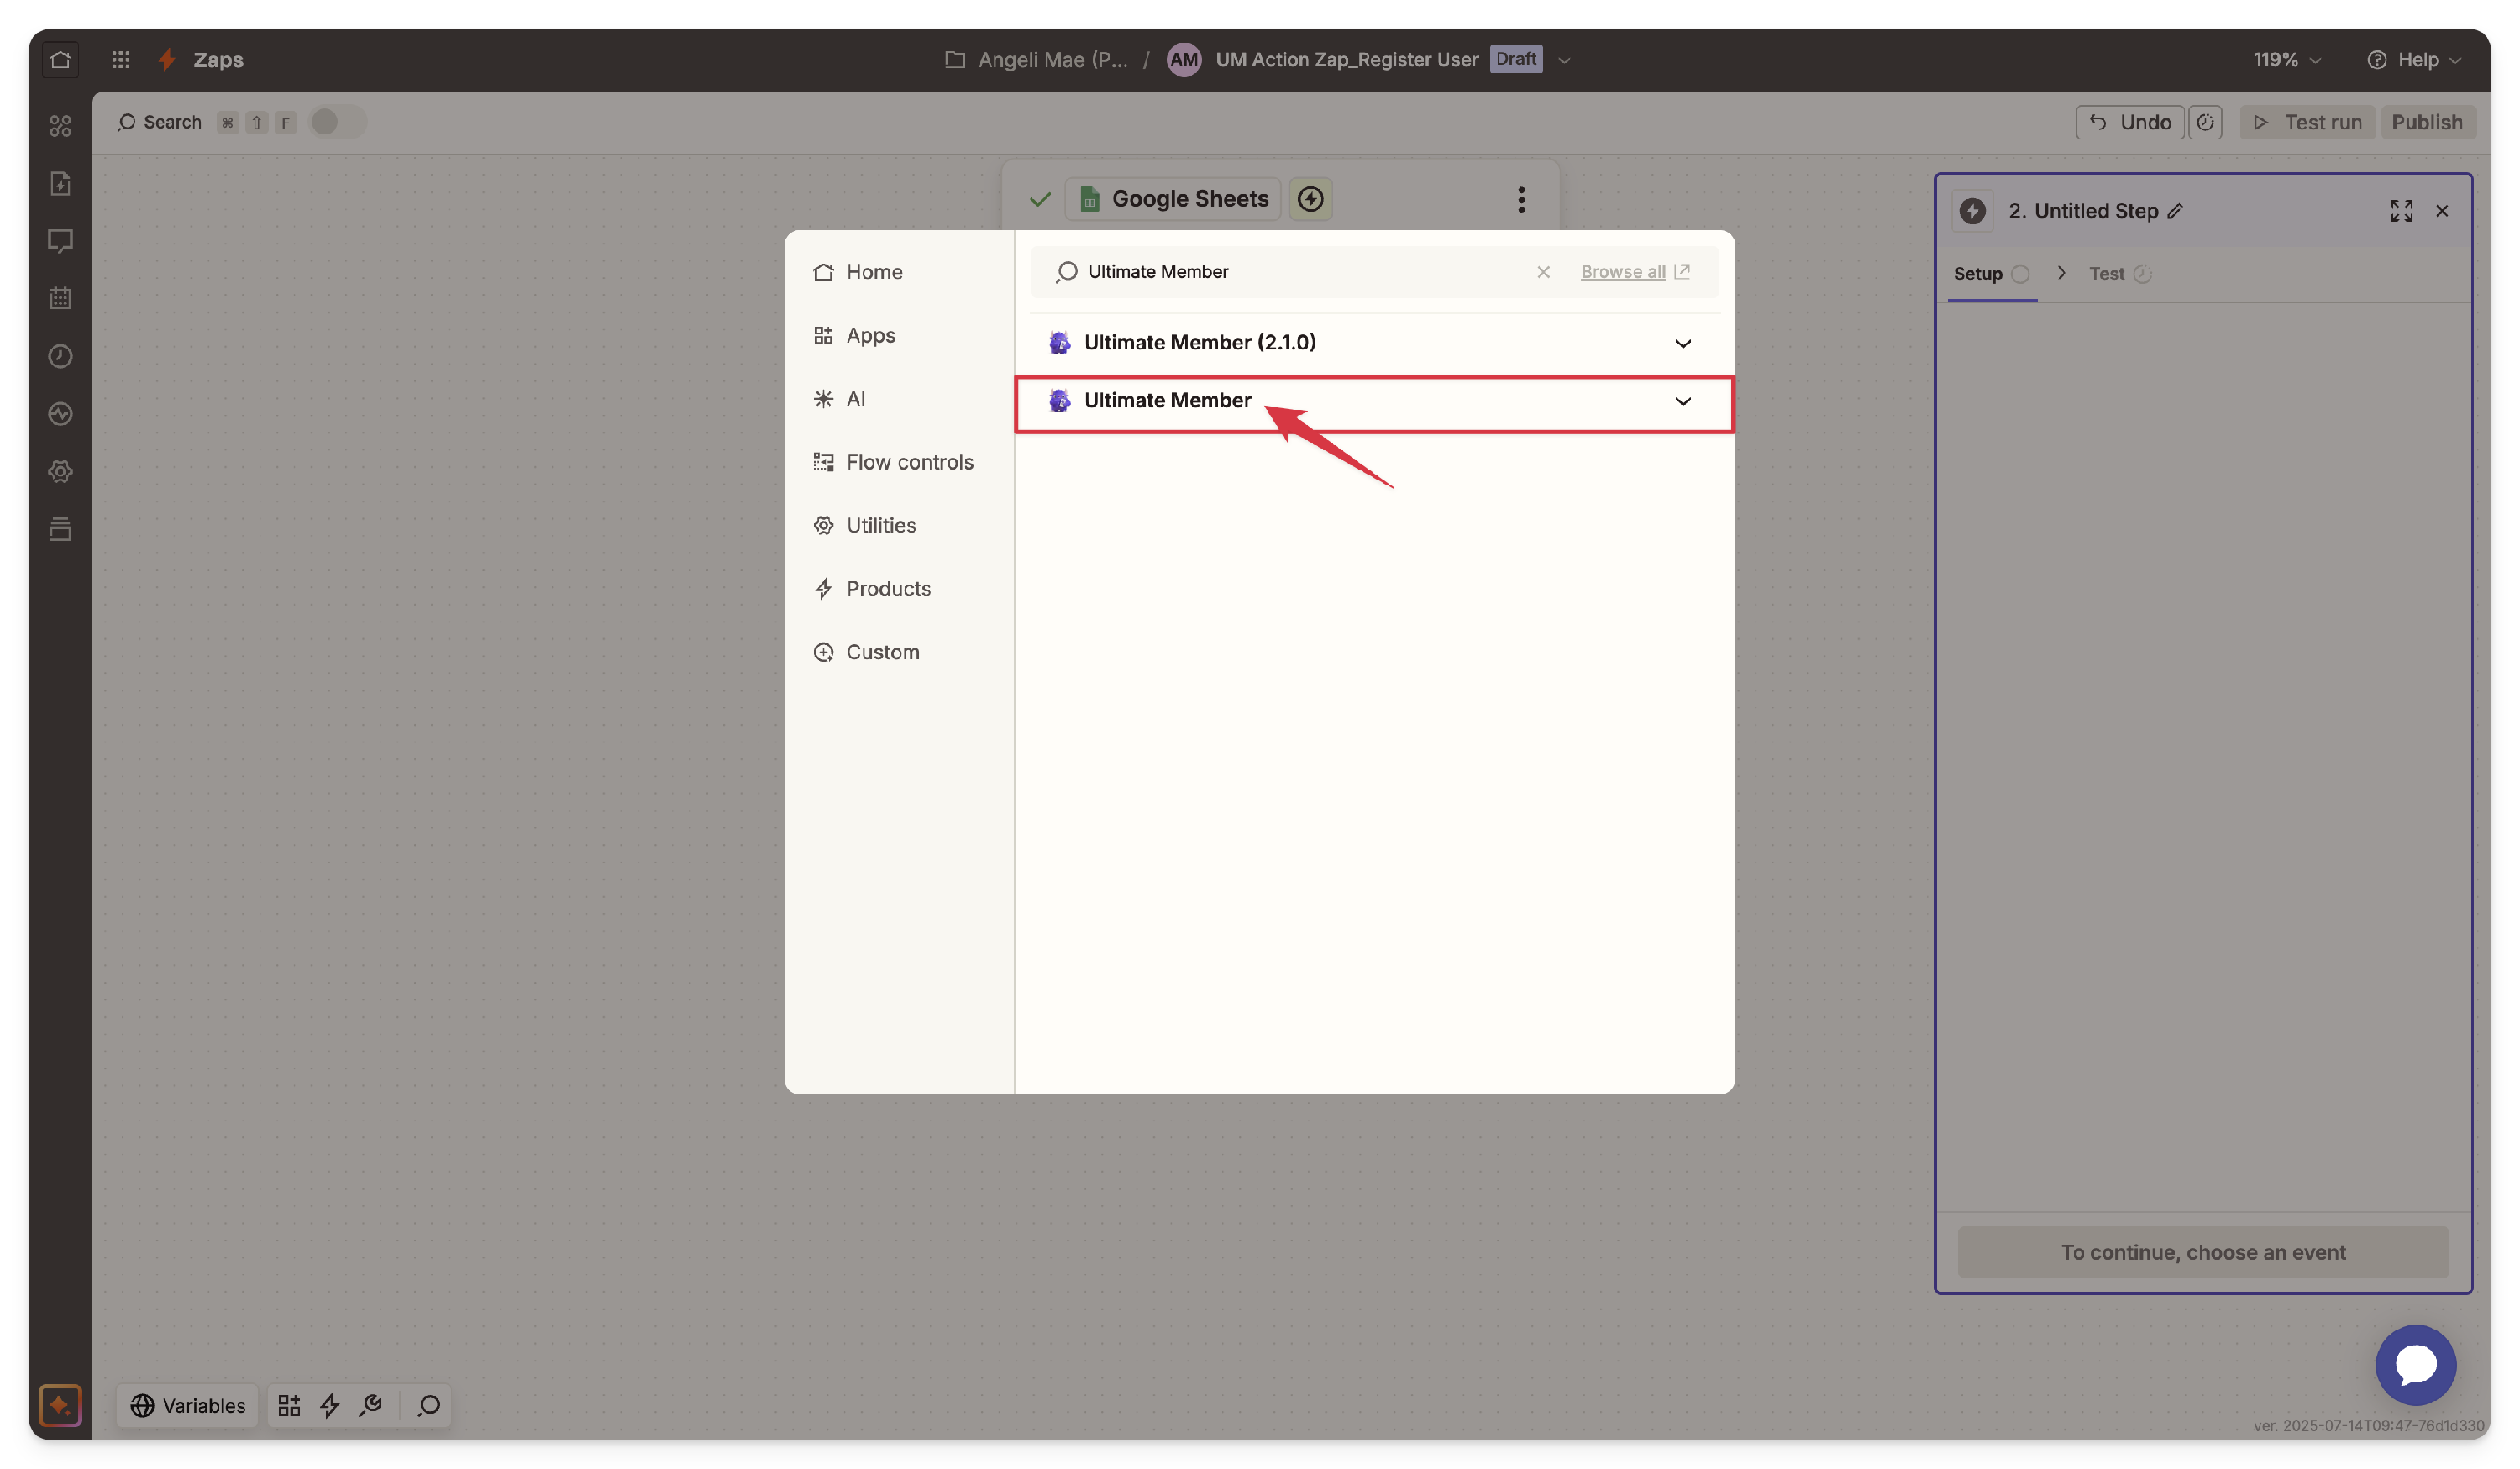
- Search for and select Ultimate Member from the list of apps. When setting up your Zap, you may notice multiple Ultimate Member apps listed. For example:
Ultimate MemberUltimate Member (2.1.0)
To ensure compatibility and access to the latest features and updates, always select the app labeled
Ultimate Memberwithout a version number.
This entry represents the most current version of the integration.
The ones with a version number, such asUltimate Member (2.1.0), are older and should not be used.Important: Using the latest version prevents potential compatibility issues and ensures your integration benefits from the latest improvements.
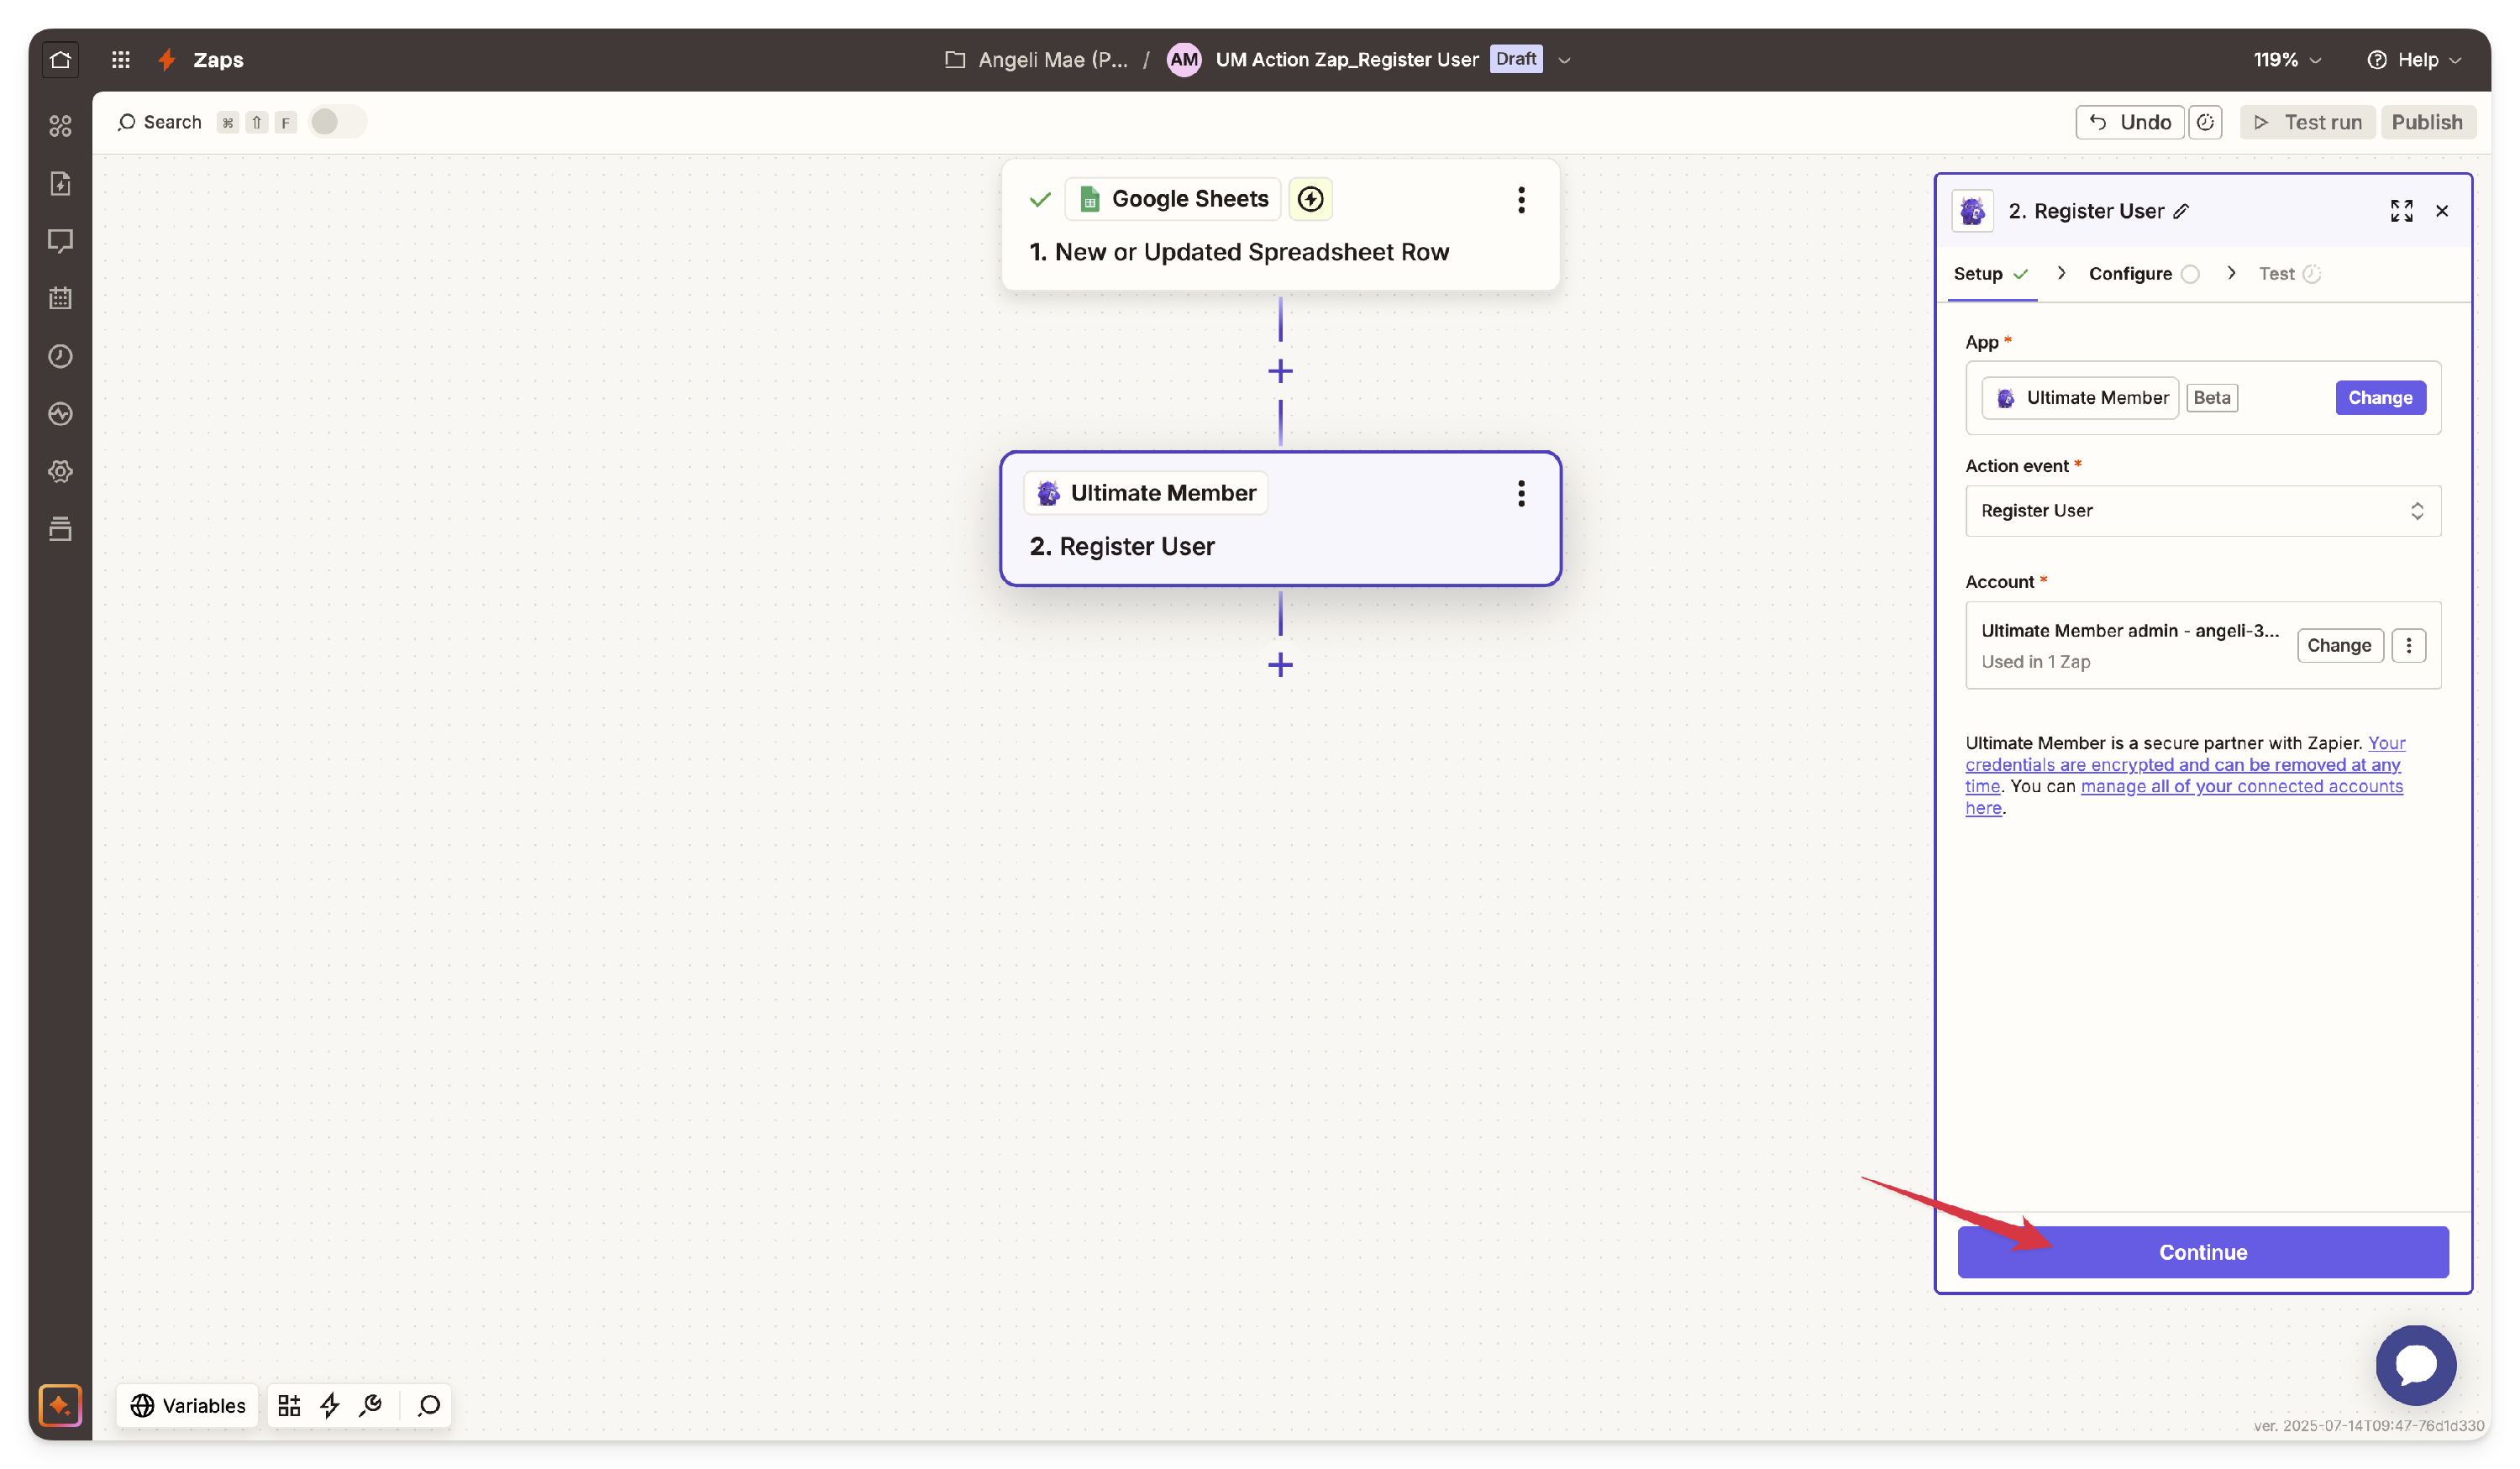
 In the Setup tab within the step details panel on the right, select the desired event under the Action Event option. For this example, we have chosen Register User.
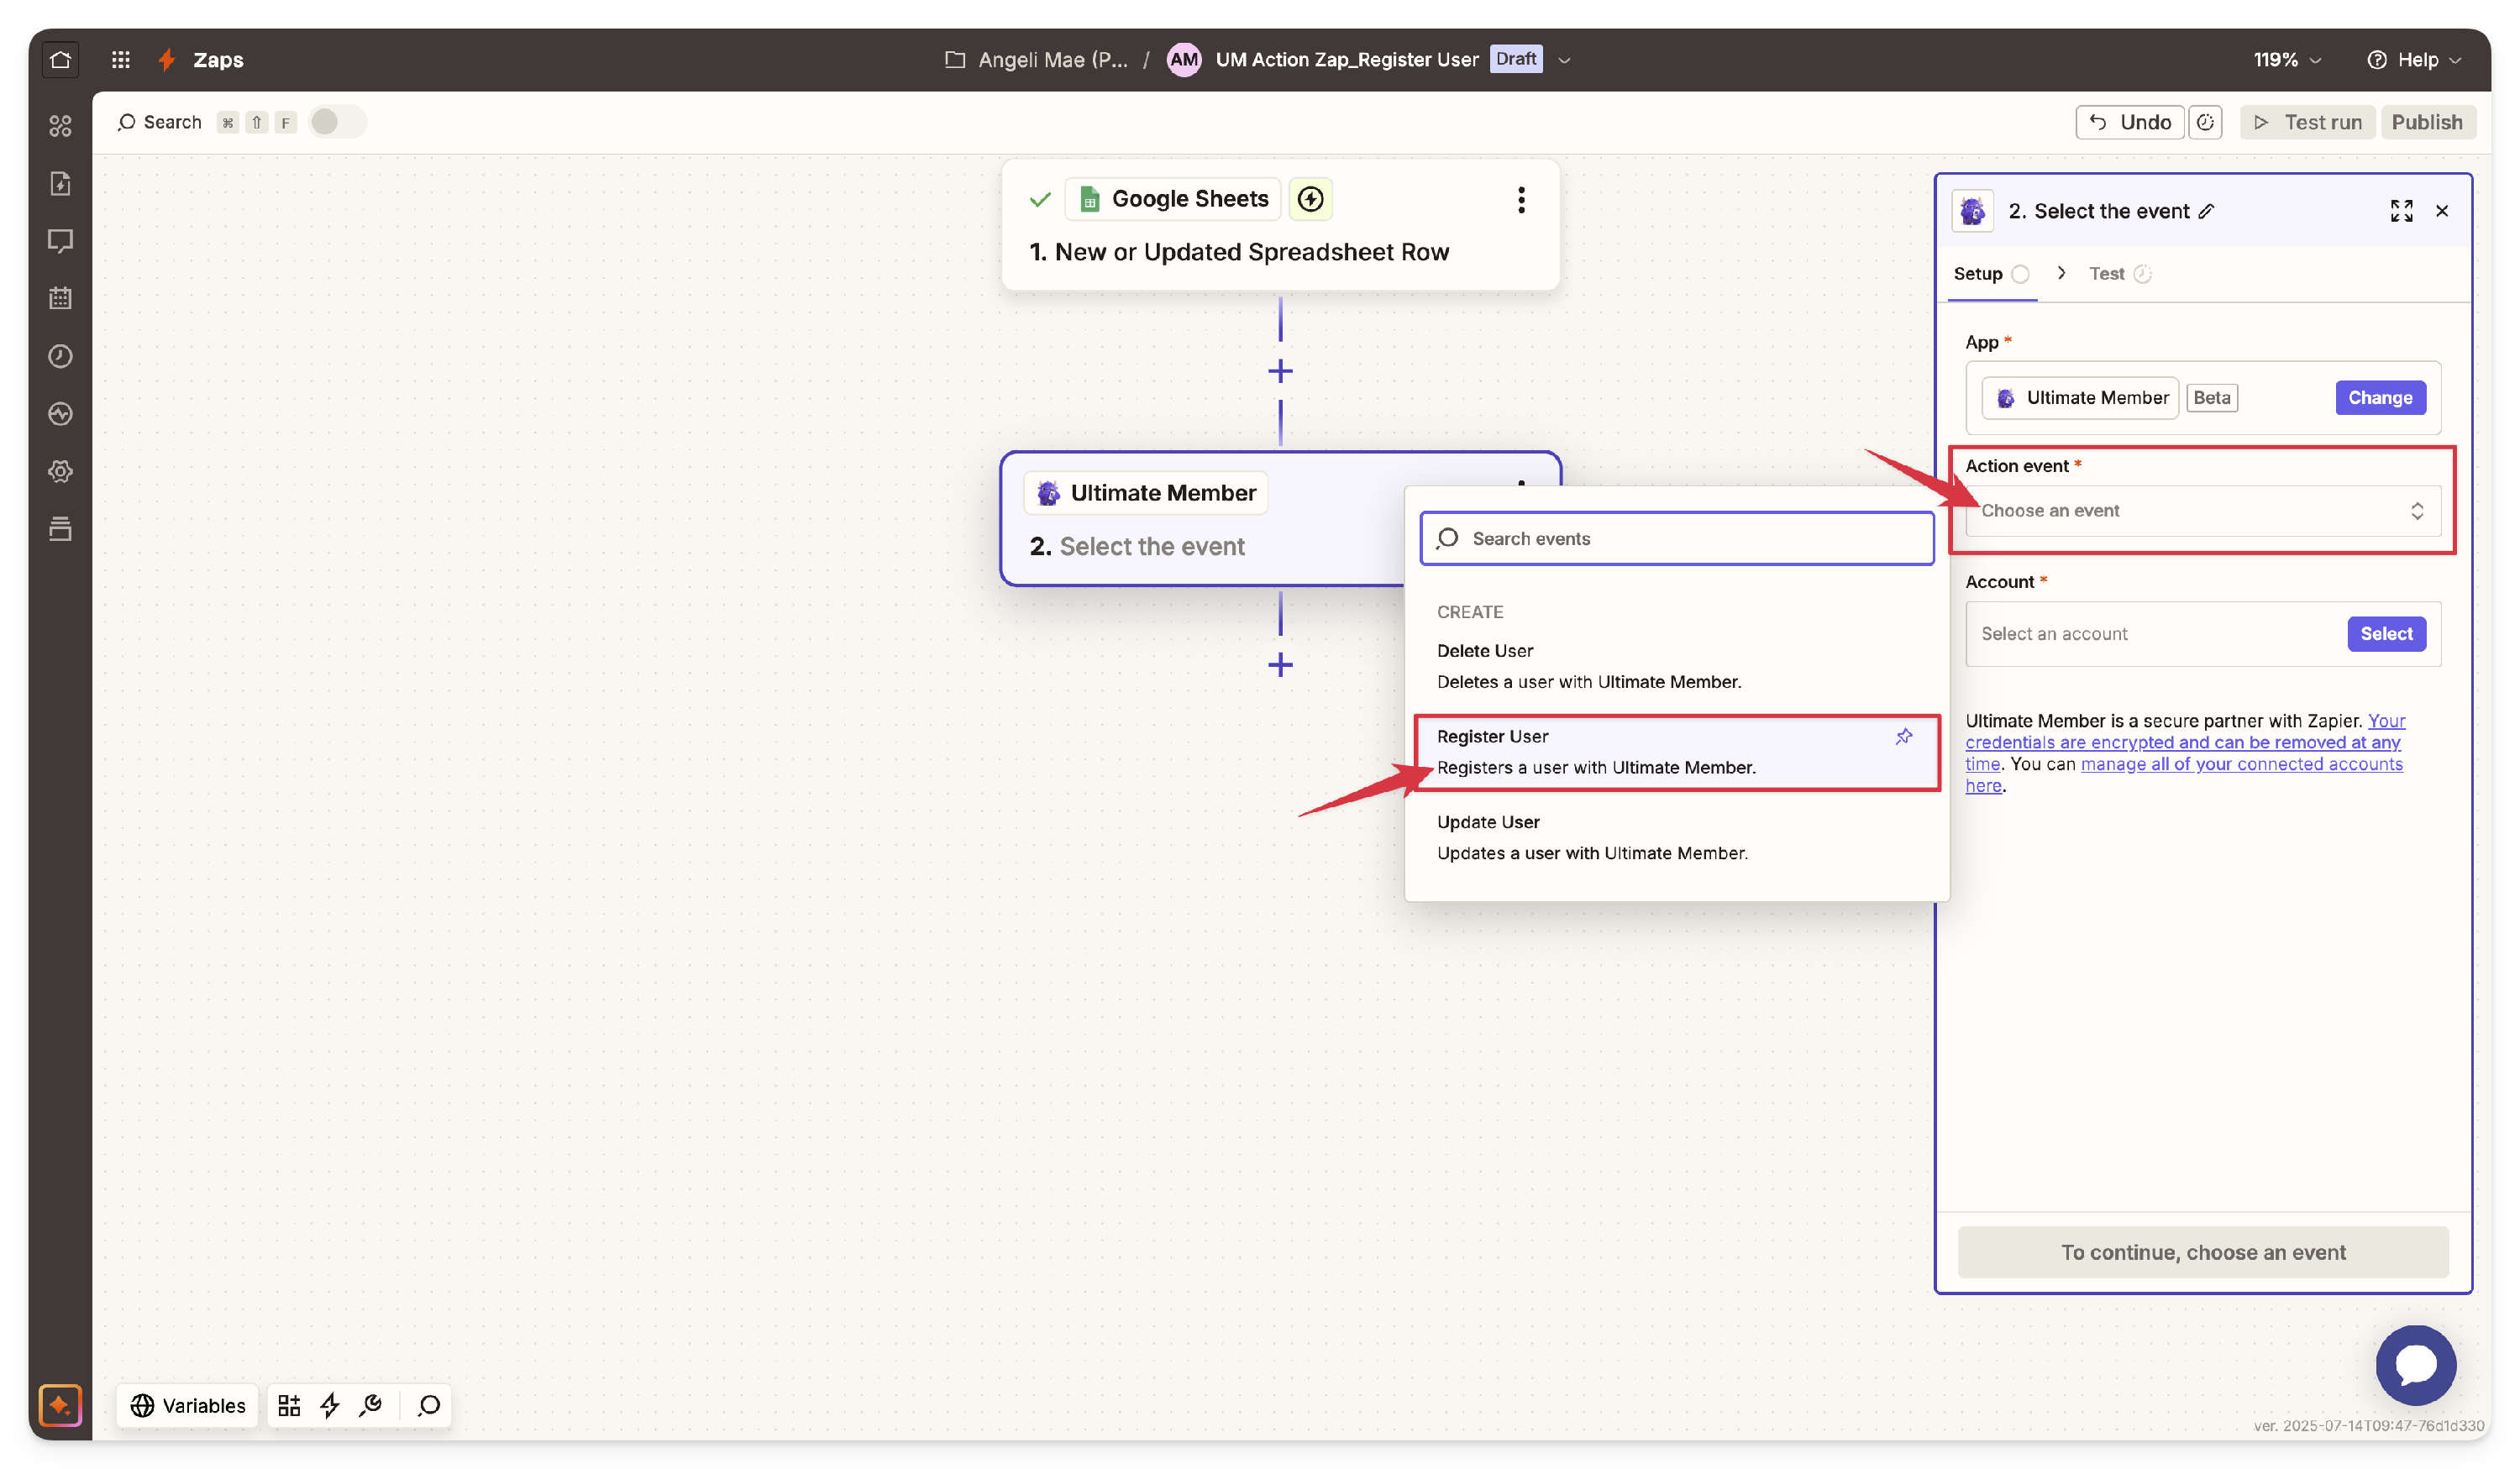
Ultimate Member currently provides three action events to choose from:
- Register User: Registers a user to the website.
- Delete User: Finds a user account by email or username and deletes it, with an option to confirm deletion if the account isn’t found.Update Users: Find a user by email address or username and update the user's details.
- After selecting an action event, continue to the Account option, where you can manage all connected accounts. Ultimate Member is a verified Zapier partner, ensuring secure encryption of your credentials. From here, click the Change button to choose an existing account or + Connect a new account to add a new one.
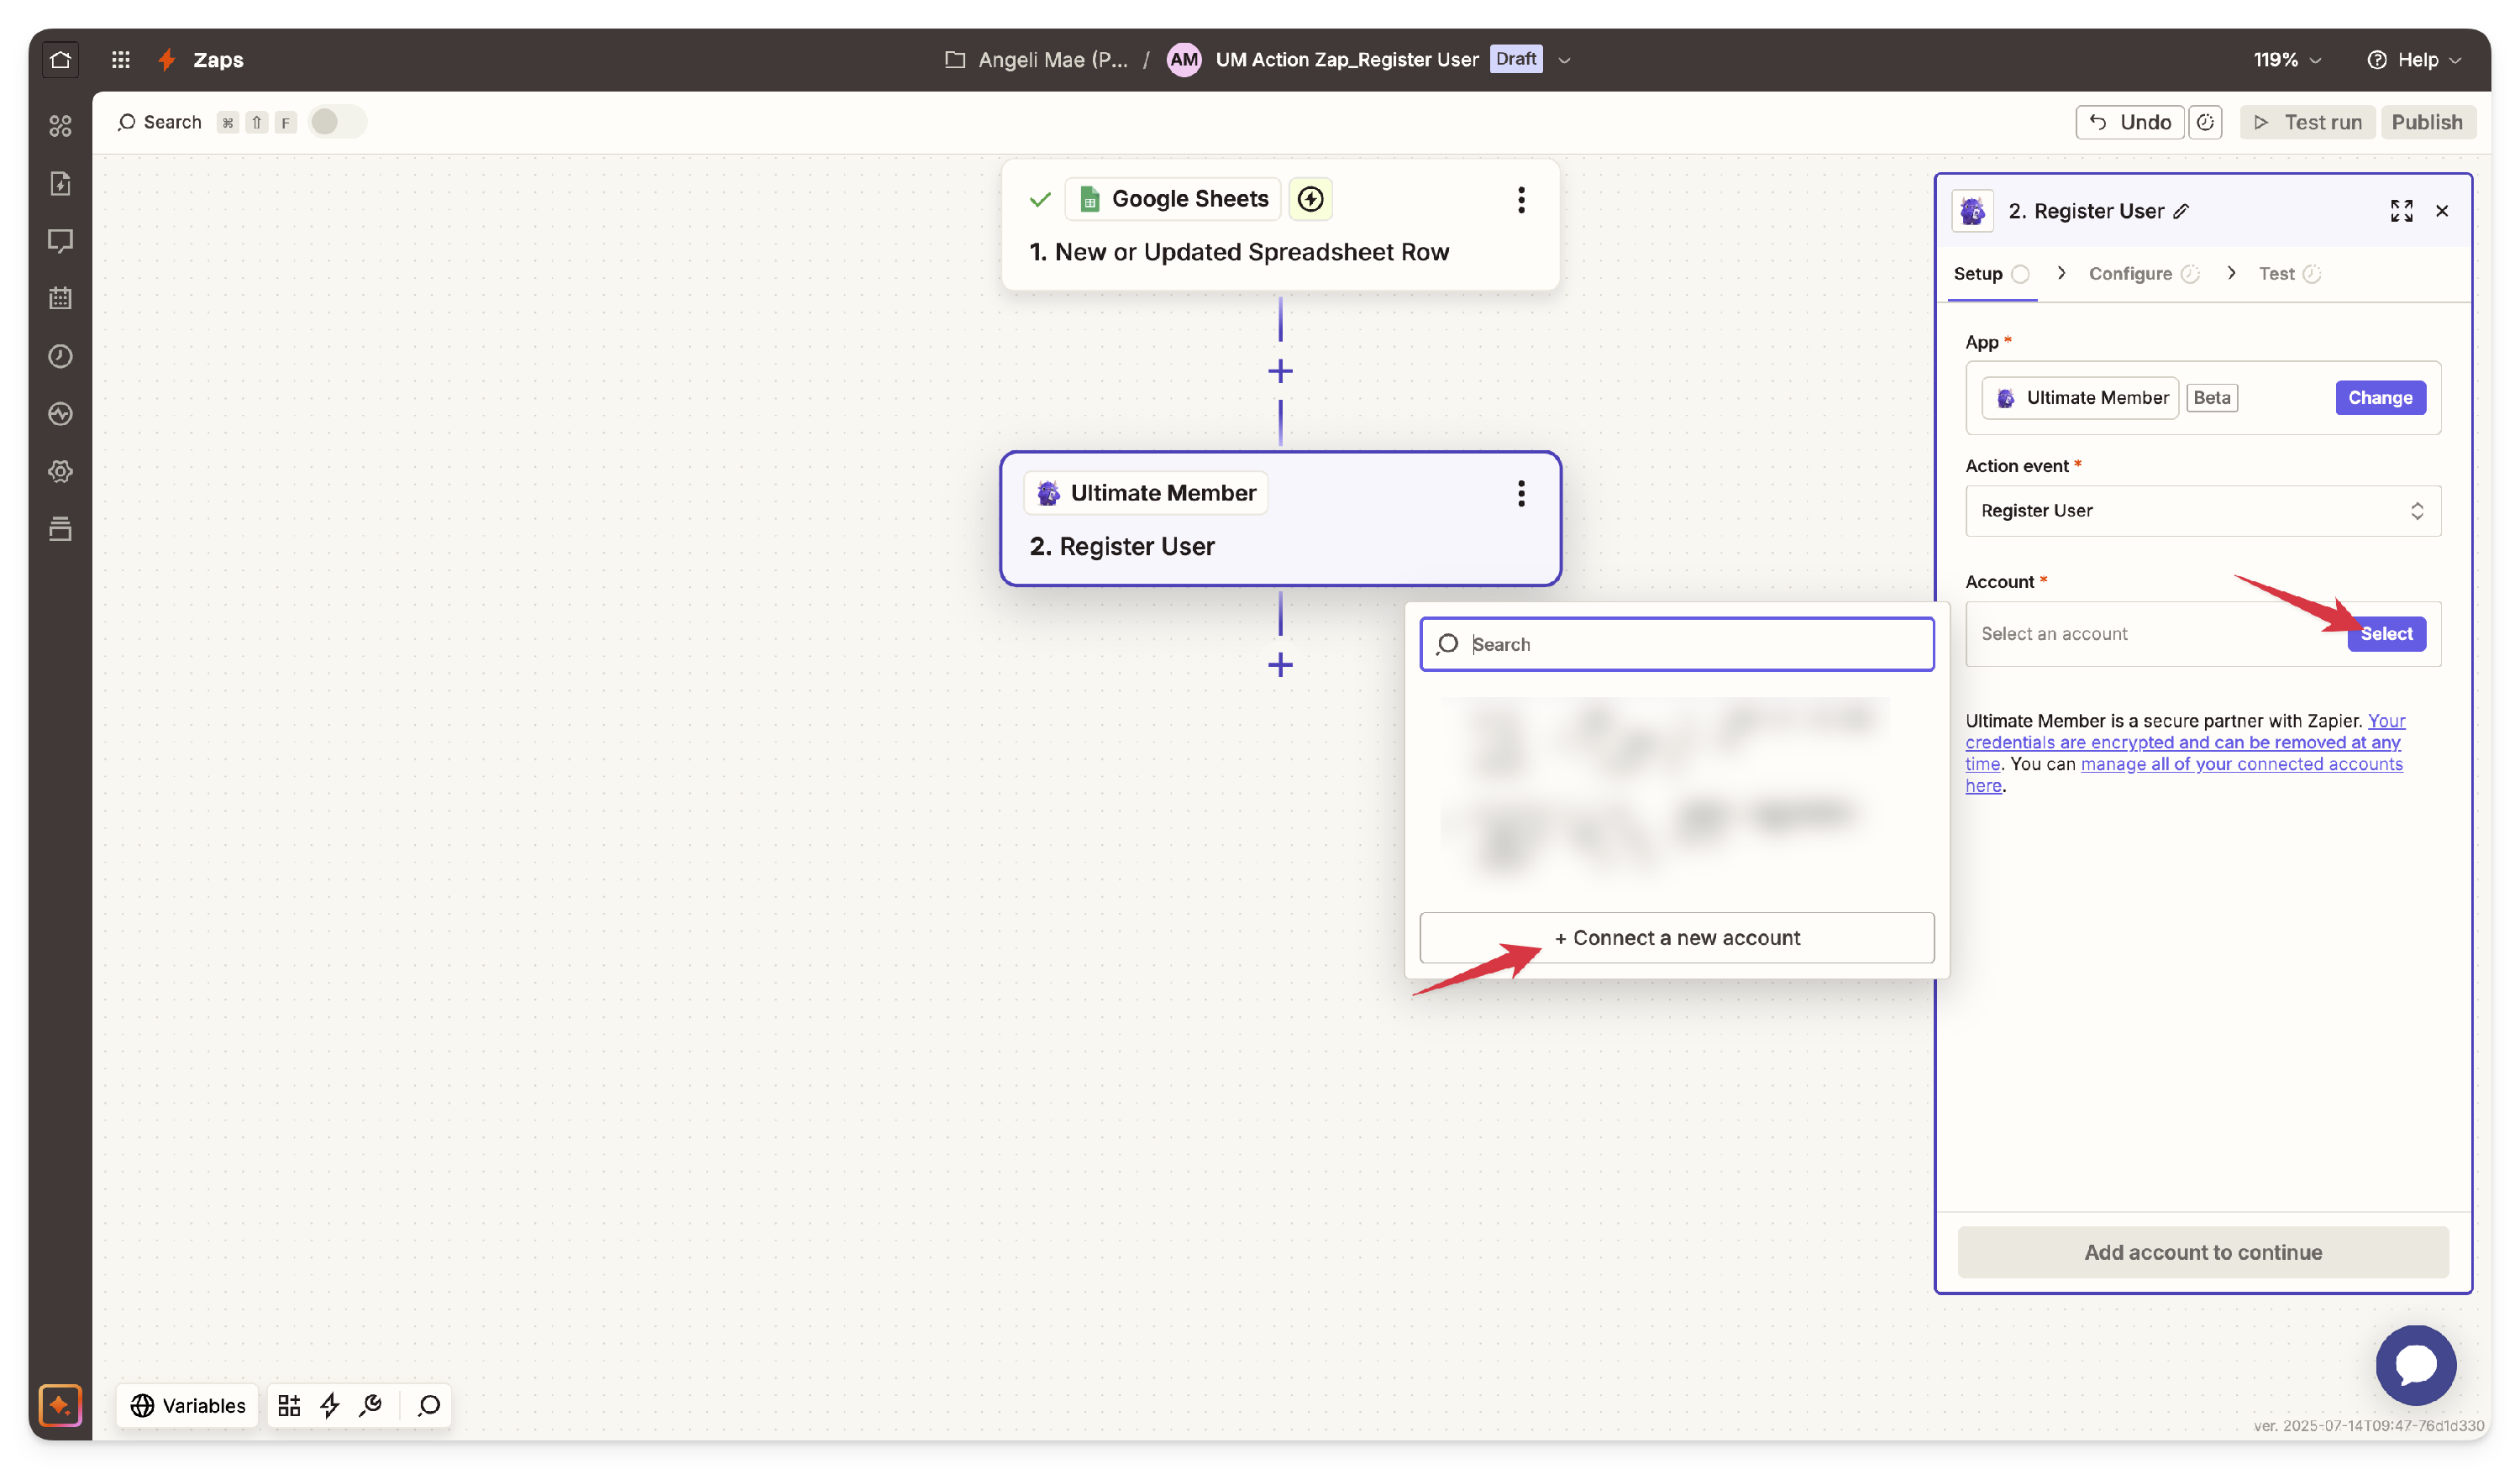
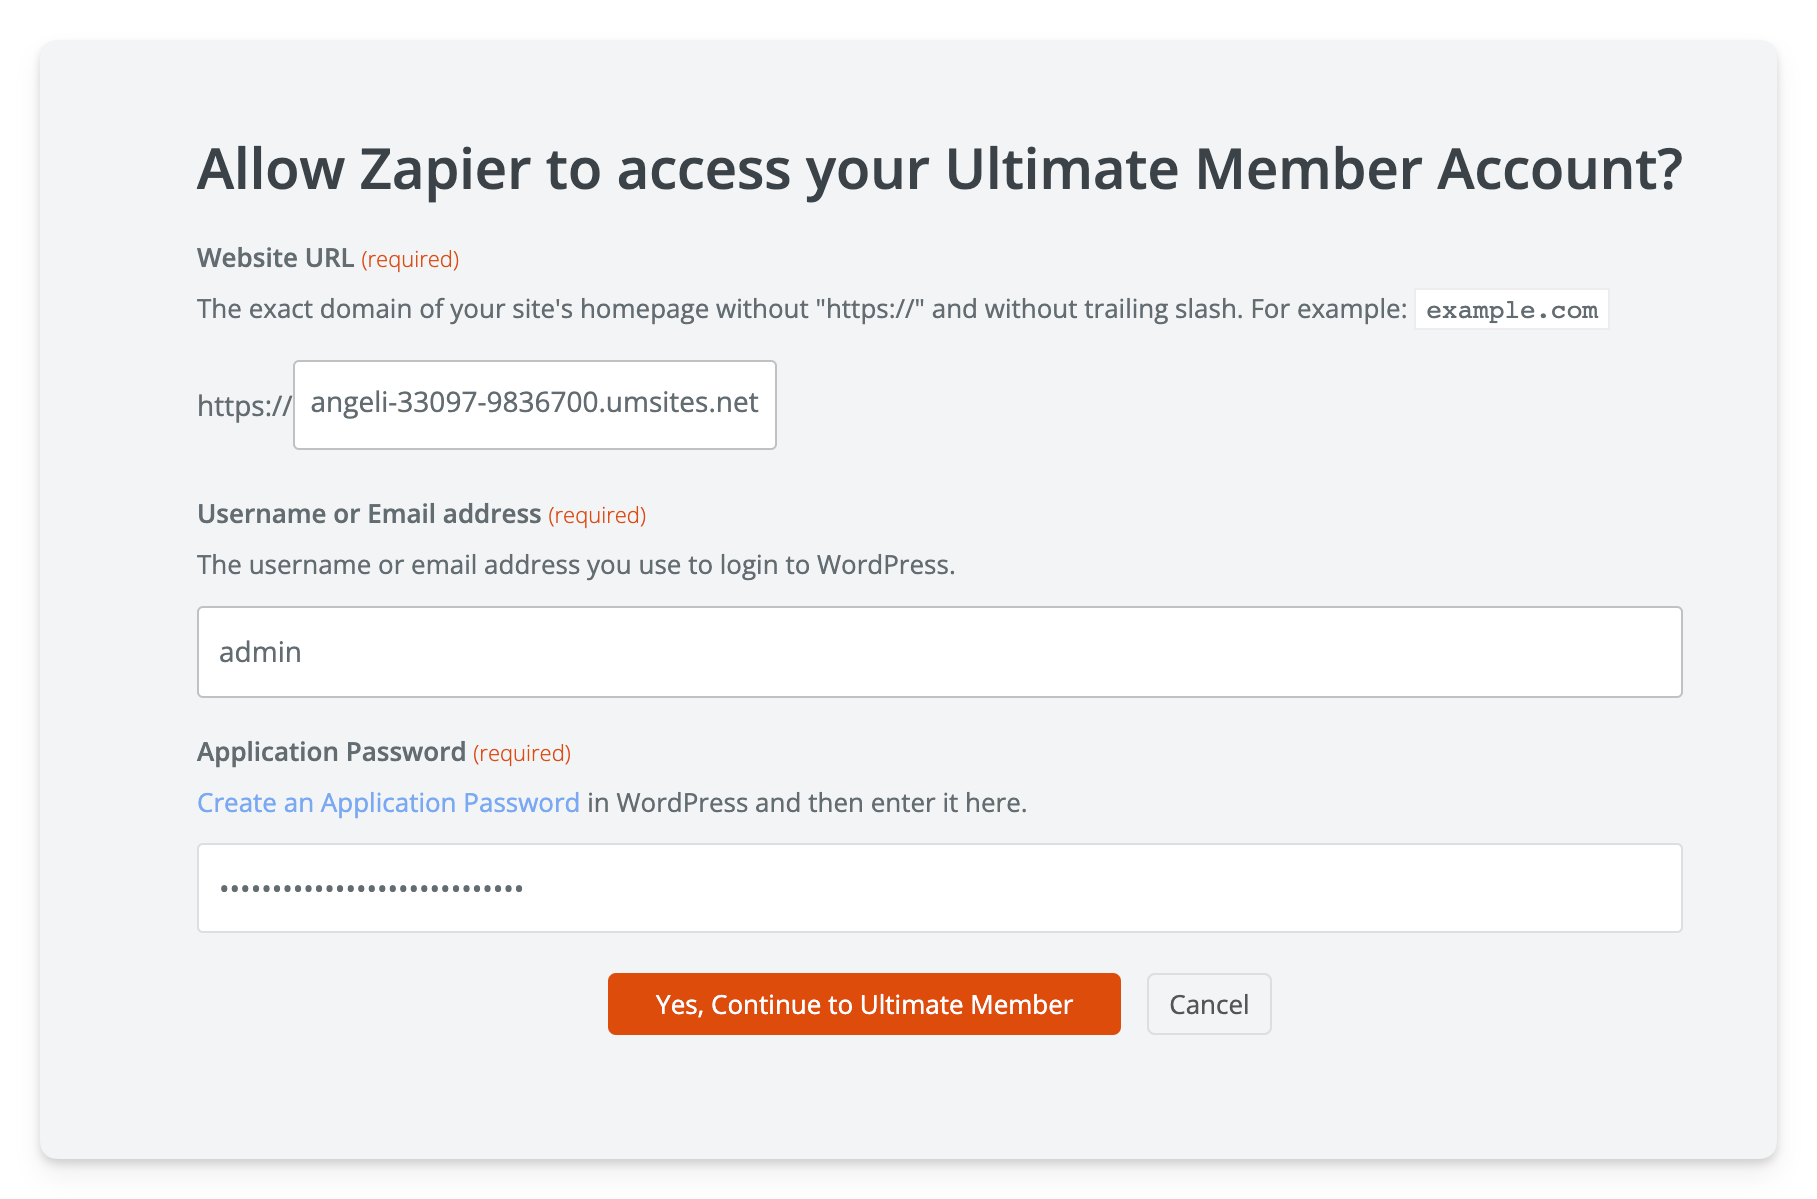
- Clicking "+ Connect a new account" will open a new tab to the authentication page, where you’ll enter your Website URL, username, and application password. Confirm by clicking the "Yes, continue to Ultimate Member" button to complete the connection.
- Confirm your account connection and click the Continue button to move to the Configure tab.
Note: Use the Application Password generated in wp-admin > Users > Edit a user > Application Passwords for this authentication process.

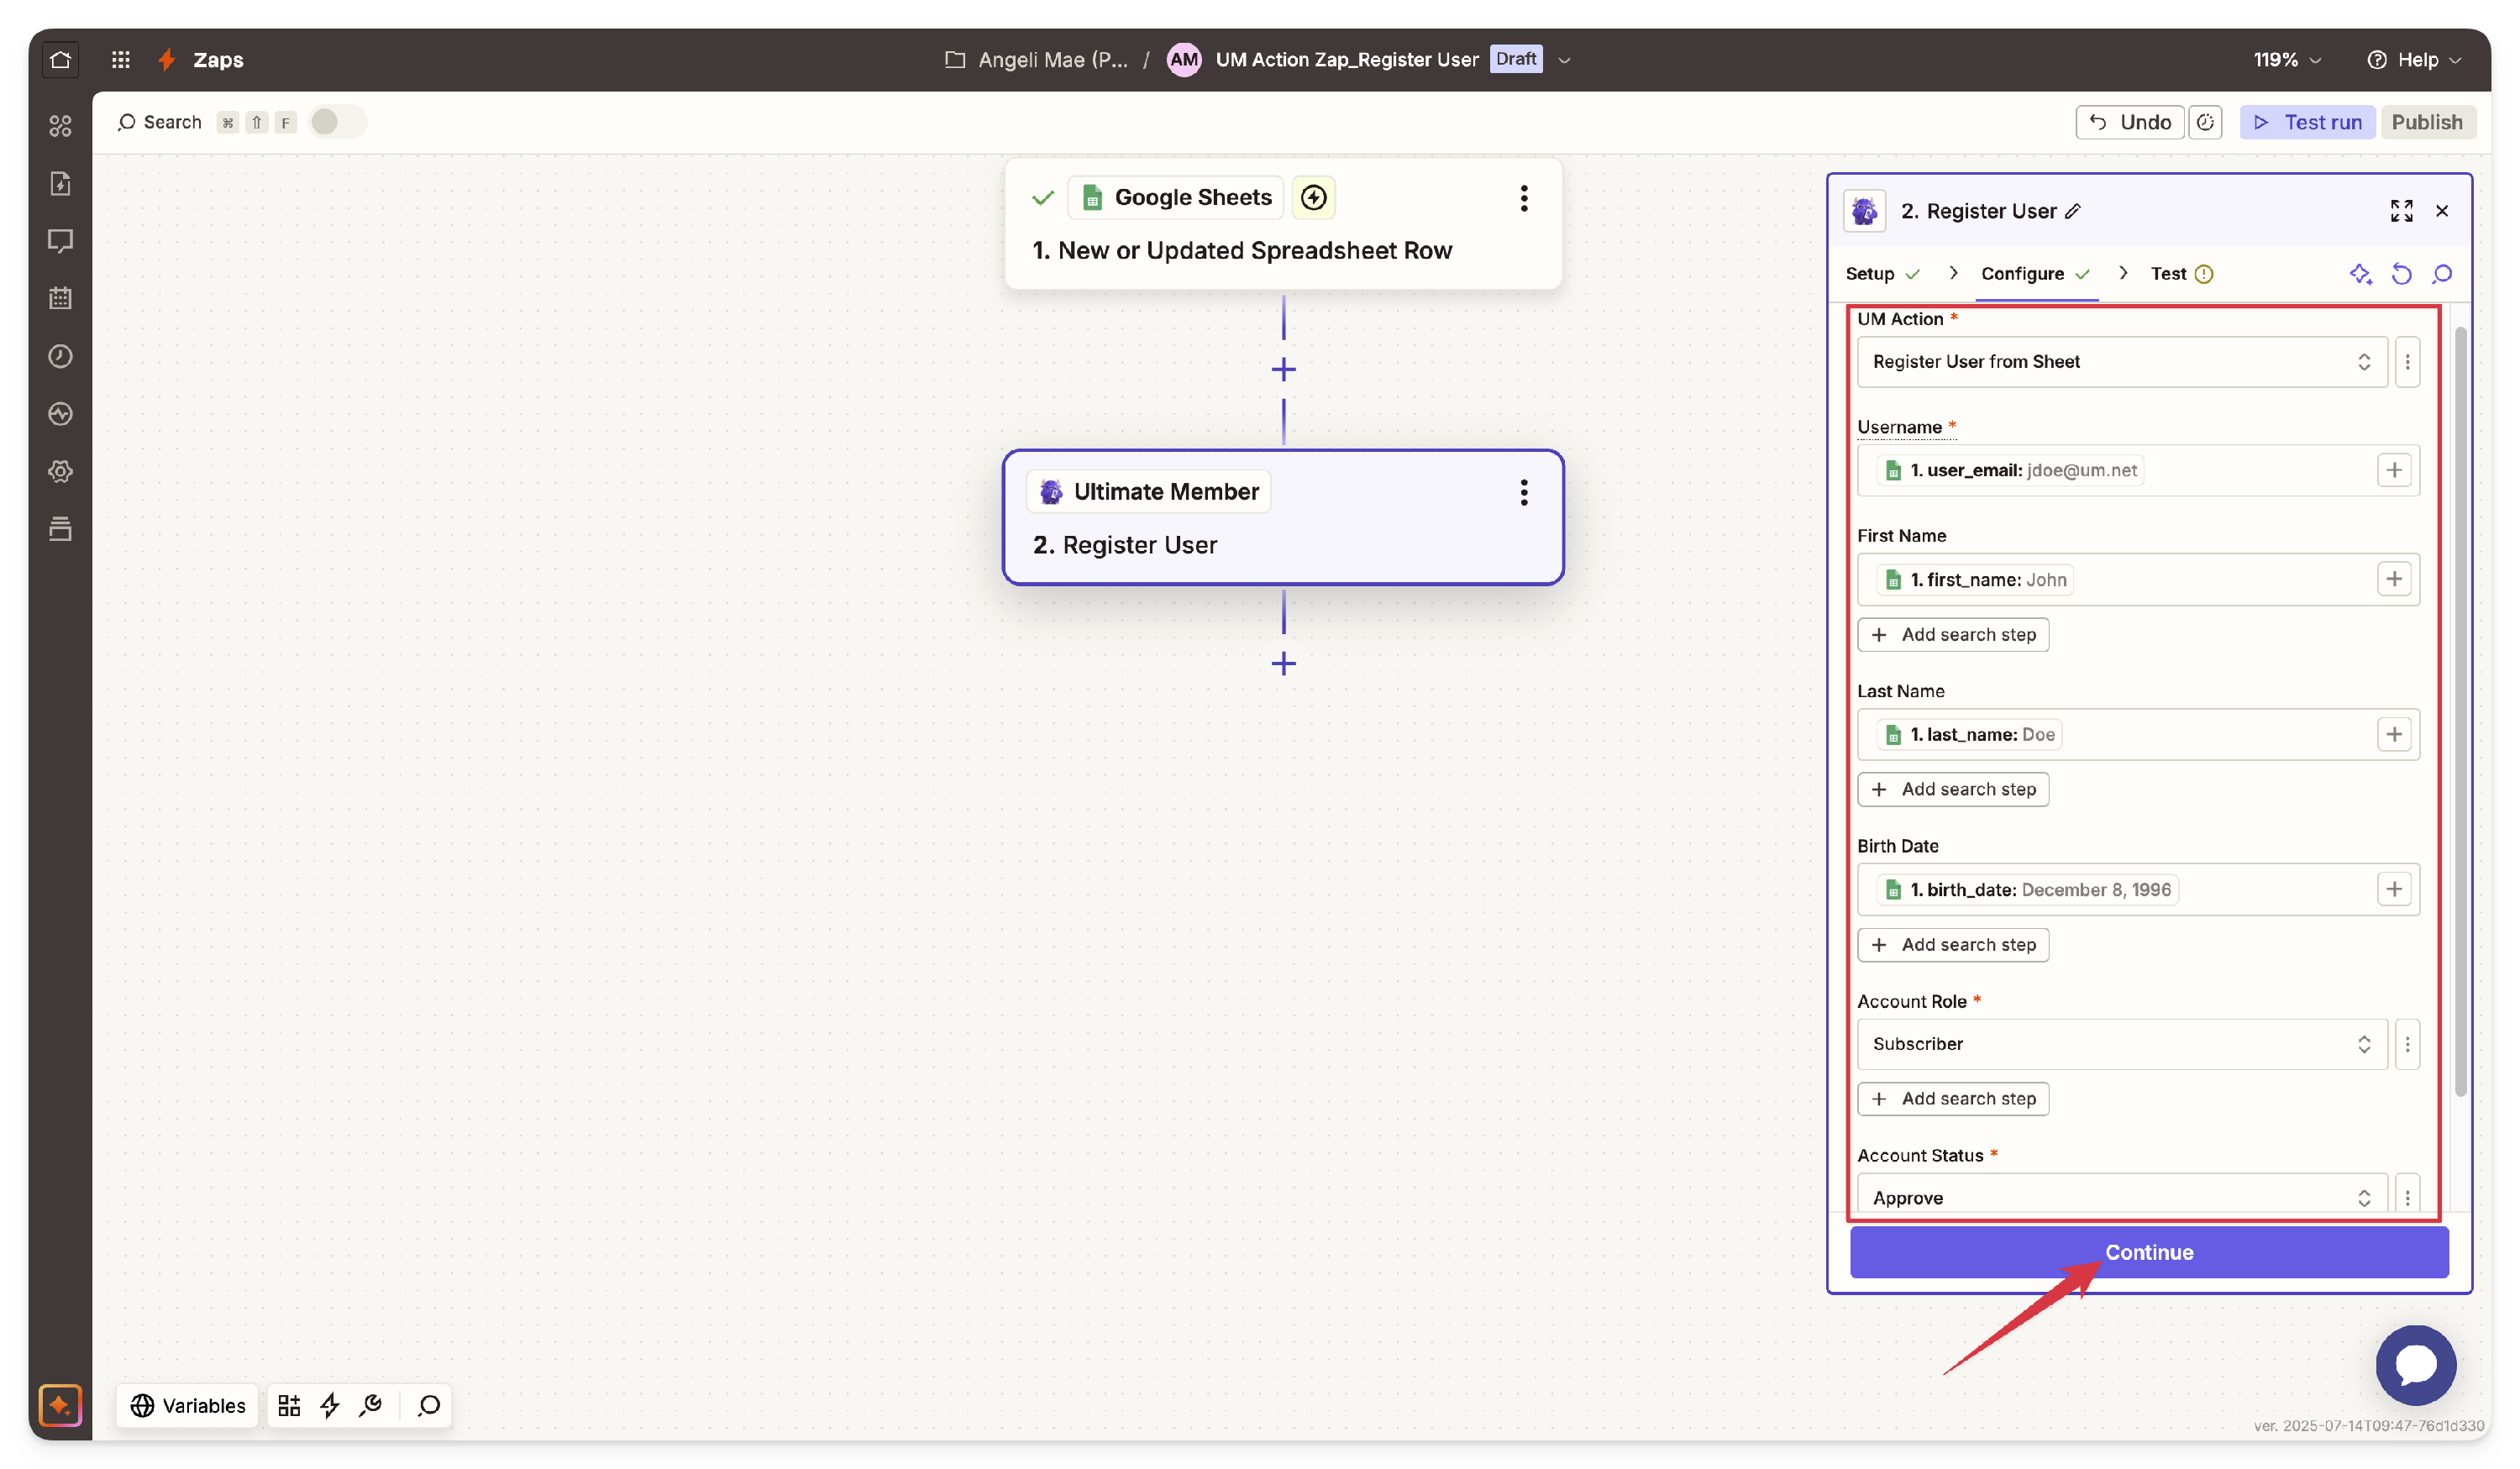
- In the Configure tab, complete the following fields:
- UM Action: This is where you can choose the Zap action you set up in the Ultimate Member Zapier.
- Username (required): The Zapier module will search for a user by email or username on your site. If the account exists, it won’t create a new one.
- UM Field Group: Choose the field group you created in WP Admin > Ultimate Member > Zaps. Once selected, additional fields from the group will appear below.
- Account Role: Set the user’s default role upon registration.
- Account Status: Set the default account status upon registration.
- After configuring these options, click Continue to move to the Test tab.
-
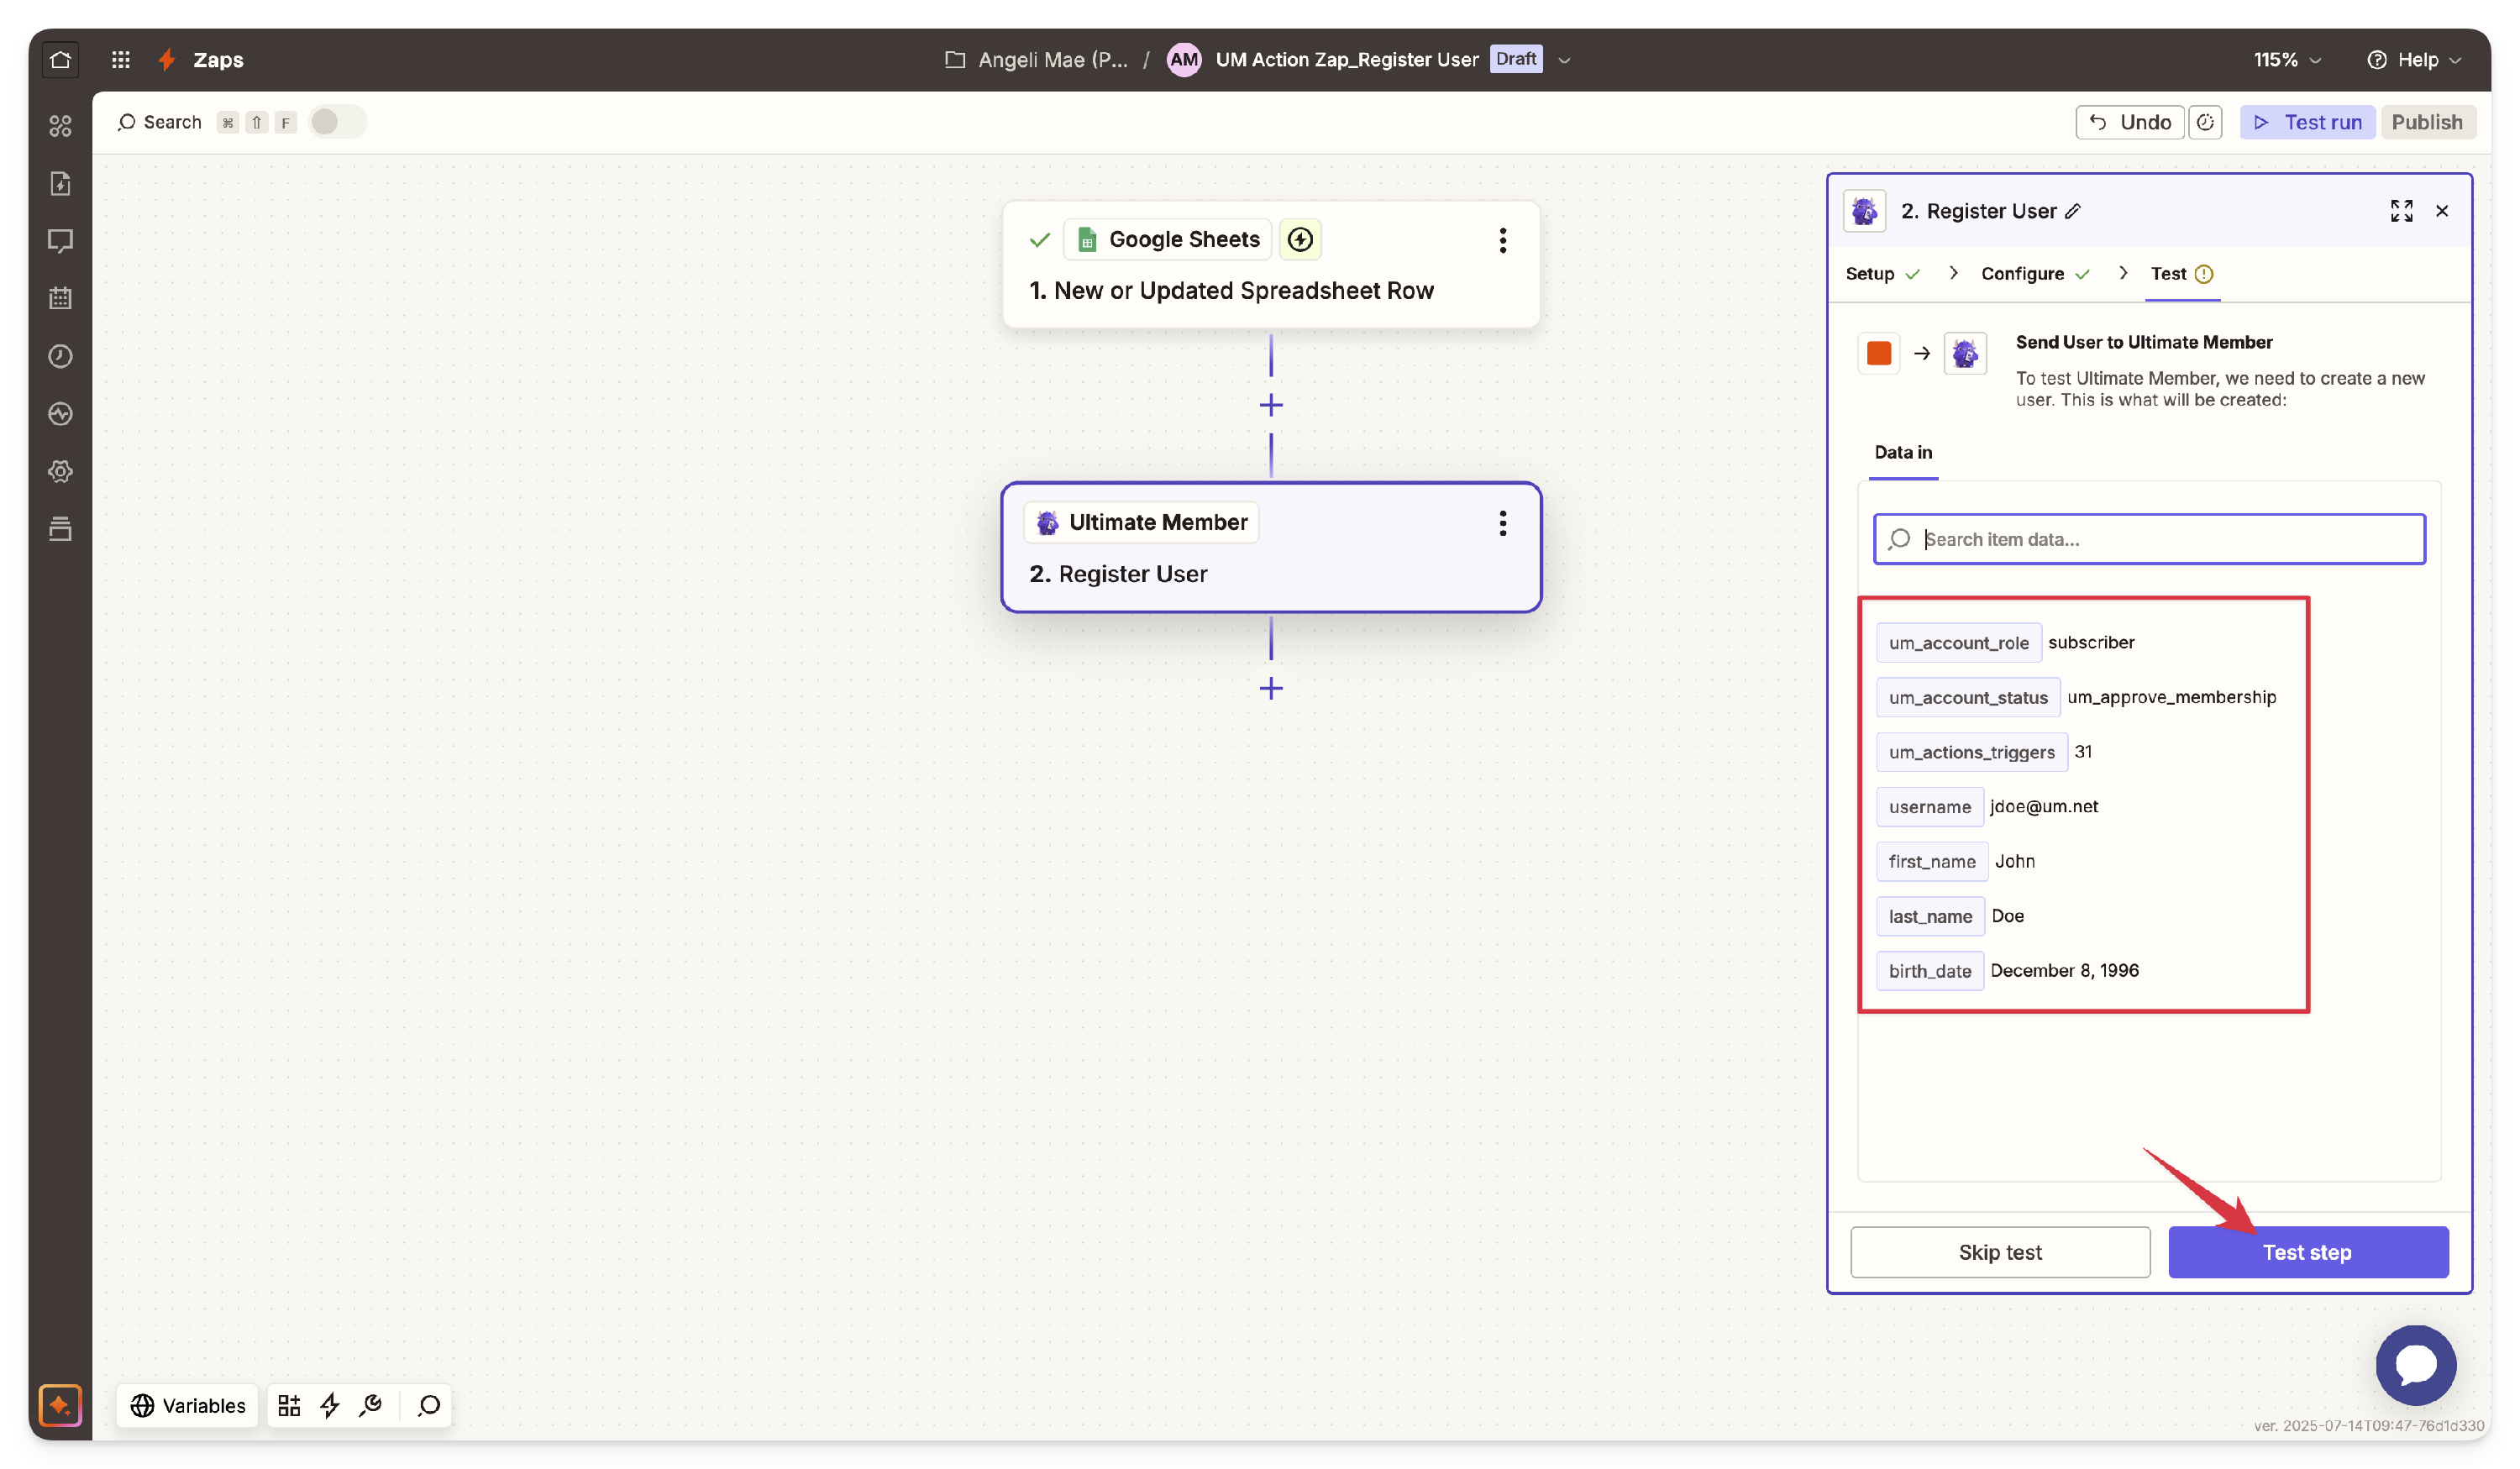
In the Test tab, view the Data In list, which displays the data to be created when a new user registers.
-
Click Test Step to view the Data Out list, showing the details of the newly registered user based on input from your Google Sheet.
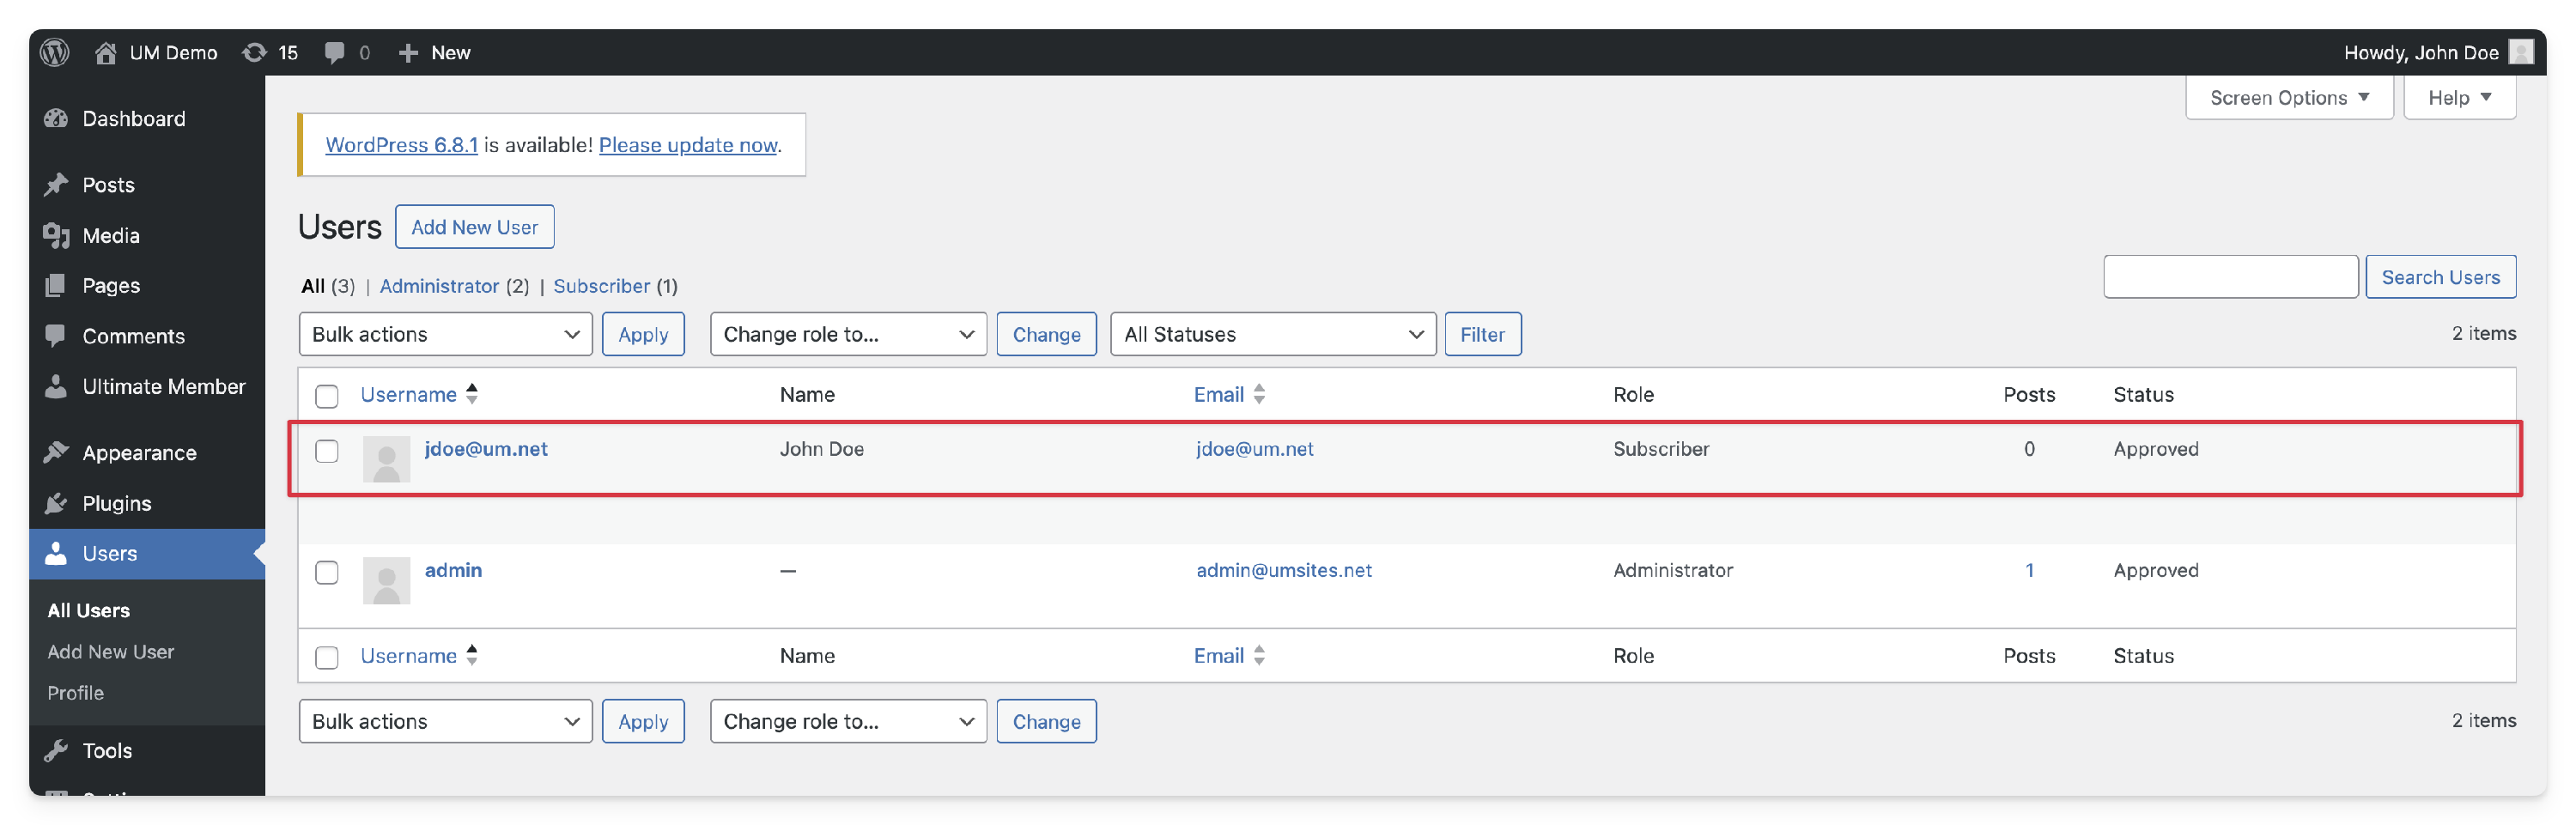
-
Check in wp-admin > Users to confirm the user has been created or registered successfully.
-
 If successful, click Publish to activate your Zap, save your changes, and enable synchronization between Google Sheets and Ultimate Member for future entries.
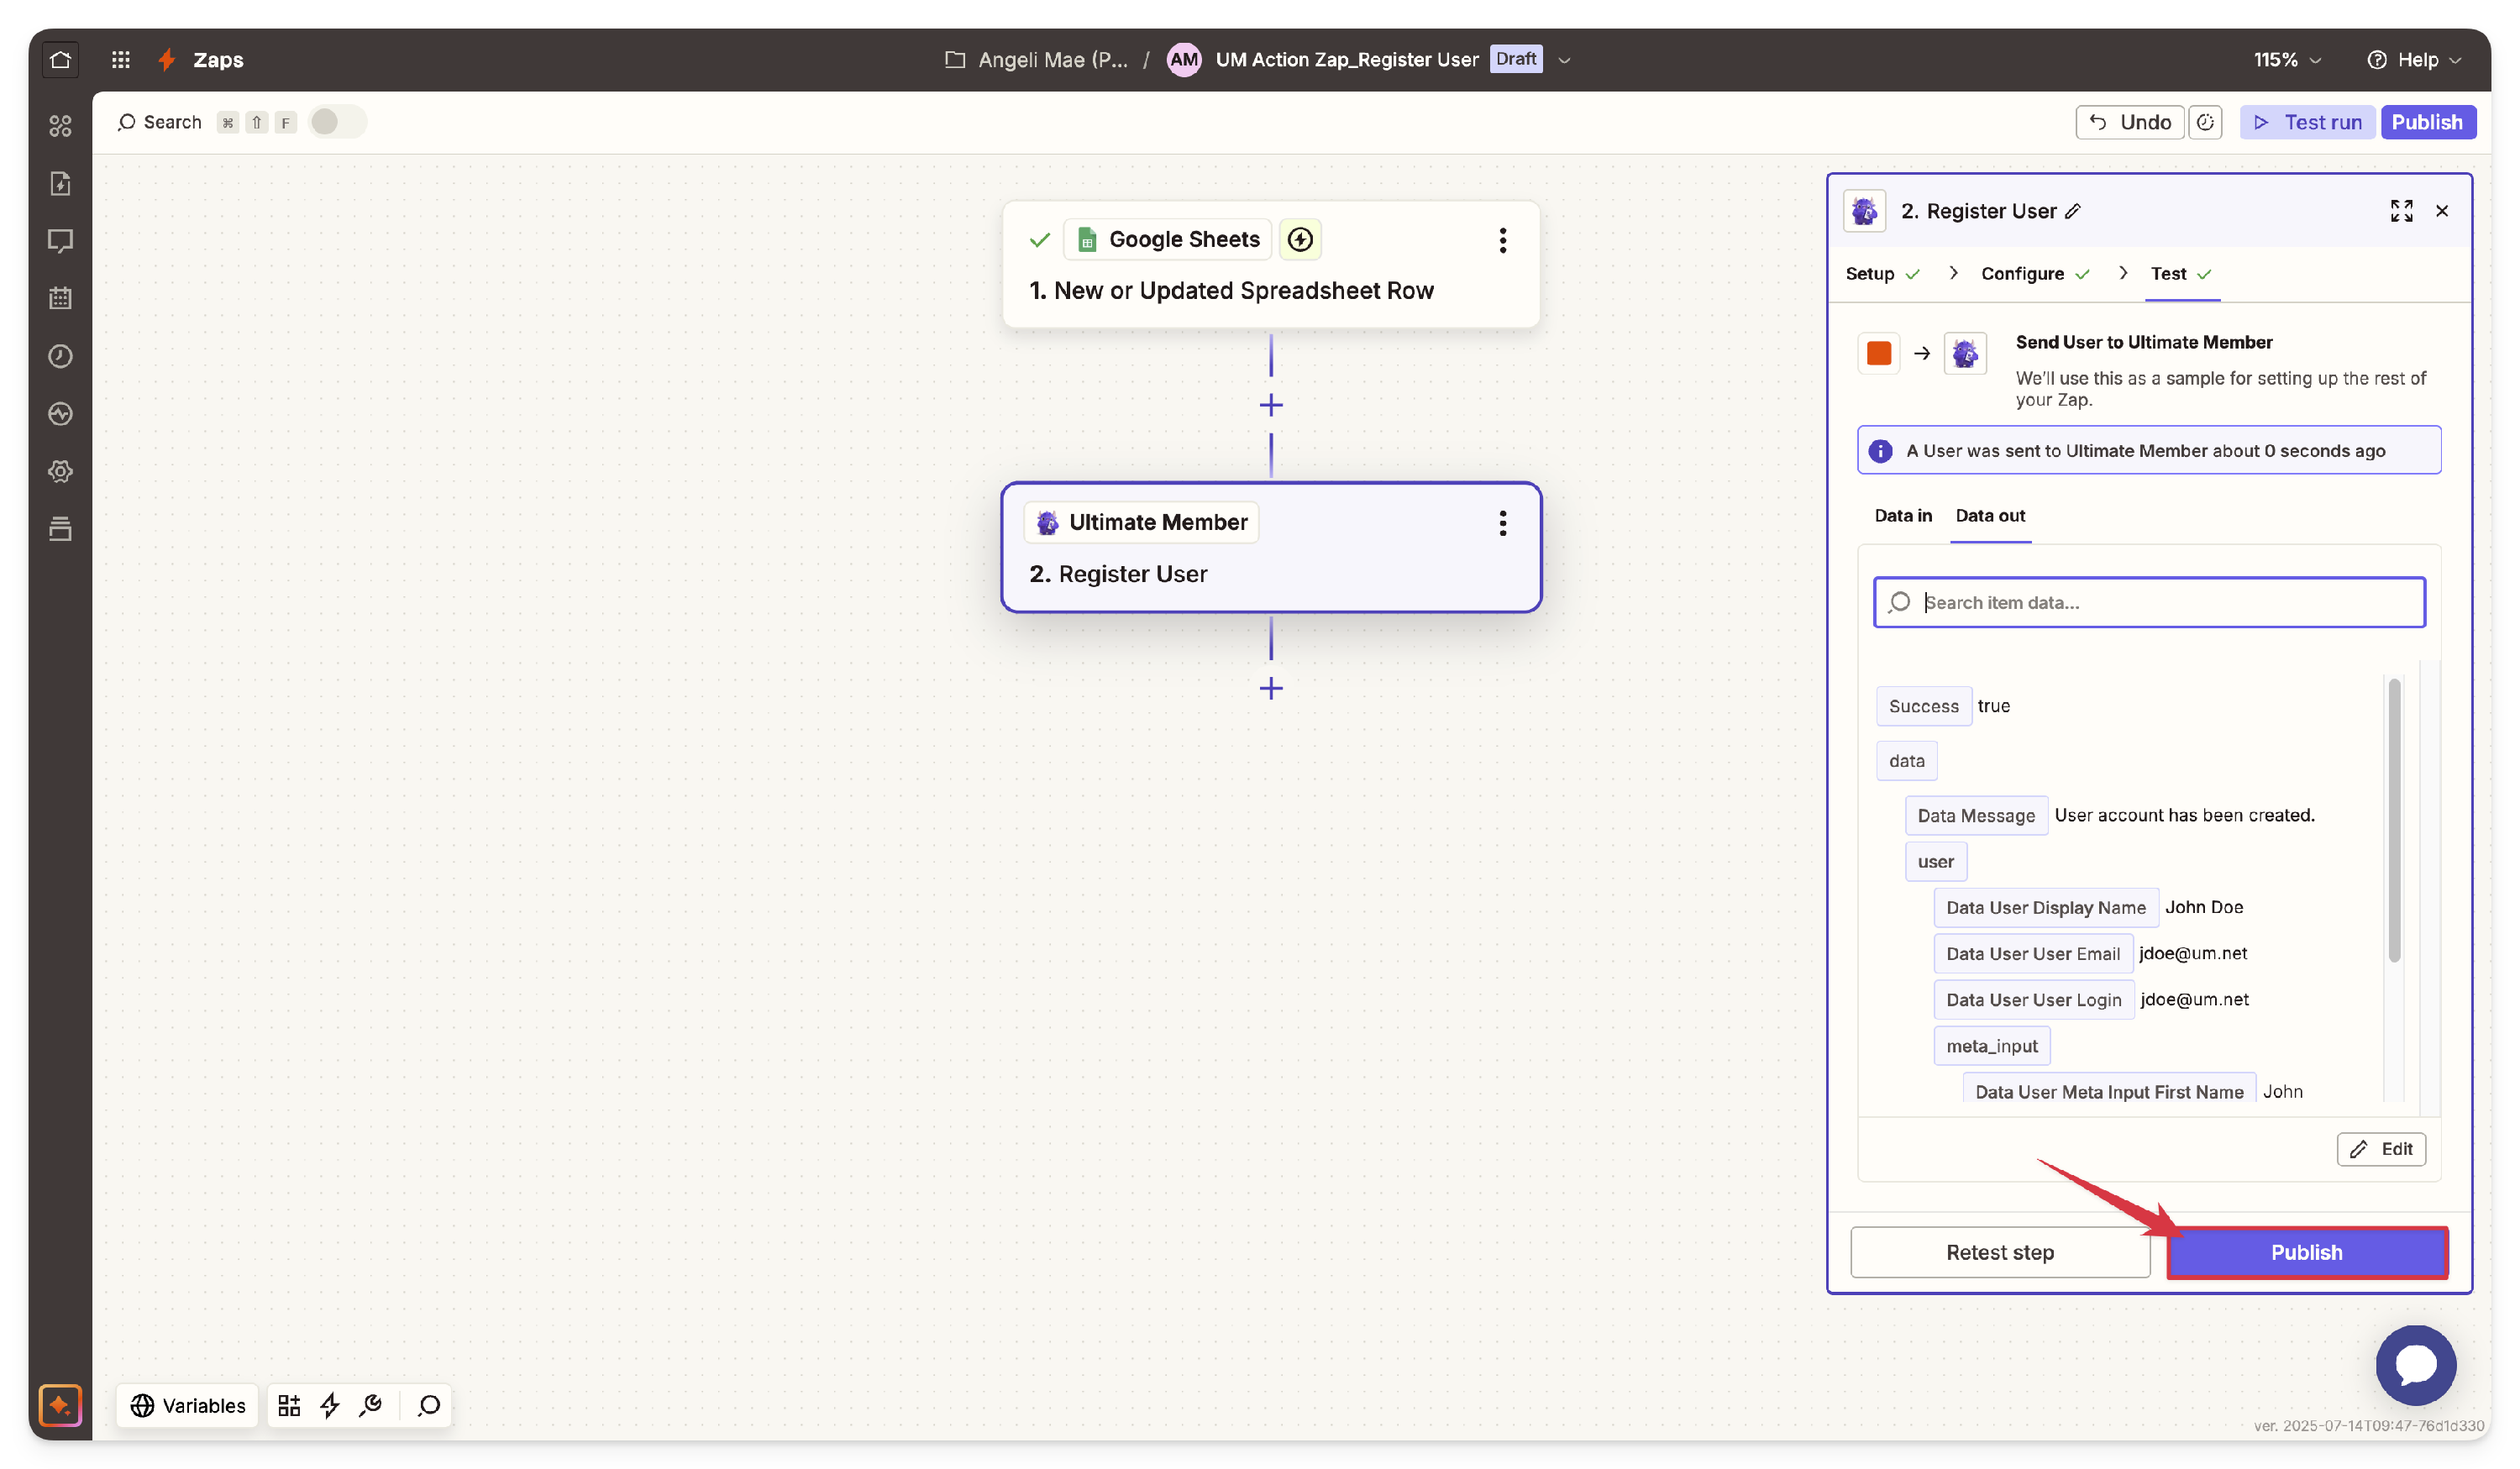
 In the Setup tab within the step details panel on the right, select the desired event under the Action Event option. For this example, we have chosen Register User.


 If successful, click Publish to activate your Zap, save your changes, and enable synchronization between Google Sheets and Ultimate Member for future entries.