Terms & Conditions
Overview
The Terms & Conditions extension integrates a mandatory legal agreement step into the Ultimate Member registration process. It ensures compliance by requiring users to acknowledge your site’s terms before account creation. Additionally, it provides an automated workflow to manage legal updates, enabling administrators to reset agreements and notify existing members directly from the dashboard.
1. Initial Configuration
To function correctly, the extension requires a source for your legal text. The plugin uses a standard WordPress page to pull content dynamically.
Step 1: Create the Legal Source Page
- Navigate to wp-admin > Pages > Add New.
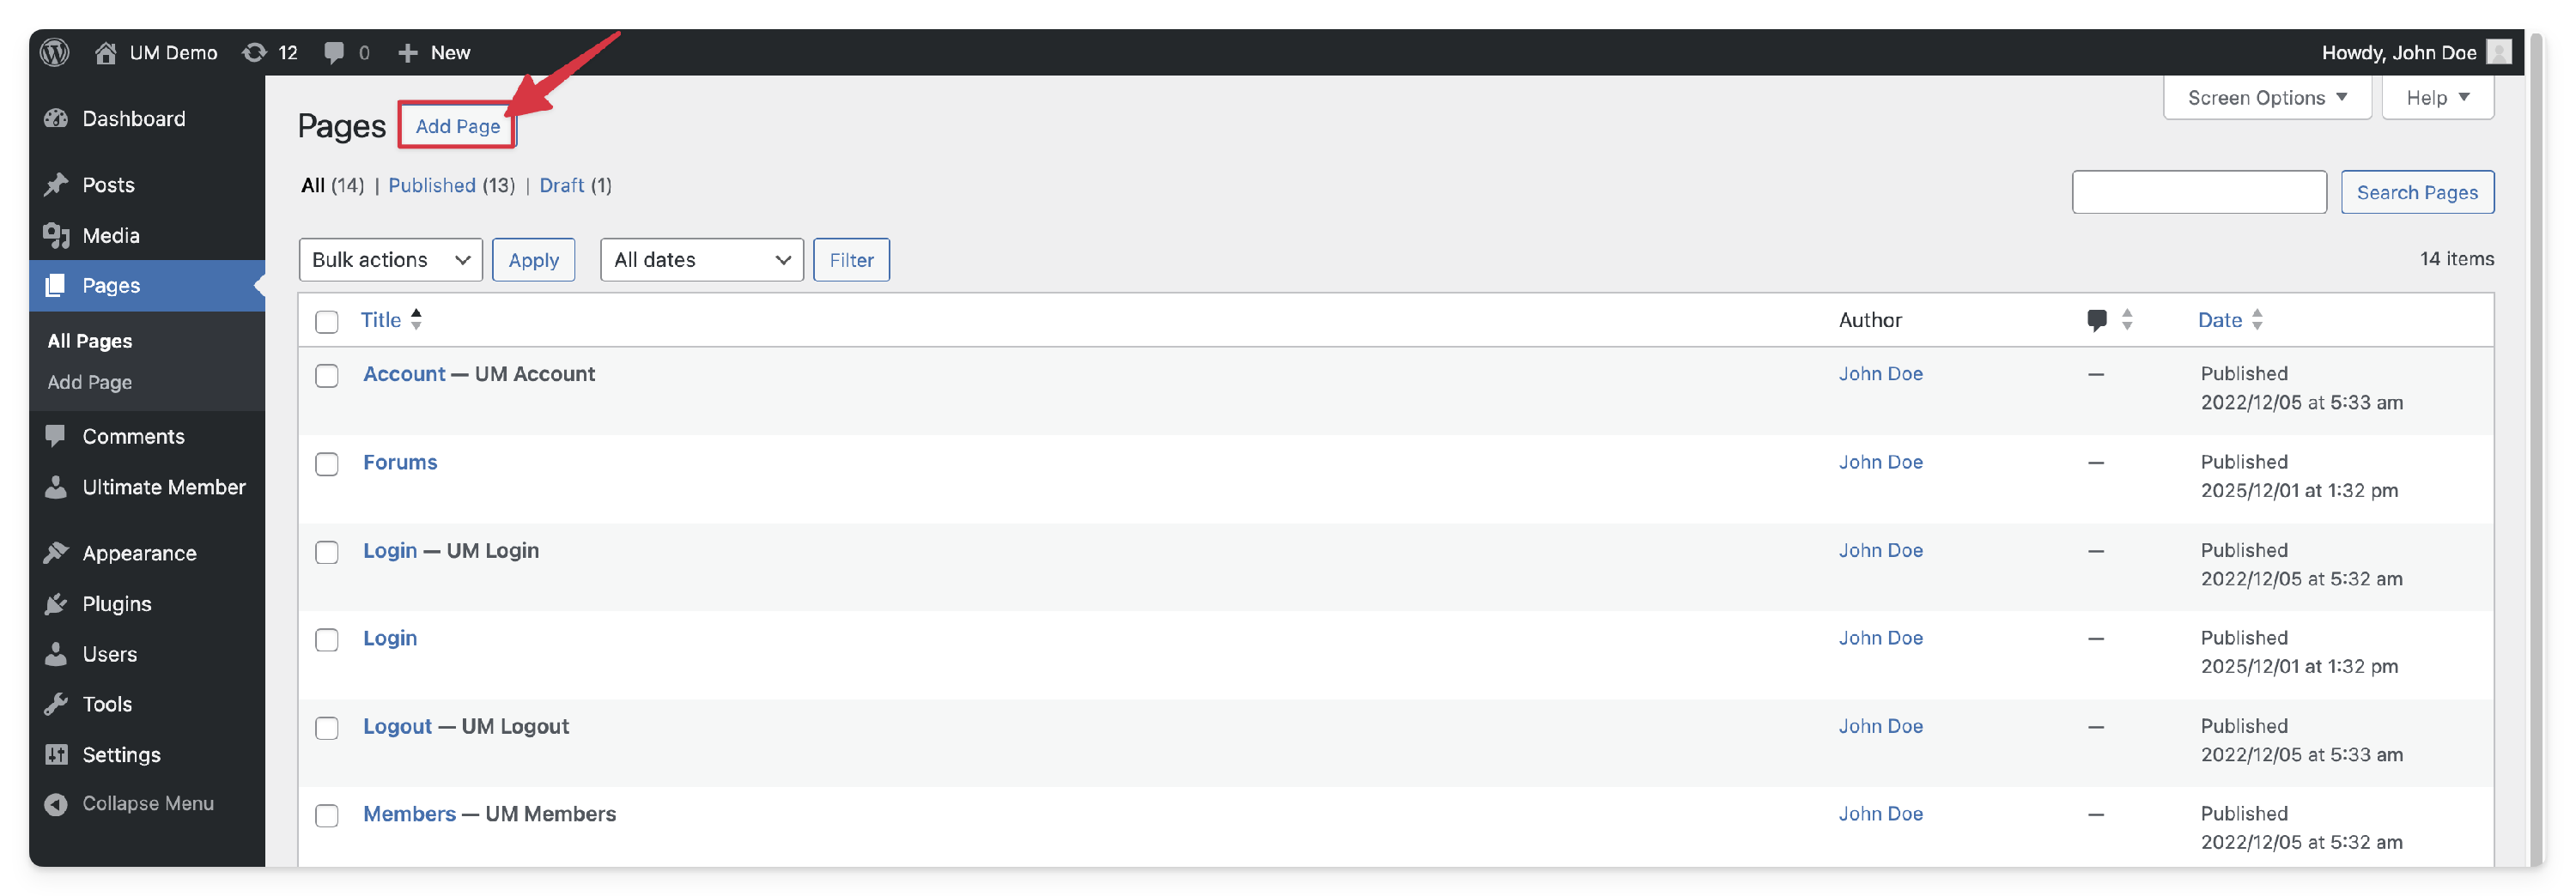
- Title the page (e.g., Terms of Service, Privacy Policy, or "Ultimate Member Terms & Conditions").
- Enter your legal content and click Publish.
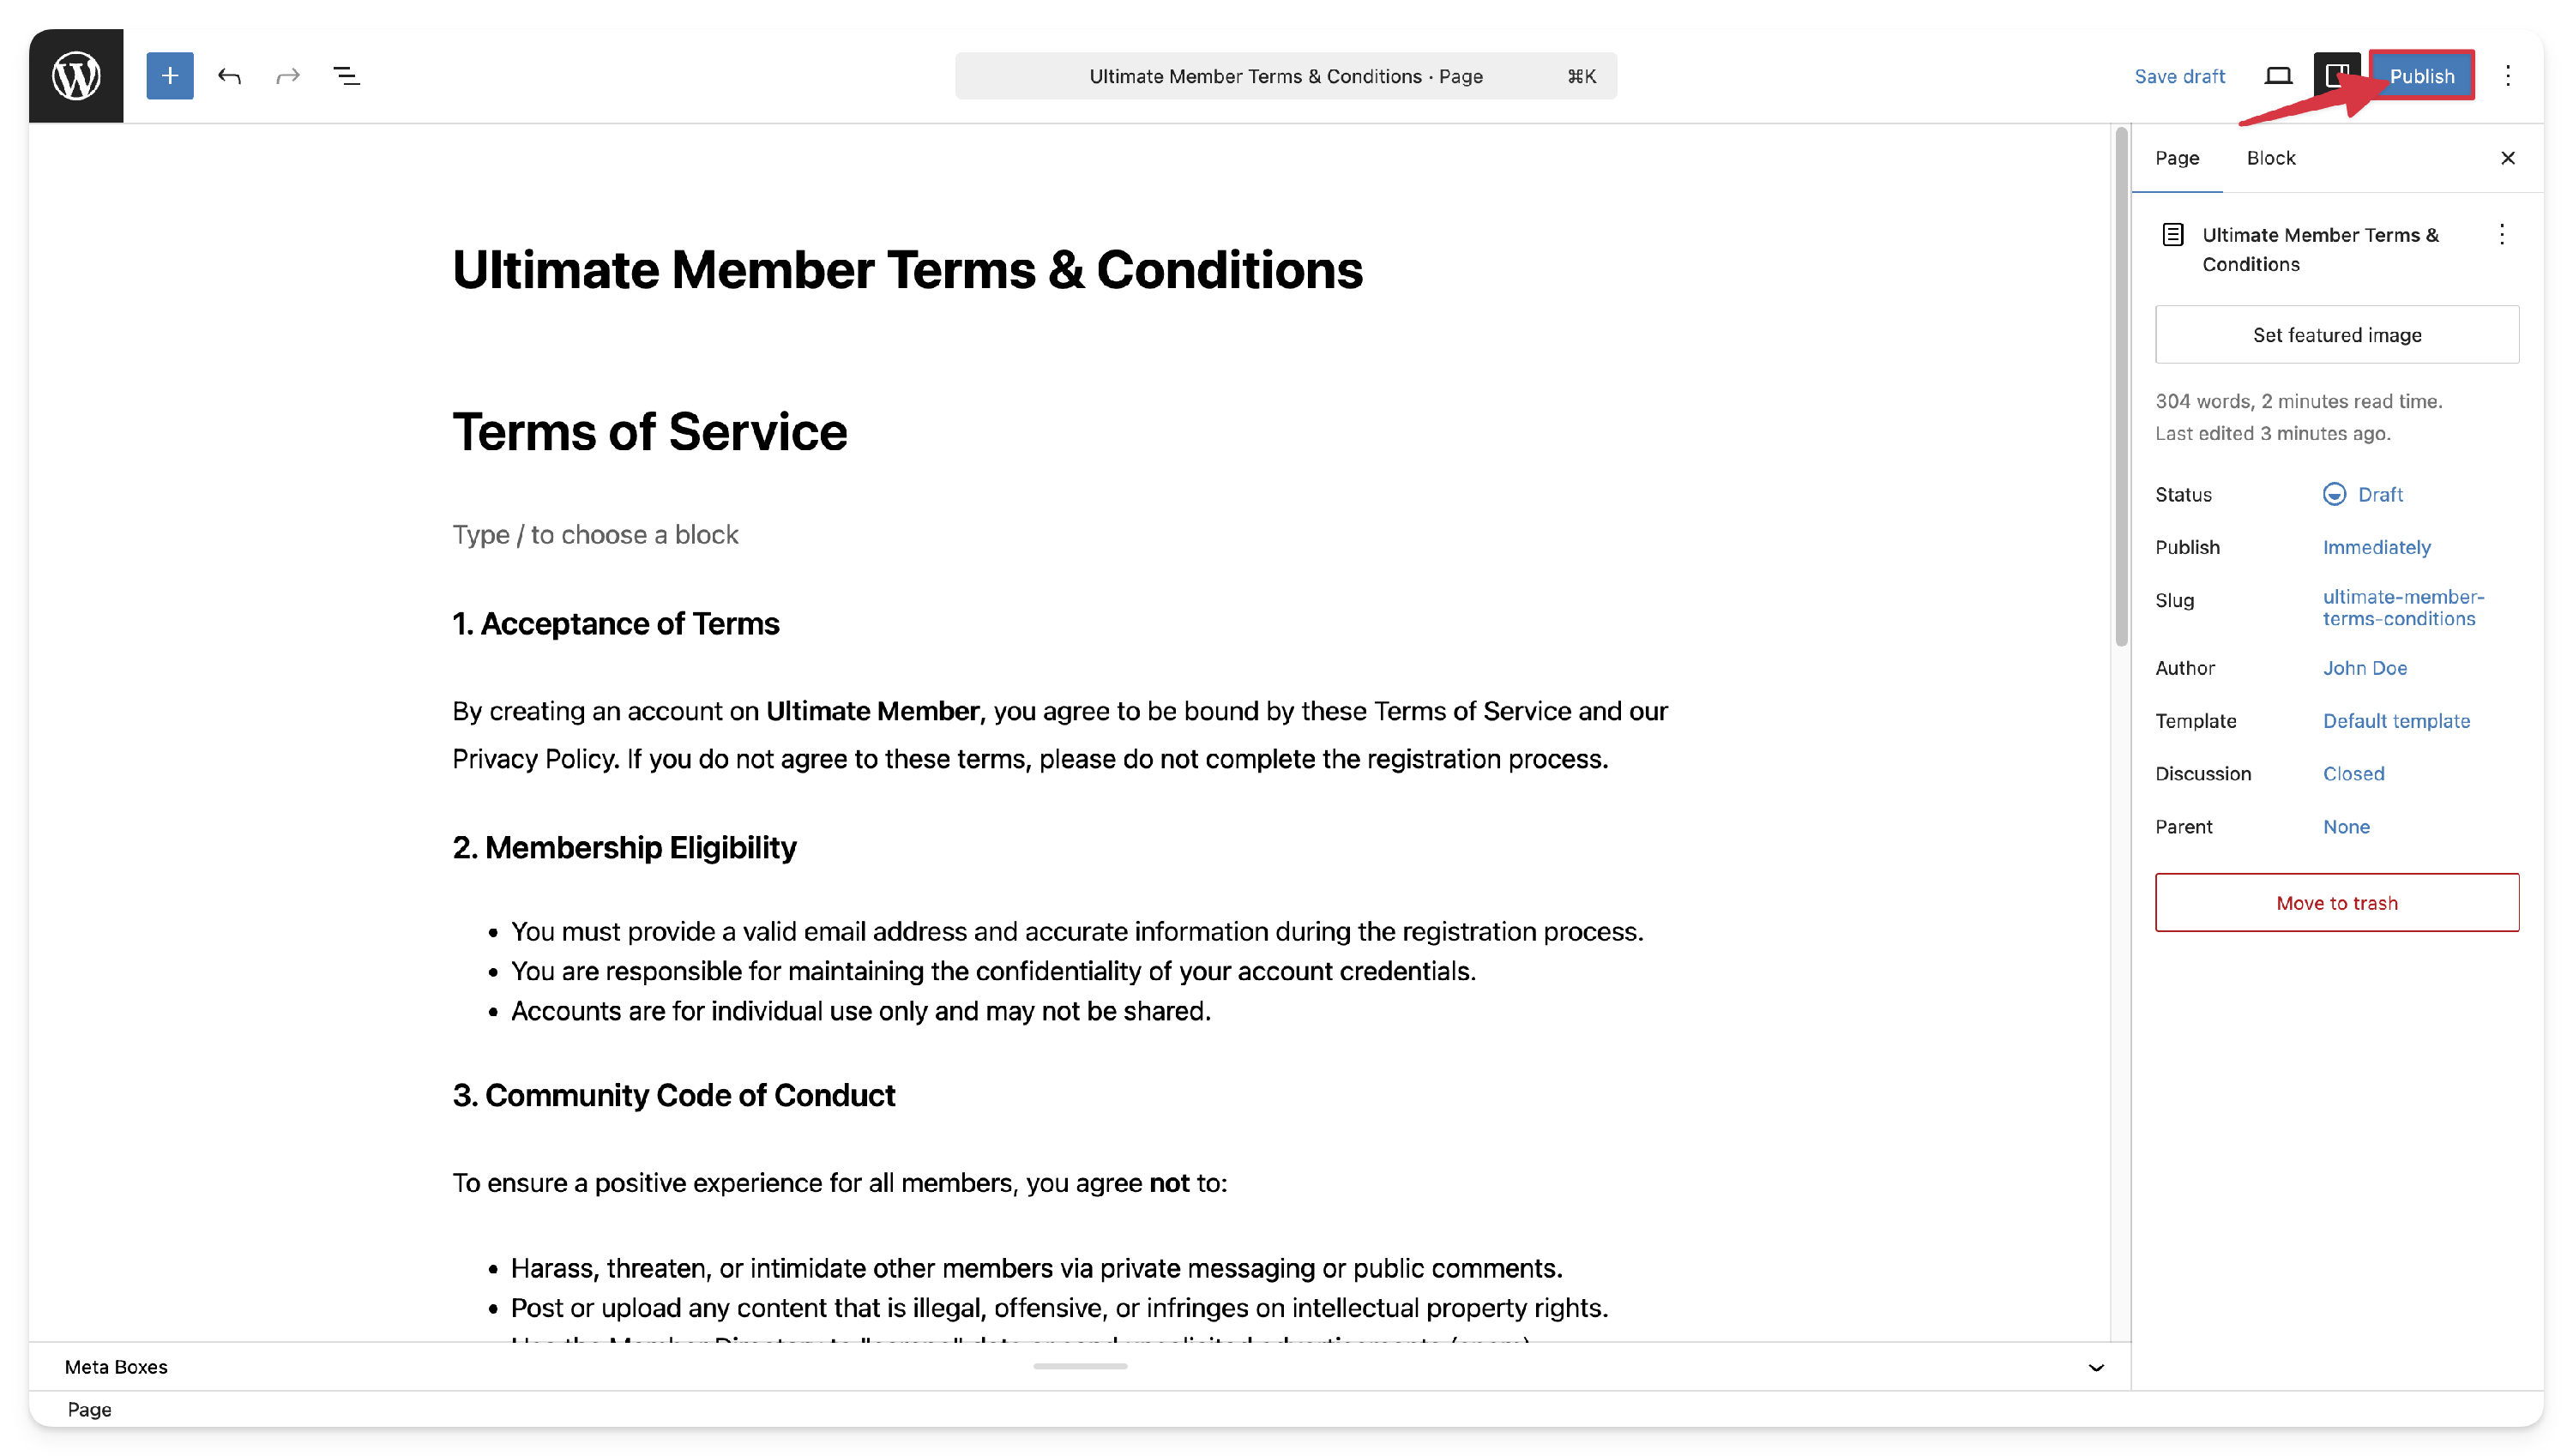


Note: The page visibility must be set to Public. The extension cannot "fetch" content from Drafts or Private pages. You do not need to add this page to your site navigation menu.
Step 2: Enable T&C on Registration Forms
Once the source page is live, you must link it to your specific registration form.
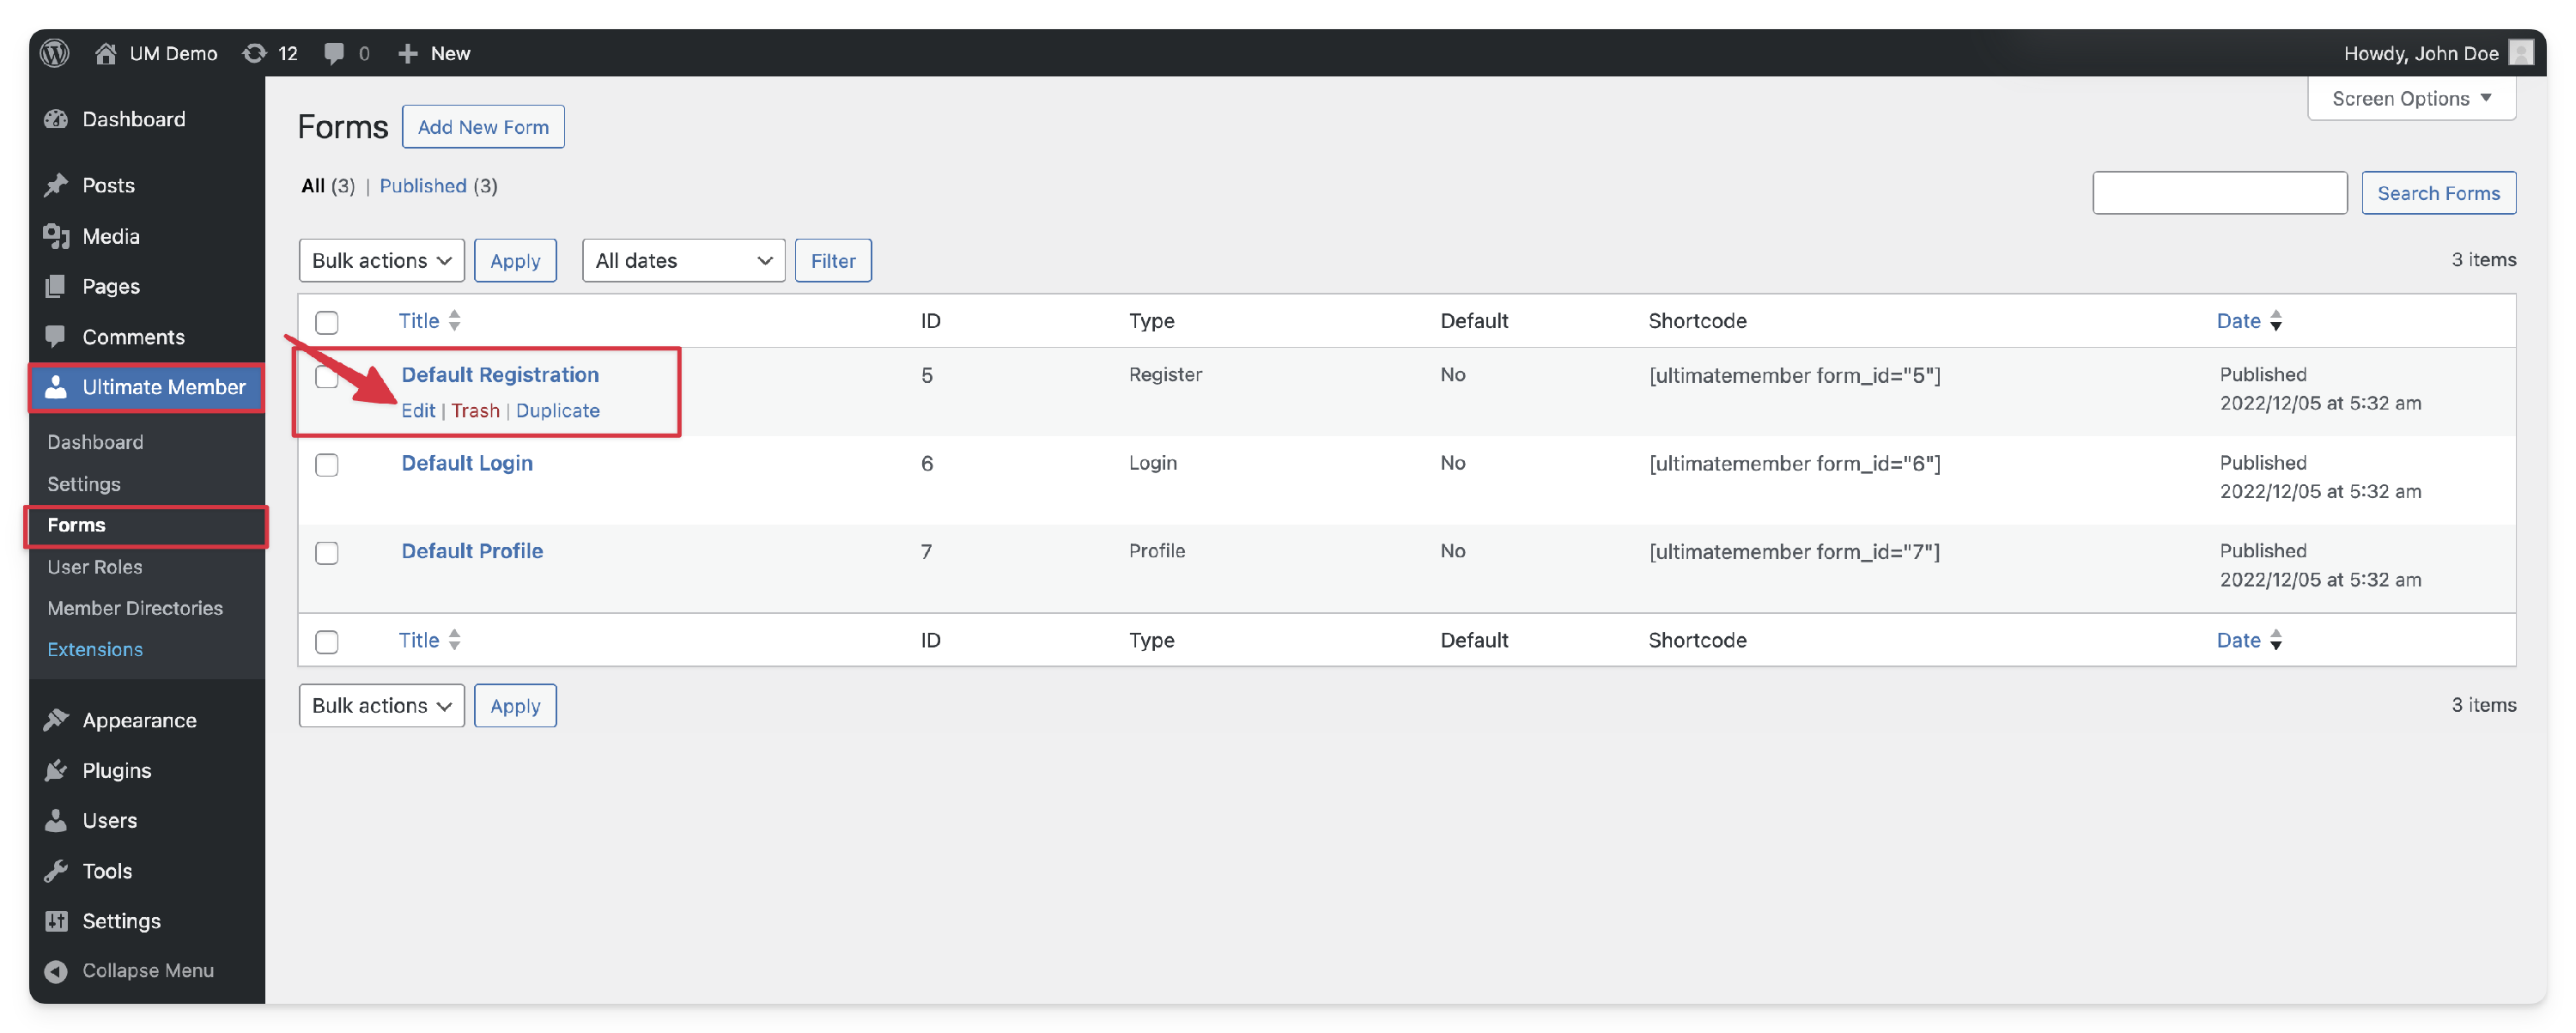
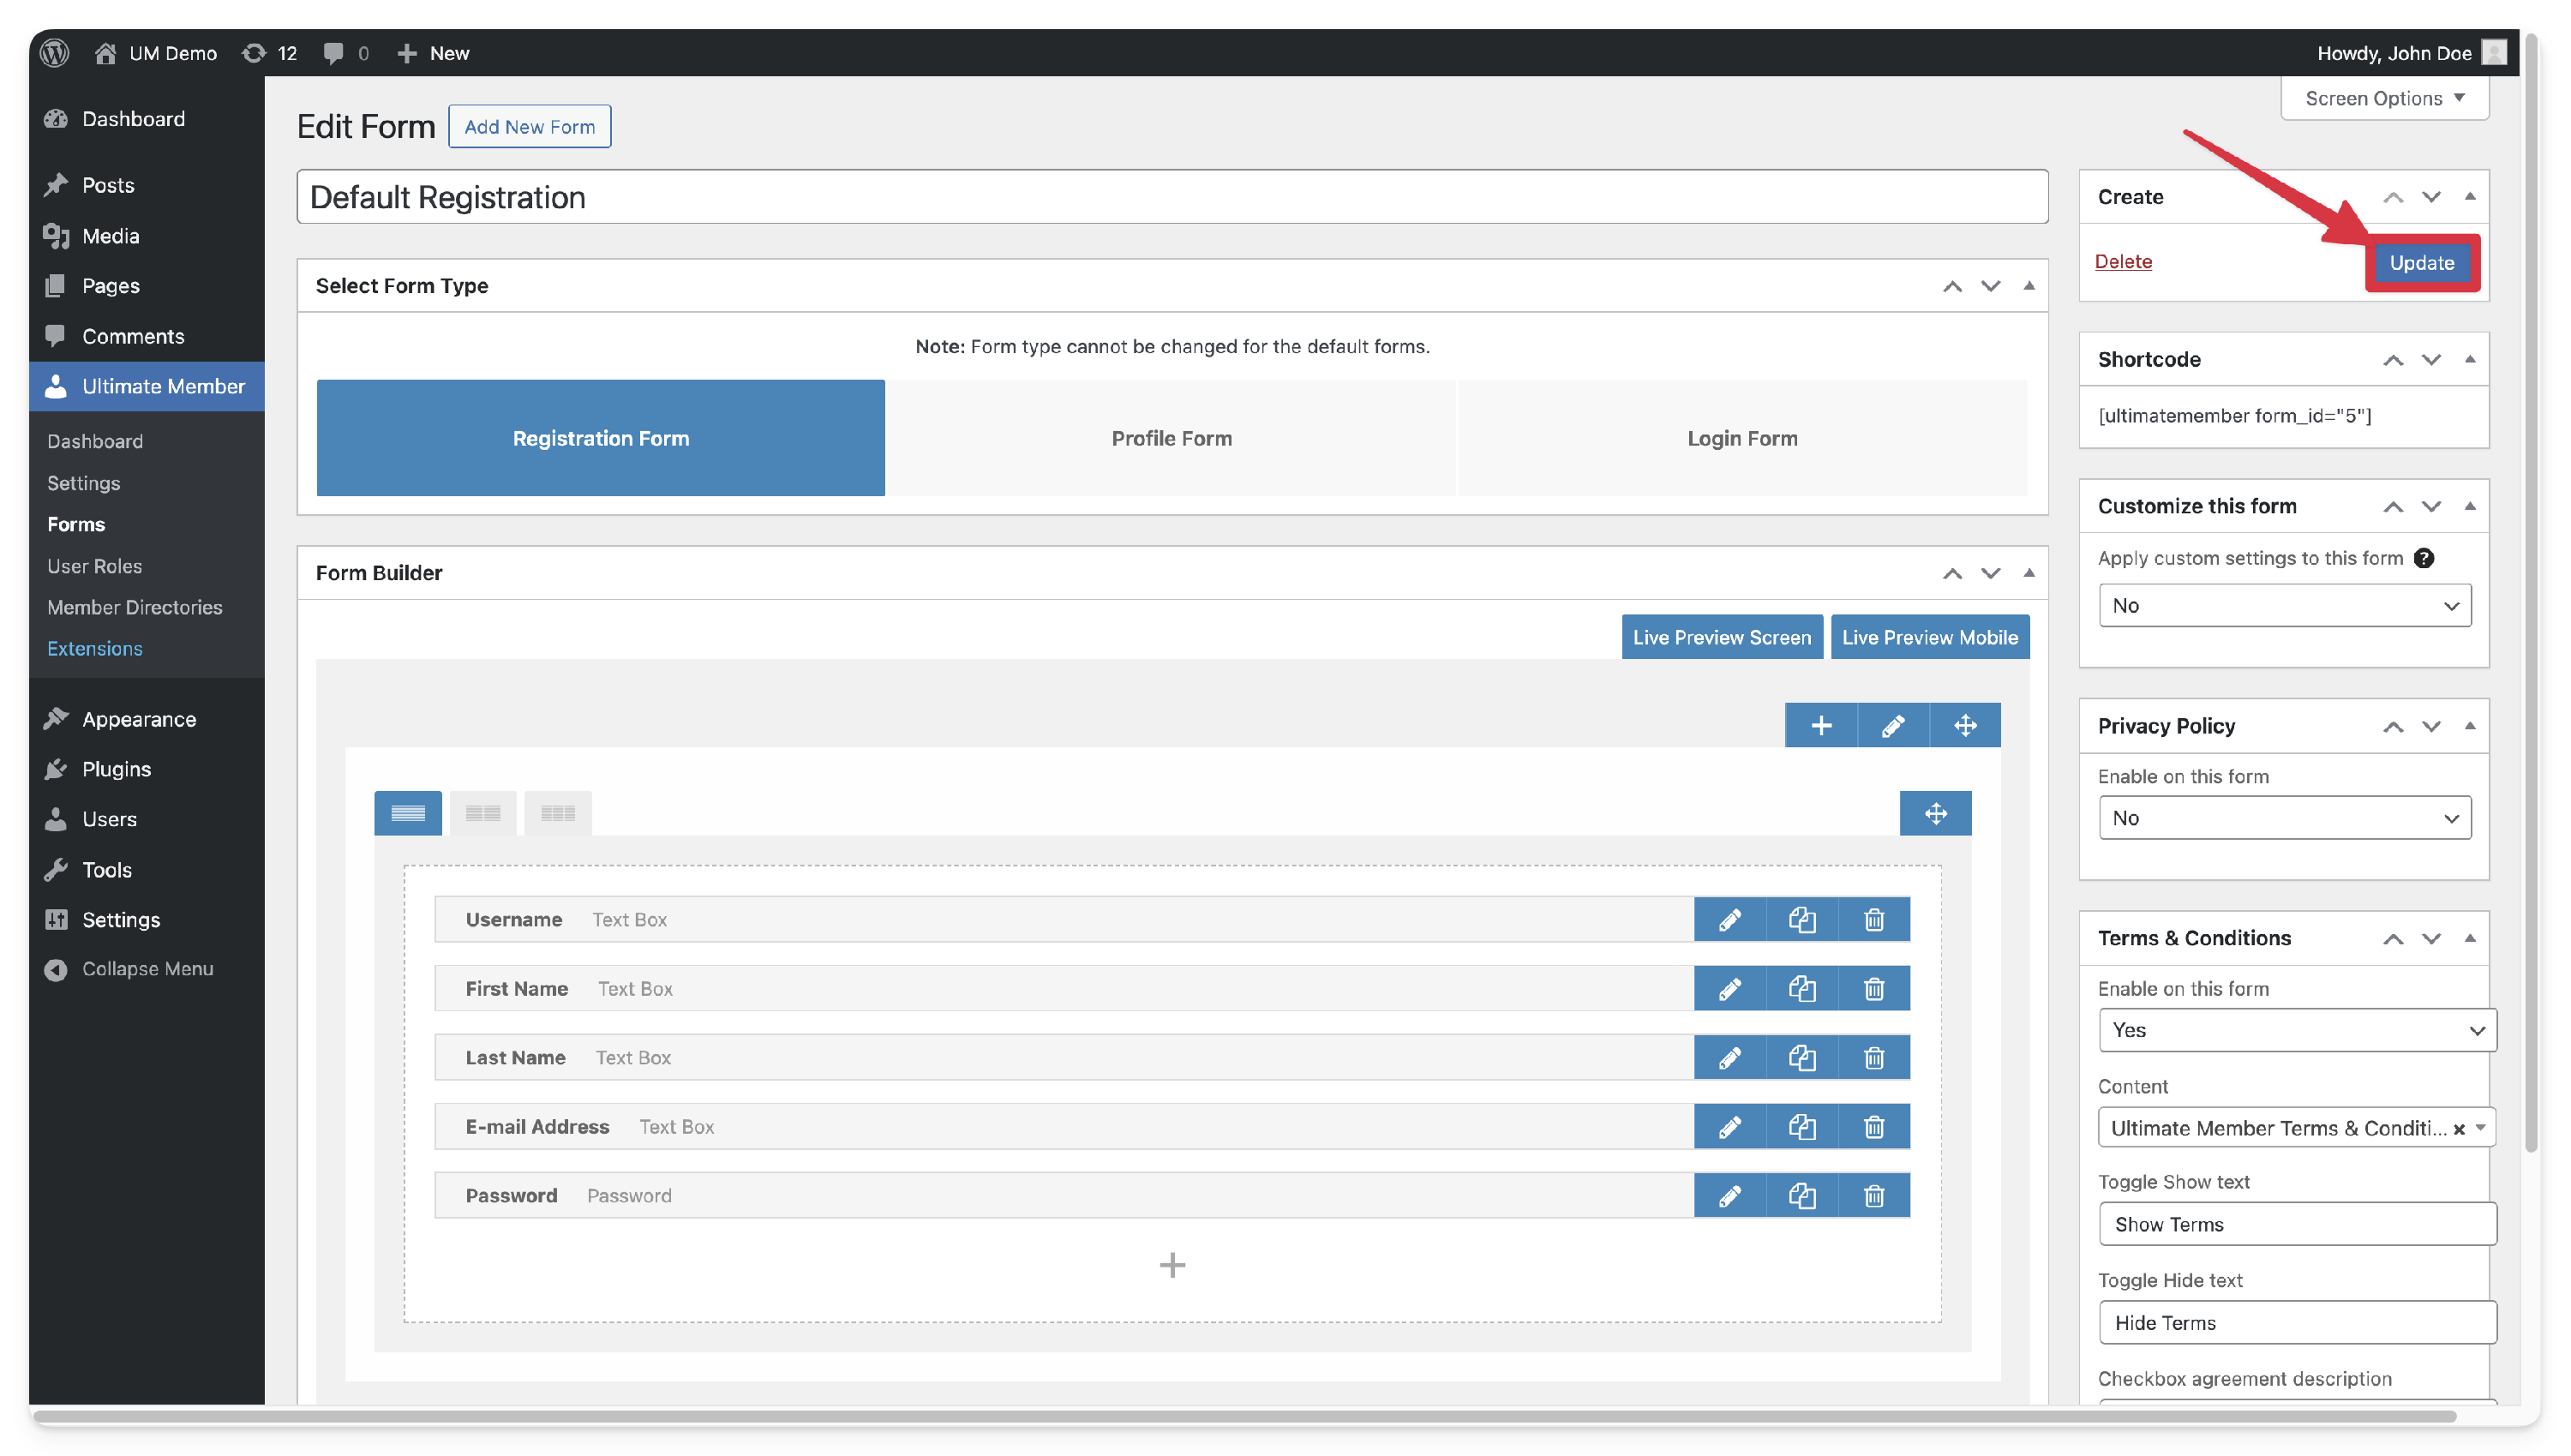
- Navigate to Ultimate Member > Forms, select your Registration Form and click Edit.
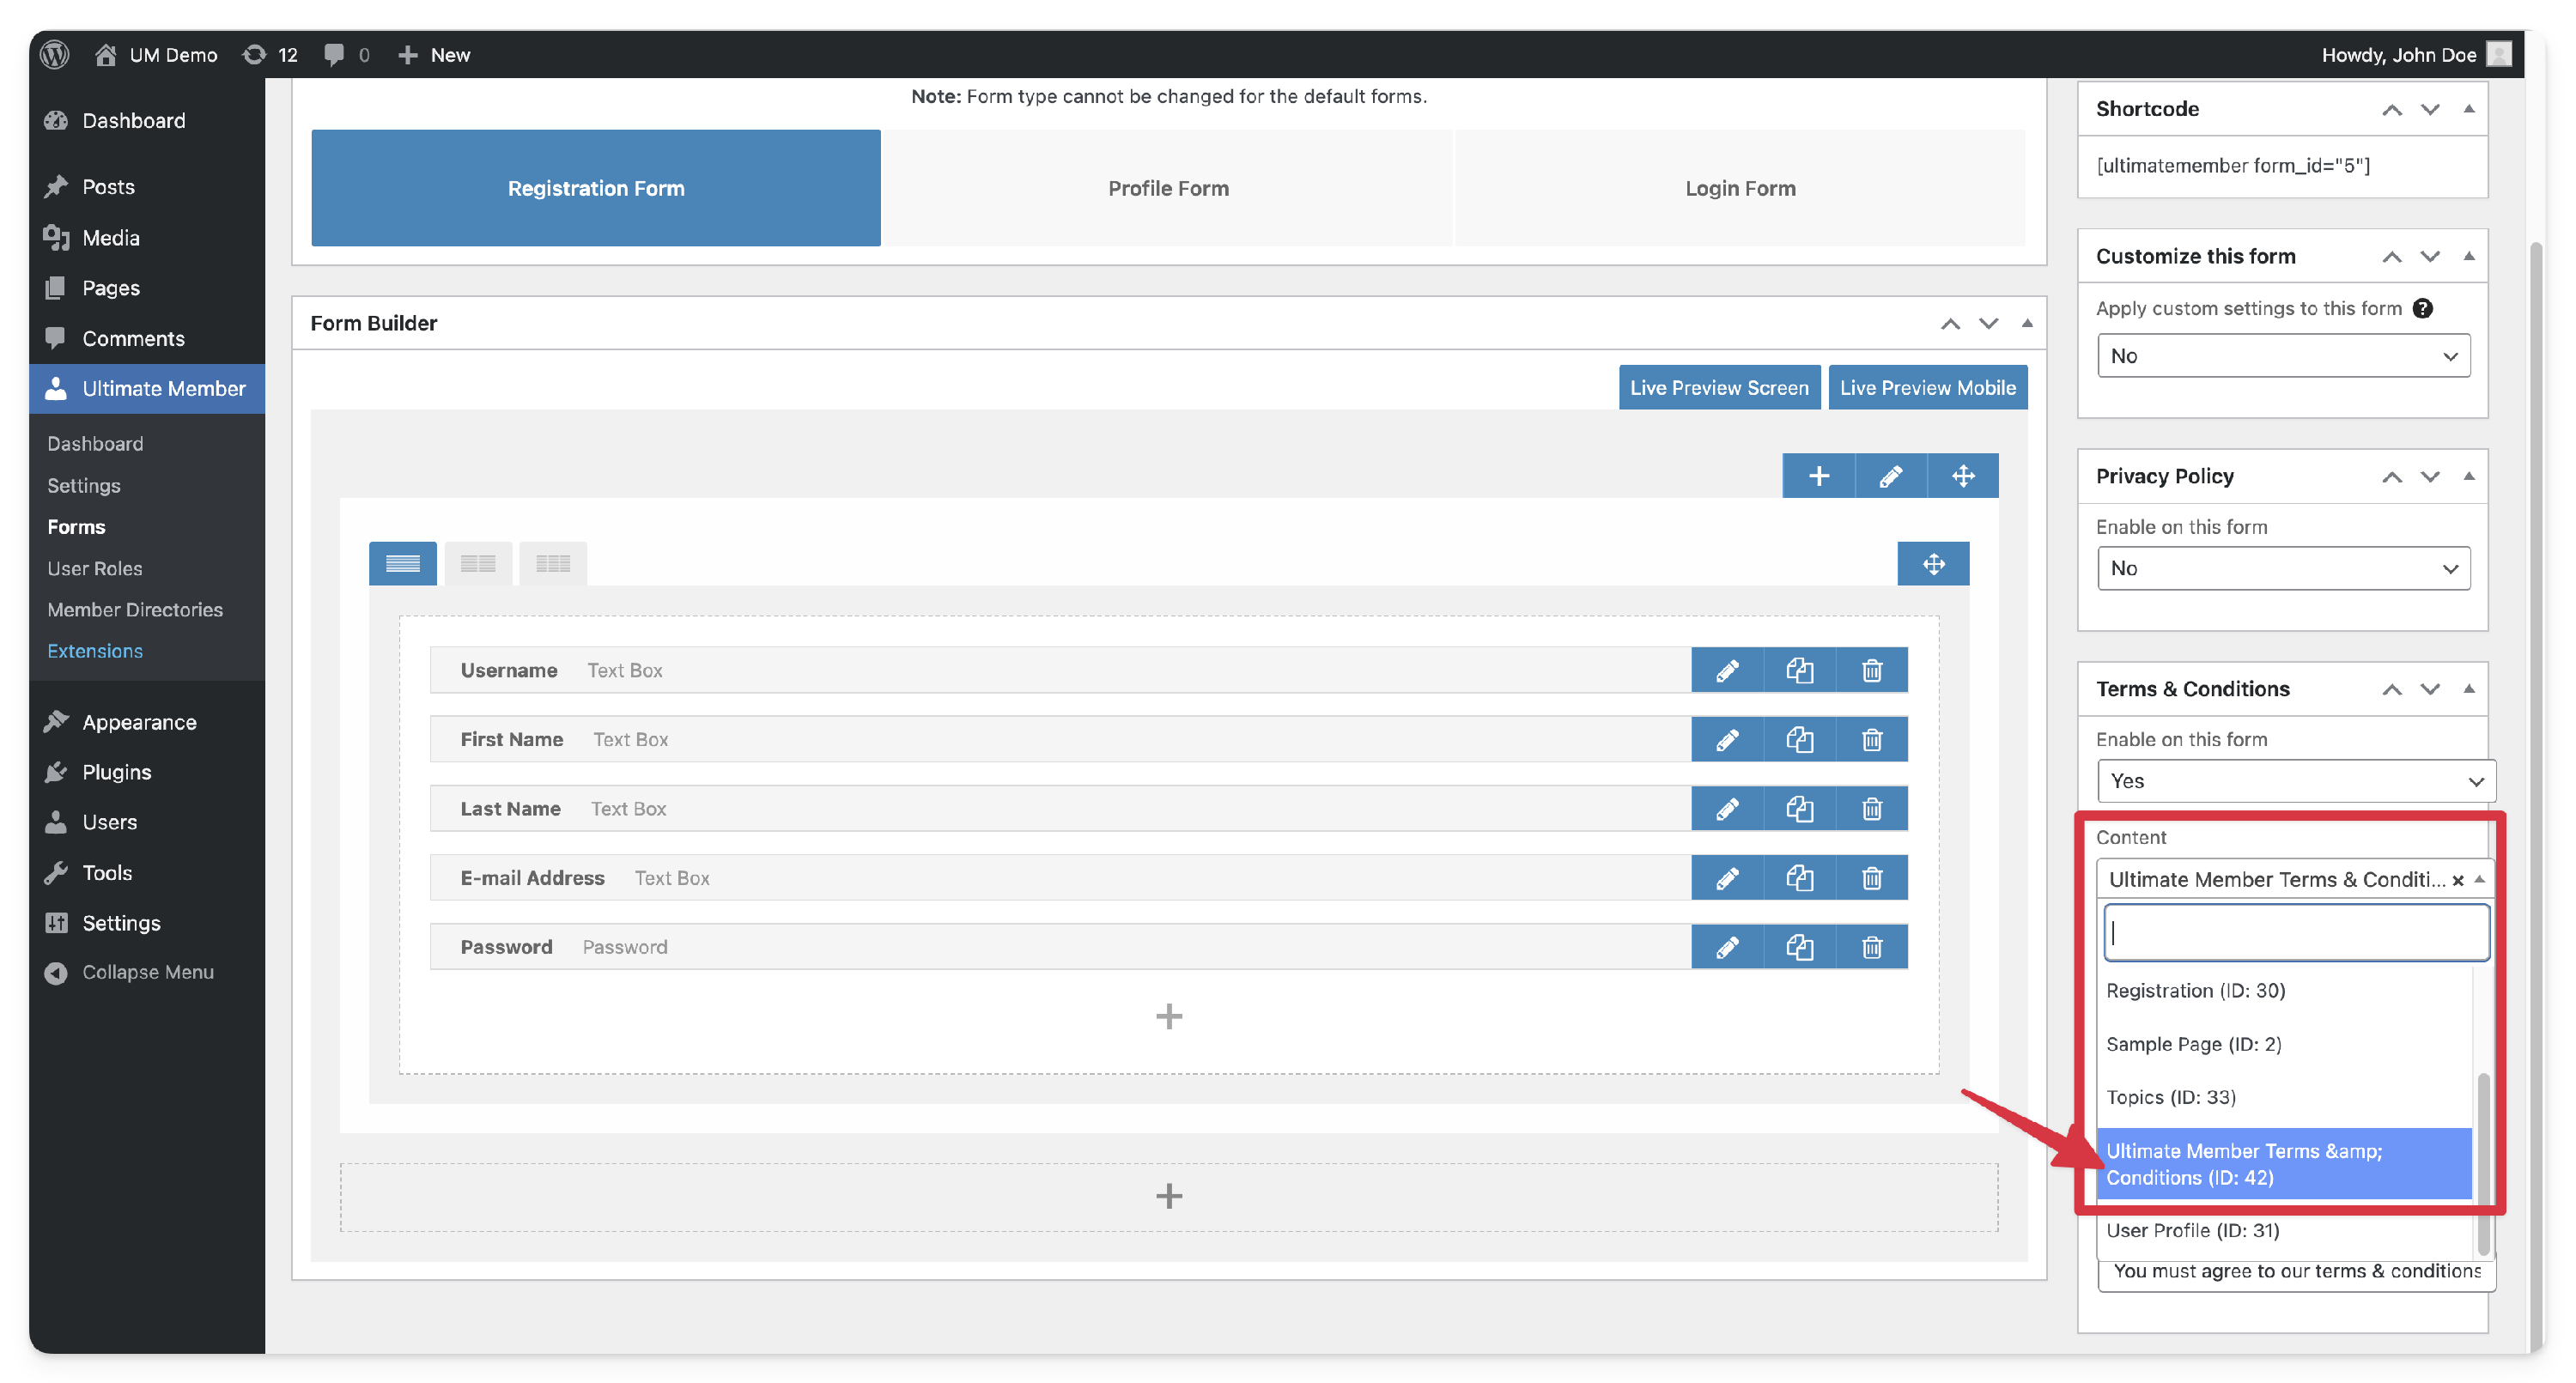
- Locate the Terms & Conditions box in the right-hand sidebar.
- Set Enable on this form to Yes.
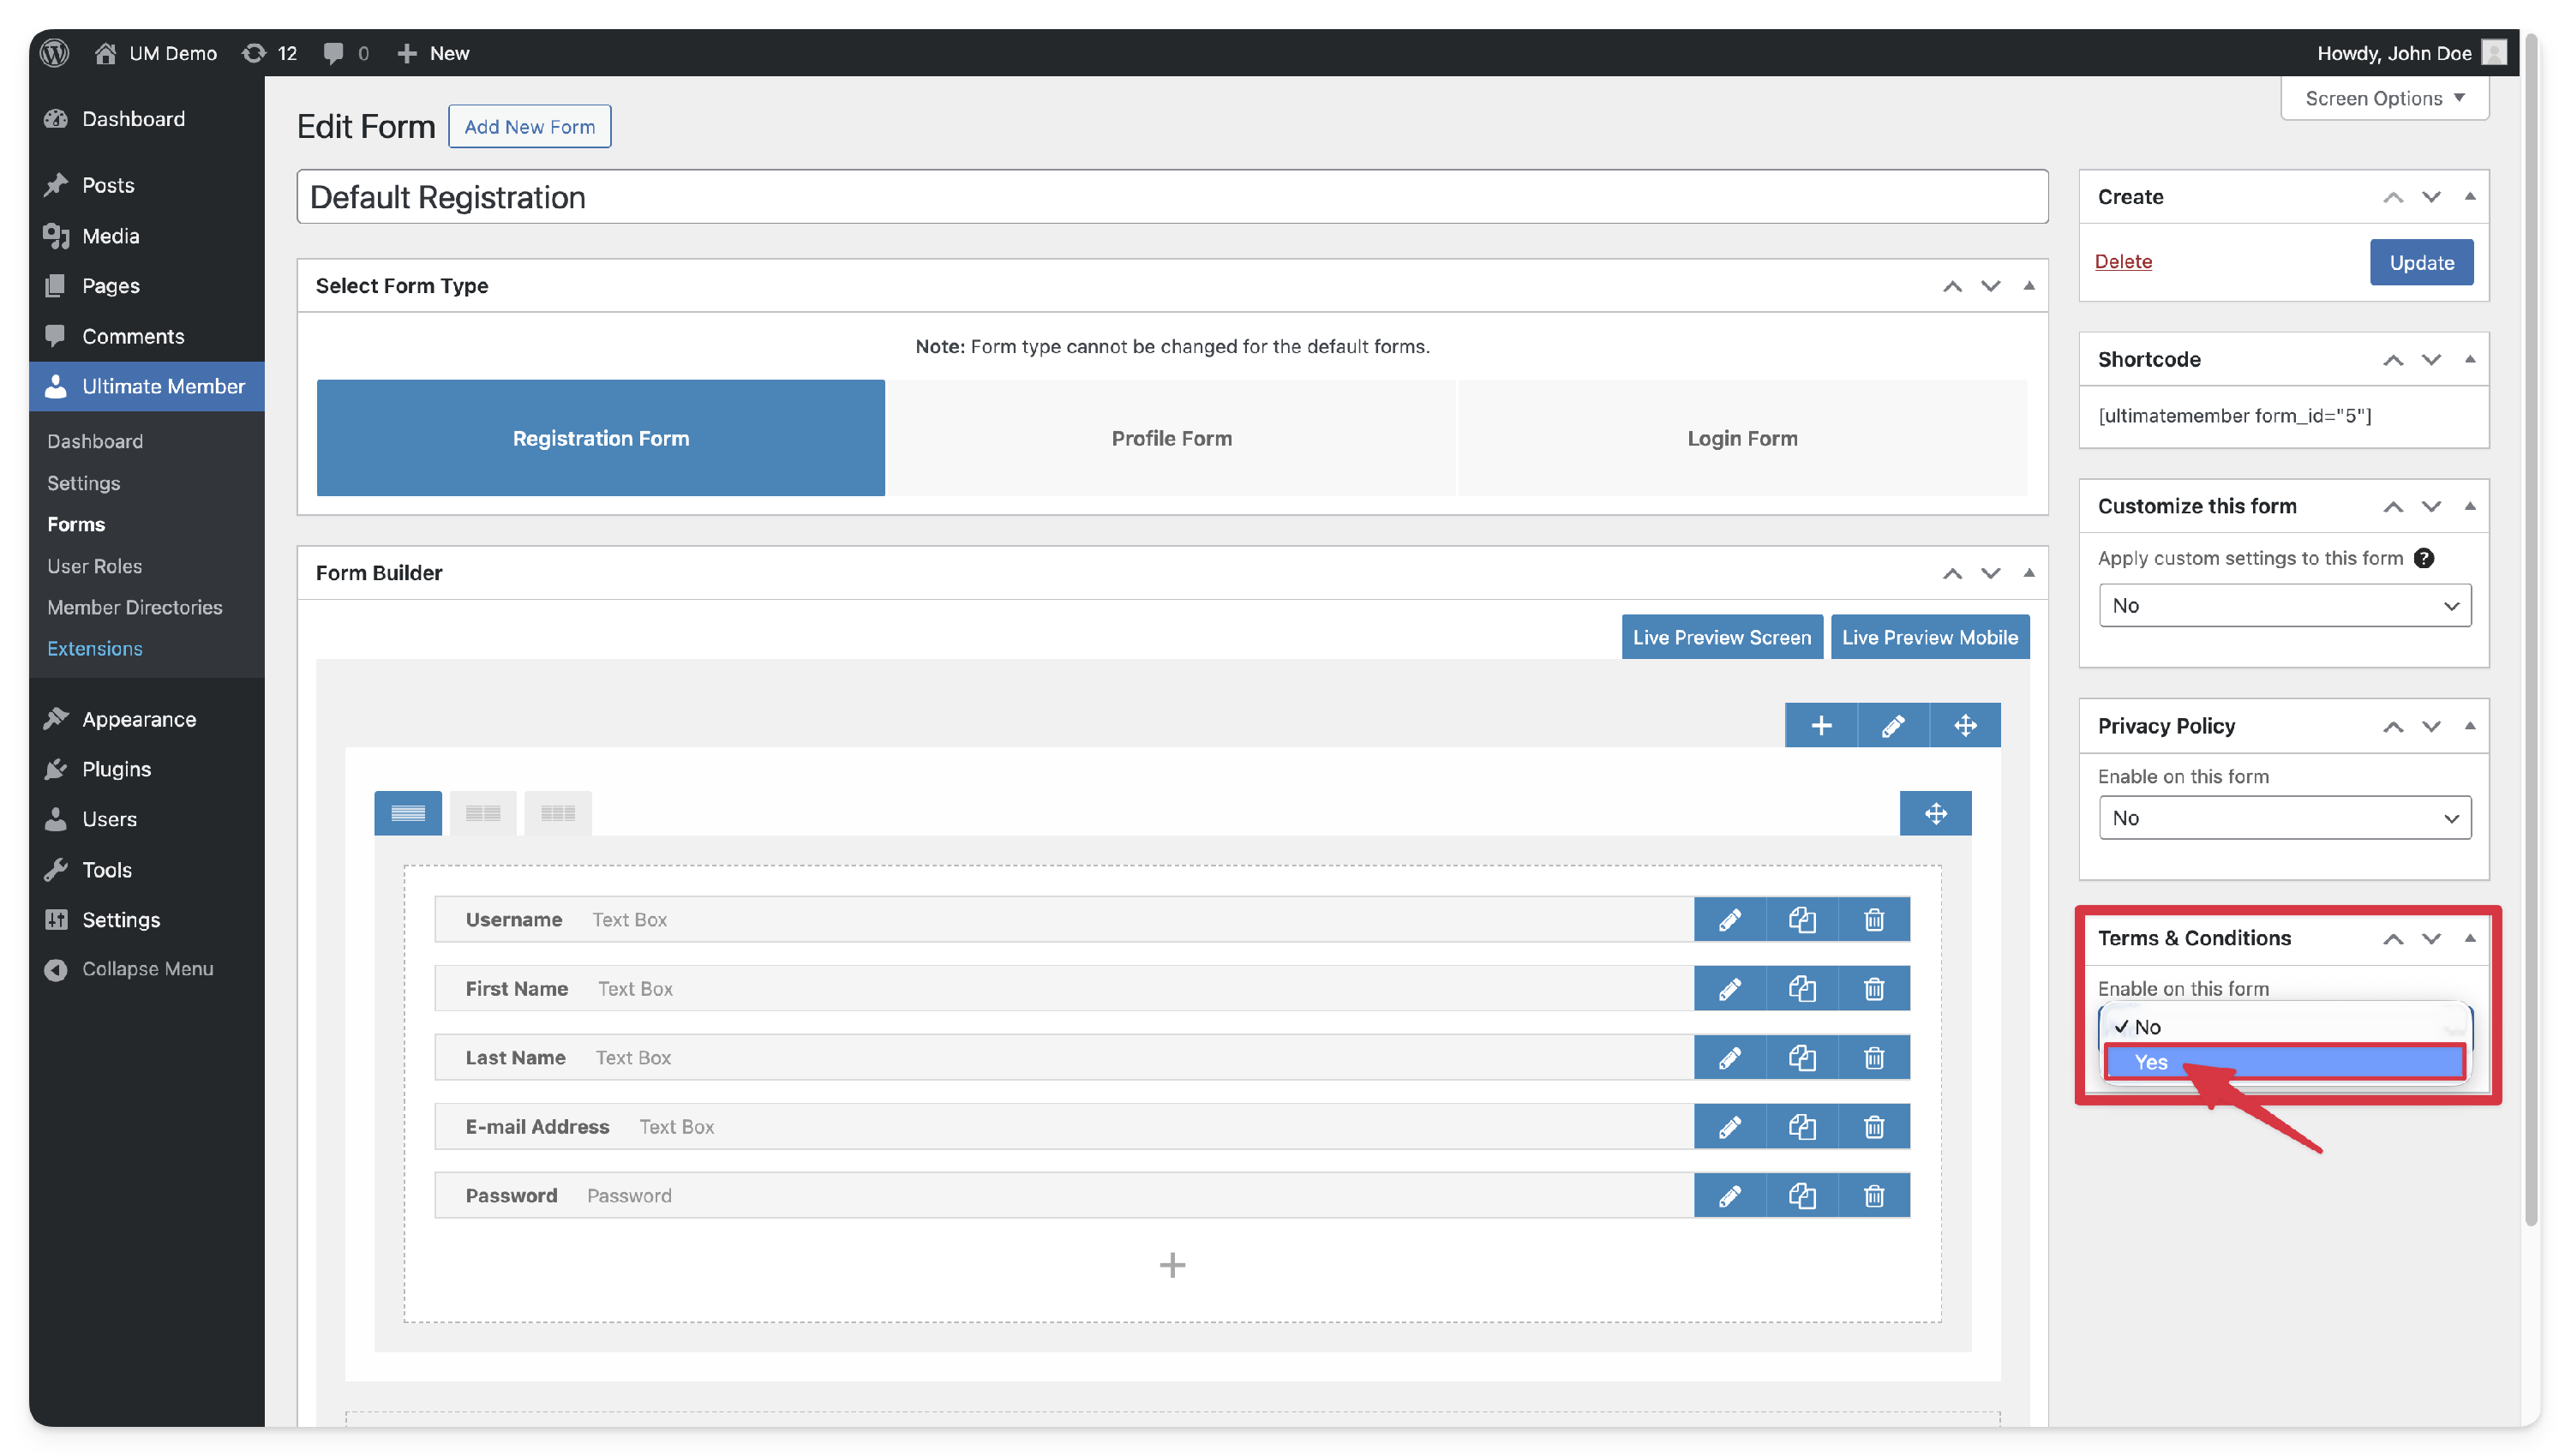
- In the Content dropdown, select the page created in Step 1.
- Click Update Form.


2. Settings & Options Reference
Registration Form Settings
Located within the Registration Form Builder.
- Enable on this form - This option allows you to enable or disable terms & conditions in the registration form. Select Yes from the dropdown to enable.
- Content - This option allows you to select your T&C content from the dropdown selection.
- To add content or an option in this selection, you must create a page, add and publish your T&C content in wp-admin>Pages>Add New.
- Once you click on publish, go back to Ultimate Member > Forms > Edit Registration > Terms & Conditions, then select the content from the drop-down menu.
- Toggle Show/Hide Text: Defines the labels for the link that expands the terms (e.g., "Show Terms" / "Hide Terms").
- Checkbox Agreement Description: The label appearing next to the mandatory checkbox (e.g., "I agree to the Terms & Conditions").
- Error Text: The validation message is displayed if the user attempts to submit the form without checking the box.
Extension Settings
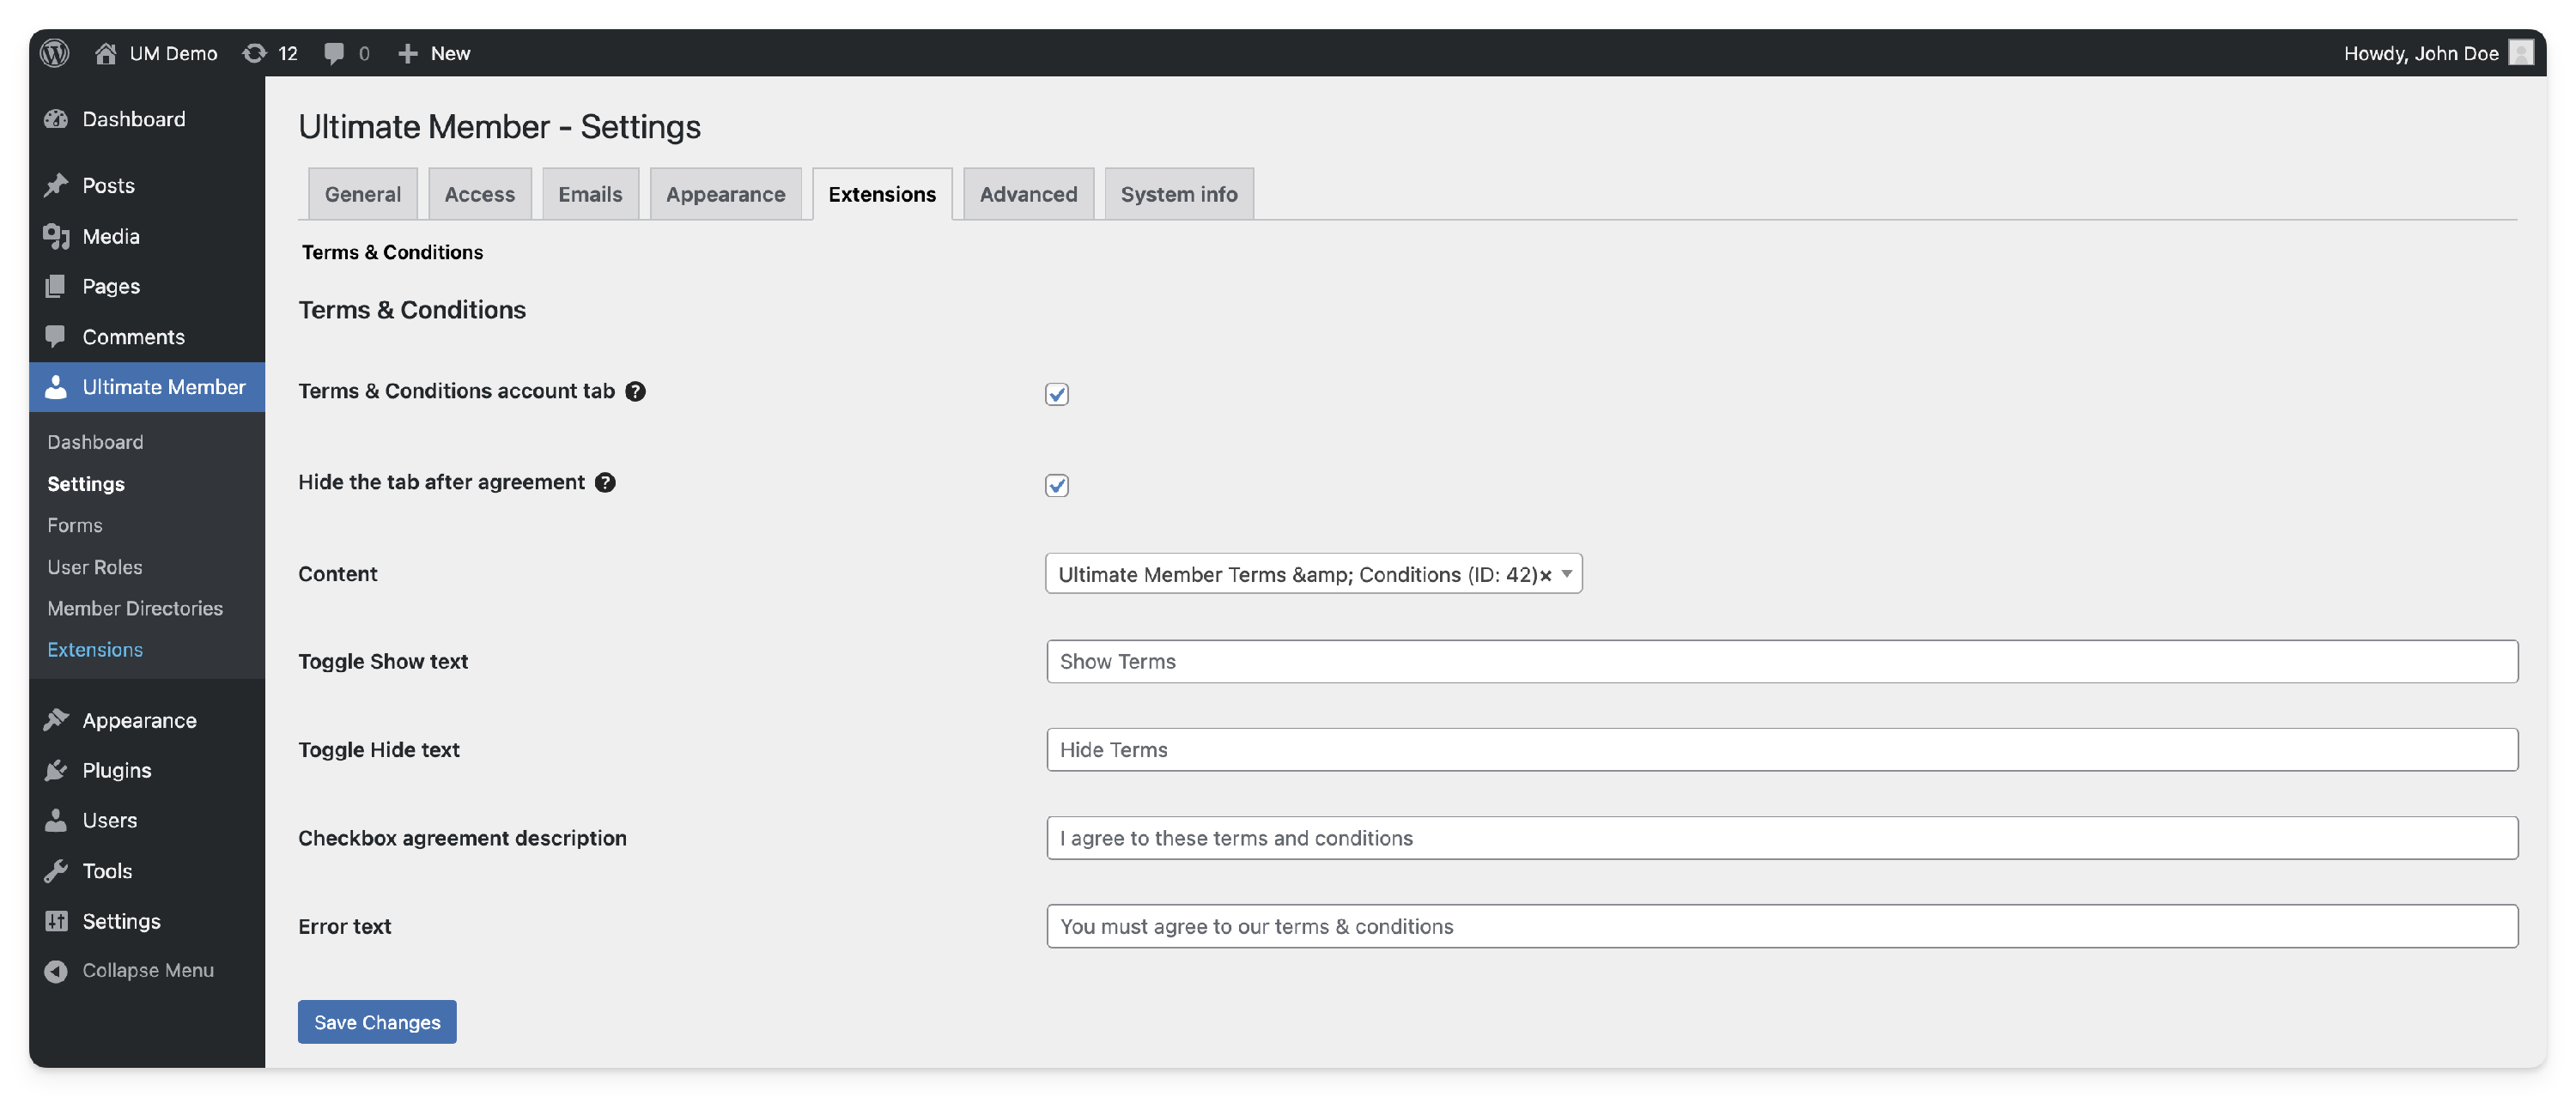
Located at: Ultimate Member > Settings > Extensions > Terms & Conditions
These settings govern the Account Tab, which is critical for maintaining compliance with users who are already registered.
- Terms & Conditions account tab: Enable this to add a dedicated "Terms" section within the user's
Accountpage. - Hide the tab after agreement: When enabled, the tab is only visible to users who have not yet agreed to the current terms. Once they click "Confirm," the tab is hidden to maintain a clean User Interface (UI).
- Content: Select the page to be displayed within the account tab.
- Toggle Show Text: This option allows you to edit the text of the Toggle Show text in the terms & conditions tab in the user's account page.
- Toggle Hide Text: This option allows you to edit the text of the Toggle Hide text in the terms & conditions tab in the user's account page.
- Checkbox agreement description: This option allows you to edit the Checkbox agreement description in the terms & conditions tab in the user's account page.
- Error Text: This option allows you to edit the error text in the terms & conditions tab in the user's account page.

3. User Experience: The Terms & Conditions Tab
When you enable the Terms & Conditions account tab, a dedicated section is added to the user's front-end Account Page. This allows members to manage their legal agreements without needing to contact an administrator.
How it Works for the User
1. Accessing the Tab
The user will see a new tab labelled "Terms & Conditions" in their account menu. This is particularly useful if:
- They want to review the rules they agreed to during registration.
- You have updated your terms, and they need to re-verify their agreement.
2. The Interactive Toggle
To keep the page clean, the legal text is hidden behind a "Show Text" link. When the user clicks this, the terms expand downward, allowing them to read the content without leaving the page. 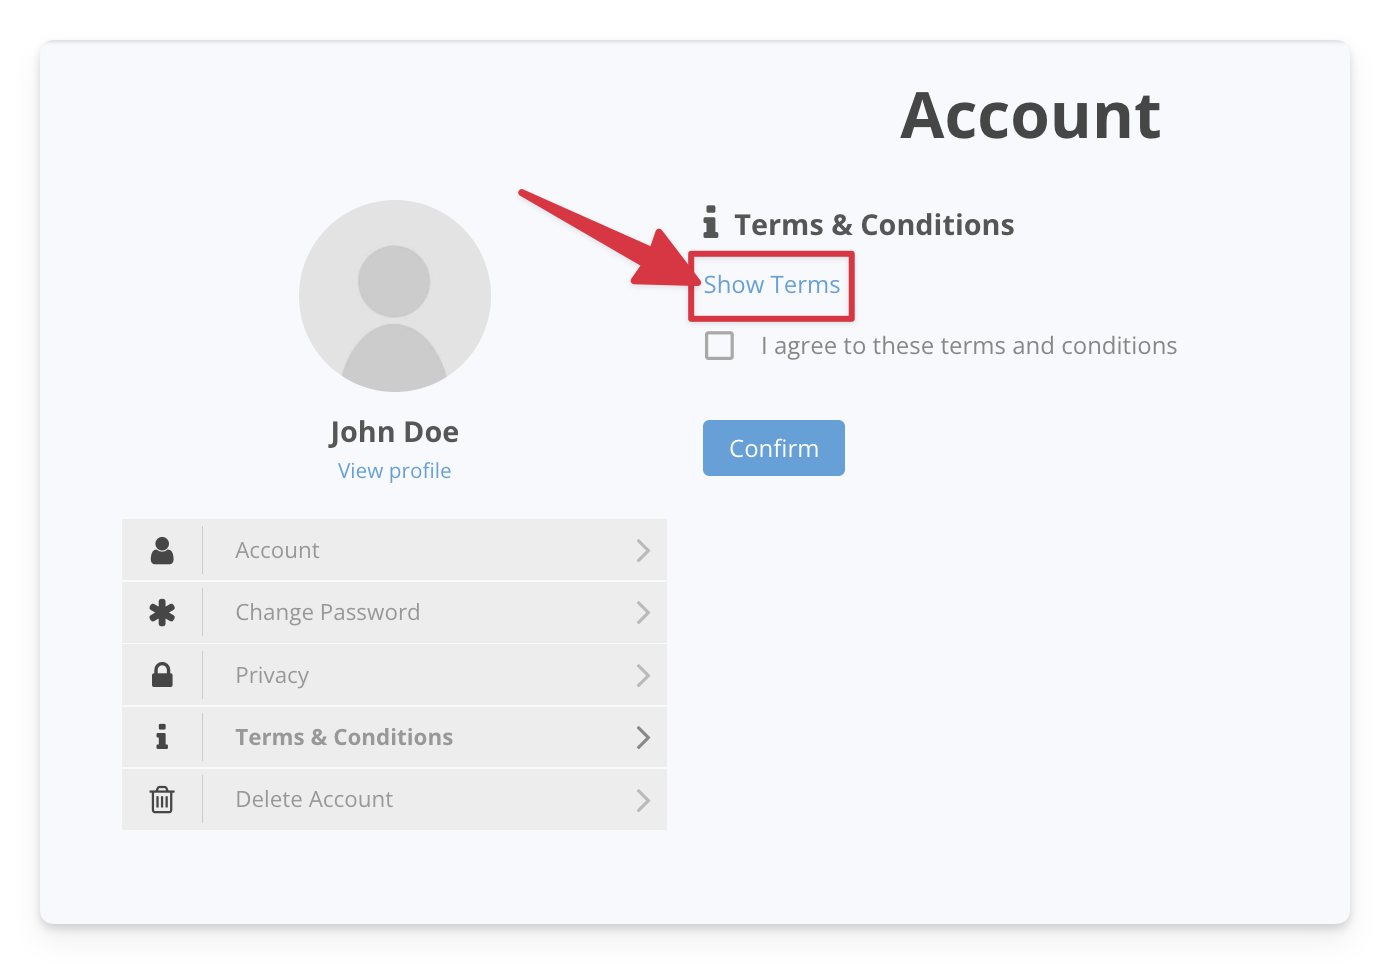
3. Confirming the Agreement
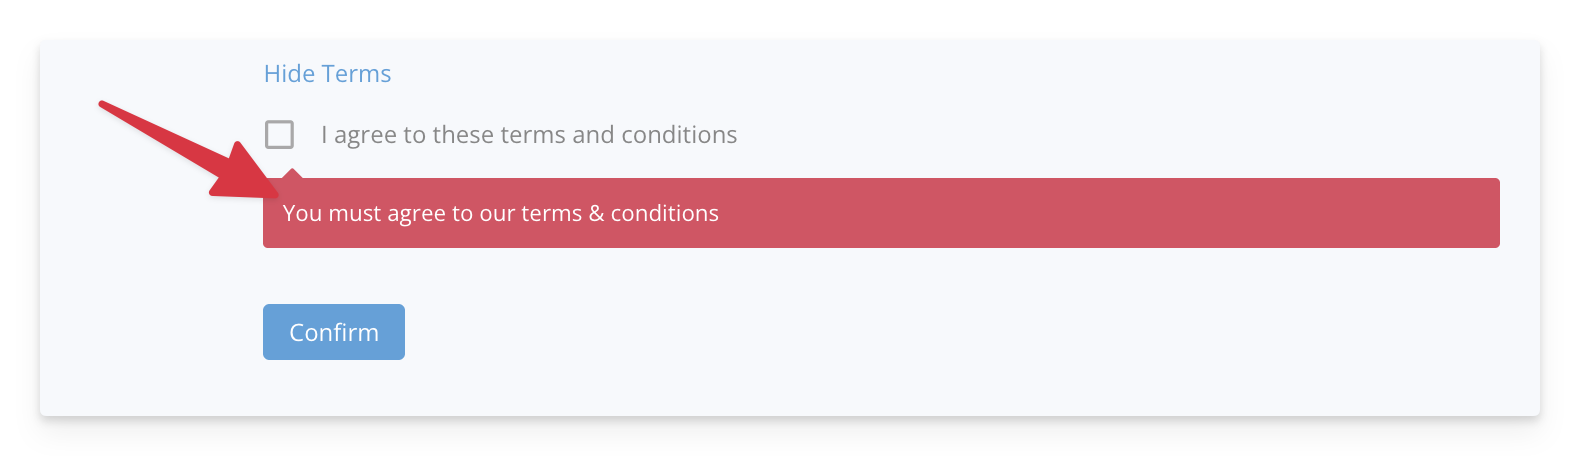
Below the text, the user will find a mandatory checkbox and a "Confirm" button.
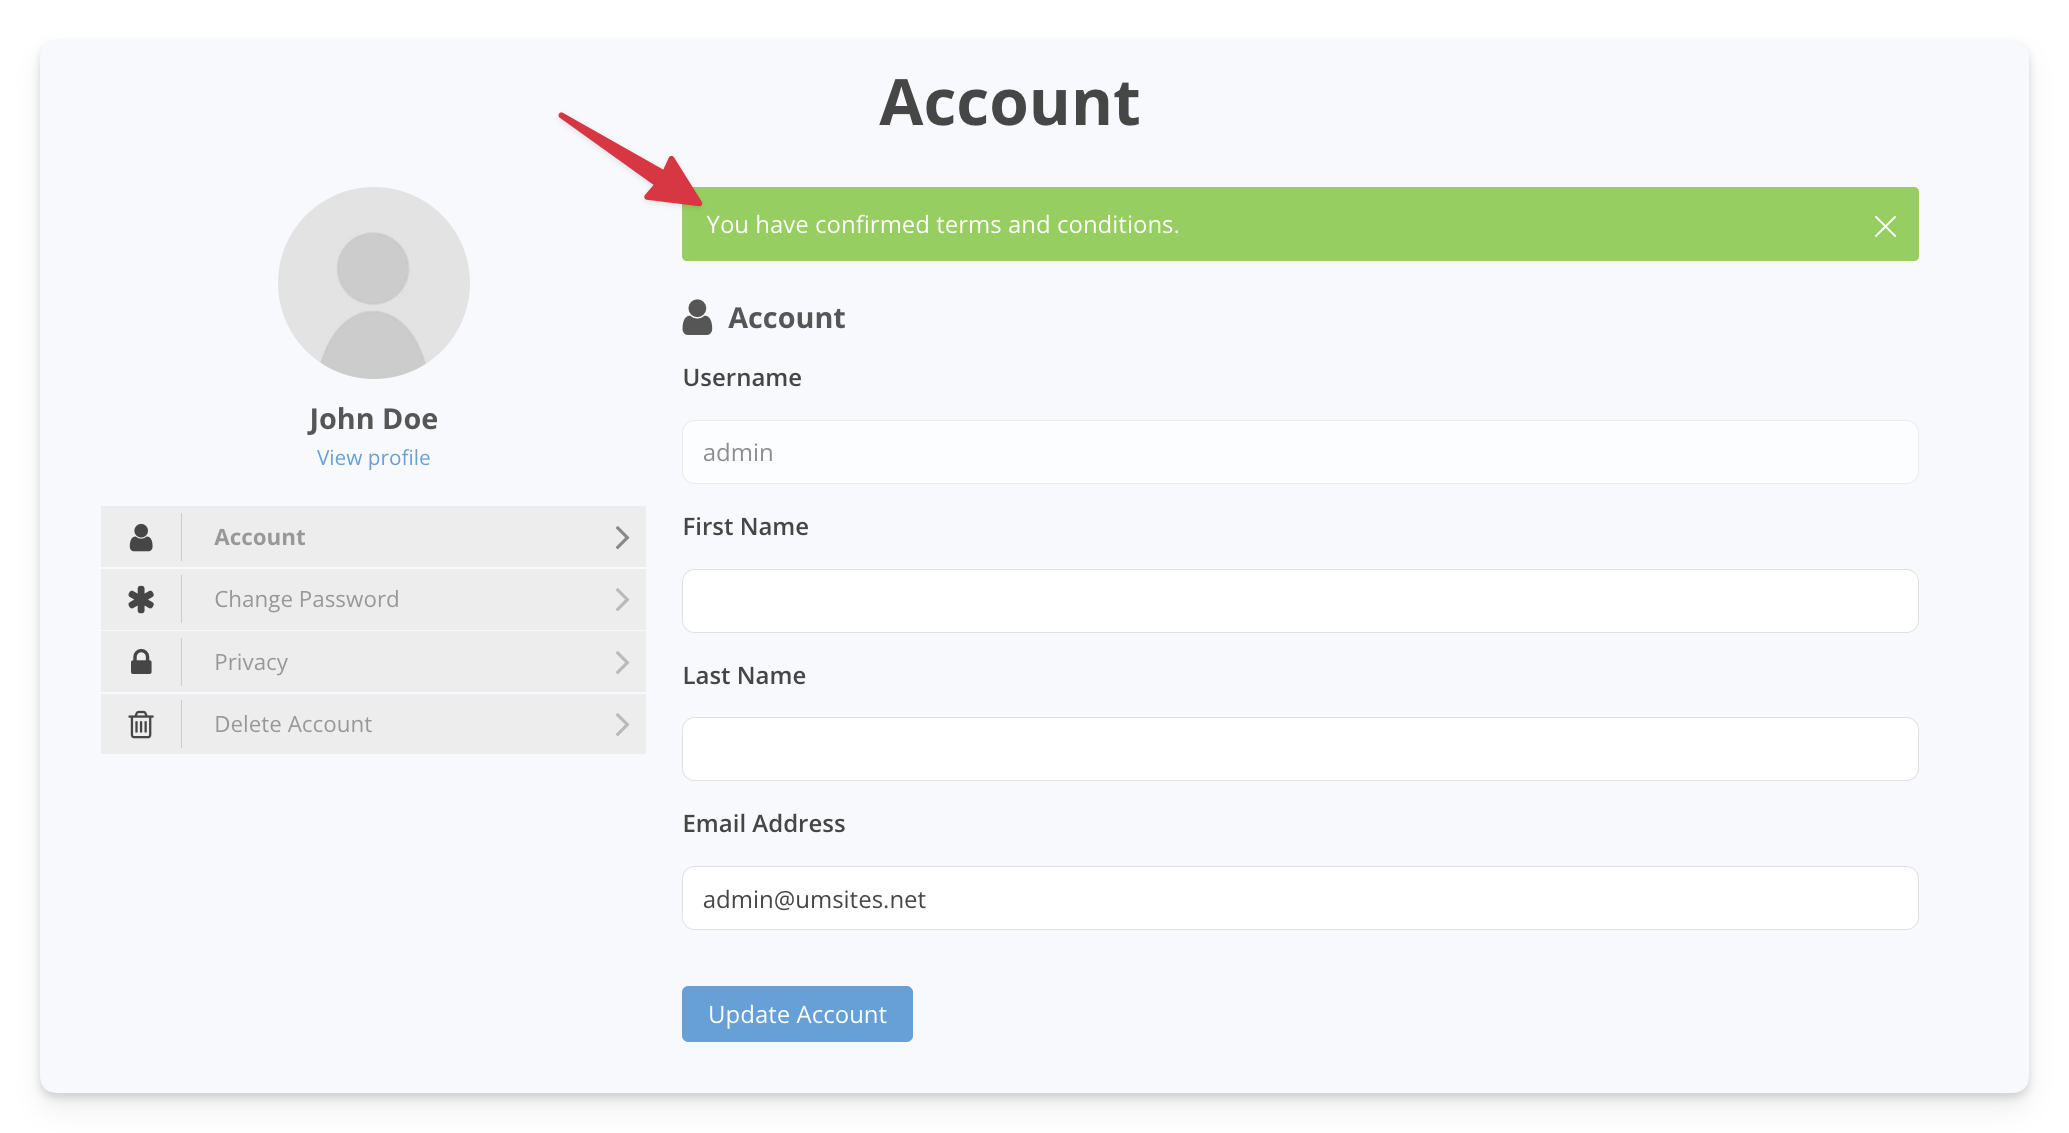
- Success: If the user checks the box and clicks confirm, they receive a green success message:
"You have confirmed terms and conditions."
- Error: If the user clicks confirm without checking the box, they receive a red error message:"You must agree to our terms and conditions." (Note: You can customize this text in your settings).


The "Smart" Tab Behavior
You can control how persistent this tab is by using the "Hide the tab after agreement" setting:
- If Enabled (Recommended): The "Terms & Conditions" tab is only visible when the user’s action is required. Once they click confirm, the tab disappears from their menu. This keeps the user's dashboard clutter-free.
- The Reappearance: If you ever click "Reset Agreement" in your admin dashboard, the tab will automatically reappear for the user the next time they log in, alerting them that a new agreement is required.
4. Managing Legal Updates (Resets & Notifications)
When you update your legal documents (such as your Terms of Service or Privacy Policy), you must ensure that your current members review and accept the new version. The extension provides a centralized management tool for this purpose.
Step 1: Resetting Past Agreements
Resetting an agreement clears the "signed" status from your users' profiles. This is necessary to make the Terms & Conditions tab reappear on their account page.
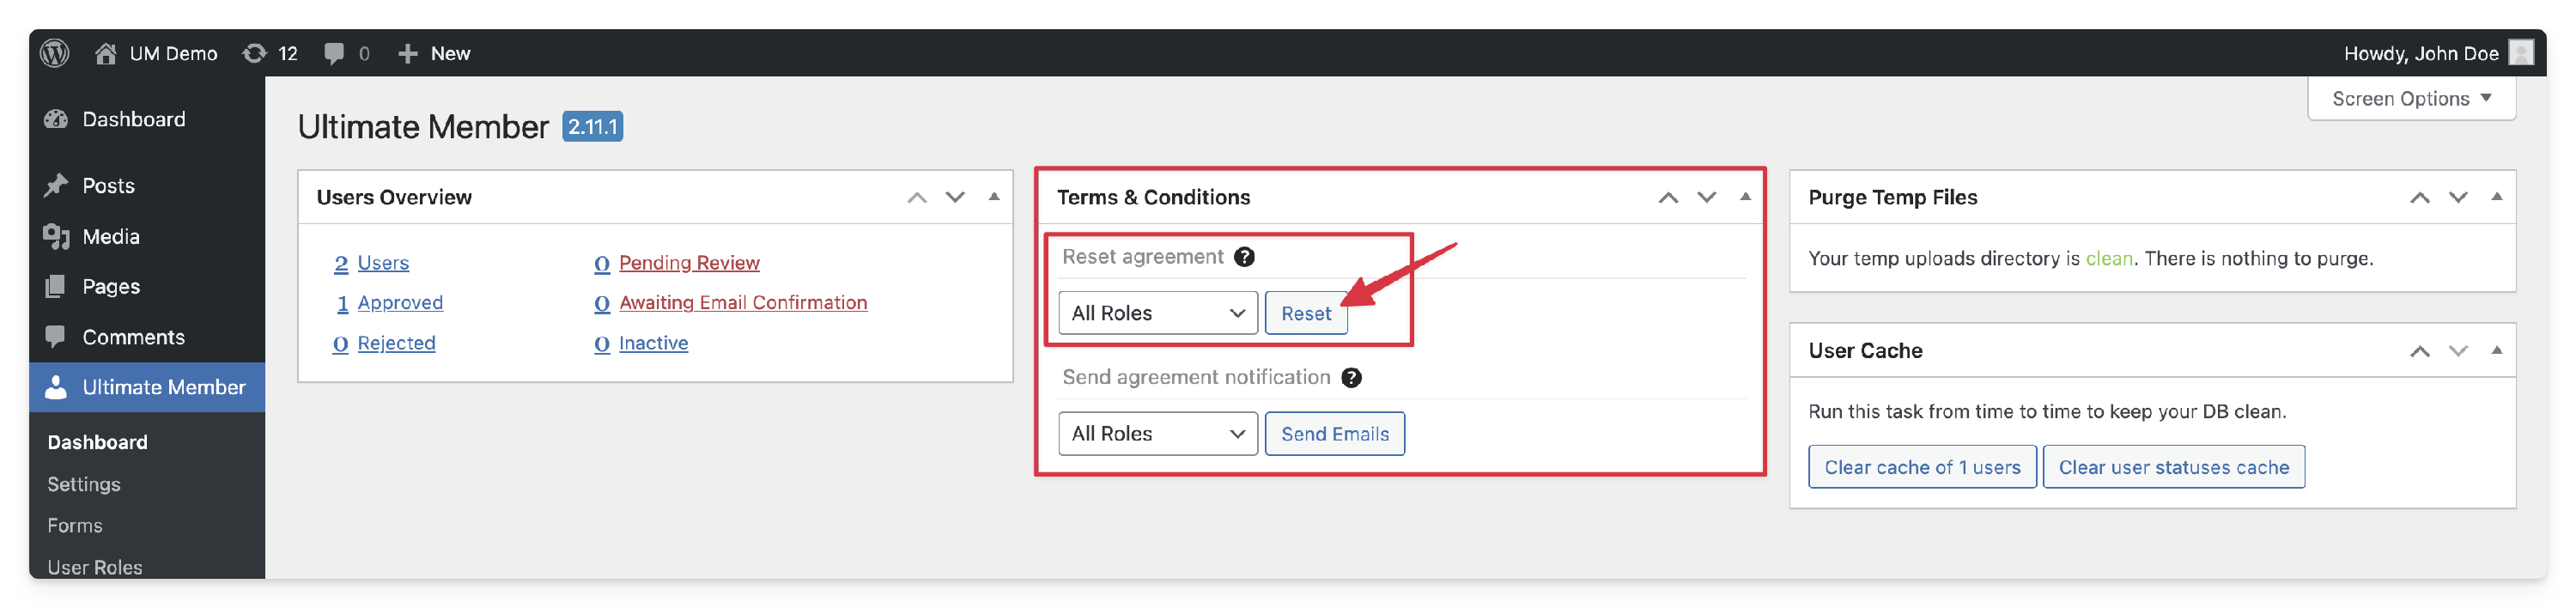
- Navigate to wp-admin > Ultimate Member > Dashboard.
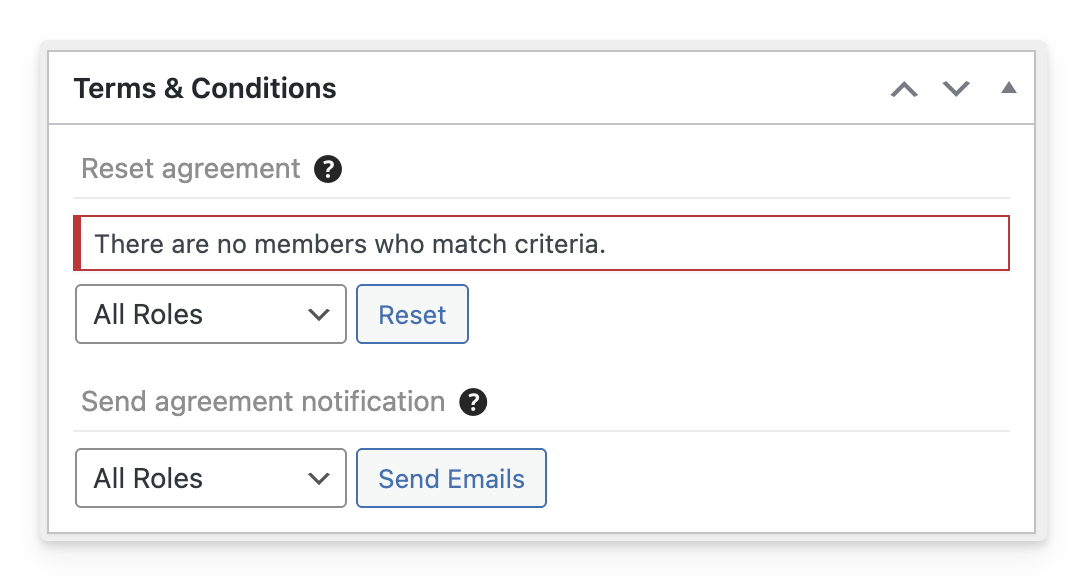
- Locate the Terms & Conditions widget.
- Reset agreement: Use the dropdown to select specific User Roles (e.g., Members or Customers) or leave it as "All Roles."
- Click the Reset button.

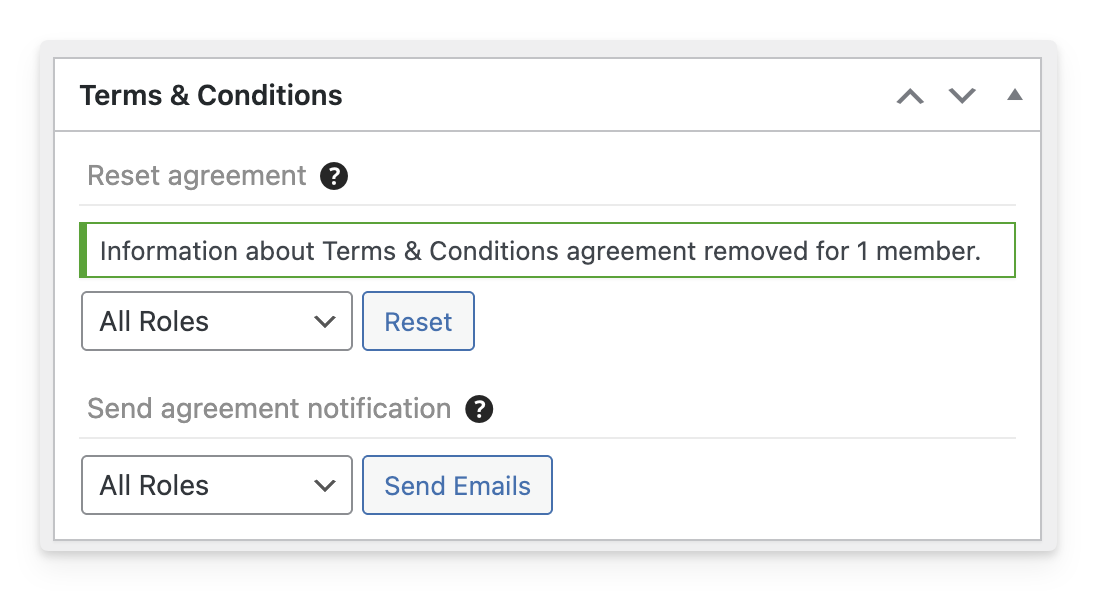
System Feedback:
- Success: If users were affected, you will see: "Information about Terms & Conditions agreement removed for [X] member(s)."
- No Action: If no users in that role had previously agreed, you will see: "There are no members who match criteria."


Step 2: Notifying Your Members
After resetting the agreement, you should proactively notify your users that action is required. To successfully notify your users about legal updates, you must configure the automated email system. This ensures that members are not only informed of changes but are also directed to the exact location where they can provide their consent.
Critical Dependency: The Account Tab
For the notification system to work as intended, you must have the Terms & Conditions account tab enabled in the global settings.
The Logic: The default email template includes a unique link ({account_terms_conditions_link}) that redirects the user to their personal Account Page. If the Account Tab is disabled, users will arrive at their account settings but will not see the checkbox required to confirm the agreement.
How to Enable and Customize the Email
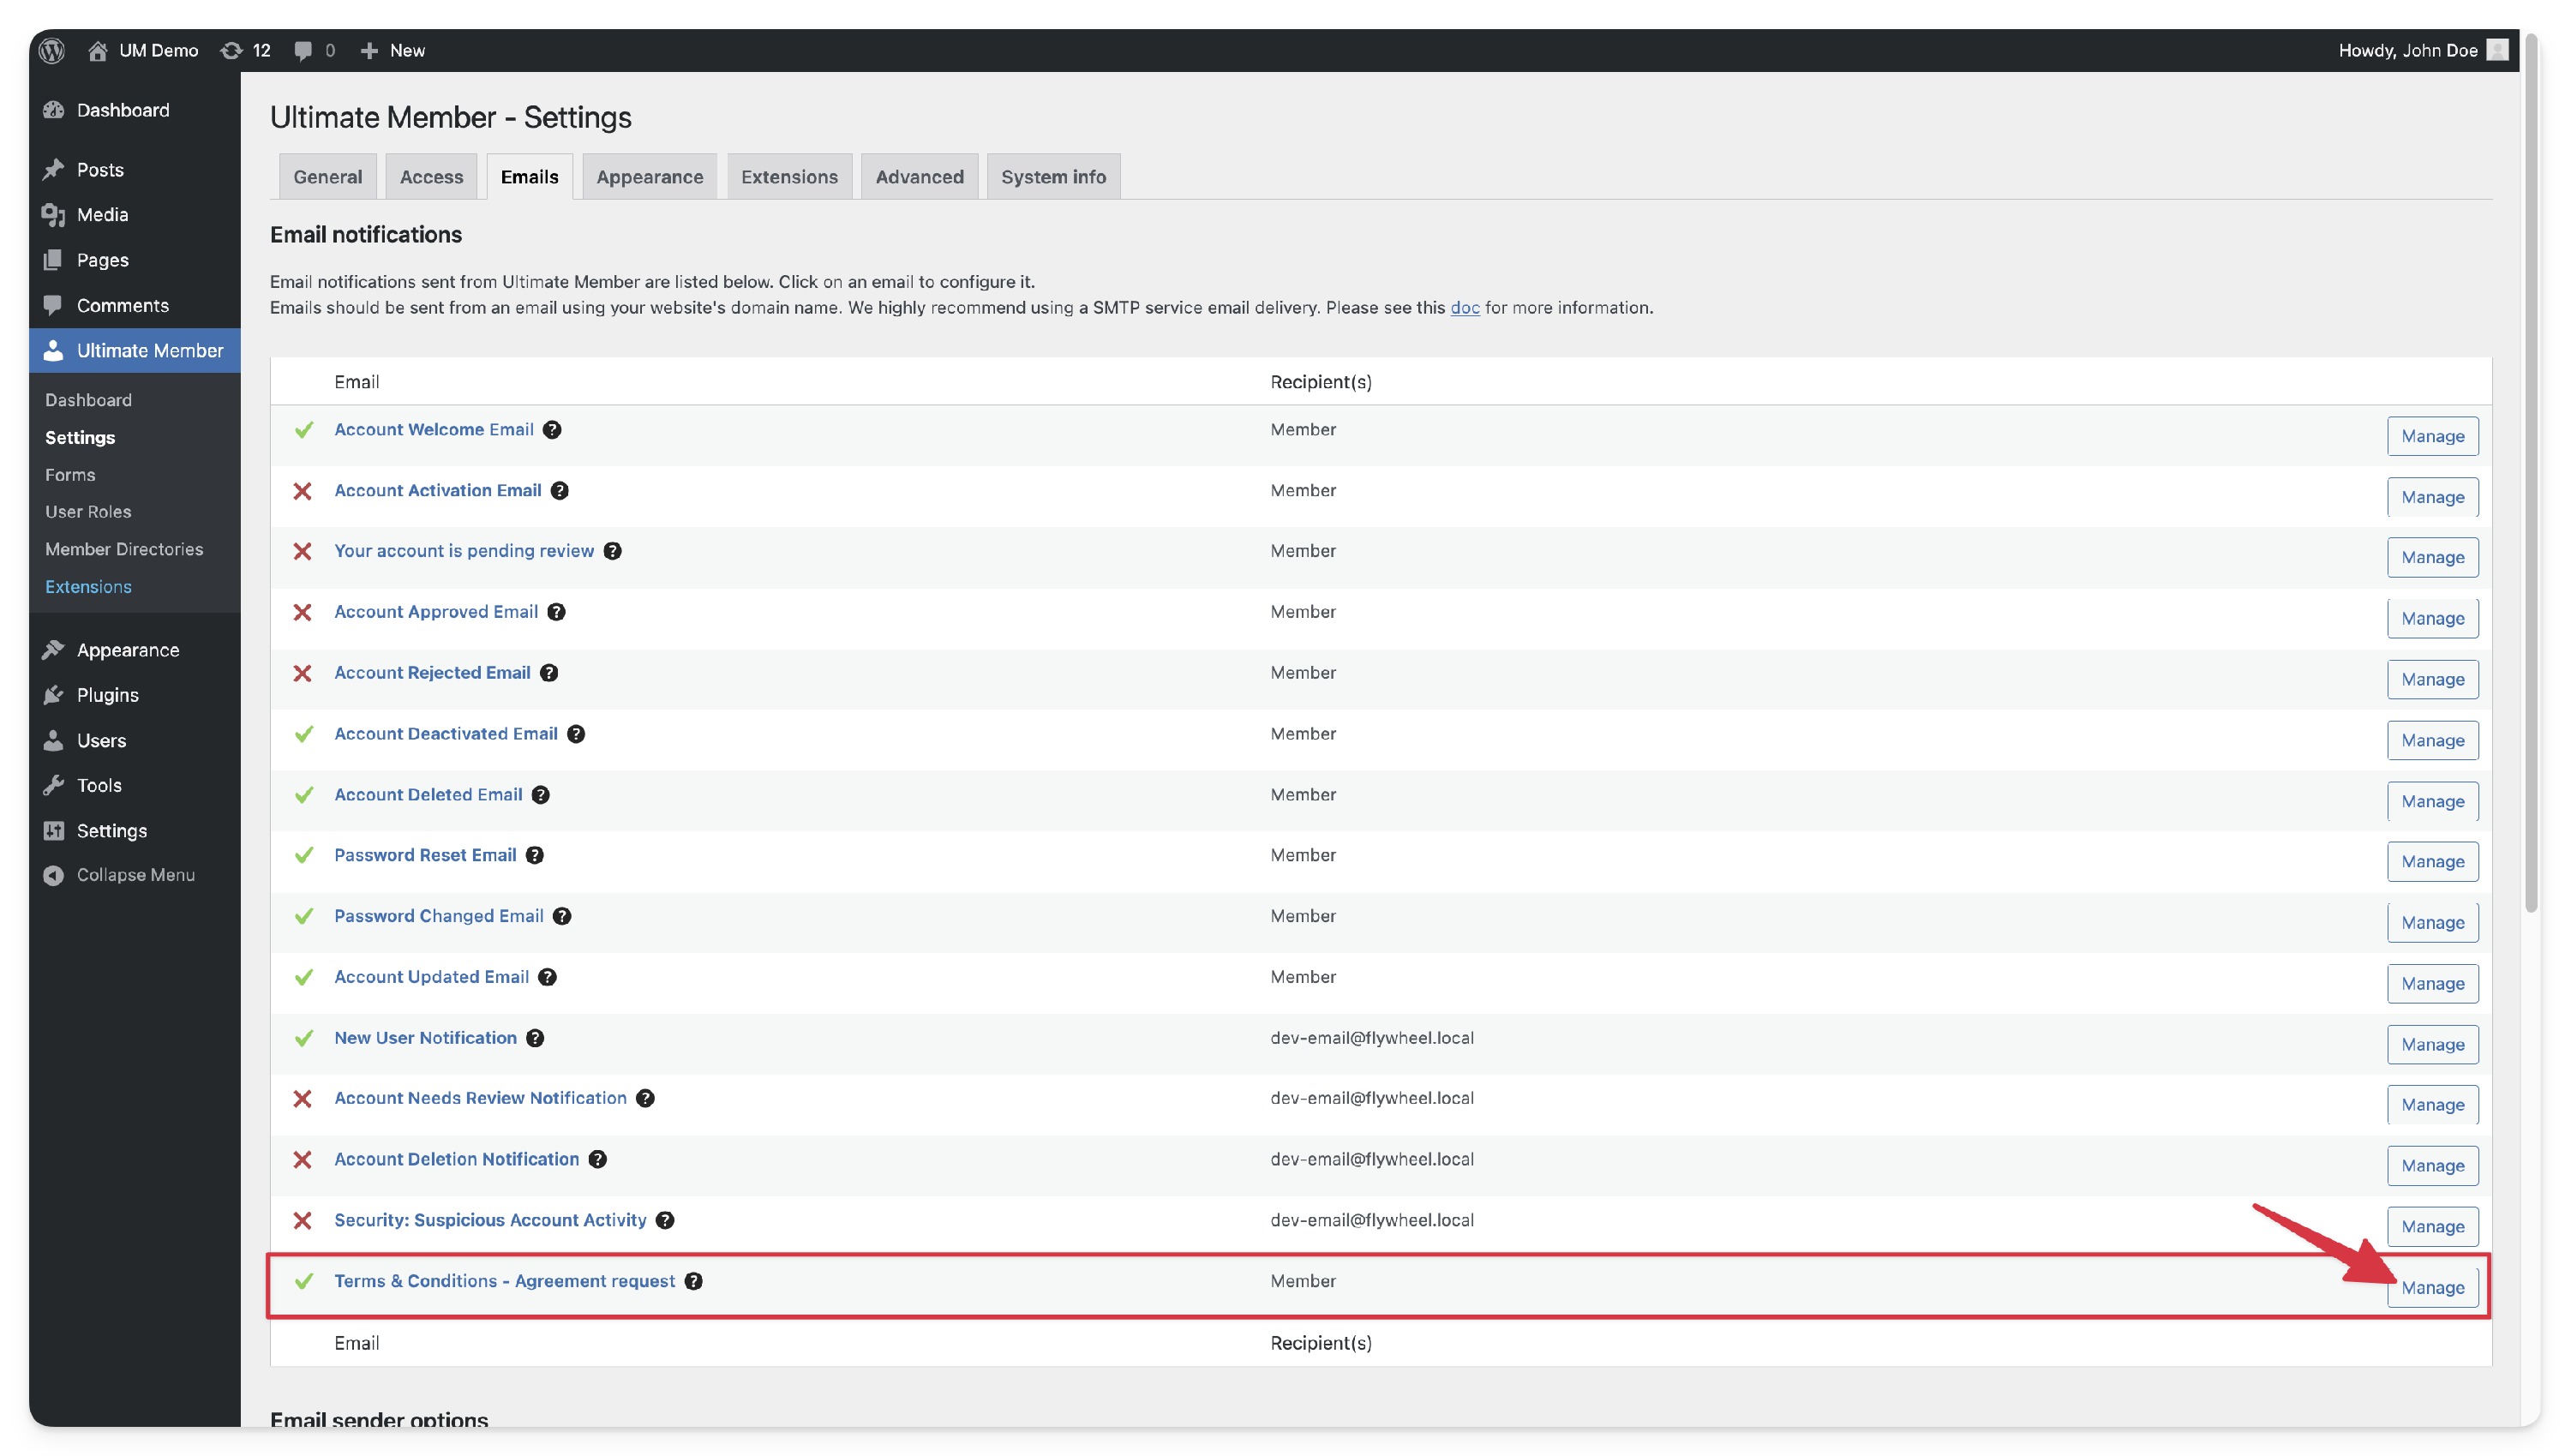
- Navigate to wp-admin > Ultimate Member > Settings > Email.
- Locate the template titled Terms & Conditions - Agreement request.
- Click the Manage button to access the template editor.
- Enable: Toggle the switch to ON or checked to activate the notification.
- Customize (Optional): You can modify the Subject Line and the Body Text to match your brand's voice.
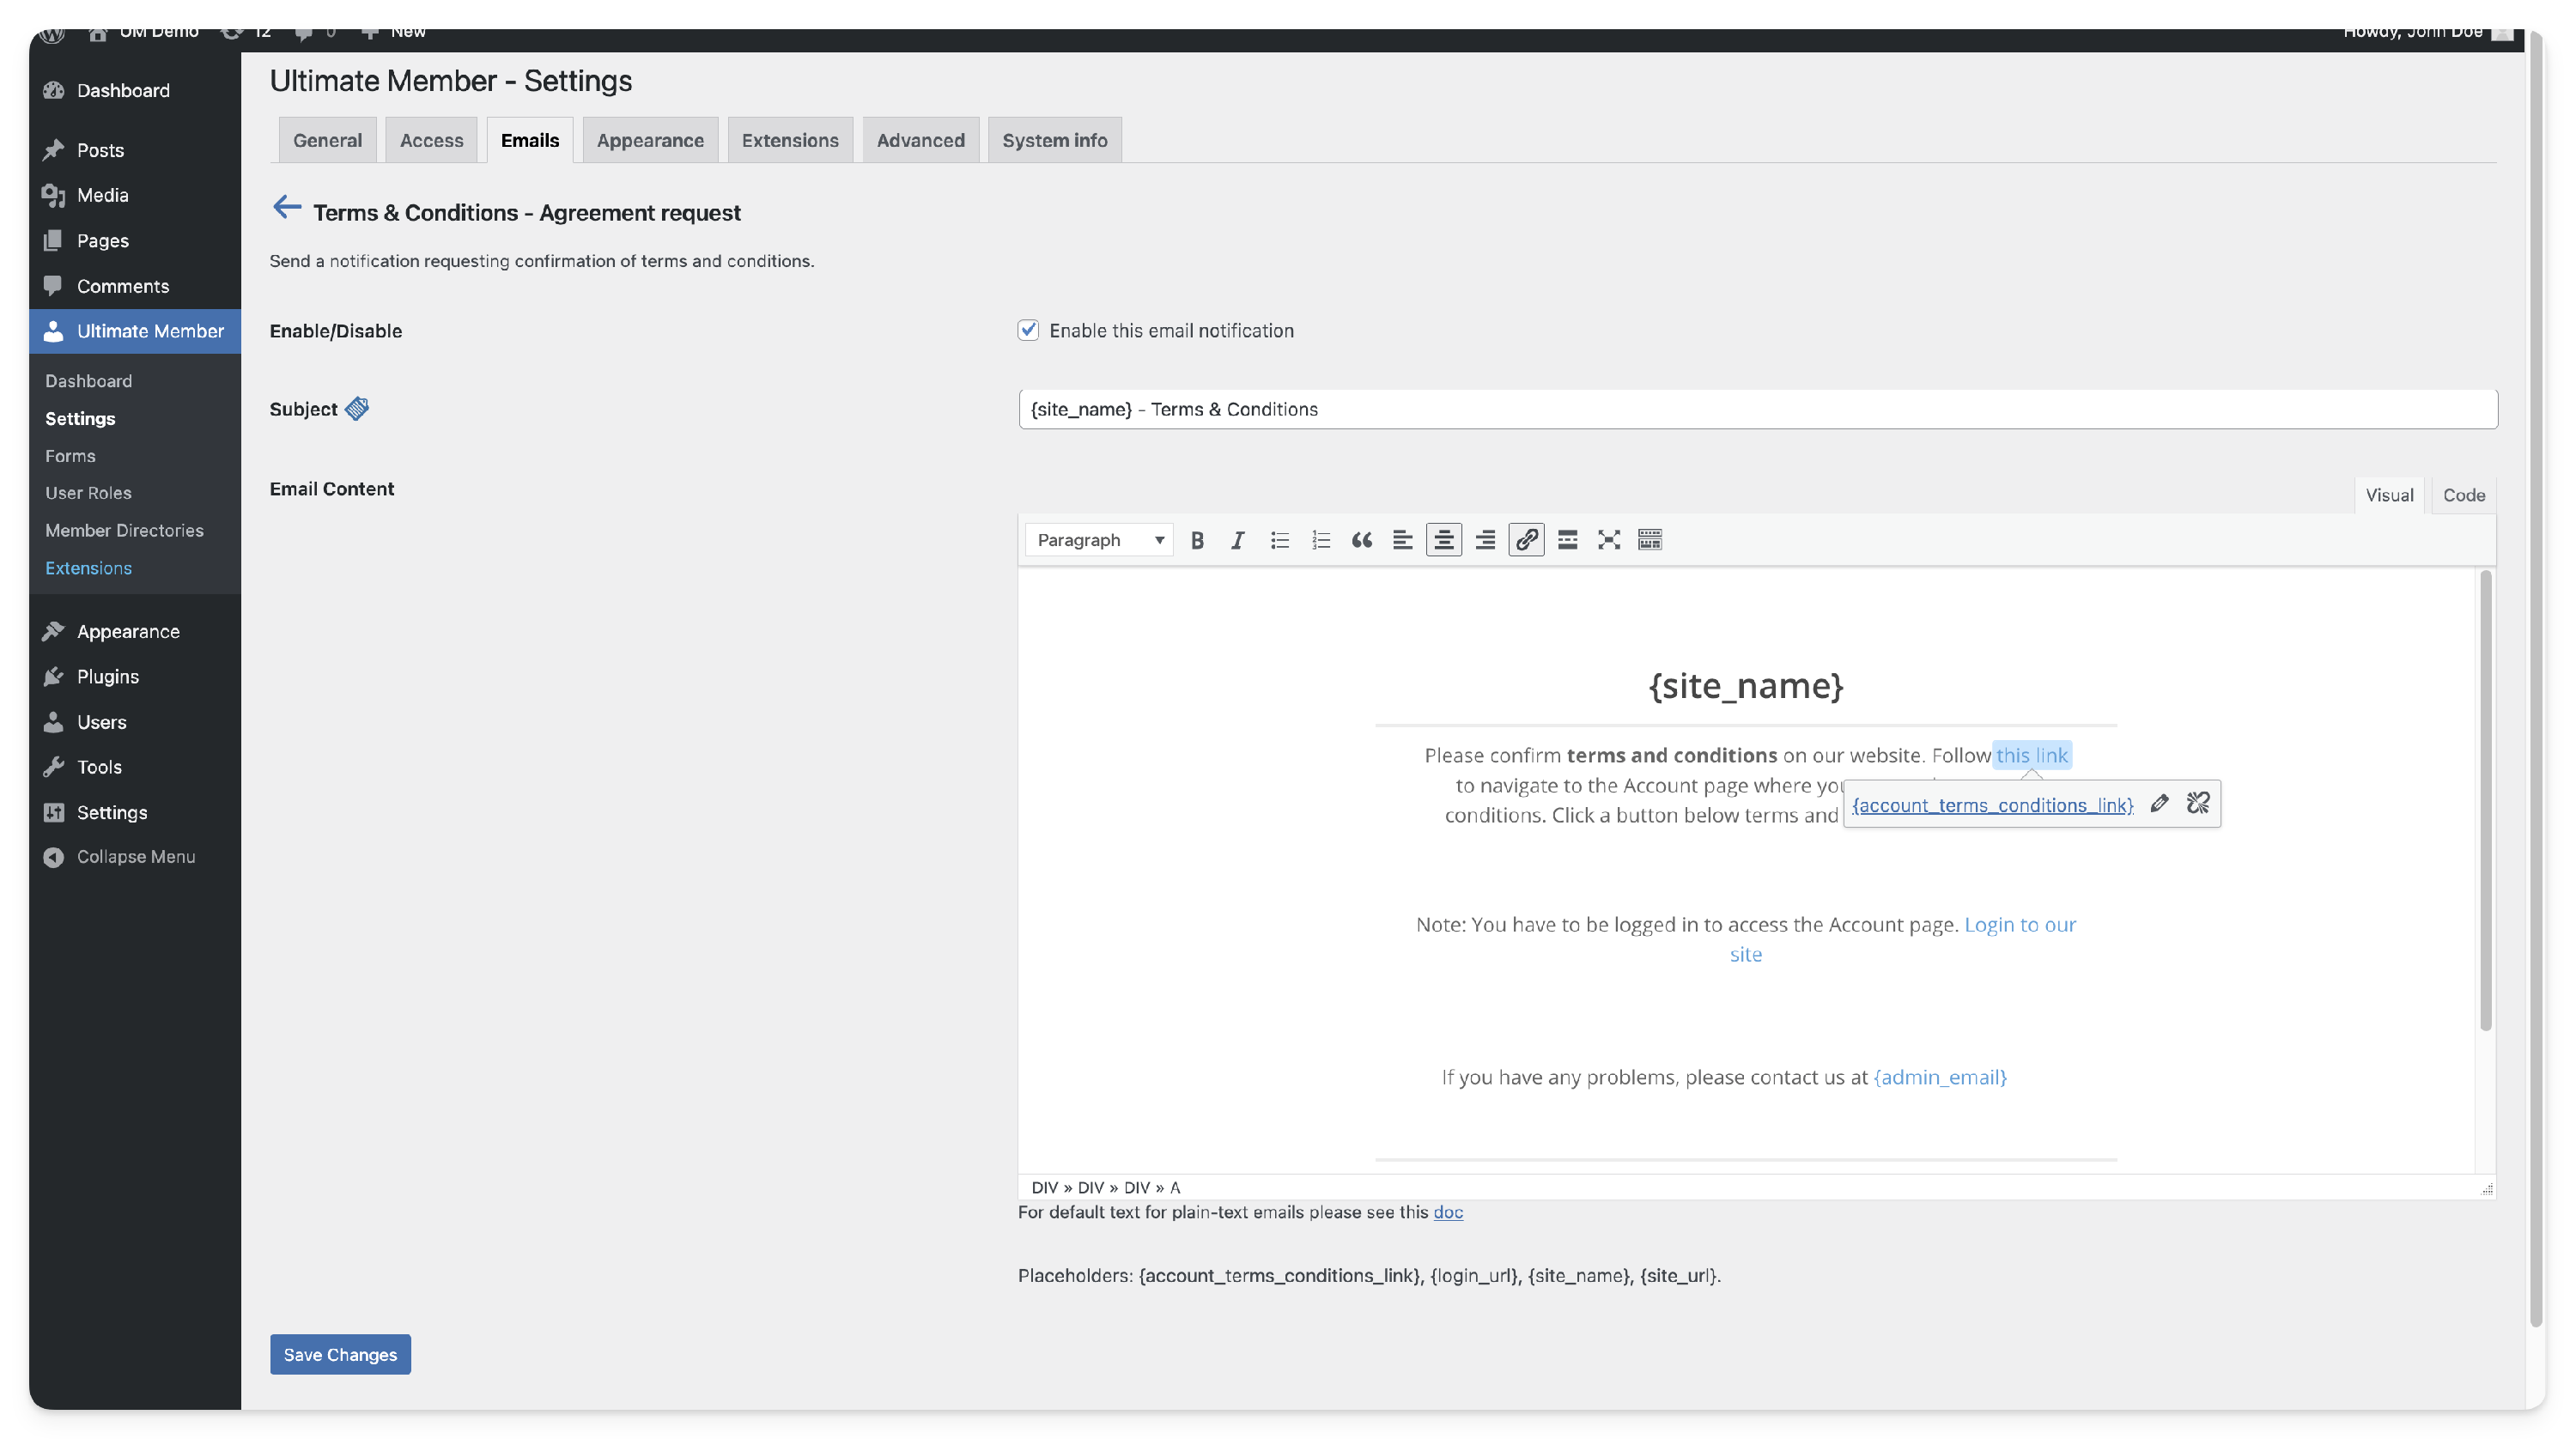


TIP: Ensure the placeholder {account_terms_conditions_link} remains in your email body. This automatically generates the direct link to the user's Terms & Conditions tab, removing any friction from the agreement process.
Send Agreement Notification
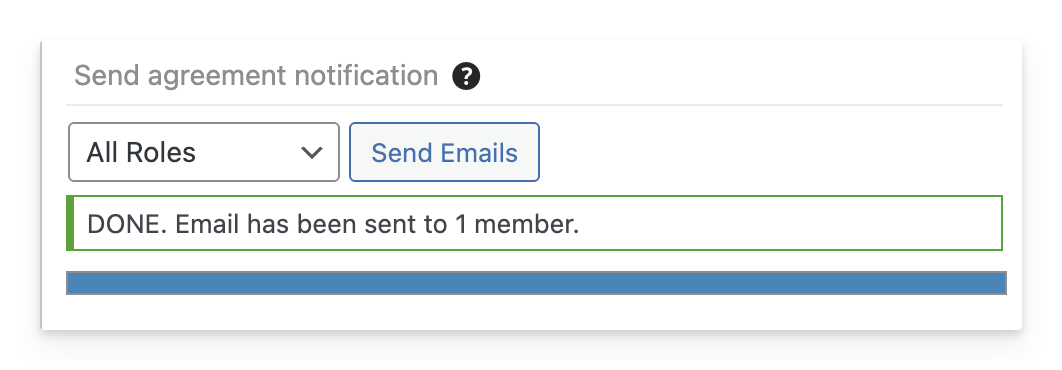
- In the same Terms & Conditions widget, select the target User Roles.
- Click Send agreement notification.

- The Result: An automated email is sent only to those who have not yet accepted the current terms.
- System Feedback: Once complete, the system will display: "DONE. Email has been sent to [X] member(s)."


IMPORTANT Prerequisite for Emails: For the "Send" button to function, you must first enable the email template. Go to Ultimate Member > Settings > Email > Terms & Conditions - Agreement request and ensure the notification is toggled ON.
User Experience After a Reset
Once you click Reset, the "Terms & Conditions" tab on the user's front-end Account Page undergoes a specific lifecycle:
- Reappearance: The tab, which may have been hidden previously, instantly becomes visible again in the user's account menu.
- Mandatory Action: The user must navigate to this tab, review the updated text, and check the box to re-confirm.
- Automated Cleanup: If you have enabled the "Hide the tab after agreement" setting, the tab will disappear again as soon as the user clicks "Confirm," keeping their dashboard clean.
5. Technical Logic & Troubleshooting
How the Toggle Works
To optimize performance, the extension uses AJAX (Asynchronous JavaScript and XML). The legal text is not loaded when the page first opens; it is only fetched from the database when a user clicks the "Show" toggle. This ensures your registration page remains fast and lightweight.
Troubleshooting Table
| Issue | Cause | Resolution |
| T&C Box is missing in Form Builder | Incorrect Form Type | Ensure you are editing a Registration form. This feature is unavailable for Login or Profile forms. |
| Dropdown is empty | Page Status | Confirm the source page is Published and Public. |
| Users cannot see the T&C Tab | Agreement Status | If "Hide tab after agreement" is ON, the tab will not show for users who have already agreed. Use the Reset tool to make it reappear. |
| Notification emails fail | Template Disabled | Ensure the Agreement Request email is enabled in the Email settings. |