Create Subscription Prices
Overview
The Stripe extension for Ultimate Member lets you create multiple subscription prices that can be connected to shortcodes. This allows you to display different subscription buttons and plan options in your registration form, providing users with flexible membership options.
If you already have subscription prices configured in your Stripe account, these can be imported directly into your WordPress site using the Ultimate Member Stripe settings. If you haven’t created any pricing options yet, follow the steps below.
Note: Before proceeding, it’s recommended to review the FAQ article “What Pricing Models are Supported in the Stripe Extension?” for a detailed explanation of the pricing models available within the integration.
Creating a Subscription/Product Price in Stripe
To create a new subscription or product price, log in to your Stripe Dashboard. From the side menu, click Product Catalog to open the product management page. On the Product Catalog page, click the + Create product button to open the product creation form.

Product Details
In the product form, enter the following details:
- Name of your product (required)
- Description (optional)
- Image (optional)
Price Information
In the Price Information section, select your desired pricing model and enter the amount for your product or subscription.
The Stripe extension for Ultimate Member supports two pricing models:
- Recurring — Use this option for subscription-based pricing. After selecting Recurring, enter the amount to be charged and choose a Billing Period from the following options: Daily, Weekly, Monthly, Every 3 months, Every 6 months, Yearly, or Custom.
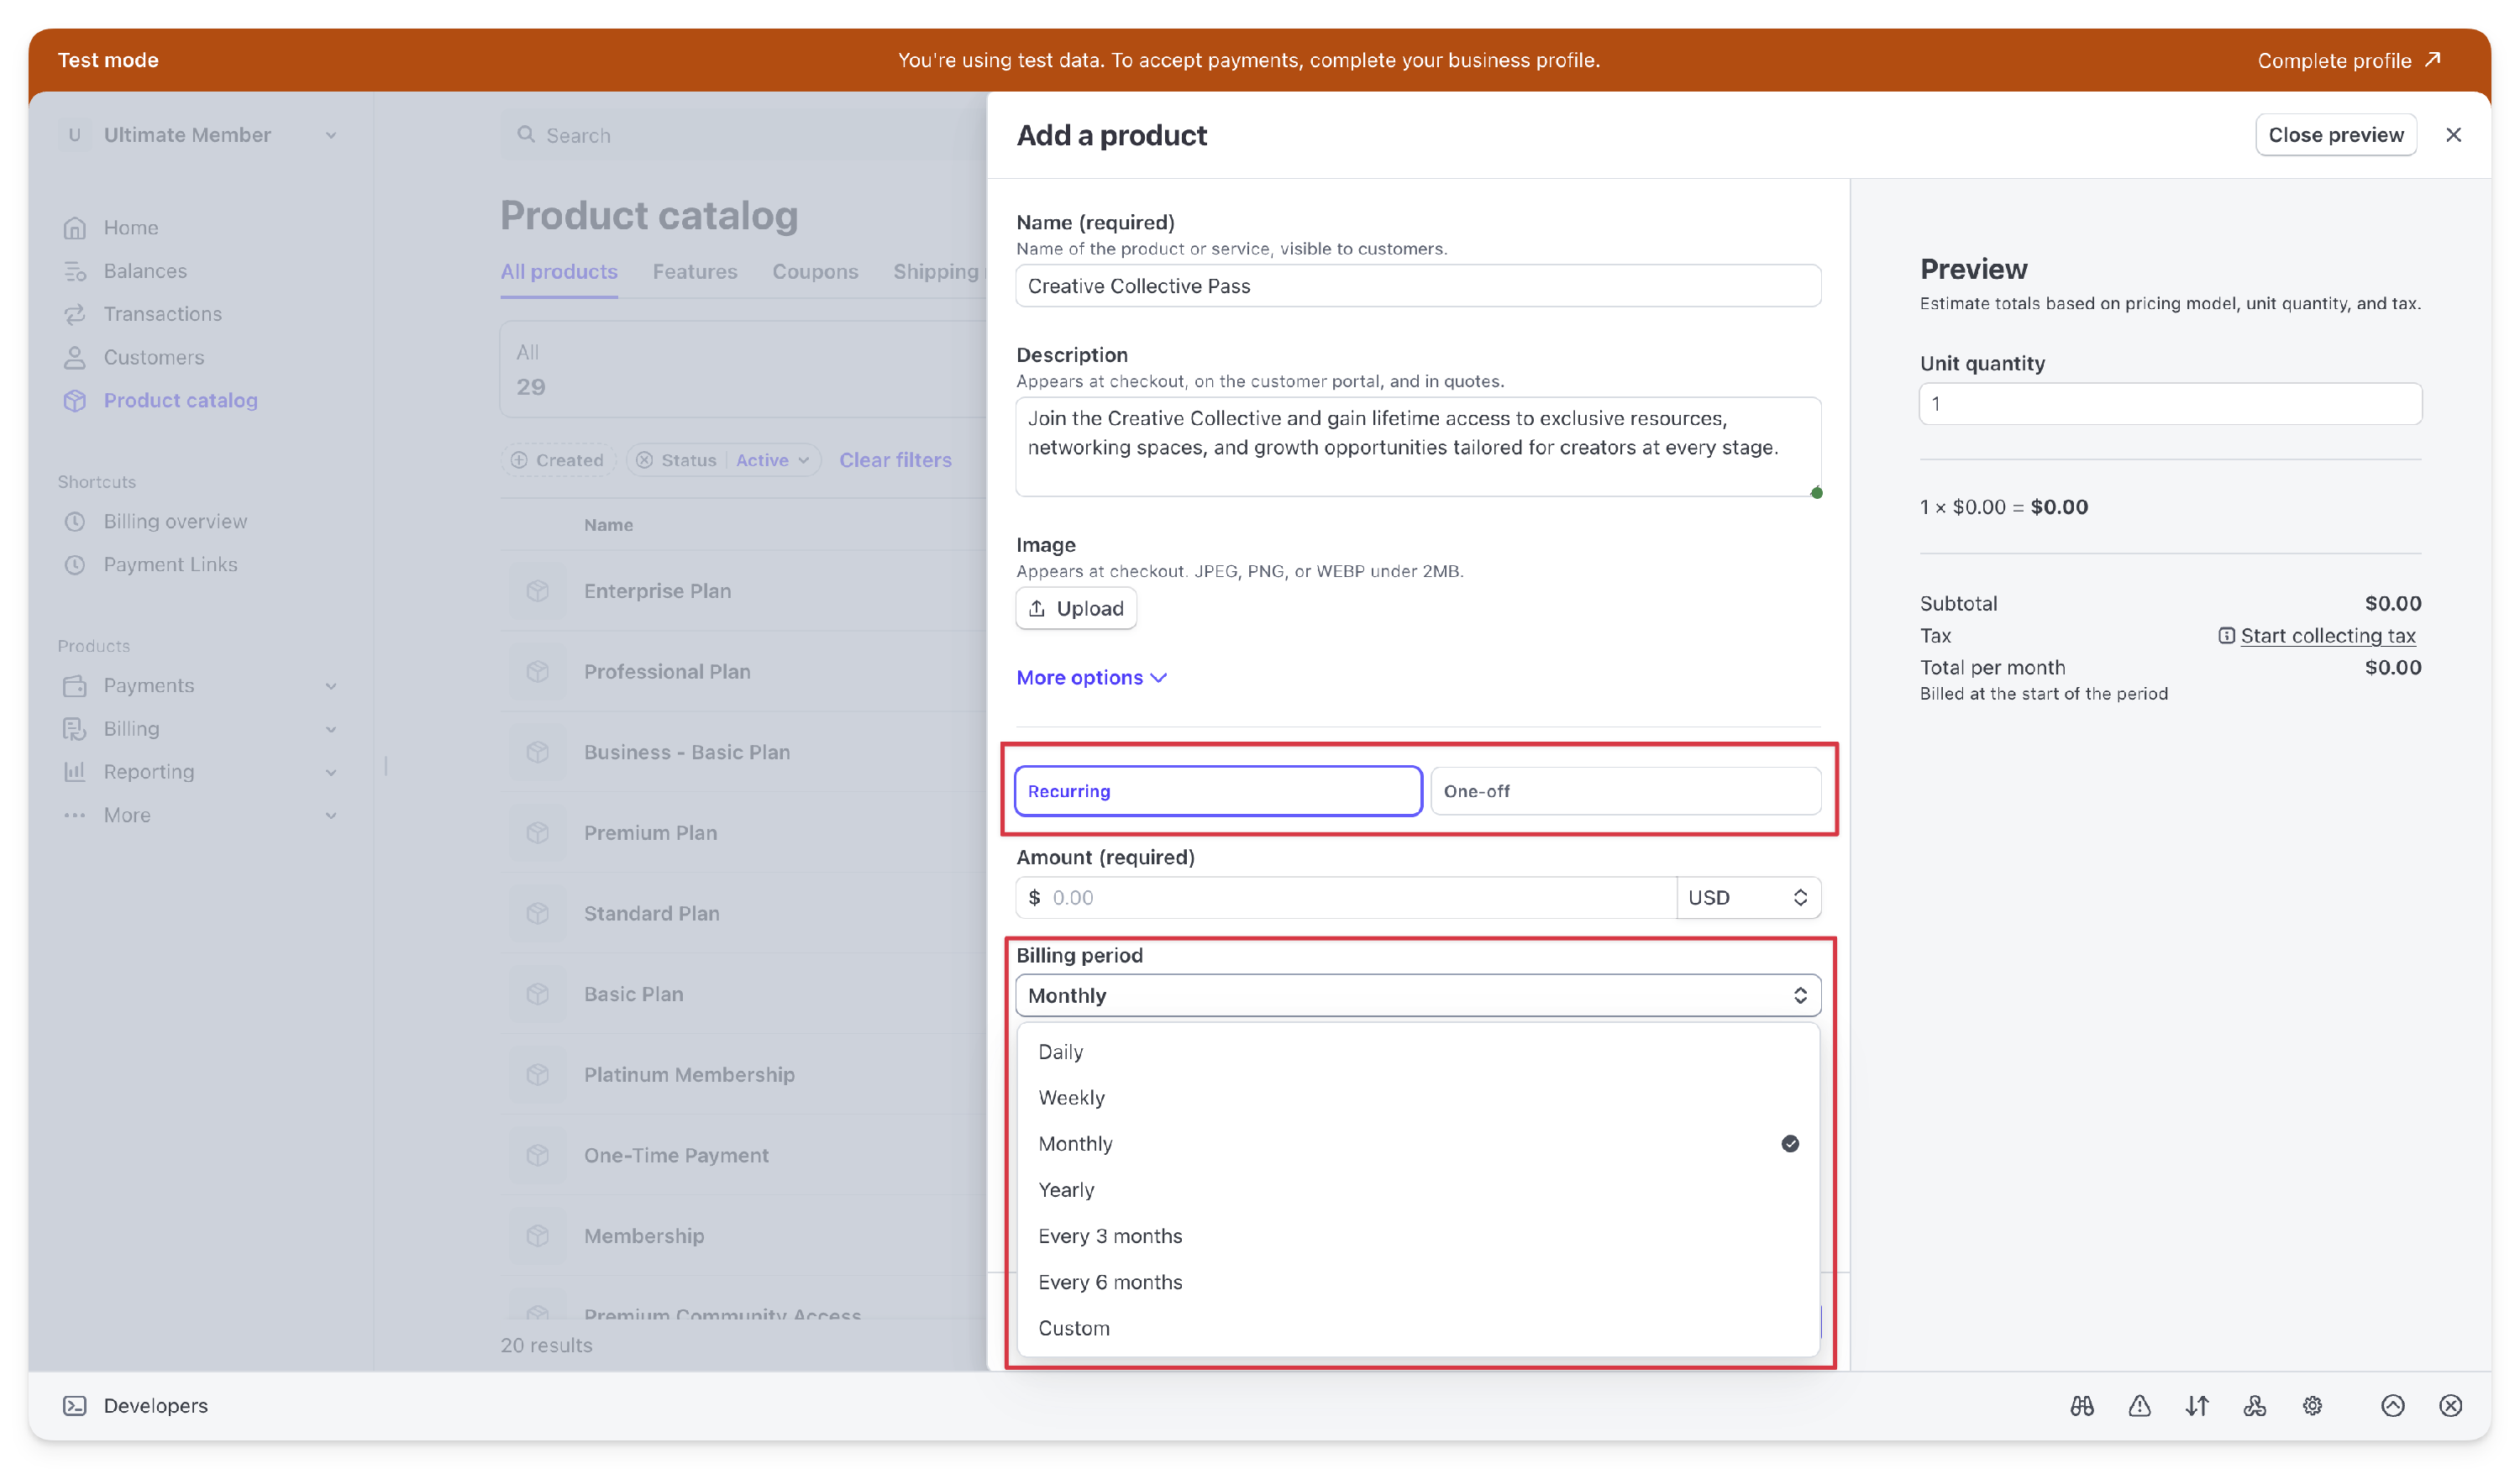
- One-off — Use this option for single, non-recurring payments. Enter the one-time amount to be charged, and select whether the price will be a Flat rate, Package pricing, or allow the Customer to choose the price (if this feature is enabled in your Stripe account settings).

Adding Multiple Pricing Options
If you need to offer multiple pricing options for a single product — for example, both Monthly and One-time plans — Stripe allows you to add these under the same product record using the More pricing options feature.

After clicking More pricing options in the product setup screen, you’ll be taken to a pricing configuration panel where you can add multiple prices under the same product. This allows you to offer different pricing types — such as a monthly recurring fee and a one-time payment — all linked to one product.
To create a pricing option, start by choosing whether this price will be a Recurring charge or a One-off payment and choose the appropriate pricing model. If you select Recurring, you’ll also need to define how often the customer will be charged by setting the Billing period (for example, Monthly, Yearly, or a custom interval).Once you’ve selected the pricing model, enter the amount you want to charge for this option.
For example, you might enter $ 12.00 for a monthly recurring subscription. After entering the amount, you have the option to add a short internal Price description to help organize your pricing options, though this isn’t visible to customers. You can also assign a Lookup key to this price — a unique, internal reference string you can use to manage or retrieve the price in Stripe later. This is especially useful if you plan to update prices through the API or automate subscription management. When you’ve completed the details for this first pricing option, click the Next button. 
When you’ve completed the details for this first pricing option, click the Next button. The price you just created will now appear in the Pricing list for this product.
If you need to add another pricing option under the same product — for example, a one-time payment option — click the + Add another price button. This opens a new pricing form where you’ll repeat the process. For instance, you might select One-off, set the amount to 100.00 USD, and optionally enter a Price description like Lifetime Access Fee, along with a Lookup key such as creative_pass_onetime_100.
After adding this second price, click Next again. Both prices will now be listed in the product’s pricing summary.
 Once you’ve finished adding all required pricing options, review the pricing list carefully to confirm that the amounts, billing intervals, and pricing models are correct. When everything looks good, click the Add product button to save the product along with its multiple pricing options.
 The product, along with its multiple pricing options, is now listed in the Product Catalog. At this stage, the product — featuring both the Recurring Monthly $12 USD and One-time $100 USD options — is ready to be imported into your Ultimate Member Stripe integration for use within your membership plans.
Importing Stripe Prices into Ultimate Member
After saving your product and its pricing options in Stripe, the next step is to import these prices into your WordPress site so they can be used within your Ultimate Member Stripe integration.
To import prices:
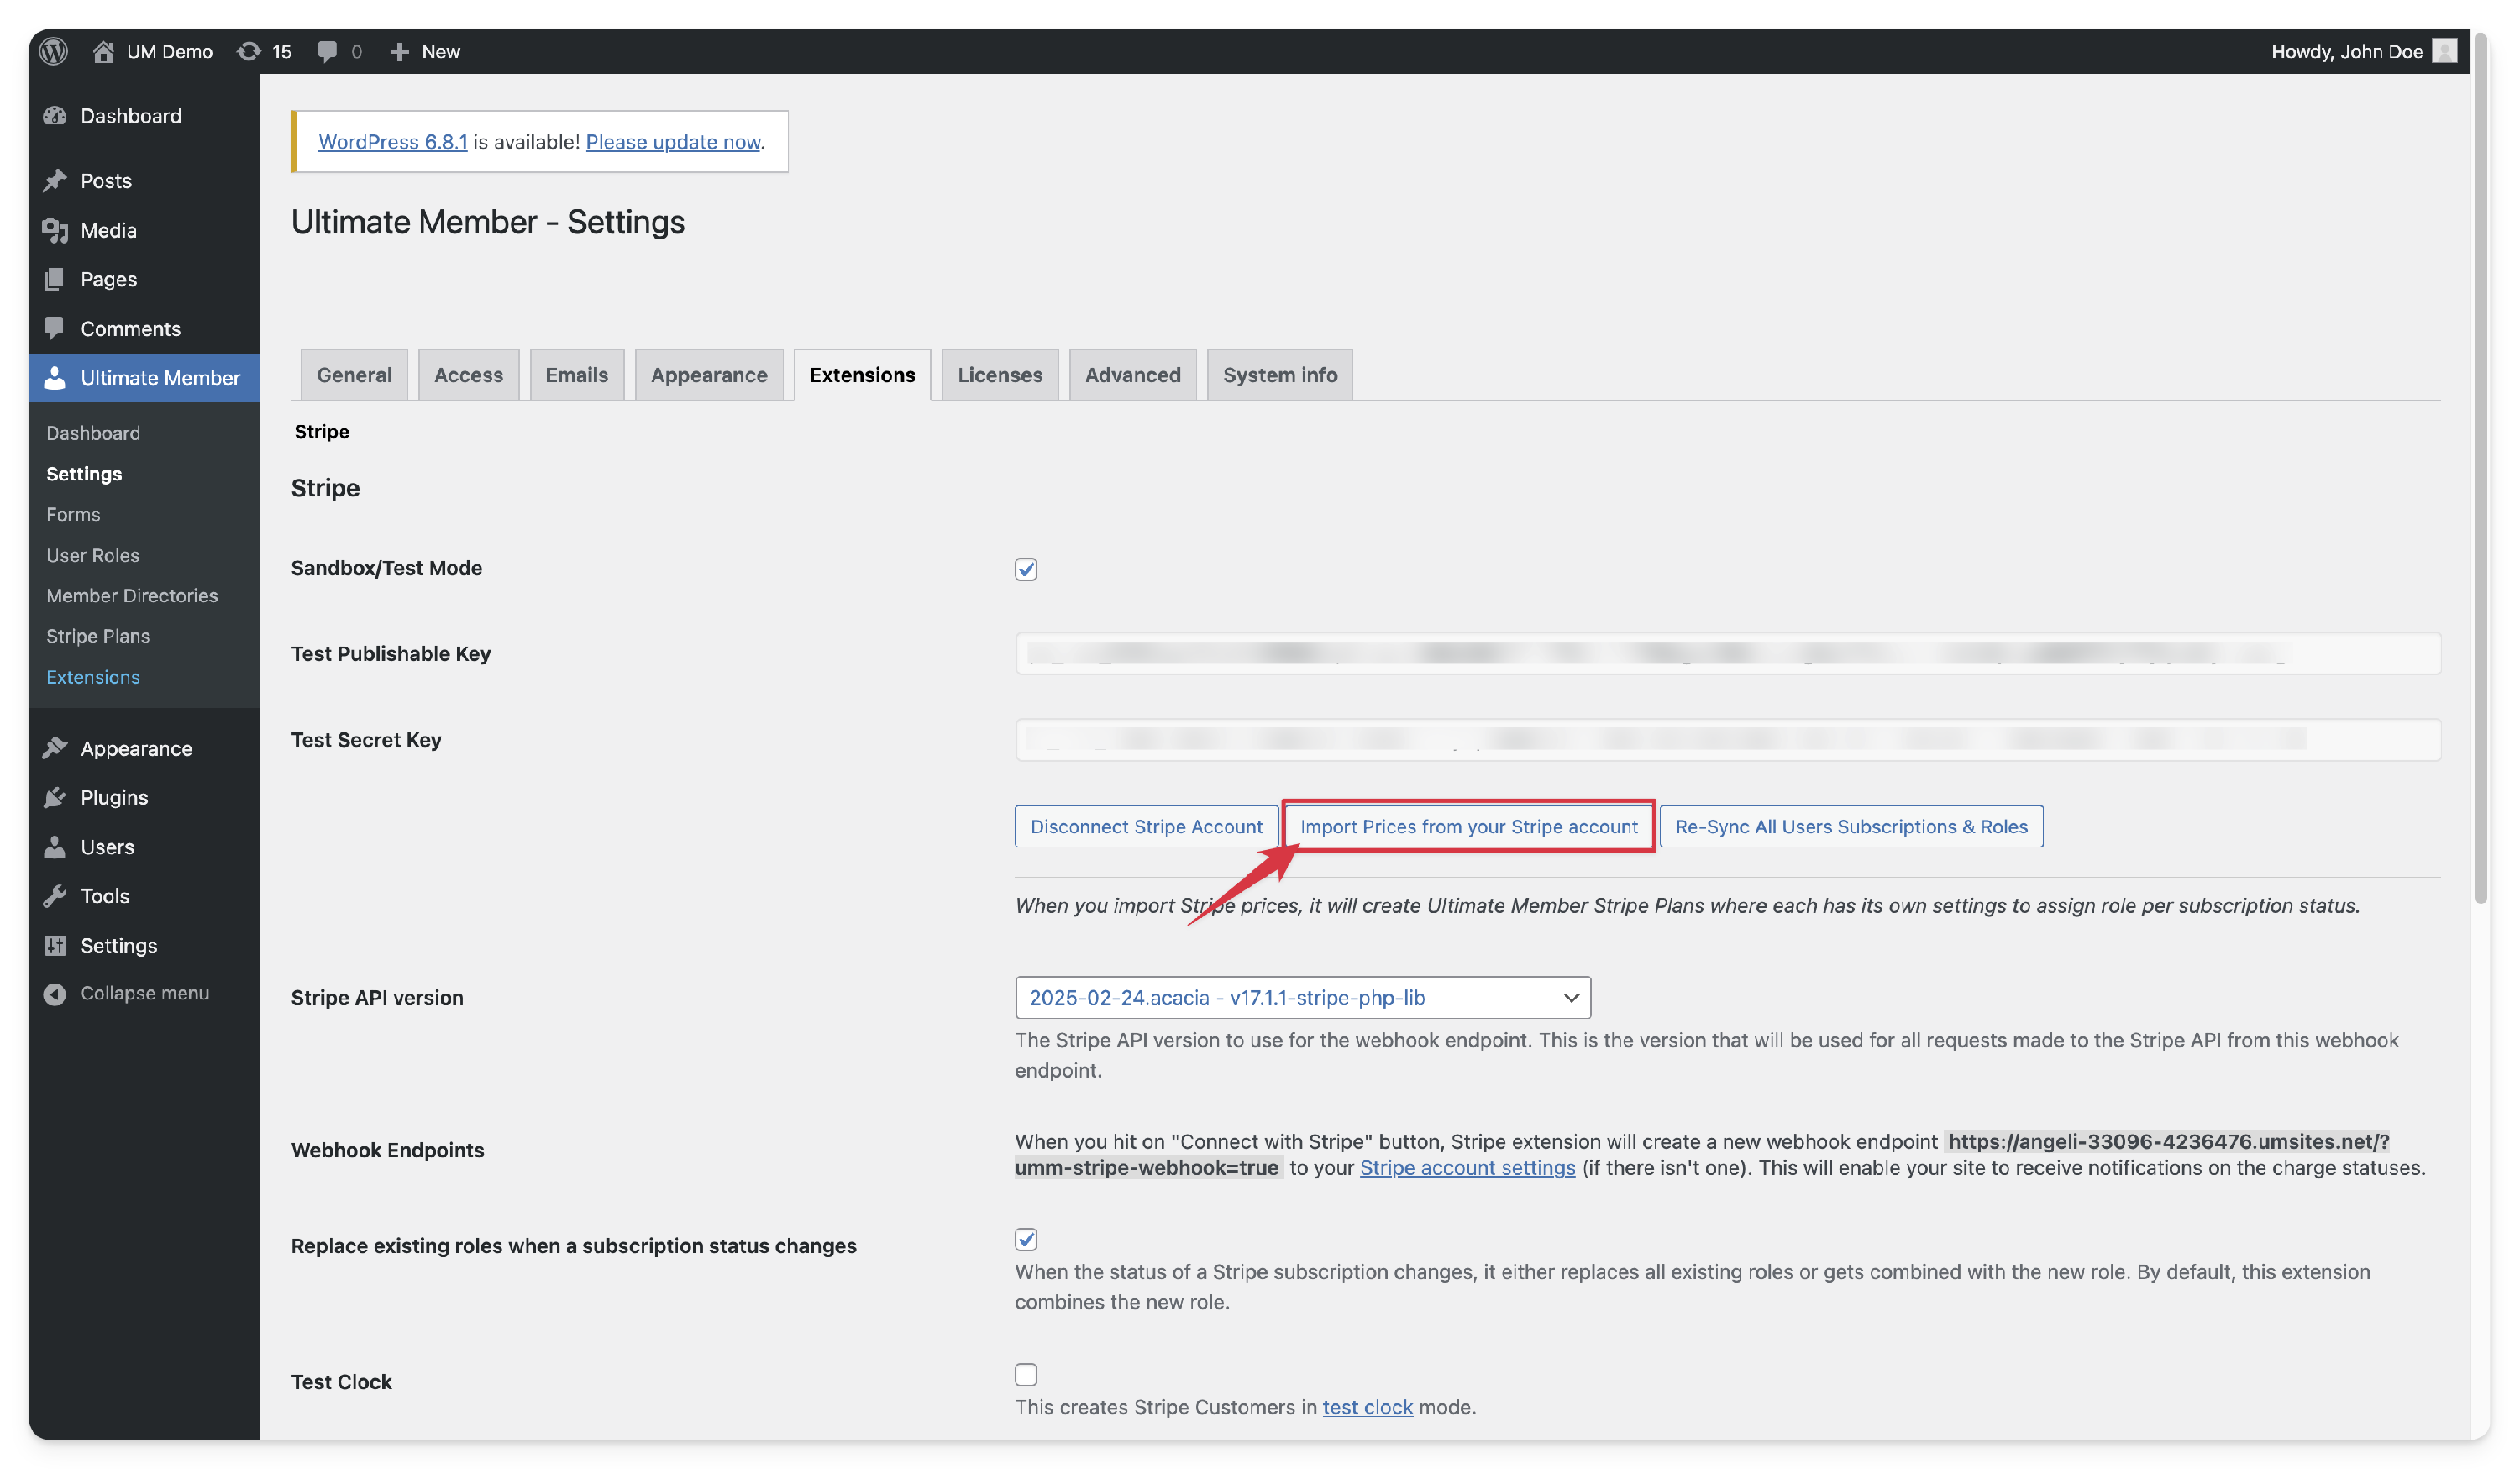
- From your WordPress dashboard, navigate to Ultimate Member > Settings > Extensions > Stripe.
- Locate the Import Prices button and run the import.

Once the import process is complete, the newly created pricing options will appear under WP-Admin > Ultimate Member > Stripe Plans. To review or configure a specific plan, hover your mouse over the desired Stripe Plan and click Edit.
On the Edit Plan screen, the Subscription Price field will display the corresponding product type (for example, Recurring) and pricing details (such as $12.00/month) exactly as configured in Stripe. These values are locked within Ultimate Member to ensure consistency and prevent conflicts between your WordPress site and your Stripe account.
If a One-off price was created for the product in Stripe, it will also appear in the Stripe Plans field, listed alongside any recurring pricing options assigned to the same product. This allows you to offer both one-time and recurring payment options under a single membership plan.

Once your Stripe prices have been successfully imported and reviewed, they’re ready to be connected to your registration forms, shortcodes, and membership plan options within your Ultimate Member setup. When configured, the form will display the available Stripe subscription prices, allowing users to select and purchase their preferred membership option during registration.
EXT: SHORTCODE REFERENCE