Social Login Setup
Overview
This document provides instructions on how to set up the Social Login extension so users can sign-up/login to your site via their social accounts and how to enable the error logs.
Contents
- App creation and setup
- General Settings
- Social Registration form
- Show social connect buttons
- Error Debugging
App creation and setup #
For social login to work correctly, you need to create an app on each social network so your site can be linked to the app. We have created separate docs for each app setup:
- X (formerly Twitter)
- GitHub
- WordPress.com
- Discord ( v2.3.15+ )
- TwitchTV( v2.3.15+ )
Link apps to your site
Once you have created each app, you will need to copy over the App ID/Key and the secret key and paste them into the social network tabs on the settings page.
General settings #
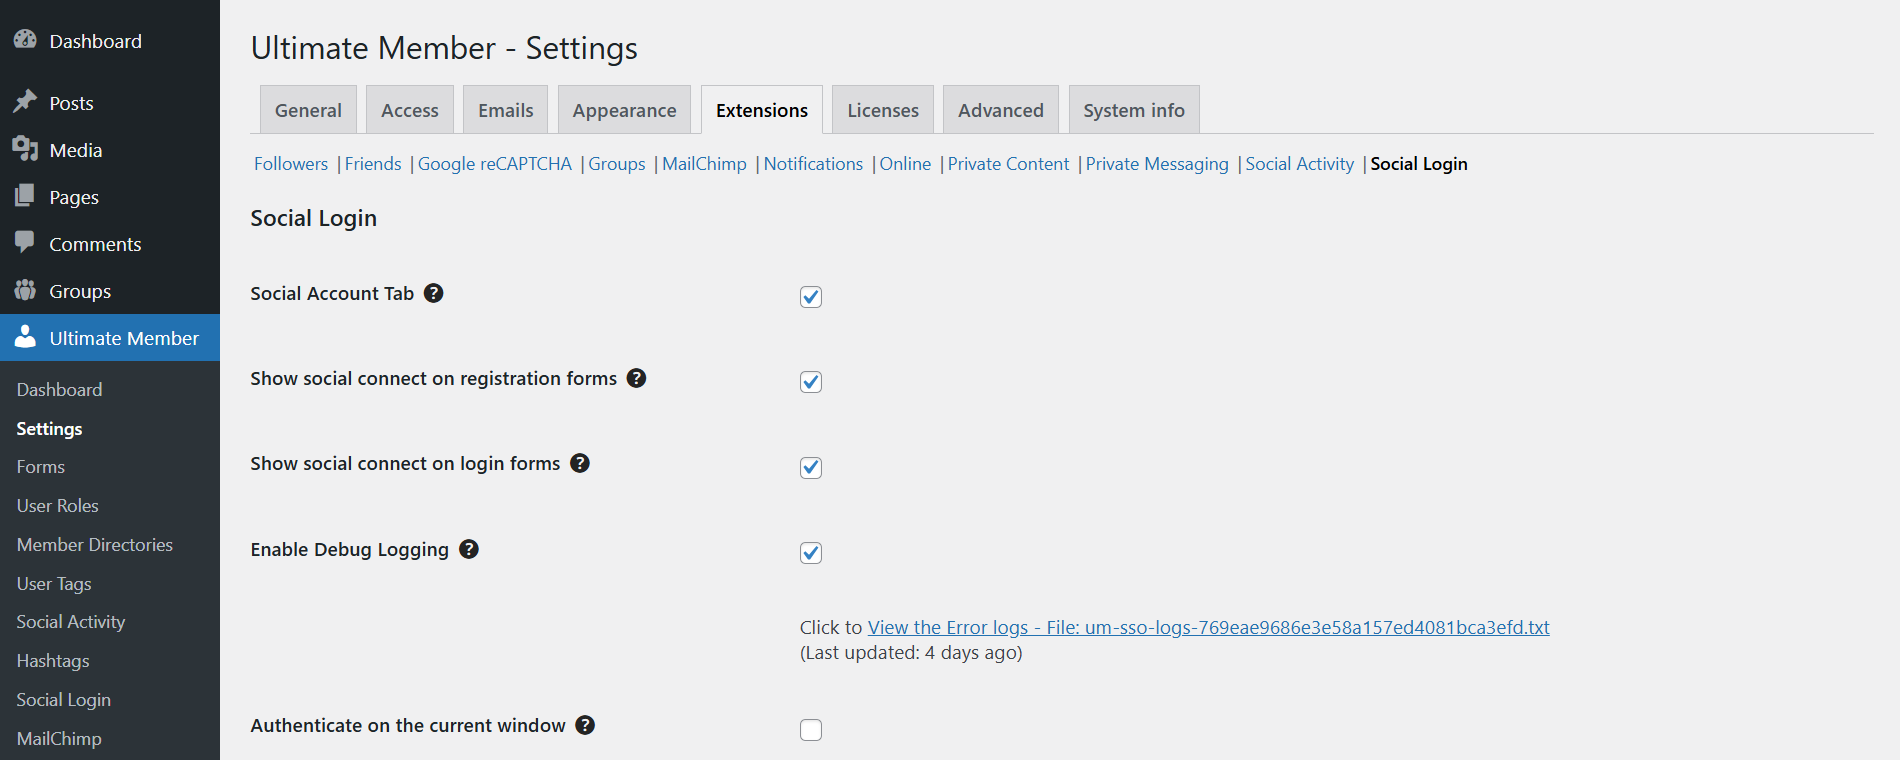
Go to wp-admin > Ultimate Member > Settings > Extensions > Social Login to manage the extension settings.
The general settings tab for the Social Login extension allows you to:
- Turn on/off the social tab on the account page
- Show the social login buttons by default on the default register form
- Show the social login buttons by default on the default login form
- Enable or disable authentication on the current window
- Social networks settings
Each social network has a setting that can activate/deactivate that particular network. Once the setting is turned on you'll see fields where you must add API Keys for the social login to work.
Social Registration form #
When a user tries to register on your site using the social login buttons, they will be taken to the social network site to accept the app permissions. If they accept, they will be redirected back to your site, where they will see an overlay displaying the Social Registration form.
This form is needed to collect and add required user details (for example, X (formerly Twitter) does not provide a user's email address) so the user can complete the registration process. Once a social network account is connected to a user on your site, the user will be logged in immediately upon returning to your site, as long as they are logged in to the social network on that browser.
The Social Registration form is automatically added to the forms list when you activate the plugin. You can edit this form in wp-admin > Ultimate Member > Forms.
Set up the social registration process #
There are two ways to process data from social network apps to register a user on your site: a one-step process or a two-step process.

|

|
Two-Step process
There are instances where users can check the fields that will be submitted to your site during the registration process - the Two-Step process enables users to check the details and allows them to edit the form or add extra fields to fill out before submitting the Social Registration form.
The Two-Step process is recommended for testing and debugging because it makes fields and warnings visible on the screen.
One-Step process
You can choose this process if you want to register a user automatically without showing the Social Registration form fields on the overlay. This allows users to register and then login automatically upon successful registration.
When one of the Social Networks does not pass a user's email address or Email Address has already been used on the site, there are 4 options to choose from which you can use to continue the Registration process:
- Link Accounts & Login immediately
- Link Accounts & Redirect to Login Page
- Allow new account creation with a generated Email Address
- Do not link accounts & prevent account creation
There's also an option to show a Splash Screen to display pre-loading content or an Image loader on the overlay during the registration process.
Note: To synchronize fields using the 1-step process with a specific registration form, you must enable the "Use this form in the overlay" option and set it to "Yes."
In the one-step process of social login with Ultimate Member, users are registered and logged in automatically without having to set a password during the registration process. This approach is designed to streamline the user experience and make it easier for users to sign up and access the site quickly.
Here's how it works:
- Social Login Initiation: When a user chooses to log in with a social account (e.g., Facebook, Google) on your site, Ultimate Member's one-step process kicks in.
- Authentication and Registration: The user is redirected to the chosen social network's login page, where they authenticate their account. Once authenticated, the social network provides necessary user information to Ultimate Member.
- Automatic Registration: Ultimate Member automatically registers the user on your WordPress site using the information provided by the social network. This registration process includes creating a new user account in the WordPress database.
- Immediate Login: After registration is successful, Ultimate Member automatically logs the user in to their newly created account. This means the user can access the site's features and content without the need to log in again manually.
- Password Setting: Since no password is set during the registration process, users are prompted to set a password after registration. This is typically done through a link provided in the Welcome Email. This email with a placeholder is a notification sent to users, typically after registration, that contains a dynamic placeholder tag like
{action_url}. This placeholder tag is crucial when no password field is present during registration, such as in a one-step social login process. The{action_url}placeholder generates a link in the email that allows users to set their password. Users can click on this link to be redirected to a page where they can securely set their password, ensuring a smooth registration process and access to their account.
Benefits of One-Step Process:
- Simplified Registration: Users can sign up quickly and easily without the need to fill out a lengthy registration form.
- Instant Access: Users can access the site immediately after registration, enhancing the overall user experience.
Profile data import #
Social Login adds the "Sync Field" field option in the form builder that synchronizes the specific data from the Social Networks to populate the field value on the registration process. Please note that not all Social Networks return the same data e.g. Instagram doesn't pass an Email Address, but Facebook returns it with Email Permissions in the Facebook application.

- "Username" (user_login) field is synced with "ID".
- "First Name" (first_name) field is synced with "First Name".
- "Last Name" (last_name) field is synced with "Last Name".
- "E-mail Address" (user_email) field is synced with "Email Address".
Please see the List of Sync Field options and Sync Field with extended options for details.
Profile photo import
The social login extension will import a user's profile photo from their social network profile as the profile photo on your site. The most recently connected social network will be the photo used (e.g., if a user registers with X, it will show their X profile photo, but if on the account page they connect to Facebook, then their Facebook profile photo will become the profile photo on your site).
Show social connect buttons #
The extension can display social connect buttons in the following areas:
- Account page
- Login and Registration forms
- Social Login shortcode
Account page #
The extension adds the "Social Connect" tab to the user account. Users can connect or disconnect their social networks from their accounts on this tab.

Turn off the Social Account Tab setting on wp-admin > Ultimate Member > Settings > Extensions > Social Login if you wish to disable this tab.
Login and Registration forms #
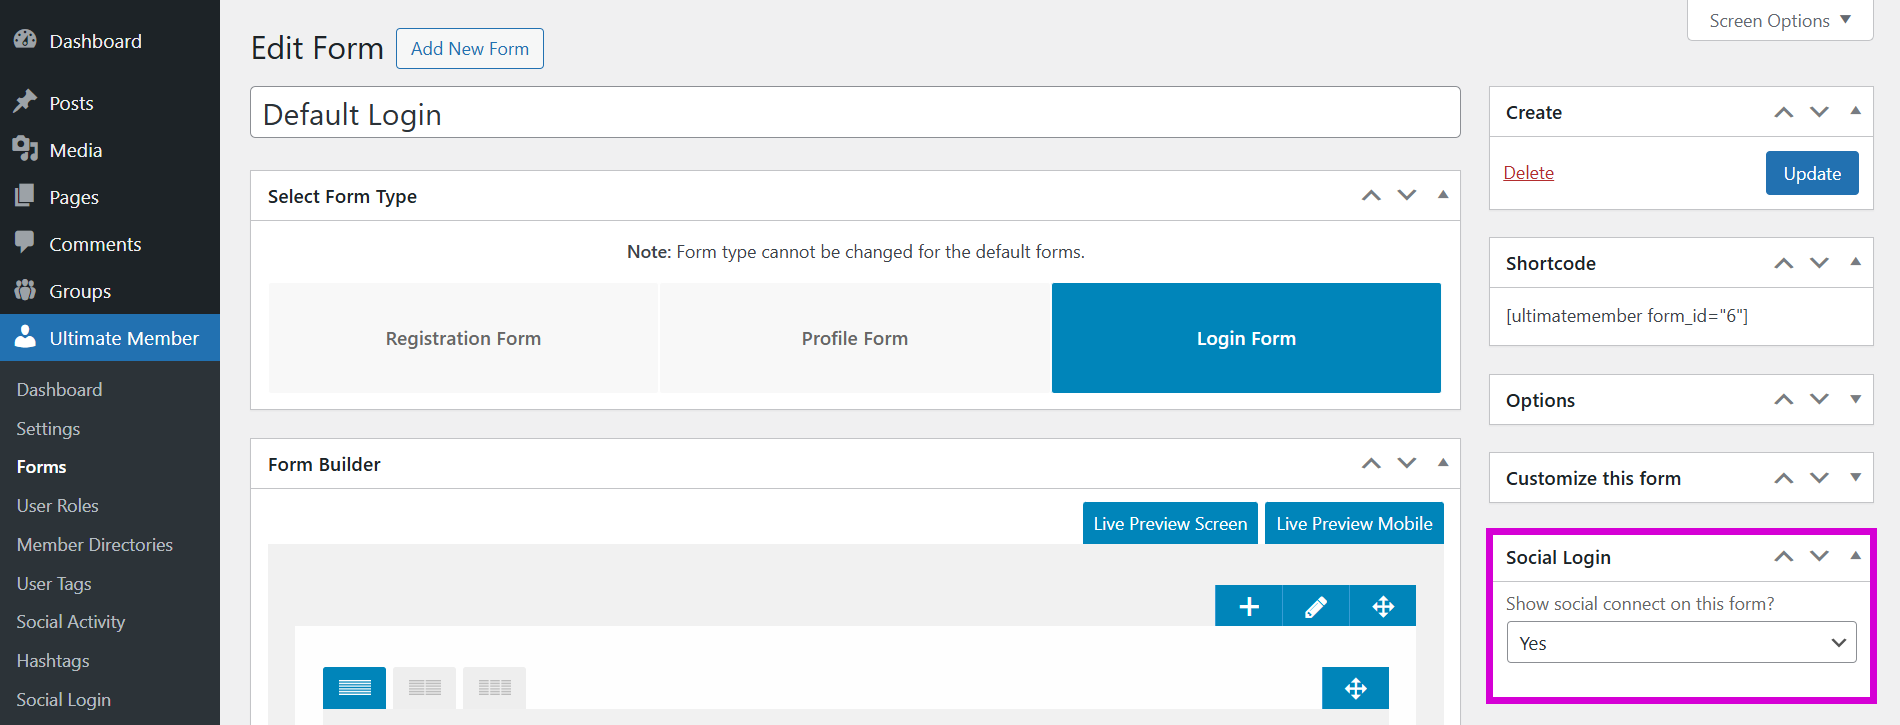
Social connect buttons are integrated to the login and registration forms.

Use settings on wp-admin > Ultimate Member > Settings > Extensions > Social Login to enable these buttons globally:
- Show social connect on registration forms - Show/hide social connect on all registration forms by default.
- Show social connect on login forms - Show/hide social connect on all login forms by default.
You can override a global setting for a certain form using the Show social connect on this form? setting.
Shortcodes #
The social login extension allows you to place social login buttons anywhere on your site using shortcodes. You can create multiple social login shortcodes for a different output on your site depending on where you want to add the buttons.
The general settings for each shortcode allow you to:
- Assign a specific role to a user on registration via Social Login
- Show Social Buttons to logged-in users only
- Keep users logged in
- Choose the integration type for the Social buttons: Login only, Register only, or Both ( default ).
Add the social login shortcode on a custom page for users to log and configure the user role settings and set the redirection after the login to a custom URL. The redirection won't work because the social login shortcode is for dynamic pages only. It will only reload the current page where the shortcode is added.
Creating a new Social Login shortcode
The steps for creating a new social login shortcode involve accessing the social login settings, adding a new social login option, configuring which social media buttons to display and their styling, and then copying and adding the generated shortcode to your site to enable social media logins.
- Navigate to Social Login Settings:
- Enter your WordPress admin dashboard and go to wp-admin > Ultimate Member > Social Login.
- Add a New Shortcode:
- Click on the Add New button.
- Configure the Social Login options:
- In the Add New Social Login Shortcode page, you can decide which buttons to show and adjust these settings as needed to customize the appearance and behaviour of the social login buttons on your site:
- Provider Settings: Enable or disable specific social login providers.
- General Settings: Configure role assignment, visibility for logged-in users, and sign-in persistence.
- Integration Type: Select the integration type for the social buttons.
- Button Appearance: Adjust icon, label, font size, icon size, button style, width, and padding.
- Container Appearance: Set max width, margin, and padding for the container.
- In the Add New Social Login Shortcode page, you can decide which buttons to show and adjust these settings as needed to customize the appearance and behaviour of the social login buttons on your site:
Adding the Social Login shortcode
To find the shortcode, you need to edit or add a social login shortcode. Go to wp-admin > Ultimate Member > Social Login to edit existing shortcode or add new shortcode.

Go to wp-admin > Appearance > Widgets to add the shortcode to widgets.

Error Debugging #
Error debugging is finding, analyzing, and fixing errors in a software application. By enabling debug logging, developers can see detailed error messages and logs, which helps in identifying the root cause of issues and improving the overall functionality of the social login feature.
Debug logging helps developers identify and fix errors by capturing detailed information during the social authorization process. Here's how to enable it:
- Go to wp-admin > UM > Settings > Extensions > Social Login and see Enable Debug Logging
- Click on the check box to enable it, then click on the highlighted link to view the error logs.

